“Can FFmpeg crop video? I have heard that we could use FFmpeg to trim video without losing quality, but wht is FFmpeg? How can FFmpeg trim/crop video? I have no idea on this. I prefer using regular video cropper software to such command tools. Please help me with this.”
FFmpeg is a popular open-source program for processing, converting or manipulating video and audio files. The program is used for endless things like rotating videos, scaling videos, extracting information about videos and many others. It is awesome for video scaling, format transcoding, decoding, encoding, demuxing, streaming, filtering, converting audio files, recording live audio/video, handling video and other multimedia files. This multimedia framework is designed for command-line based processing of multimedia files, and you can make basic edits with a single line commands.
Many people have been searching for solutions to use FFMPEG to crop videos without losing the video quality, but have no idea since FFmpeg is actually a command line tool. The command line tool is not commonly used by regular customers. If you are looking for ways to crop a video without losing quality in FFmpeg on Windows or Mac, this guide would be exactly what for you.
Outline
Part 1: How to install and use FFmpeg on Windows 10
Accessing FFmpeg to execute commands for handling videos is a little confusing. Installing and using FFmpeg can take a lot of time as you need to manually open FFmpeg folder within command prompt or Power Shell terminal to access FFmpeg executive file to execute relevant commands for basic editing.
Here we would show you how to install and use FFmpeg on Windows 10. You could follow the below guide to learn the details.
1. You need to download the latest FFmpeg build from the official FFmpeg website. You can either Download the 32-bit version or 64-bit version that suits your system. Click the Download Build button to start downloading.
2. You need to add a program to system path using Environment Variables to make FFmpeg work directly on Windows 10.
3. Navigate to the downloaded folder where the FFmpeg zip file is a store. Right-click on the Zip folder and click extract from the drop-down menu.
4. Right-click on the extracted folder and click Rename from the drop-down menu with title FFmpeg-20180424-d9706f7-win64-static to FFmpeg.
5. Copy the FFmpeg folder and navigate to C drive. Paste the folder to the root of C drive.
6. To use FFmpeg in Command Prompt, you need first to add the bin folder containing the FFmpeg executable file to your Windows path.
7. Navigate to Advanced button and click Environment Variables at the bottom of the window.
8. In the Environment Variables window, Select the variable Path and click Edit to change the Path variable.
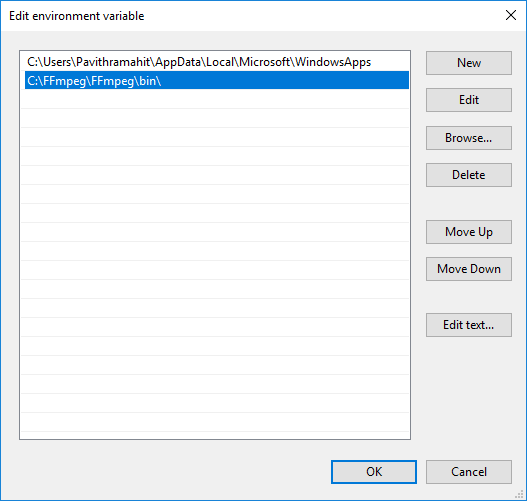
9. Click New and type the path of FFmpeg folder “C:\ffmpeg\bin\” and click OK.
10. Type the path directory according to the drive or folder where you have placed FFmpeg folder.
11. Once done, the path gets added to the Environment variables. Click OK to apply changes.
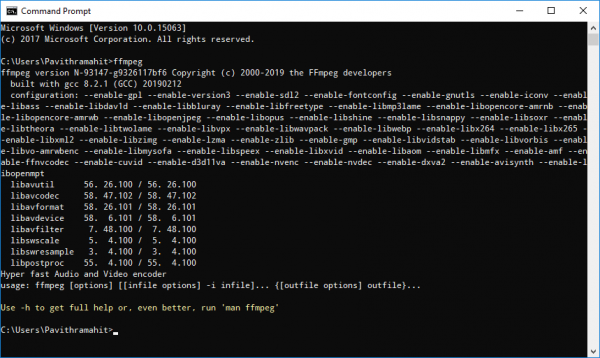
With all these changes, you then only need to verify if FFmpeg is installed successfully. Launch Command Prompt and type the command FFmpeg in the command prompt terminal and hit Enter.
If the FFmpeg is added properly to Windows Path, the command prompt will display the details about FFmpeg like its version number, configuration, etc. If you weren’t successful, it only means that your command prompt did not recognize the commands. Cross check to see if you have added the FFmpeg folder to the system path properly.
Then, you could freely use FFmpeg to handle video files on your computer as you like.
Part 2: How to install and use FFmpeg on Mac
On a Mac, you can install FFmpeg using Homebrew which is a superb package manager for the MacOS ecosystem. Here is the one-liner to install FFmpeg on a Mac machine (testing and working on Cataline v 10.15.5).
- 1. Firstly, install Homebrew.
- 2. Then install FFmpeg through the ffmpeg formula: brew install ffmpeg
- 3. This will download a lot of dependencies such as x264, but after that you should be good to go.
- 4. To update ffmpeg later on, run: brew update && brew upgrade ffmpeg
If you want additional tools like Netflix’s VMAF on MacOS with FFmpeg, all you need to do is to include if when you install ffmpeg. For example: brew install ffmpeg --with-libvmaf
The brew page is an excellent resource for all the possible options.
Part 3:How to crop a video using FFmpeg after running this program successfully
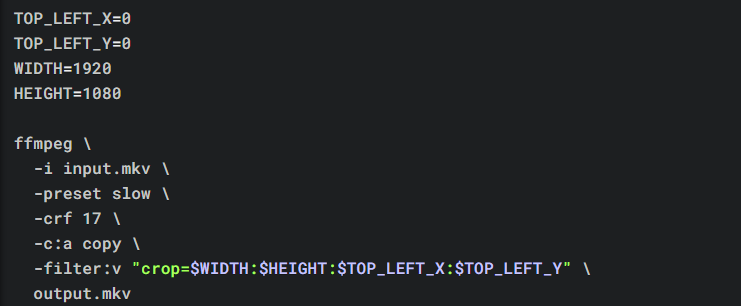
Then, let’s go to the main topic: how to crop a video using FFmpeg without losing video quality. The following command will crop your video to the left side of the video using the first 1920 x 1080 pixels. This is useful if you accidentally recorded two 1080p monitors and just want the left one. Check the below command lines in the picture:
Unfortunately, this will be re-encoding the video, so you may want to add a few options like:
Or, you could try the below solutions to make use of the crop feature within FFmpeg. the below are the crop command:
- ffmpeg -i in.mp4 -filter:v "crop=out_w:out_h:x:y" out.mp4
These 3 filters refer to: out_w is the width of the output rectangle; out_h is the height of the output rectangle; x and y specify the top left corner of the output rectangle. You could check the below 3 examples to learn how to crop a video within FFmpeg without losing quality:
1. To crop a 80×60 section, starting from position (200, 100):
ffmpeg -i in.mp4 -filter:v "crop=80:60:200:100" -c:a copy out.mp4
2. To crop the bottom right quarter, just try these commands:
“ffmpeg -i in.mp4 -filter:v "crop=in_w/2:in_h/2:in_w/2:in_h/2" -c:a copy out.mp4”
“ffmpeg -i in.mp4 -filter:v "crop=320/2:240/2:320/2:240/2" -c:a copy out.mp4”
“ffmpeg -i in.mp4 -filter:v "crop=160:120:160:120" -c:a copy out.mp4”
3. Crop 20 pixels from the top, and 20 from the bottom:
ffmpeg -i in.mp4 -filter:v "crop=in_w:in_h-40" -c:a copy out.mp4
You could try these commands within FFmpeg to crop video without losing quality.
Part 4: Best easy-to-use alternative to FFmpeg to convert/edit video
Though FFmpeg could help you crop a video without losing video quality or convert MKV to MP4 , it’s quite complicated to use and you can’t get instant preview of the cropping effect. Therefore, we would like to recommend you the best easy-to-use alternative to FFmpeg to help you convert and edit videos without losing quality. That’s Leawo Prof. Media, an all-inclusive media converter suite that could help you easily handle Blu-ray, DVD, video, audio, picture and even online videos in various ways including: converting, editing, burning, downloading, etc.
Leawo Prof. Media could offer you quite a few practical solutions such as, convert Blu-ray/DVD/video files, ripping/copying even 4K Blu-ray movies, burning video/photos to Blu-ray/DVD, downloading online videos, copying and backing up Blu-ray/DVD movies, converting 2D to 3D, etc.Its inside media editor feature enables you to freely crop video files in various ways.
You could follow the below guide to learn how to crop video files within Leawo Prof. Media. Download and install it on your computer first. Get source media files ready.

-
Leawo Prof. Media 11
An 11-in-1 All-inclusive Total Media Converter Ultimate Solution
Convert All Media files of Video, Audio, 4K UHD Blu-ray and DVD
Download Videos and Audios from 1000+ Sites
Professional Photo Slideshow Maker and Burner
Greatly Enhance Blu-ray/DVD/Video Output Effects
Step 1: Launch Leawo Prof. Media
On Leawo Prof. Media program interface, open “Convert” menu to enter the “Convert” module.
Step 2: Add source video files
Under the “Convert” module, you could directly drag and drop source media files, or click “Add Video” button to browse and load video files from your computer. You could also use Leawo Prof. Media to convert and edit 4K Blu-ray/Blu-ray/DVD movies by clicking the “Add UHD/Blu-ray/DVD” button to load source 4K Blu-ray/DVD/Blu-ray files.
Attention:
If you are going to load Blu-ray/DVD files, Leawo Prof. Media offers 3 different content loading modes: Full Movie, Main Movie and Custom Mode. Full Movie allows you to import all titles, and Main Movie only imports the longest title by default but allows you to switch, while under Custom Mode you could freely choose any title(s) for loading. Choose the one according to your needs and load source Blu-ray movies.
Step 3: Set output format
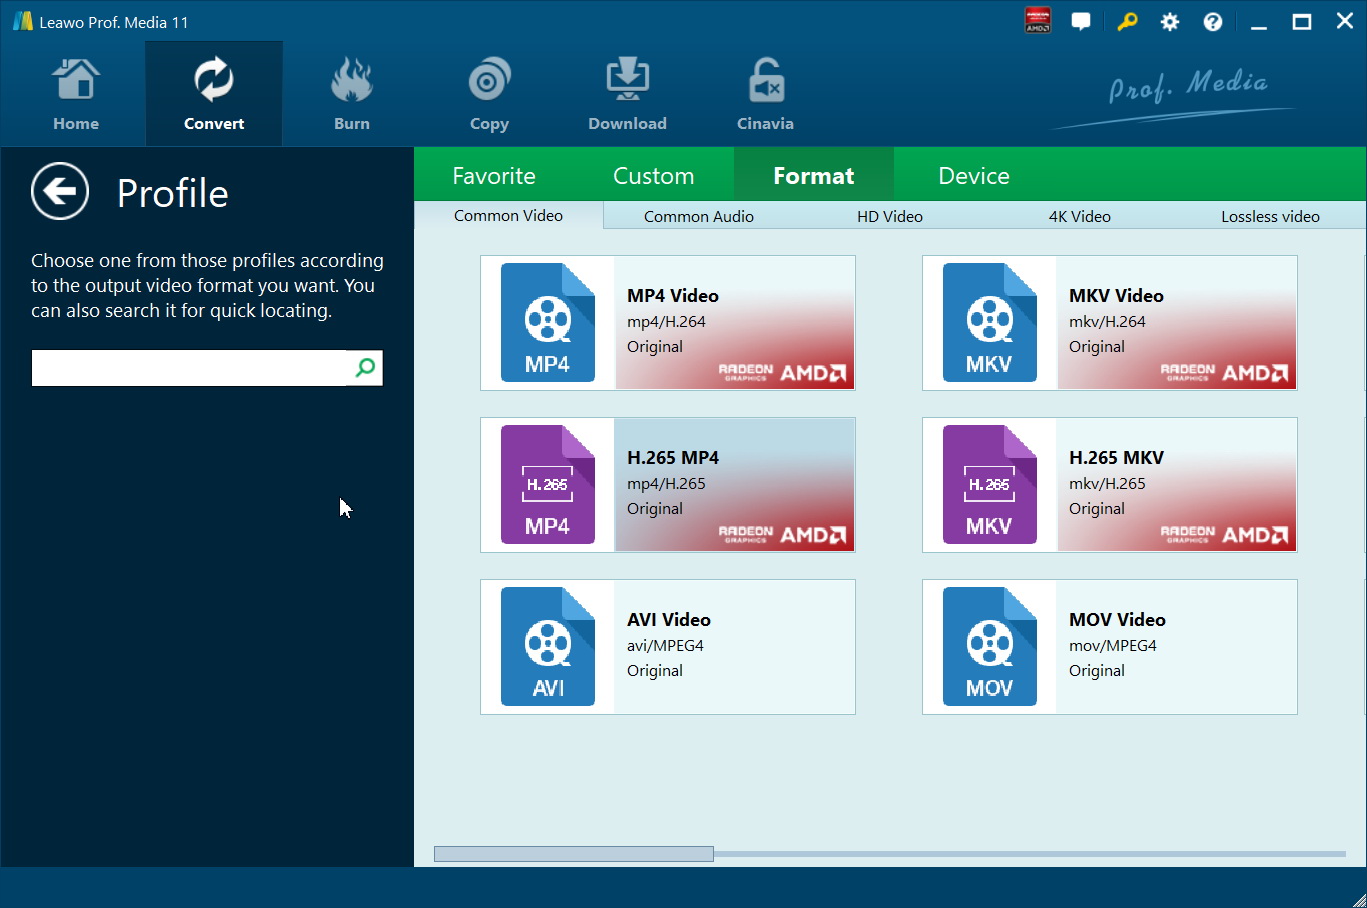
Hit the button next to the “Add Photo” button and then click “Change” option to enter the “Profile” panel. Choose output format from “Format” or “Device” group according to your needs. To get quality-lossless output files, you could open “Format > Lossless video” group to choose lossless output video format.
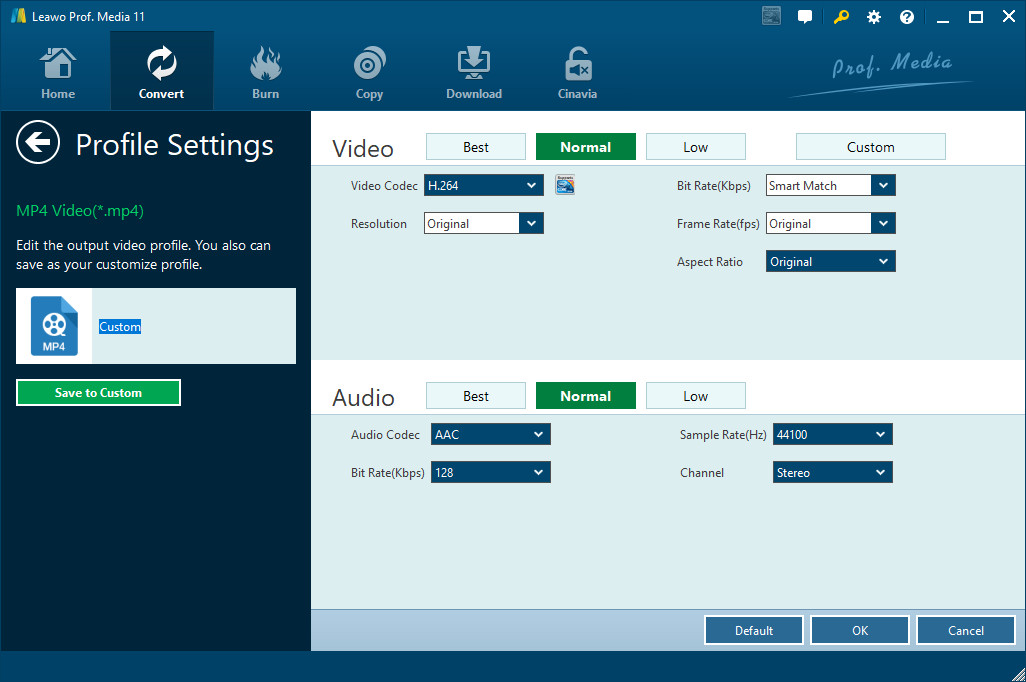
Click the “Edit” option on the drop-down panel next to the “Add Photo” button and then you can adjust the output video and audio parameters like video codec, video bit rate, aspect ratio, resolution, audio codec, sample rate, bit rate, channel, etc. If you want to reduce file size, lower the values of bit rate, frame rate, resolution, audio bit rate, sample rate, etc. But you need to know that lowering down these values would result in quality loss.
Step 4: Trim and crop videos within Leawo Prof. Media
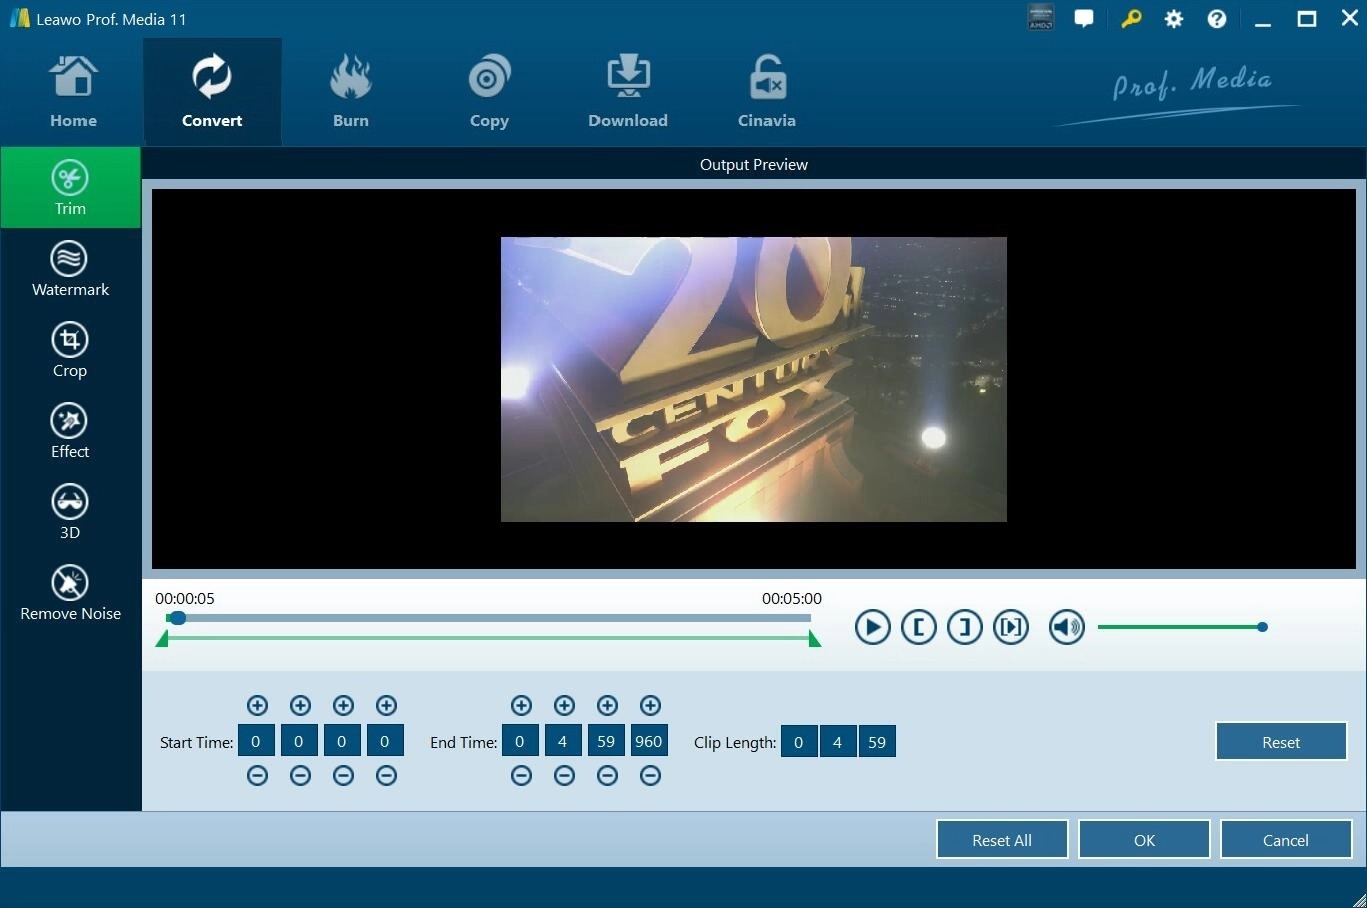
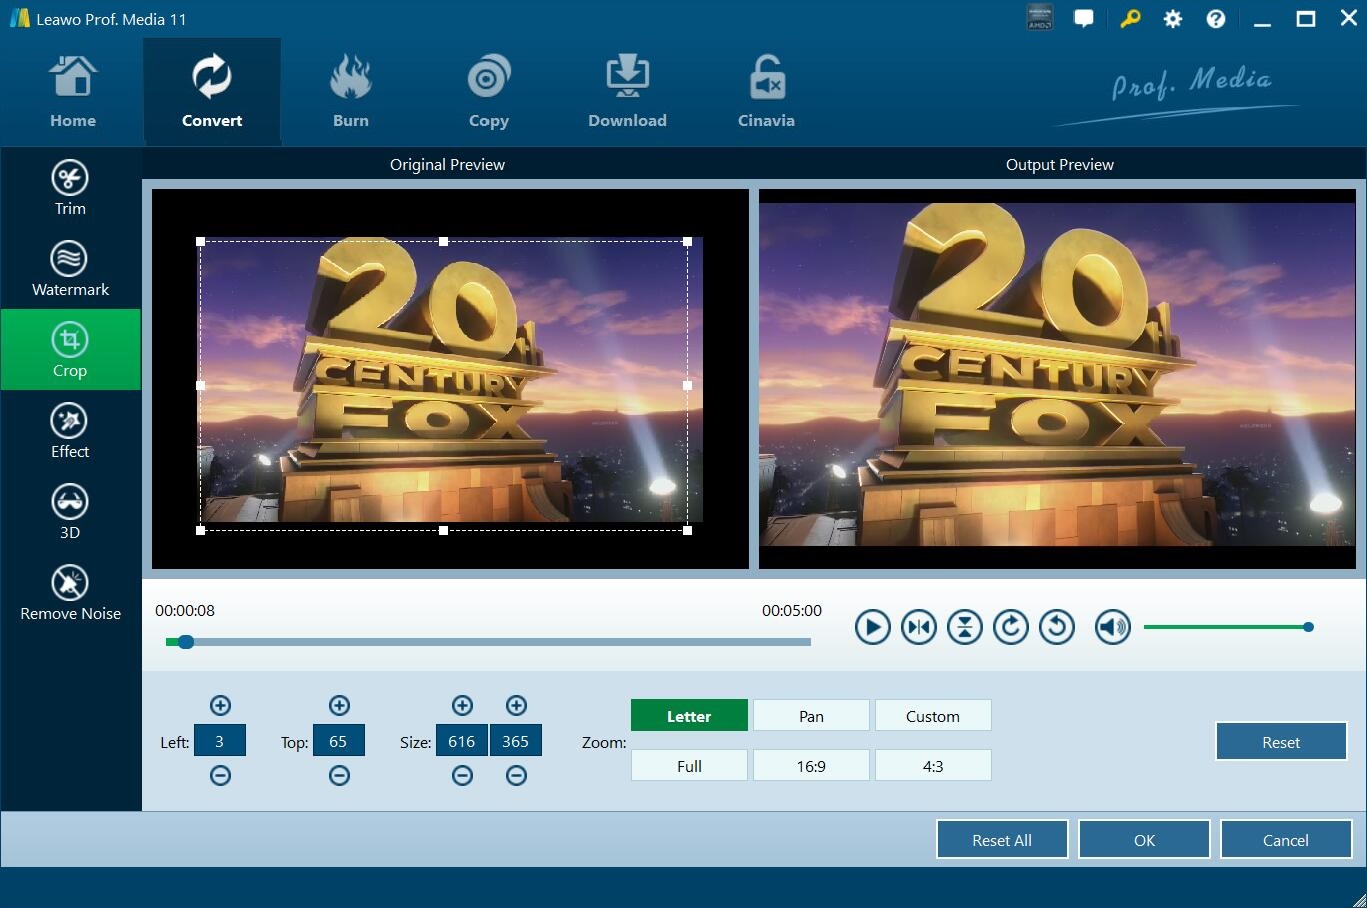
In each loaded video title, click the “edit” icon to enter the editing panel to trim and crop video files within Leawo Prof. Media.
1. Trim video
Open the “Trim” tab, drag the left limiter and the right limiter on the playbar to trim video clip and get rid of unwanted clip. You could also set the values of the “Start Time” and “End Time” below. Click “OK” to save trimming.
2. Crop video
Open the “Crop” tab and then you could crop video size to remove black margin or unwanted parts. You can firstly choose a Zoom style, and then drag the handlers of the frame on the left "Original Preview" window, or modify the parameters below for an accurate result to crop video size and remove black margins. Here you could also rotate video for special angle of view. Click the “OK” button then.
Step 5: Set output directory and start converting
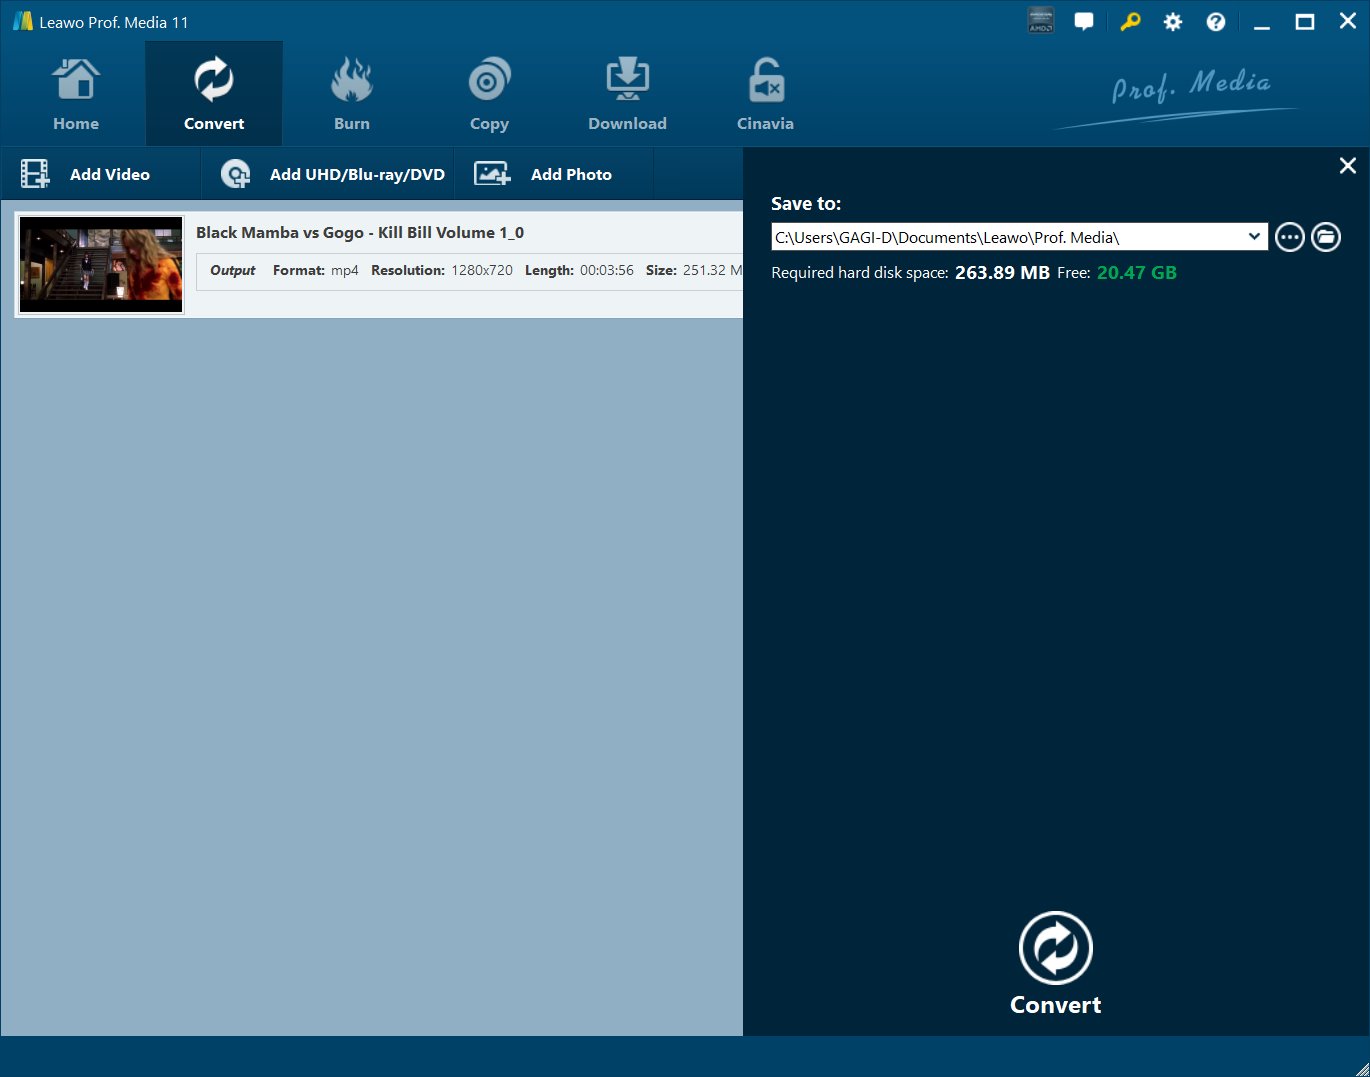
On the main interface, click the green button of “Convert” and then click the “Save to” option to set a directory, and hit the “Convert” option to start converting.
When the conversion completes, you could then get your movie files successfully cropped. It won’t take you much time. You could obviously see that this program offers you direct and instant preview of any editing features. Besides the video cropping feature, you could use other features like merging, adding watermark, adjusting video effect, creating 3D movies, removing noise, etc. It’s much easier to use.


