Backup iPhone to computer seems to be a very simple issue. The user only needs to plug their iPhone into computer and launch iTunes, then hit “Back Up” in the File option to kick off the backup process. Or they only need to get Wi-Fi, and connect iPhone to charger with the screen closed, then the iPhone data will be uploaded to the cloud. Both ways are easy to be done, and have their own unique advantages. As a matter of fact, iPhone backup issues occasionally come up along the iPhone users, and different problems may have different solutions. So let’s take a look at the solutions of how to backup iPhone to computer in the following post.
iPhone backup, in iTunes or iCloud, will provide a safe copy of the important data in our iPhone, and help us to get the lost files back.

Backup iPhone in case that the device get lost or stolen.

Before updating to newer iOS, you will need to backup iPhone.

Water damage or other physical damages will lead to permanent data loss, so you'd better backup iPhone before it happens.

Before jailbreaking your iPhone, you will want to back up the data from your iPhone to computer to keep them safe.

Switching to a new iPhone is great, but don’t forget to back up the old iPhone so that you can move the data to new iPhone easily.
iTunes and iCloud backups are both helpful for backing up users’ iPhone, but which one should be chosen? In fact, iTunes and iCloud backup both have their own unique characteristics which can’t be replaced by the other. Either way is useful when you want to backup iPhone. But as you may see, iPhone users should worry about the sync of iTunes, and the storage of iCloud is limited. So these can be the main reasons why some iPhone users don’t want to use them.

Connect iPhone to computer with USB cable

iTunes Recognizes iPhone and display the iPhone icon

Click File > Device > Back Up to start

Log in Apple ID

Enable iCloud

Tap Backup Now
Voila, you have got most of your important backed up in your computer or the cloud. When we want to backup music files, apps and other files which can’t be saved in the backups, we’ll need the help of the third-party iPhone backup software.
After backing up iPhone with iTunes or iCloud, users can restore their device easily. If you are going to restore your iPhone with iTunes, you only need to plug iPhone into computer via the USB cable, and then choose “Restore Backup” in the summary panel of iTunes. If you want to restore iPhone with iCloud backup, you should connect to Wi-Fi and tap Settings > iCloud > Restore Backup on your iPhone. Note that iTunes and iCloud will ask you to erase all the contents and settings before the restoring process starts.
When we want to view iPhone backup contents on our computer, we’ll need to make it clear that the contents in iCloud backup can be viewed in iCloud.com on our computer, but we aren’t allowed to view the contents in iTunes backup on computer. But we are able to get access to the location of the iTunes backup on our computer.
Windows XP: C:\Documents and Settings\username\Application Data\Apple Computer\MobileSync\Backup\
Windows Vista, Windows 7 and Windows 8: C:\Users\username\AppData\Roaming\Apple Computer\MobileSync\Backup\
Mac OS: ~/Library/Application Support/MobileSync/Backup/
On a Windows computer, how can iPhone users make more than one iPhone backup? In fact, you have several steps to do, and the following tutorial will show you how to get it:
1. Open Computer, and go to C:\Users\Username\AppData\Roaming\Apple Computer\MobileSync\Backup\, and double-click to open the folder. You will see folder(s) named with numbers and letters. Identify your iPhone backup with the time beside the name of the folder.
2. Copy and paste the iPhone backup folder, and rename the folder. It is a good idea if you want to name the backup after the date you create this backup.
3. Double-click the new iPhone backup folder, and find the “info.plist” file. Open it with your Notepad, and locate a “
4. Save the file, and there you go. You have made a copy of your iPhone backup now. Next time when you want to restore your iPhone, you will see this backup in iTunes.
Sometimes we don’t need an iPhone backup anymore and want to delete it from iTunes. The following guidance will show you how to do it:
1. Start iTunes and go to “Edit > Preferences > Devices”, and you will see the backups you created in the window below.
2. Move your mouse to the iPhone backup, and you will get the phone number and the IMEI number of the iPhone so that you can identify whether the backup is the one you need.
3. Select the iPhone backup and click “Delete Backup” at the right bottom. Then iTunes will start deleting iPhone backup from iTunes.
If you are using a Mac computer, you should click “iTunes > Preferences” When you want to delete iPhone backup.
If you are using iCloud to backup iPhone, you will be able to manage the size of the backup by tapping Settings > iCloud > Storage > Manage Storage (If you are using iOS 7 or earlier, tap Storage & Backup) on your iPhone.
On you Mac computer, you can go to Apple Menu > System Preferences, click iCloud then click Manage.
On your Windows 7 computer, you can choose Start Menu > All Programs > iCloud > iCloud, then click Manage.
If you are using Windows 8 or Windows 8.1 computer, you should go to the Start Screen and choose iCloud then click Manage.
If you are using iTunes to backup iPhone, you will find it impossible to manage the data in your iPhone backup on computer as the contents in the backup aren’t viewable. So the only way to reduce the iPhone backup in iTunes is to delete the unwanted photos, videos and so on before backing up your iPhone.
Sometimes we do want to change the location of the backup to free up our C:/ drive. The following guidance will show you how to do that:
1. Create a new folder on your computer named Backup.
2. Create a symbolic link to the new backup folder. You need to hit Windows + R and enter cmd in the Command dialog. Then type the following code: mlink /J “%APPDATA%\Apple Computer\MobileSync\Backup” “D:\Backup”. If you create a new backup folder in other location, you need to type the right location of the new iPhone backup folder.
If you are using iCloud, and have same Apple ID on your new iPhone, you are able to restore your new iPhone with the iCloud backup easily. If not, you can take advantage of iTunes to restore iPhone with the new backup. The following guidance will show you how to do it:
1. Start iTunes and go to “Edit > Preferences > Devices”, and check “Prevent iPods, iPhones and iPads from syncing automatically”.
2. Plug old iPhone into computer and click “File > Devices > Back Up” at the upper left corner after iTunes recognize your iPhone.
3. After iTunes backing up your iPhone, unplug the iPhone and connect your new iPhone to computer with the USB cable. Then click “Restore from Backup” in the summary panel.
After restoring your new iPhone with the old backup, your new iPhone will restart and you will get the backup contents in your new iPhone.
But still, many iPhone users don’t want to restore new iPhone with the old backup, because the old backup can be large and include many outdated data and unwanted apps. So it’s up to you whether you are going to restore the new iPhone with the old backup.
Of course, sometimes we’ll have to erase all the contents and settings in our iPhone to get rid of the unwanted files once and for all. If you want to set up your iPhone as a new one, you only need to tap Settings > General > Reset > Erase All Contents and Settings on your iPhone. This will delete the phone settings, photos and other media files on your iPhone.
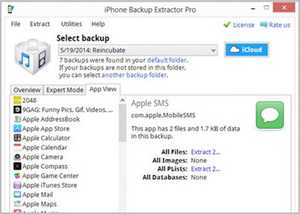
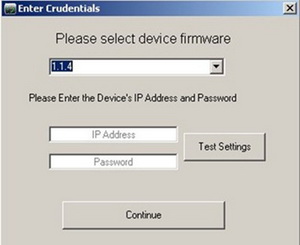
People can find various kinds of iPhone backup programs on the Internet now, and they will be helpful when you want to backup iPhone without using iTunes, or want to view the files after backing up your iPhone. The following post introduces 10 iPhone backup software to all users.
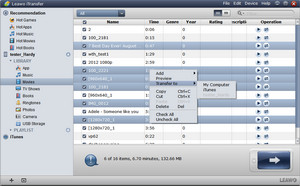

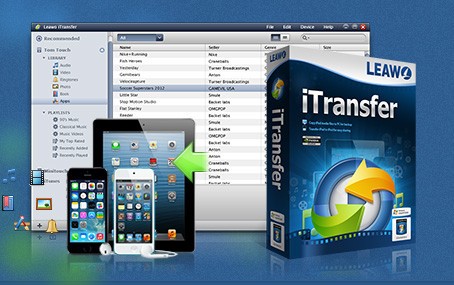
Recommended: Leawo iTransfer is an all-in-one iPhone transfer program with an easy-to-use interface. With this iPhone backup/transfer software, users are able to get rid of the sync of iTunes.
• Backup iPhone files to computer in viewable files within seconds.
• Transfer iPhone files without the sync of iTunes.
• Fully compatible with iPhone 3GS or later.
• Fully support the latest version of iTunes.
• Transfer Apps, media files, Camera Roll and contacts easily.
• Make iPhone as a flash drive.