iPhone camera which equipped with the HDR feature is quite remarkable. This feature is very useful for elevating an average photo to an extraordinary shot. It can help users a lot to take great shots. However, not all people know the exact meaning of HDR and how to take advantage of this feature. If this is just what you desire to learn, you are just in the right place. This tutorial will show you the answers to these questions. You will also be able to know how to further enhance your iPhone HDR photos and a great method to transfer your HDR photography to computer for backup.
Part 1: What is HDR on iPhone Camera?
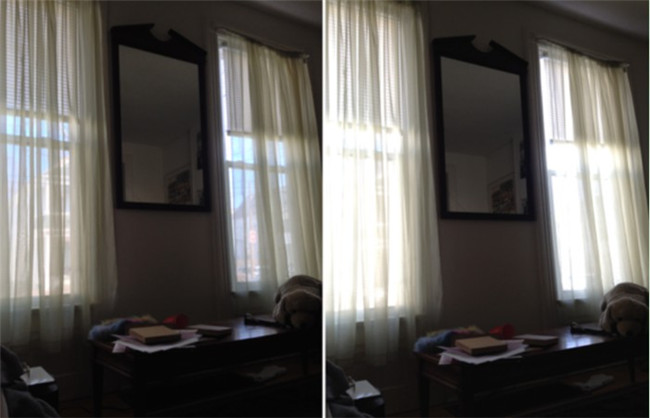
Most of us use iPhone to take a lot of excellent photos, but not everyone knows exactly what iPhone camera HDR is. What is HDR on iPhone camera? HDR is a setting on the iPhone Camera app, which stands for High Dynamic Range. This feature can be used to create pictures that are lit perfectly with more colors and details in both the bright and dark areas, which can deal with exposure problems in a great way. In general, HDR was a photographic technique for dealing with tricky lighting situations. What can HDR on iPhone camera do for us? When you enable iPhone camera HDR, it will automatically blend the best parts of three photos taken quickly at different exposures—one at normal exposure, then one each of the brightest and darkest parts of the scene. As we have shown you what is HDR on the iPhone camera, below you will learn how to use HDR on iPhone camera.
Part 2: How to Use HDR on iPhone Camera?
After you learn what is HDR on iPhone camera, you may also want to know how to use this feature. Read on and you will become professional in iPhone HDR photography.
2.1 How to Turn on HDR on iPhone Camera?
To take HDR photos with your iPhone, you can turn on HDR feature to assist you. The steps are shown below for your reference.
Steps:
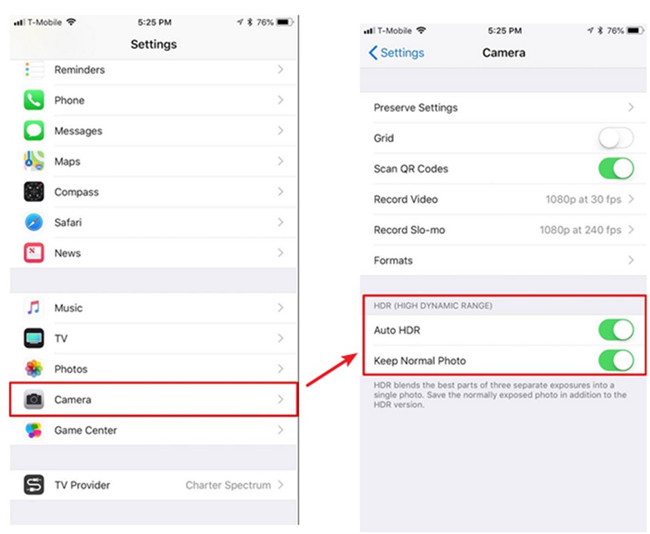
- On your iPhone, you need to go to the Settings app and then hit on the tab of “Camera”.
- Navigate to the area of “HDR” and toggle on the feature of “Auto HDR”. You need to make sure the button turns green.
- The “Keep Normal Photo” option is also available on this interface. You can turn it on to keep your regular and non-HDR picture as well. This option allows you to select the photo you desired to share or edit. However, this feature will take you so much space, so it is not a good idea for you to turn it on all the time.
After you enable HDR on iPhone camera, your device captures and saves two versions of the image. Then you can compare the two photos and use the one that you like most. If you want to save iPhone storage space, go to “Settings > Camera > Keep Normal Photo” and swipe to turn off. If you set HDR to Auto, your device will determine whether or not each photo would look better with or without HDR.
2.2 When to Use HDR on iPhone?
It is not hard for you to turn on the HDR feature on your iPhone, but the time to use this feature is also important for you to know. Not every iPhone user is clear on when to use HDR on iPhone. Read on the following content and you will understand the HDR feature much better.
- When you shoot high contrast scenes with dark shadows and bright highlights, it is sensible for you to make use of the iPhone HDR feature, for it will help you to capture more details in both the bright and dark areas of the scene.
- When you desire to shoot wonderful landscape photos, you’d better switch the HDR feature on, for it can assist you to obtain a perfectly lit image with much colors and details.
- When you are in shooting situations with tricky lighting conditions, you are recommended to use the HDR feature.
- If you are not good at adjusting exposure of your photography, you can use HDR to help you get rid of this trouble and to get balanced photo exposure.
2.3 When Not to Use HDR on iPhone?
Although HDR is convenient for you to apply to get better exposure, there are also some cases that you should not use HDR. It is necessary for you to know when not to use this feature, which can do you much help in taking iPhone photos with the best quality in various situations.
- When you aim to shoot the high contrast nature of a scene, you are recommended to turn off the HDR feature.
- When you want to create a silhouette picture and the subject you desire to shoot seems fully black against the bright background, you’d better not use HDR.
- If your older iPhones do not have the feature of smart HDR, you need to be careful when you use HDR to shoot moving subjects.
Part 3: How to Enhance iPhone HDR Photography?
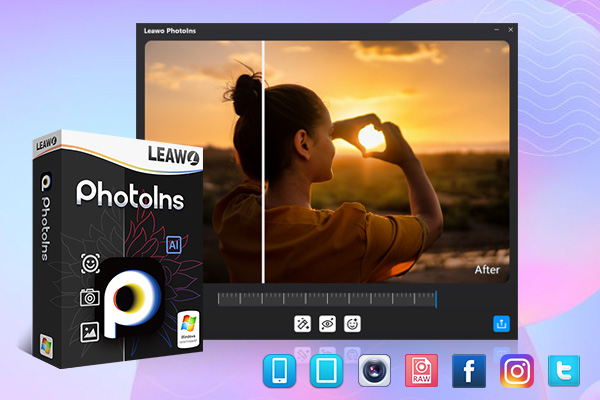
It is not easy for you to capture perfect iPhone HDR photos. In order to improve iPhone HDR photography after you know what is HDR on iPhone camera and the way to use HDR, you can resort to various enhancers for help. There are many apps for you to enhance iPhone photo effects, you can directly use them on your iPhone to improve HDR photos. If you desire to use a simple program to edit your iPhone HDR pictures more directly on a large computer screen, you can apply Leawo PhotoIns to make it easily. This photo enhancer can improve your HDR iPhone photo quality automatically with one powerful AI enhancer. As for how to use this application on computer in detail, you can refer to the following instructions to know clearly.
Step 1: Download Leawo PhotoIns
Go to the official website of Leawo PhotoIns and download the right version based on your computer system. Install this tool on your computer for preparation.

-
Leawo PhotoIns
- Enhance portrait photos easily with advanced AI technology
- Fix photo exposure and white balance issues automatically
- Optimize photo colors and perfect photo tints
- Make photos perfectly clear with smart dehaze
- Boost photo lighting and color quality
- Process RAW and JPG files
Step 2: Import Source iPhone HDR Photos to Leawo PhotoIns
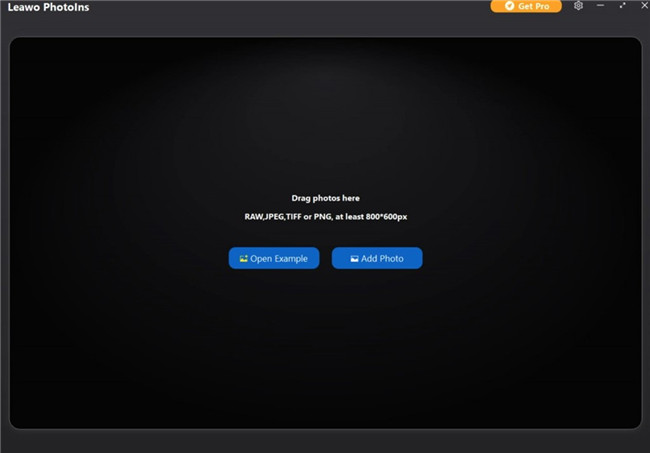
Run Leawo PhotoIns on your computer and then click on the option of “Add Photo” to load your iPhone HDR photos. You can also simply drag and drop iPhone HDR images to the screen directly. If you desire to edit many iPhone HDR pictures in batch, you can hit on the button of “Add Files” to load other more HDR photos to the program.
Step 3: Enhance iPhone HDR Photos
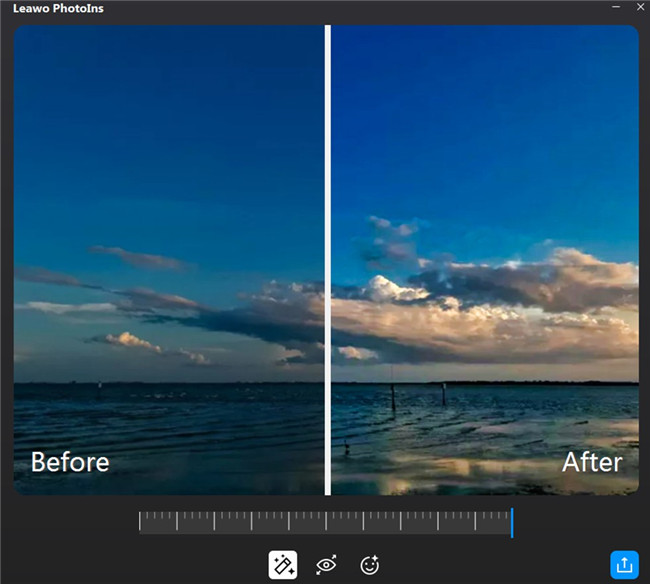
Hit on the AI Enhance tab to select the features you need. You can choose to turn on the options of "Automatic Lens Correction", "Face Enhance" and "Enlarge Eyes". Besides, there is an effect adjuster bar right below the previewer for you to set the degree of each effect. By comparing the effects before and after the adjusting, you can know how great this tool is.
Step 4: Set Output Parameters
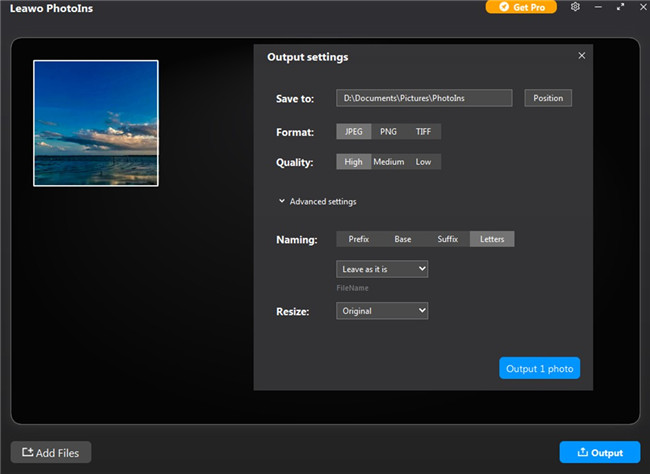
After you set the photo effects well, you need to hit on the bottom right output button to continue to modify the output settings. After the output settings panel pops up, you can finish the following settings like “Save to” route, “Format”, “Quality”, “Naming”, “Resizing” and etc. In the end, you need to hit on the “Output” button to export your enhanced iPhone HDR photo to your computer.
As you can see, it is quite simple for you to use Leawo PhotoIns to enhance iPhone HDR photos. However, you need to transfer your iPhone HDR photos to computer in advance to use this tool. Don’t worry! You can continue to read the next part to see how to use a powerful transfer tool to get your iPhone pictures to computer accurately and safely.
Part 4: How to Transfer iPhone HDR Photography to Computer for Backup?
After reading the message above, I am sure you would not ask the similar question what is HDR on my iPhone camera. As we know what is HDR on iPhone camera, we can take good advantage of this feature and take photos with better colors and details. One thing you should do after taking those photos is back them up in case you lose them accidentally. It is more convenient for you to transfer your iPhone HDR photos to computer for further improvement as well.
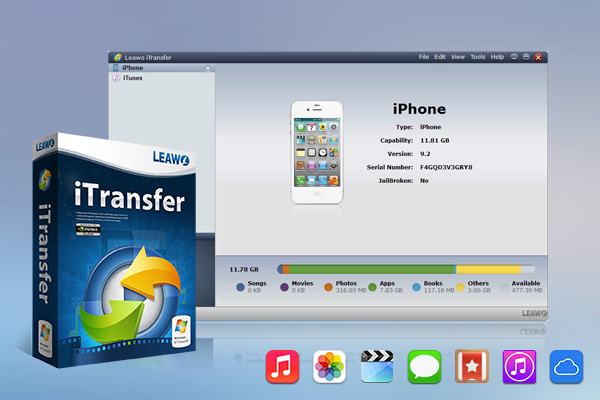
Most of the time, people would use iTunes to backup iPhone, but you can't back up photos on iPhone without having to backup the whole phone. So here's a better choice. Leawo iTransfer is specially designed for iPhone users to back up data and transfer files among different devices. With this program, you can back up photos in iPhone without having to back up the whole phone. The step-by-step instruction shown below will tell you how to take advantage of this great tool to back up your iPhone HDR photos to computer at ease.
Step 1: Download Leawo iTransfer
Go to the official website of Leawo iTransfer and download the right version based on your computer system. Install this tool on your computer for preparation.


-
Leawo iTransfer
- Transfer files among iOS devices, iTunes and PCs with ease.
- 6x faster than iTunes
- Transfer up to 14 kinds of data and files without iTunes.
- Support the latest iOS devices like iPhone 12, iPhone 12 Pro, etc.
- Play back, view, and delete data and files on iOS devices.
- Support Windows & Mac OS
Step 2: Connect iPhone to computer
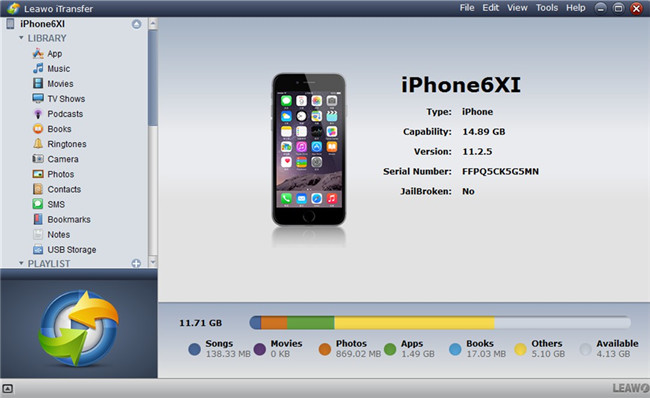
Connect your iPhone with computer with matched USB cable. Run the software and then you will see your iPhone info in the right part of the screen.
Step 3: Select iPhone HDR photos
Go to the menu of “iPhone icon> LIBRARY > Photos” to check all your iPhone images. Choose your iPhone HDR photos and right click on one of them to select the option of Transfer to > My Computer" to hit on.
Step 4: Export HDR photos from iPhone to computer
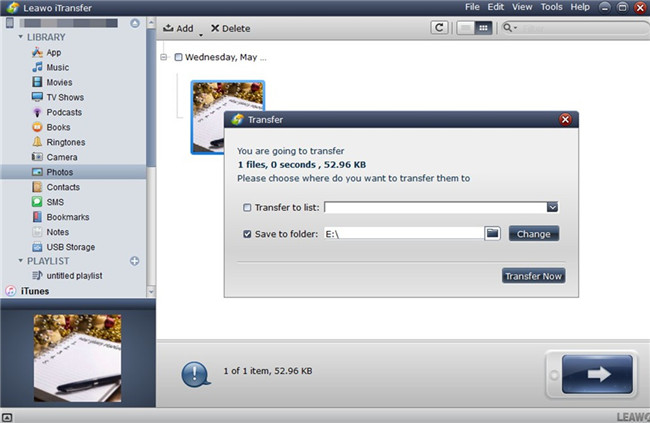
In the panel that shows up, you need to tick the option of “Save to folder” and click on the “Change” button to set a directory to save your iPhone HDR pictures. Finally, you can hit on "Transfer Now" to begin to back up your iPhone HDR pictures to computer. Wait for a while and your iPhone HDR photos will be available on computer local folder.
As we said, iPhone camera HDR is designed to help you take better-looking photos, especially in certain situations. When you use HDR on iPhone camera, you will get a beautifully lit and detailed photo. If you are still not satisfied with your iPhone HDR photos, you can use photo apps to improve the quality. To prevent losing your important HDR photos, it is also sensible for you to transfer them to your computer for backup.

