Last updated on 2021-04-28, by
How to Take HDR Photos on iPhone?
HDR stands for High Dynamic Range, a technique that is used in imaging and photography to reproduce a greater dynamic range of luminosity and to present a similar range of luminances to that experienced through the human visual system. Generally speaking, iPhone HDR photo can be completed by integrating three different exposures into a single shot. With HDR technology on iPhone, you can take delicate photos with more colors. In this way, you can create many beautiful and amazing pictures. However, the question is how to take HDR photos on iPhone. Here are tutorials for how to take HDR photos with iPhone. Please follow us to learn more.
Part 1: What is HDR Photo on iPhone?
HDR is short for High-Dynamic Range. Compared with ordinary images, it can provide more dynamic range and image details. According to LDR (Low-Dynamic Range) images with different exposure times, using the LDR image with the best detail corresponding to each exposure time to synthesize the final HDR image can better reflect the visual effect in the real environment.
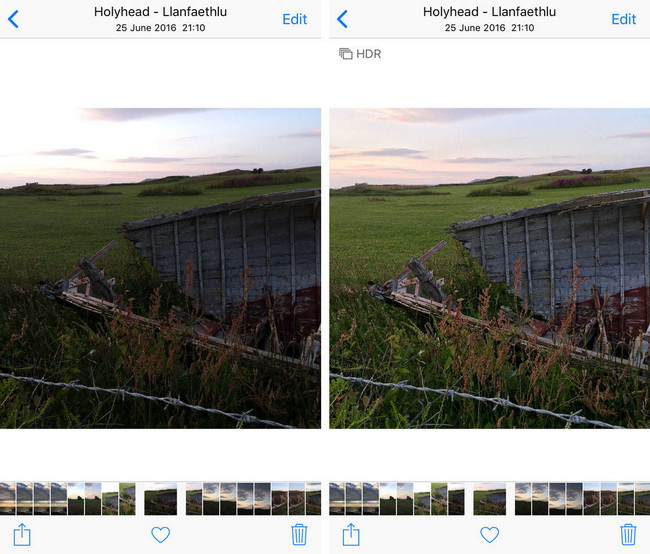
When we turn on the HDR mode in the iPhone camera, the iPhone camera will quickly take photos with different exposures (one with normal exposure, and the other two with exposures of the brightest and darkest parts of the scene), and then automatically combine these three photos to form an HDR photo with better colors and details. HDR on iPhone is the combination of three photos at different exposures that can simply convert a regular photo to HDR photo so as to bring stunning pictures to you. As we all know, human eyes can catch much greater dynamic range than camera, for camera can't capture details in a very dark or bright place. While HDR photo on iPhone can create more delicate pictures by combining three exposures into one that seems to be seamless.
Part 2: How to Take HDR Photos on iPhone?
Usually, it takes longer to take an HDR photo on iPhone than a regular one, for iPhone HDR photo has to take three separate pictures at three different exposures. In this way, it is easy for you to move your camera. Here I would advise you to station your iPhone on a tripod. Here are some major important tips related to taking HDR photos with iPhone.
1. How to Enable HDR on Your iPhone
If you prefer to enable HDR always on your iPhone, then follow the steps below.
Step 1: Open iPhone and go to Settings >> Camera >> Auto HDR.
Step 2: Make sure the toggle is on green which means the Auto HDR has been enabled. If you want the HDR photo to be disabled, then turn on the red toggle.
If you prefer to use HDR photo on iPhone case by case, then you had better turn off the Auto HDR option. Then follow the steps below to activate the HDR photo on iPhone.
Step 1: Open Camera app on your iPhone.
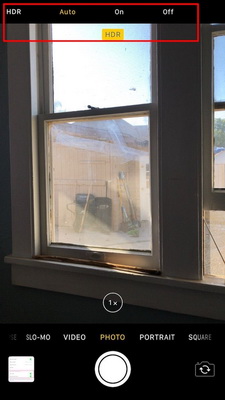
Step 2: At the top of the camera screen, tap on the HDR option, select Auto, On or Off based on your own needs. If you would like to use HDR, simply select On and you can take photos in HDR mode.
2. When Should You Take HDR Photos with iPhone
The first situation you should take HDR photos with iPhone is to take landscape photos. After using HDR, the dark areas will not look particularly dark after the combination of three consecutive sky photos, and the bright areas will not look particularly bright. The whole photo has both a sense of detail and a sense of contrast. The second is to illuminate people or objects in the sun. After turning on the HDR function, the entire subject will look perfect. The third is that you can use the HDR function when the light is particularly dark, for example, you want to shoot street scenes in a dark street. Turning on the HDR function, although the particularly dark areas on both sides will not become brighter, the brightness of the foreground part of your subject will be improved, giving people a more distinct feeling.
3. When Should You Take Non-HDR Photos with iPhone
It is not recommended to use HDR mode to shoot high-speed moving objects or portrait photos, as it is easy to have afterimages and affect the final shooting effect. If the colors of the objects or landscapes you are shooting are very bright, turning on HDR shooting may cause the colors to become dim. At this time, you can turn off the HDR mode according to your needs. If you want to achieve a strong contrast between light and dark, you had better not use HDR mode to shoot, because the contrast may be reduced after turning it on, and the ideal effect you need cannot be achieved.
Asides from some important tips on how to take HDR photos on iPhone, if you would prefer to know more about how to shoot on iPhone, you can refer to the tutorial on how to take pictures with iPhone for more information.
Part 3: How to Enhance HDR Photos on iPhone?
Once you have shot a lot of HDR photos which would be posted to some social platforms, like Instagram, you may have higher requirements on the HDR photo quality. Then how to enhance HDR photos on iPhone? The first solution would be from the best apps for iPhone photo effects which could directly enhance the HDR photos on your iPhone without further transferring. In addition, here you can make full use of a powerful photo enhancers on your computer to enhance the HDR photos taken on your iPhone. That is Leawo PhotoIns. Leawo PhotoIns is quite appropriate for you to use if you really desire to enhance the photo quality. This tool is powerful as an AI photo enhancer, which can optimize your pictures immediately. Its features are comprehensive, which includes enhancing images, intelligently retouching skin, removing freckles, reducing noise, enhancing eyes, adjusting lighting automatically and so on. It is also good at improving photo quality with the methods of fixing image exposure issues automatically, boosting image lighting and color quality, improving photo contrast for greater visual effect and more. But before enhancing HDR photos with Leawo PhotoIns on your computer, you should transfer your HDR photos on your iPhone to computer first with Leawo iTransfer. Here are the two main parts.
1. How to transfer HDR photos on iPhone to computer with Leawo iTransfer
Step 1. Download Leawo iTransfer
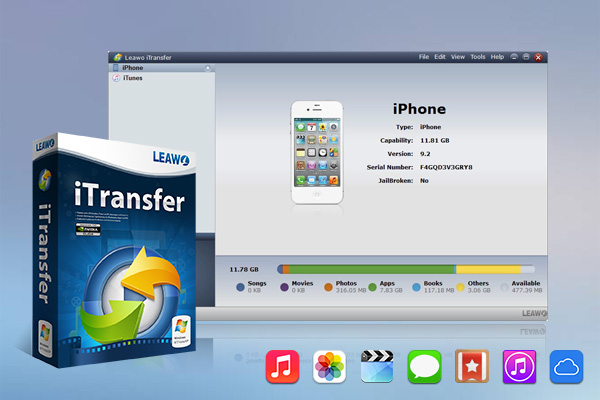
Download and install Leawo iTransfer on your computer.
-
Leawo iTransfer
- Transfer files among iOS devices, iTunes and PCs with ease.
- 6x faster than iTunes
- Transfer up to 14 kinds of data and files without iTunes.
- Support the latest iOS devices like iPhone 12, iPhone 12 Pro, etc.
- Play back, view, and delete data and files on iOS devices.
- Support Windows & Mac OS
Step 2. Connect your iPhone with computer
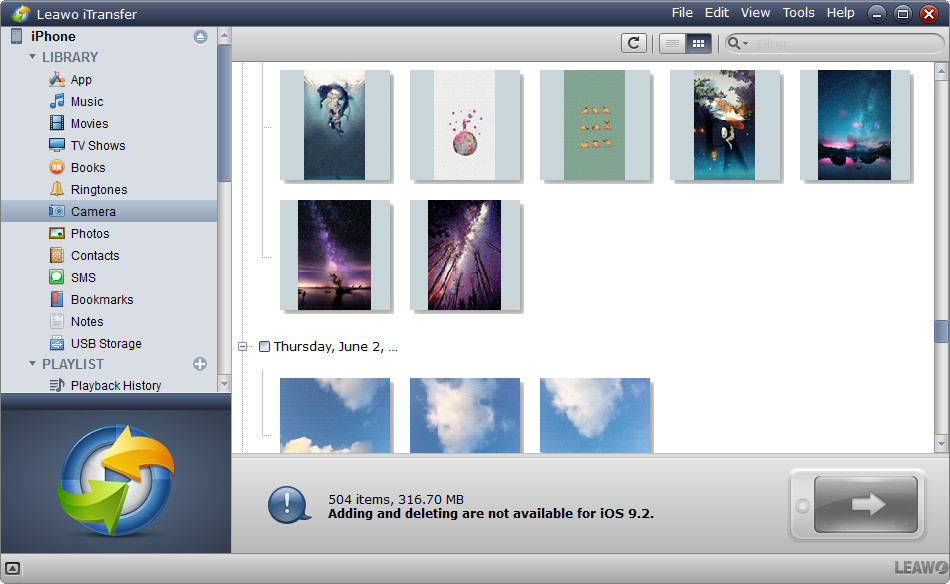
Kick off Leawo iTransfer after installing it on your computer. Then connect the iPhone and computer through the USB cable. Your iPhone will be automatically detected and the libraries of your iPhone will be shown in the left sidebar.
Step 3. Add HDR photos on iPhone to the program
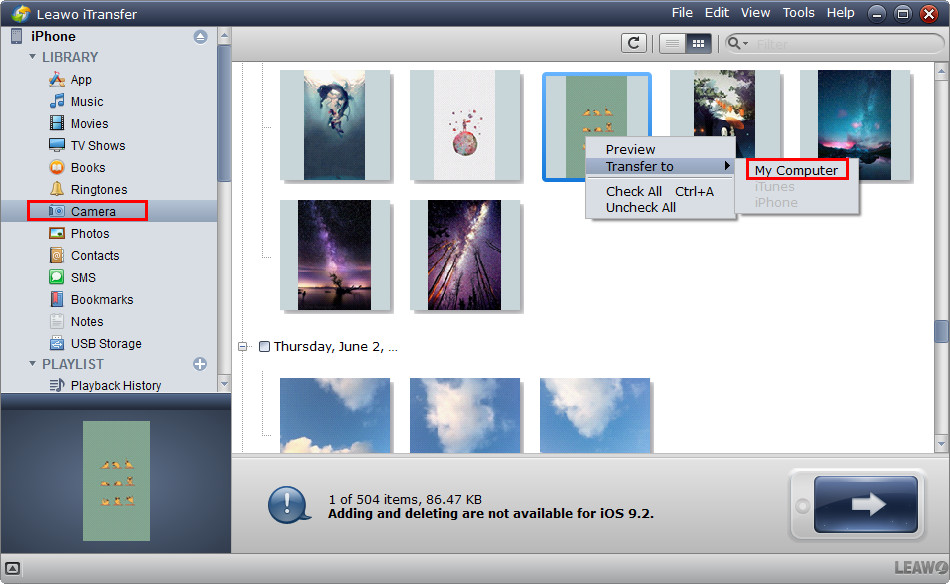
Click "Photos" in the left sidebar, and the photos will be displayed in the right part. Click the transfer button to transfer all the photos to computer. Or you can press "Ctrl" and choose photos you want to transfer. Then right click the chosen photos to "Transfer to > My Computer".
Step 4. Confirm saving route
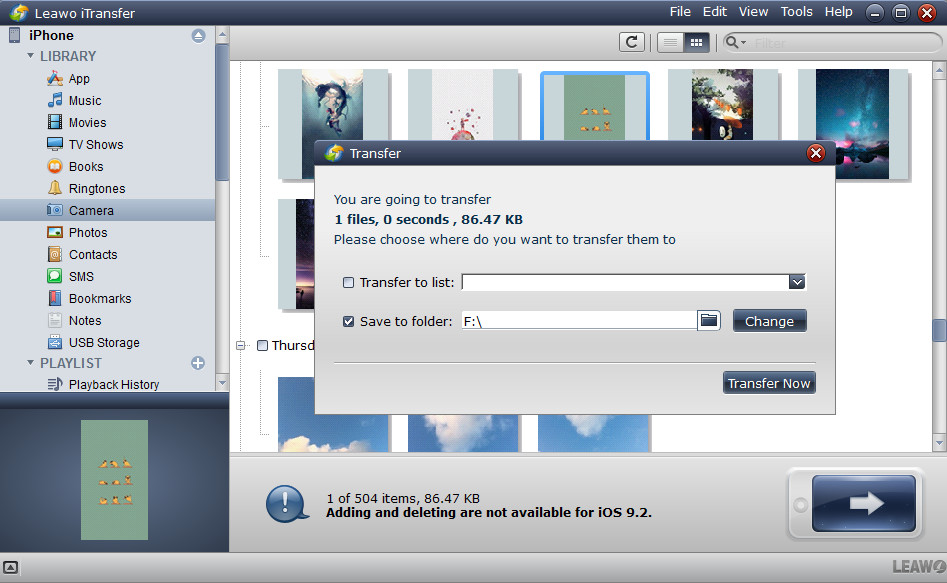
A dialog of transfer settings will pop up. Check "Save to Folder" and click "Change" to choose a folder to save the photos. Then click "Transfer Now" to start backing up iPhone Photo Library to computer. Please do not mistakenly click "Stop" button during the transfer process.
2. How to enhance HDR photos with Leawo PhotoIns?
Step 1. Download Leawo PhotoIns
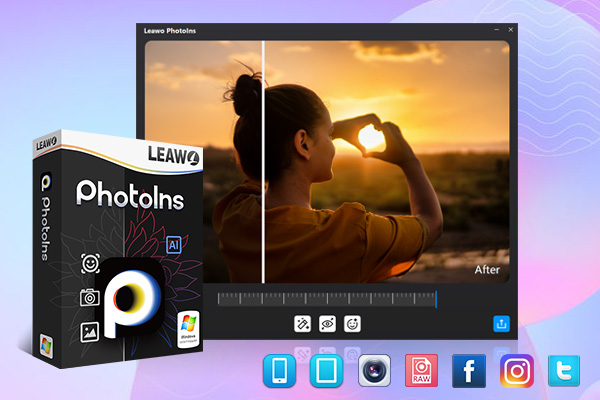
Download and install Leawo PhotoIns on your computer
-
Leawo PhotoIns
- Enhance portrait photos easily with advanced AI technology
- Fix photo exposure and white balance issues automatically
- Optimize photo colors and perfect photo tints
- Make photos perfectly clear with smart dehaze
- Boost photo lighting and color quality
- Process RAW and JPG files
Step 2. Import source HDR photos on iPhone to Leawo PhotoIns
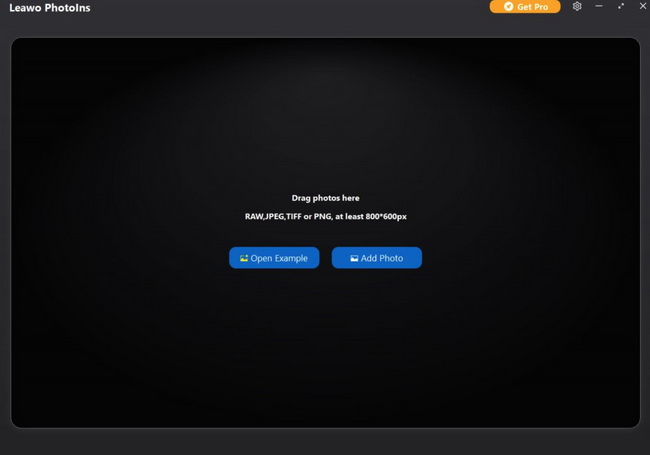
Once you have installed Leawo PhotoIns on your computer, then open it and import source photos you would like to enhance to this program. You can load preferred photos into the program by clicking the option “Add Photo”.
Step 3. Enhance photos
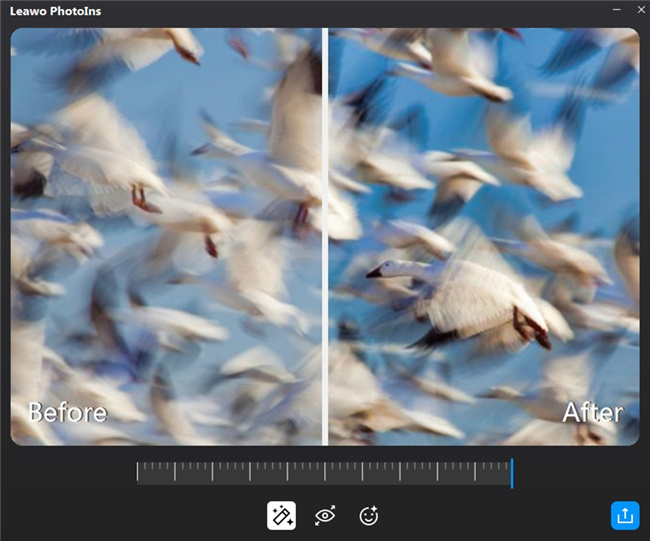
After loading your HDR photos to the tool, then you can start to enhance the photos. You can click the AI Enhance tab to enhance the photos automatically.
Step 4. Set output parameters
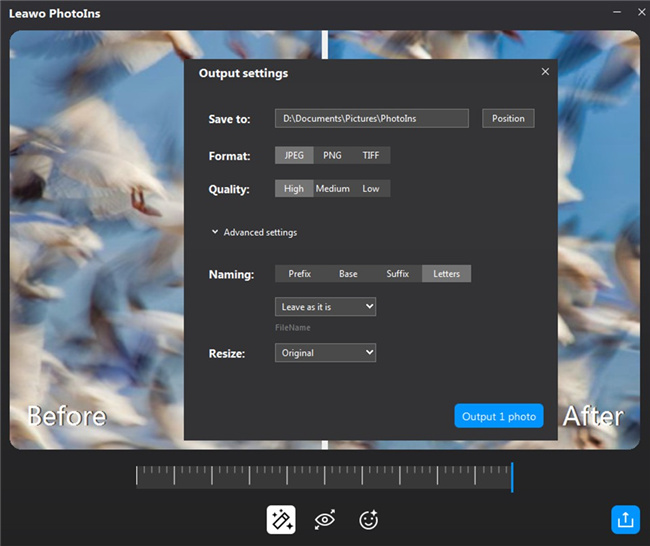
On the Output Setting panel, you can complete the following things: “Save to” route, “Format”, “Quality”, “Naming”, “Resizing” and so on. Finally click “Output” to export the enhanced photo to your computer.
Part 4: Related Tips on How to Back up and Share HDR Photos on iPhone
1. How to Back up HDR Photos on iPhone with iCloud
Every iOS device is equipped with the feature of iCloud, which is a good choice for you to back up HDR photos. The steps shown below will tell you how to realize this goal.
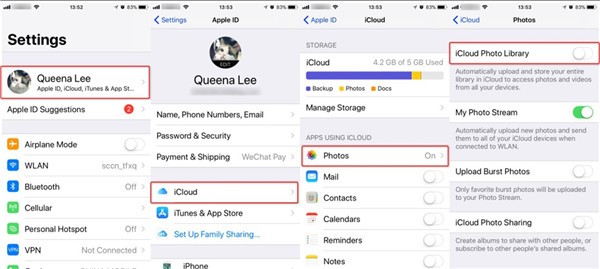
Step 1: On your iPhone, you need to navigate to your Settings app and then open it to click on "Name/Apple ID > iCloud". Choose the "Photos" tab to hit on and then enable the feature of "iCloud Photo Library" to sync iPhone HDR pictures to iCloud.
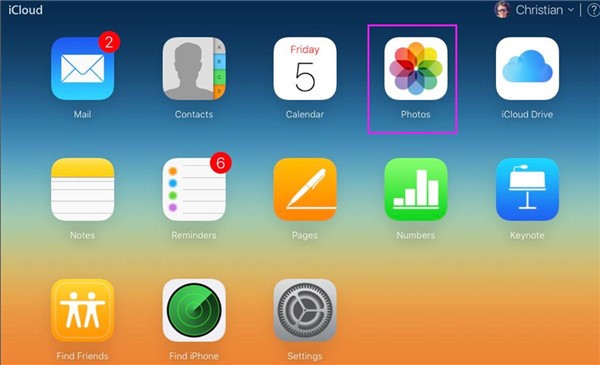
Step 2: If you want to view your iPhone HDR photos on computer, you can go to iCloud.com to check them easily by logging into your account and click on the "Photos" option in the main interface.
You need to make sure your iPhone is connected to Wi-Fi network while the syncing process is underway.
2. How to share HDR photos with AirDrop
AirDrop is a unique function under Apple's iOS, iPadOS and macOS systems. It is used to share files between multiple devices.
Steps:
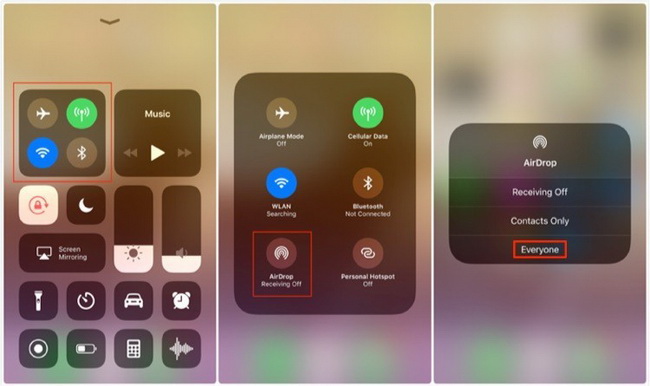
- Open your iPhone and first of all, you need to turn on AirDrop. Usually, you only need to activate Wi-Fi connection button and Bluetooth button and make sure your iPhones are working under the same Wi-Fi network.
- Launch the Photo app on your source iPhone. Locate the HDR photos you would like to transfer and select the preferred photos and click the Share icon.
- You can find all the devices that have enabled AriDrop. Make sure the other iOS device has enabled AirDrop as well. Find the correct iPhone Airdrop icon and click it. Then, you can receive a message reminding you to accept these photos to your iOS device or not. Tap Accept, then all these chosen photos between the iOS device.
3. How to share HDR photos with Android users via Email
As for how to take advantage of E-mail to finish the HDR photo sharing task, you can check the following contents to help you.
Step 1: Open Photos app on your iPhone and choose the HDR photos you like to share. Then tap the Share icon and then choose the option of "Mails" as the sharing method.
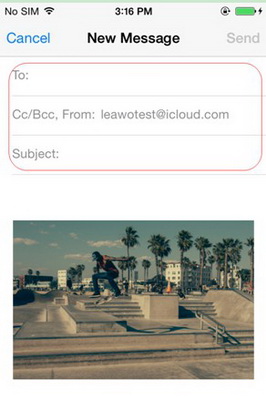
Step 2: In the pop-up window, fill in the info and make sure the address you send to is yours as well. Hit the "Send" button at the top right corner of the screen to share the HDR image to another iPhone.
Step 3: Open the email app on your Android phone and download the HDR photos to the local folder.


 Try for Free
 Try for Free

