When you are trying to customize a photo, the simplest way would be to simply change background color of photo. It is obvious that changing background color of photo can be useful to match a color aesthetic or get a better designed poster. In this case, you easily get a photo on top of a pure colored background to make the subject of the picture stand out. To make it easier, you can resort to some photo editing software and apps.
Menu
- Part 1: How to Change Background Color of Photo in Photoshop?
- Part 2: How to Change Background Color of Photo with Leawo Photo BG Remover?
- Part 3: How to Change Background Color of Photo with LazPaint?
- Part 4: How to Change Background Color of Photo Online with Online Photo Editor?
- Part 5: How to Change Background Color of Photo on Mobile
Part 1: How to Change Background Color of Photo in Photoshop?
When talking about photo editing software, Photoshop can never be neglected. It is known as one of the best and most powerful image editors on the market, which is so popular with professional designers and photographers alike. When you have a photo with a background color you don’t like and you want to reframe your photo in a more attractive color, you can install the latest follow the step-by-step process of how to change background color in Photoshop.
◎ Step 1. Run Photoshop and open your photo
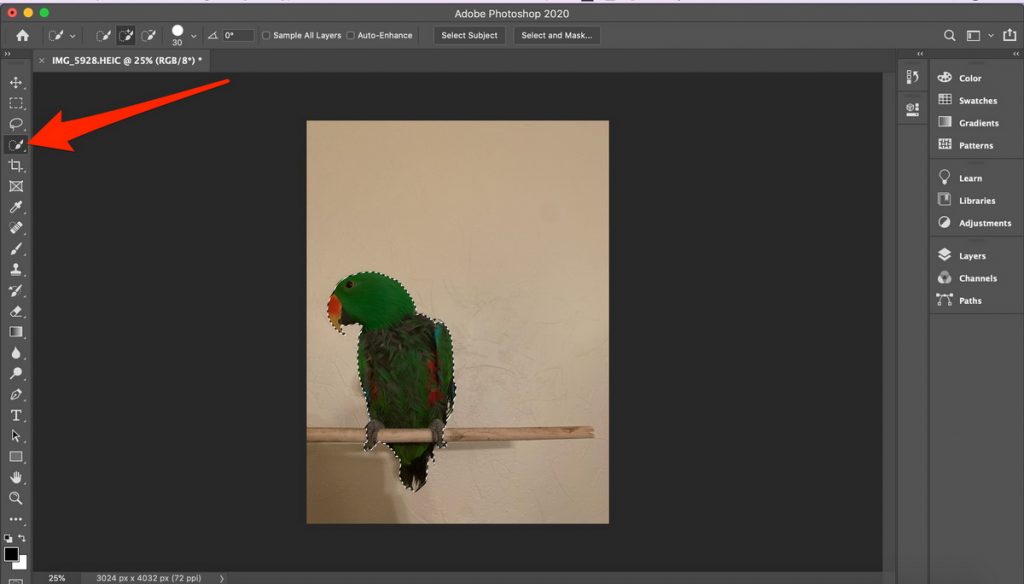
After running Photoshop on your computer, press Ctrl + O to open the photo you want to edit. When you have opened your photo in Photoshop, right-click on the Object Selection Tool from the toolbar on the left.
◎ Step 2. Select a subject
Select “Quick Selection Tool,” then tap “Select Subject” in the upper toolbar to outline the subject in the foreground.
◎ Step 3. Enter Quick Mask Mode
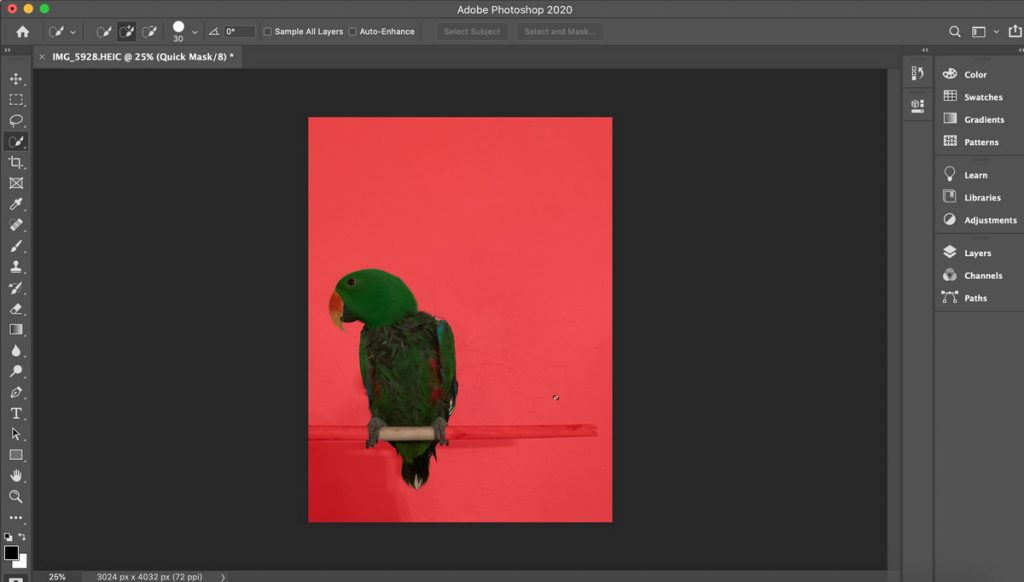
Press the “Q” key on the keyboard to enable Quick Mask mode. In this way, areas that have been captured as part of the background will be red. You can zoom in the photo to refine the edges and details to make it captured more accurately. After finishing the task, you can zoom out and tap “Q” again to exit Quick Mask mode.
◎ Step 4. Change background color of photo in Photoshop
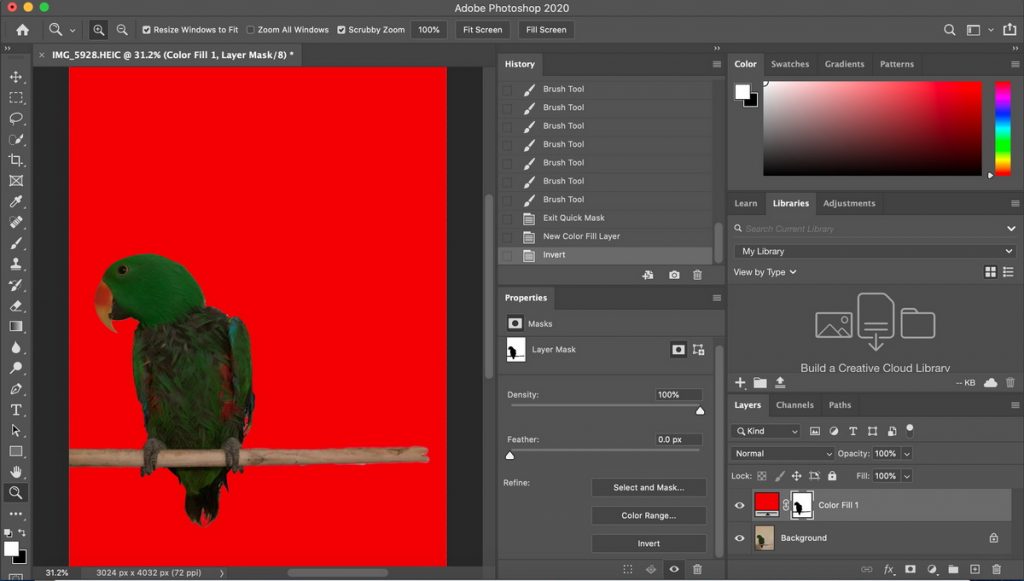
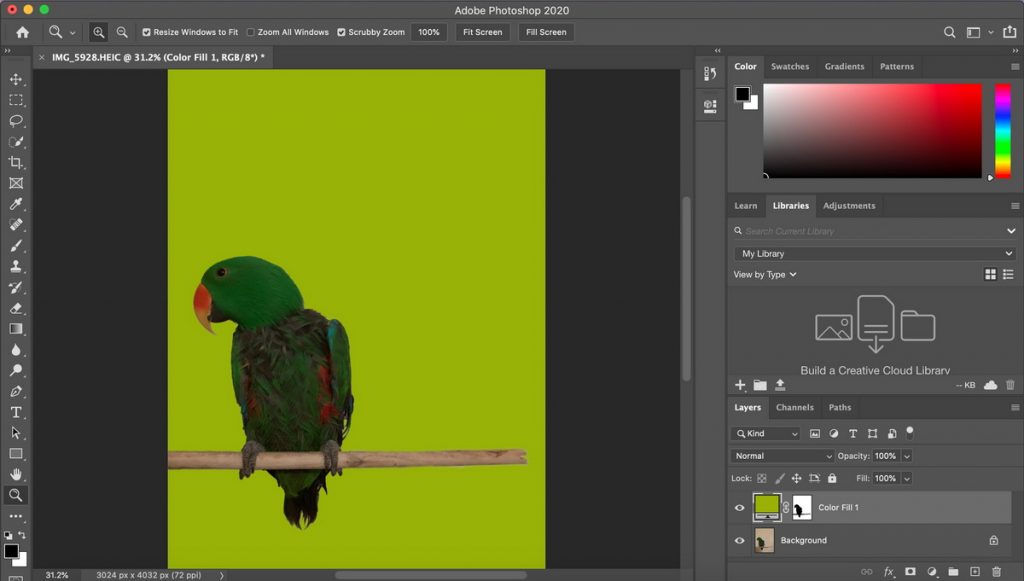
It should be noted that the selected shade will initially color the subject instead of the background. You can press Ctrl + I to invert a layer mask. Finally, just double-click on the solid color thumbnail under the “Layers” tab, and select the color for the background.
Part 2: How to Change Background Color of Photo with Leawo Photo BG Remover?
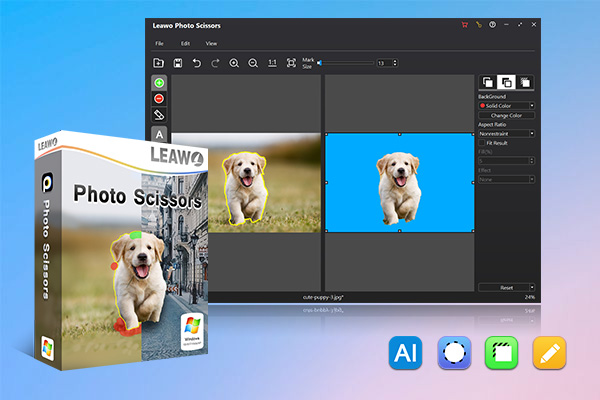
Except for changing background color in photoshop, you can also resort to Leawo Photo BG Remover to make it. As Leawo Photo BG Remover is quite simple and handy to use, it has become the easiest way to change background color of photo. Using smart algorithm, this photo BG remover can intelligently and precisely to remove background from image and change photo background. With user-friendly UI and intuitive functions, you can effectively change background color of photo in several simple clicks. Follow the guide of how to change background color.
Step 1. Download and install Leawo Photo BG Remover
Go to the official site and download the installation package of Leawo Photo BG Remover. It takes a few minutes to install it on your PC.

-
Leawo Photo BG Remover
- Automatically remove background from image with smart algorithm.
- Manually remove photo background for precise adjustment.
- Isolate object to transparent background.
- Change photo background to any solid color or photo.
- Remove background around hair, fur, feather, and more.
- Erase background from transparent objects.
Step 2. Import the photo
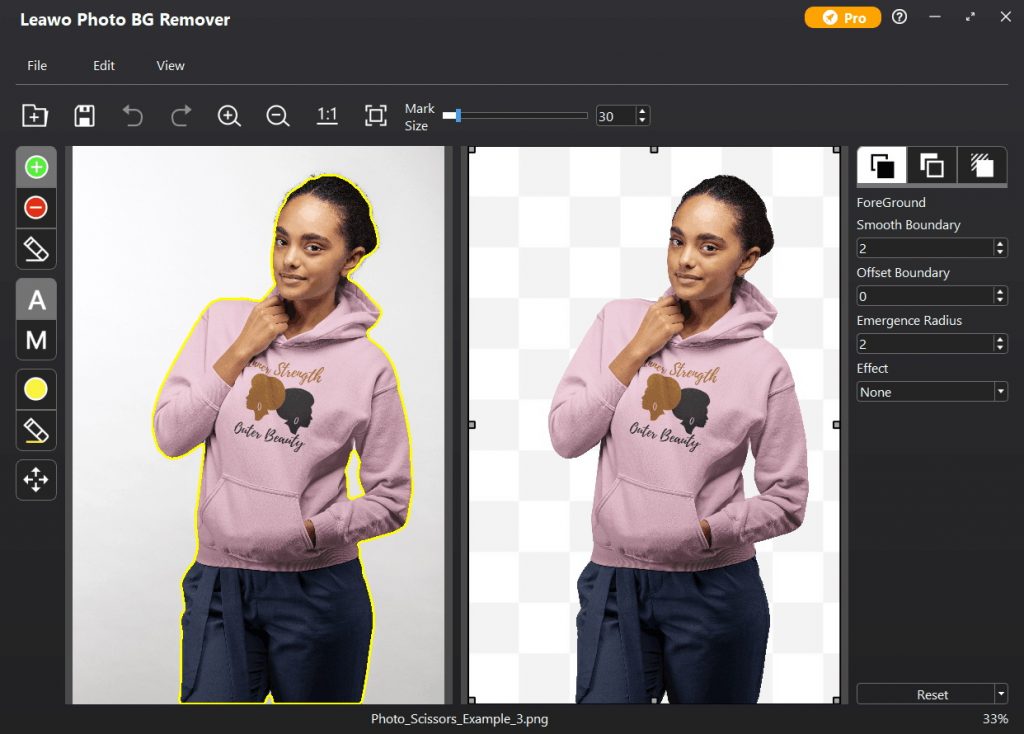
Launch the program and enter Photo BG Remover. There are several methods for you to import a photo to the program. You can drag and drop the photo you want to change background color for to the program or click on + folder icon to directly select a photo from the file folder you save the photo. The background will be automatically removed after importing.
Step 3. Select Solid Color
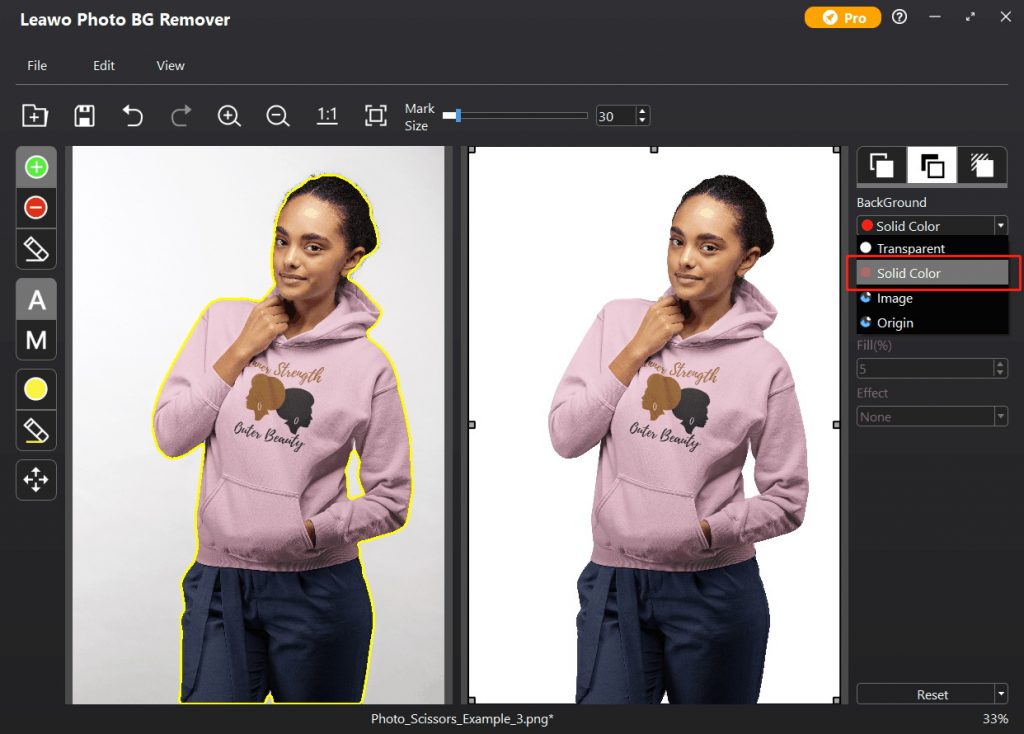
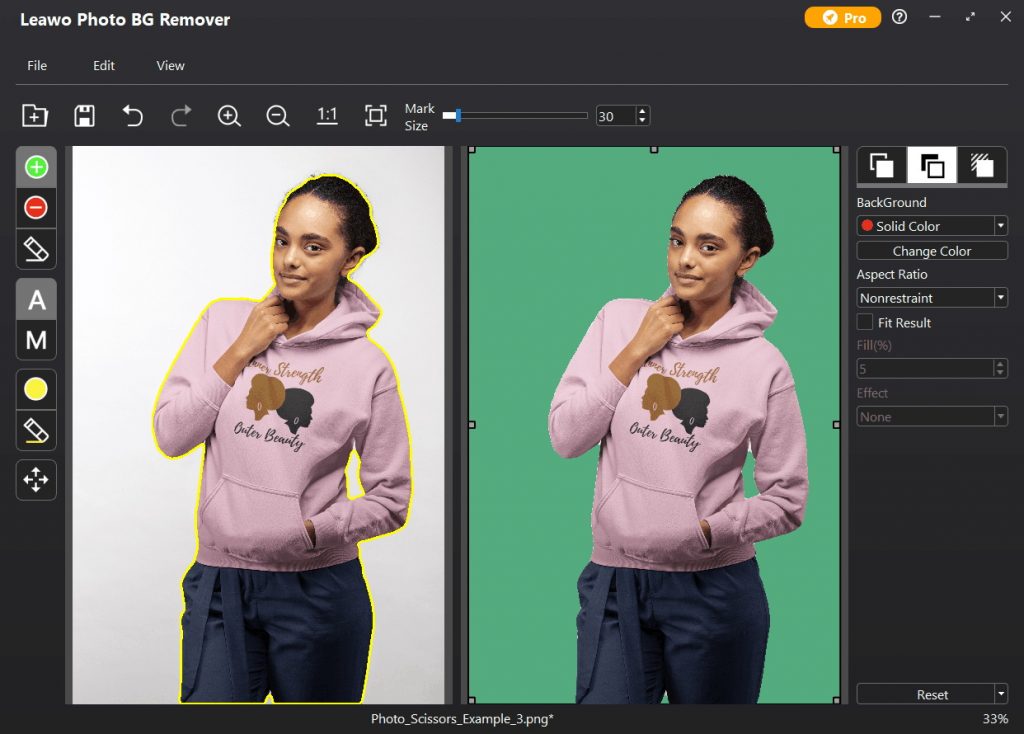
Go to the Parameter Editor Panel in the right panel of the interface, switch to Background Editor where you can change and edit photo background. Click the drop-down menu below Background and then choose “Solid Color”.
Step 4. Select any color you want
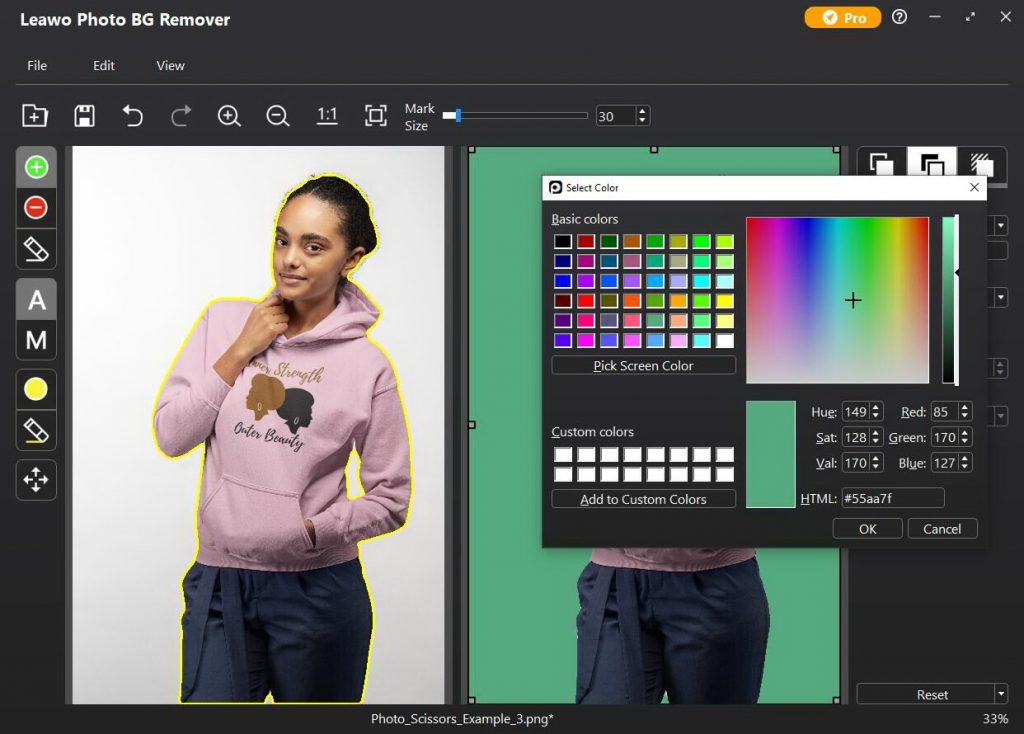
After selecting “Solid Color”, you can click on “Change color” to pop out a color panel. There are a lot of colors for your choice, you choose any color you like and then click OK.
Step 5. Change background color of photo
The background color of the photo has been changed immediately. You can click on save icon in the top menu bar to save the edited photo.
Part 3: How to Change Background Color of Photo with LazPaint?
In order to change background color of photo, another useful tool you can rely on is LazPaint. This is a free and open-source cross-platform lightweight image editor, offering a bunch of essential options to edit images quickly. It enables its users to change the background color of photo as well. It is worth noting that other features of LazPaint are quite difficult to use to some extent. You can follow the step-by-step guide below to change background color of photo with LazPaint.
Steps:
- Download LazPaint from its official web page and install it on your PC.
- Run the program, click on “File” > “Open” to select the photo you want to change background color and import it to the program.
- After importing, you can choose a solid color on the right side of the screen and apply it to the photo by using the Flood fill tool. Finally, you can click save icon on the top menu bar or click on “File” > “Save as” to save your edited photo.
Part 4: How to Change Background Color of Photo Online with Online Photo Editor?
As mentioned above, you have figured out how to change background color with desktop photo editors. Actually, there are also online photo editors that can help you to make it without any software installation. Kapwing Studio is free online photo editor with no watermark, which is one of the most commonly used online photo editor. Here, follow the guide to use this fast online image editor to change background color of photo quickly.
Step 1: Head to the Kapwing Studio at first, you can just click on Get Started to enter the editor, or directly click on Upload File to upload a photo to the Studio for importing.
Step 2: Click on the imported photo to open the edit panel, then click on “Crop” button to remove any extra parts you don’t want. Or you can click on “Erase” > “Magic wand tool” to remove the background.
Step 3: When the background is removed, just click and change the background color on the right panel. You can also change the canvas size if necessary.
Part 5: How to Change Background Color of Photo on Mobile
When you want to remove and change the photo’s background color on your smartphone, there are photo editing apps that can make it. PhotoRoom, as one of the best photo editor apps, is an application that removes the photo’s background to create a professional-looking photos. It can easily separate the subject from the background and set a white background or choose a color. It can also be used to blur the background and erase it. Read on to change background color of photo in simple steps.
Step 1. Run PhotoRoom
Install and open the PhotoRoom app on your Android phone. Go to your phone’s gallery, select a photo you want to change background color. Then the app will scan and automatically remove the background from the photo.
Step 2. Change background color
Click the Background icon, then you can tap “Fill” to choose a solid color background. Besides. You can tap on “Replace” and choose a pure-colored template from your phone’s gallery or the built-in collection to get a photo with a new background color. If necessary, you can also tap on “Erase” to remove the background and get a transparent background. Finally, tap the “Save” icon at the top right to save the edited photo.


 Try for Free
 Try for Free

