Just think about the moments when you want to transfer data from iPad to iPhone, but are trapped in finding some handy tools. It is quite headache, right? Is there any easy-to-use tool to transfer files from iPad to iPhone, so that people don't need to worry that they have to spend a lot of time on transferring data from iPad to iPhone? The answer is positive. Let's read this tutorial on how to transfer files from iPad to iPhone.
Part 1: How to Transfer Files from iPad to iPhone with iTunes?
As an iOS user, you are able to manage files among different iOS devices via iTunes. In order to transfer files from iPad to iPhone, the first step is to transfer the files from your iPad to computer via iTunes. For the detailed steps, you can follow the guide below to transfer files from iPad to iPhone with iTunes.
1.1 Transfer files from iPad to computer
Step 1: Download and install the latest iTunes on your computer.
Step 2: Connect your iPad to computer with a proper cable, and then launch iTunes.
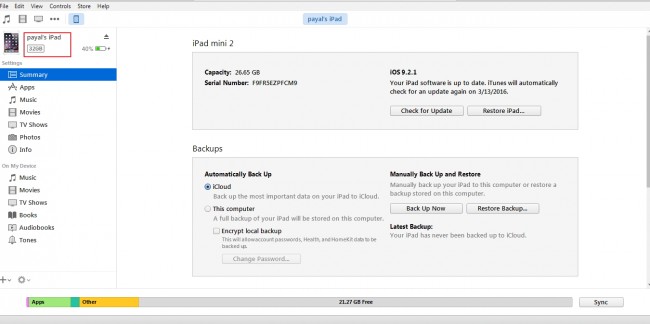
Step 3: Select your target files on iTunes. Once your iPad has been connected to your computer, and all the files would be shown on iTunes. On the main screen of iPad, click the iPad icon and choose Apps, then all the iPad apps would show in the left sidebar.
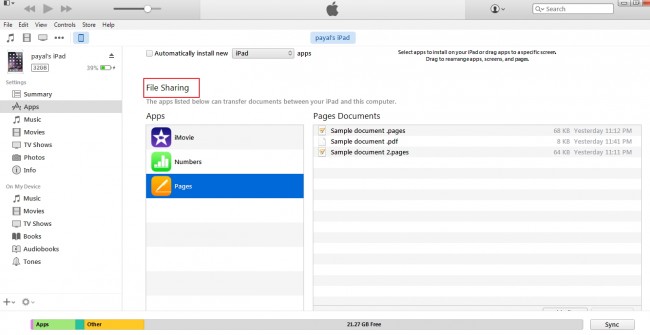
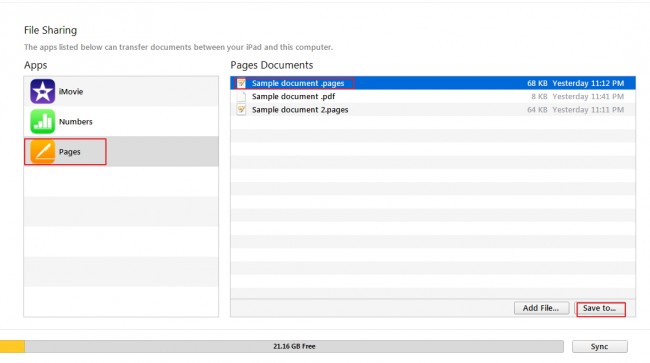
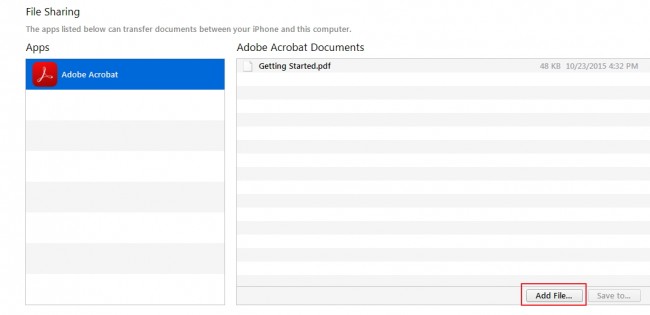
Step 4: Click File Sharing to locate the files you would like to transfer from iPad to computer. Under the File Sharing interface, you can directly click the app icons you want to save to your computer. From the given list of the file on the right column, you can simply select the files you want to save to PC. Finally click Save to button.
Step 5: Confirm the save to route. Select the folder where you want to save the chosen files on your computer. Finally, wait patiently for the completion of the files transfer between iPad and computer.
1.2 Transfer files from computer to iPhone
Step 1: Connect your iPhone to computer.
Step 2: Enter the main screen of iTunes and select the apps in the left sidebar. All the iPhone files would show up.
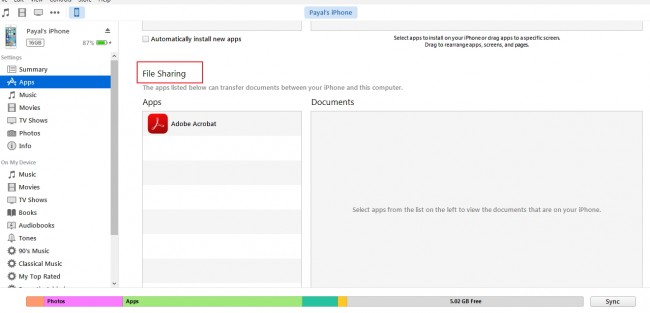
Step 3: Scroll down to locate the option File Sharing and select the apps you want to share file. Then, click the Add File button to add files from your computer to iPhone via iTunes. Now you should select the files from local computer to add to iPhone.
Step 4: Start transferring files from computer to iPhone.
Part 2: How to Transfer Files from iPad to iPhone Without iTunes?
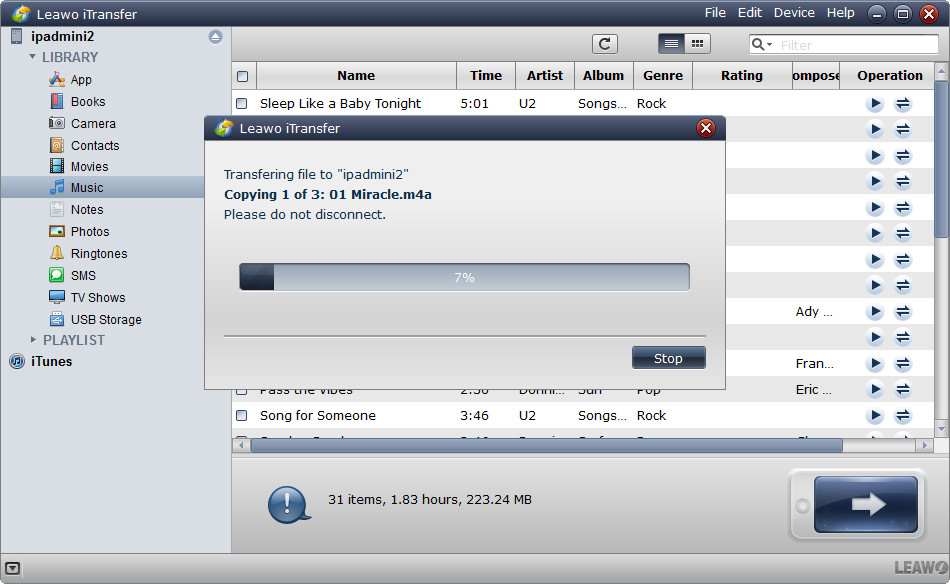
Different from iTunes, Leawo iTransfer breaks the convention. It is superior in transferring different categories of files like music, apps, books, pictures, videos, etc. from one iOS device to another or computers like Mac or Windows. In addition, it is easy to use with straightforward interface design and simple operation. Leawo iTransfer earns a lot of users' favorites for its multiple functions like empowering users to manage, rename and delete playlists on computer. What’s more, it is also a good tool helping you to spare more space by deleting duplicated files. If you want to transfer data like music from iPad to iPhone, you can give Leawo iTransfer a try. Here takes music as example.
◎ Step 1: Download Leawo iTransfer
Go to the official website and download the installation package of Leawo iTransfer. And then install the program on your computer in minutes.

-
Leawo iTransfer
- Transfer files among iOS devices, iTunes and PCs with ease.
- 6x faster than iTunes
- Transfer up to 14 kinds of data and files without iTunes.
- Support the latest iOS devices like iPhone 12, iPhone 12 Pro, etc.
- Play back, view, and delete data and files on iOS devices.
- Support Windows & Mac OS
◎ Step 2. Connect your iPad to computer
Connect iPad to Computer, and then open Leawo iTransfer on your computer.
◎ Step 3. Choose Files to Export to Computer
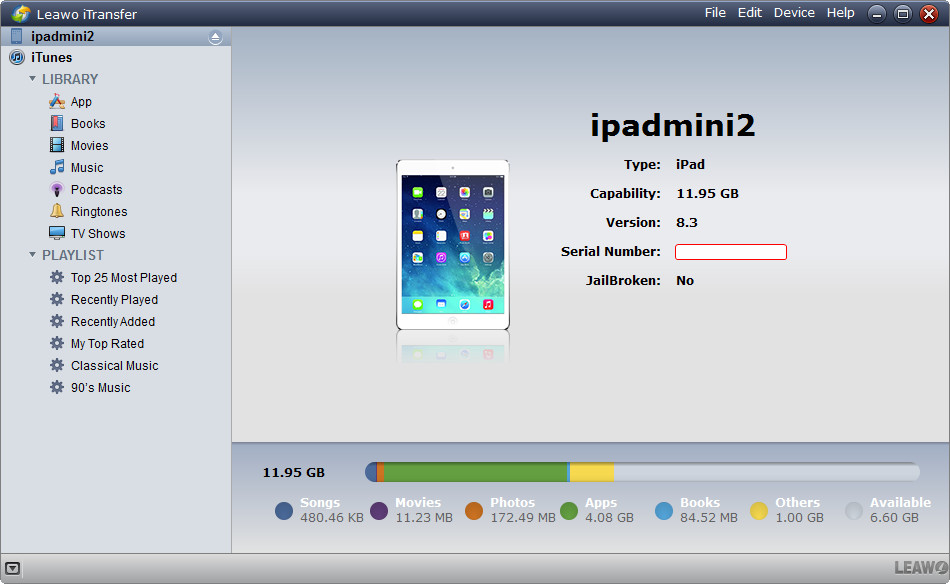
On the main screen, you can click the iPad icon and then head to LIBRARY > App to view all the app data. Then choose your targeted files and right click on the files to choose Transfer to > My Computer.
◎ Step 4. Start transferring files from iPad to computer
In the pop-up window, choose a destination folder by clicking on "Change" to browse folders on your computer. After that, click on "Transfer Now" and transfer music from iPad to computer.
◎ Step 5. Transfer files from computer to iPhone
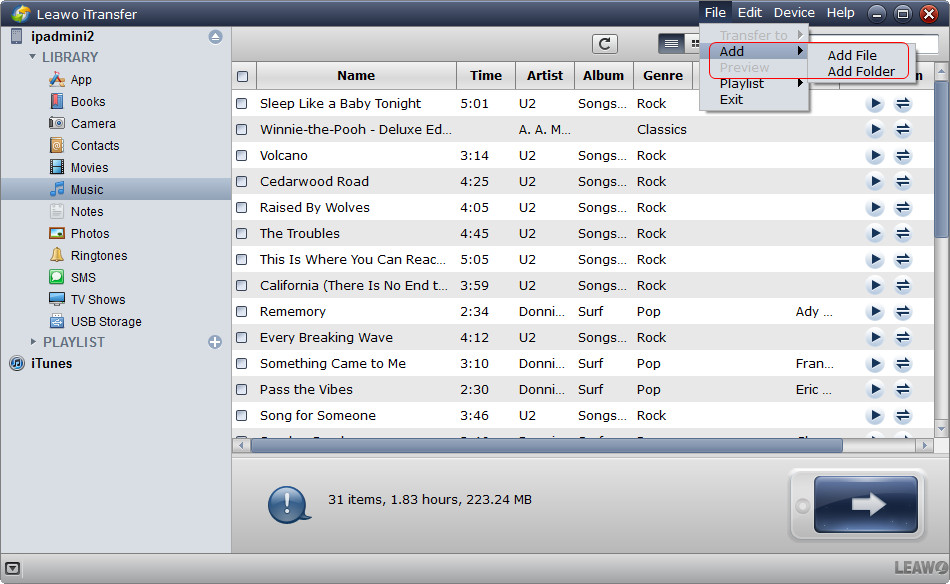
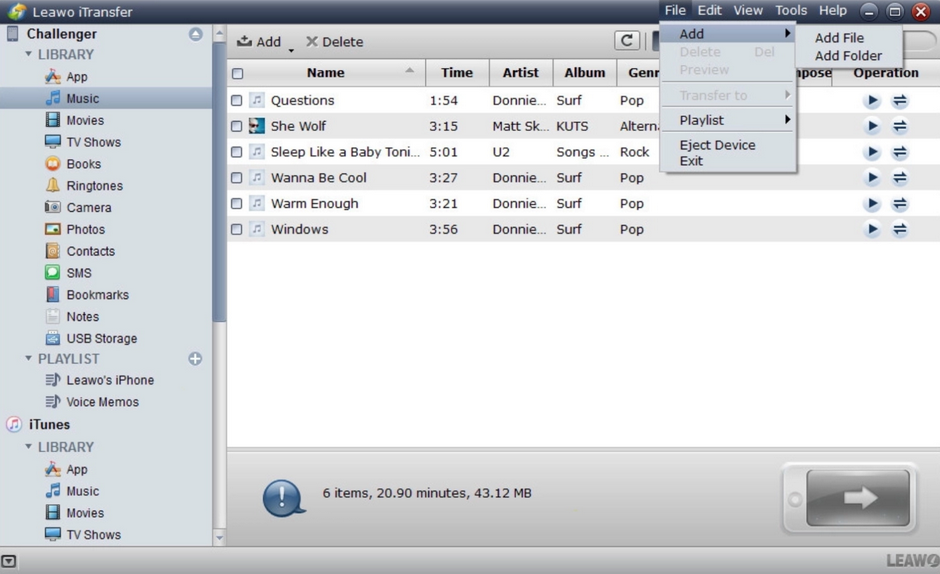
Once the files have been transferred from iPad to computer, now similarly, you can use iTransfer to import the files to your iPhone from computer. First connect your iPhone to computer. And then click LIBRARY in the left sidebar, and all contents will be shown in the right part of the window. Or, you can click "File > Add > Add File/Add Folder" at the upper right corner of the window to add files from computer to your iPhone.
Part 3: How to Transfer Files from iPad to iPhone via AirDrop?
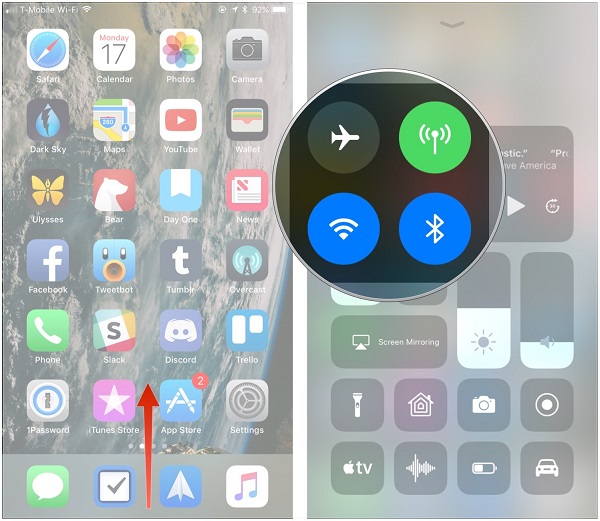
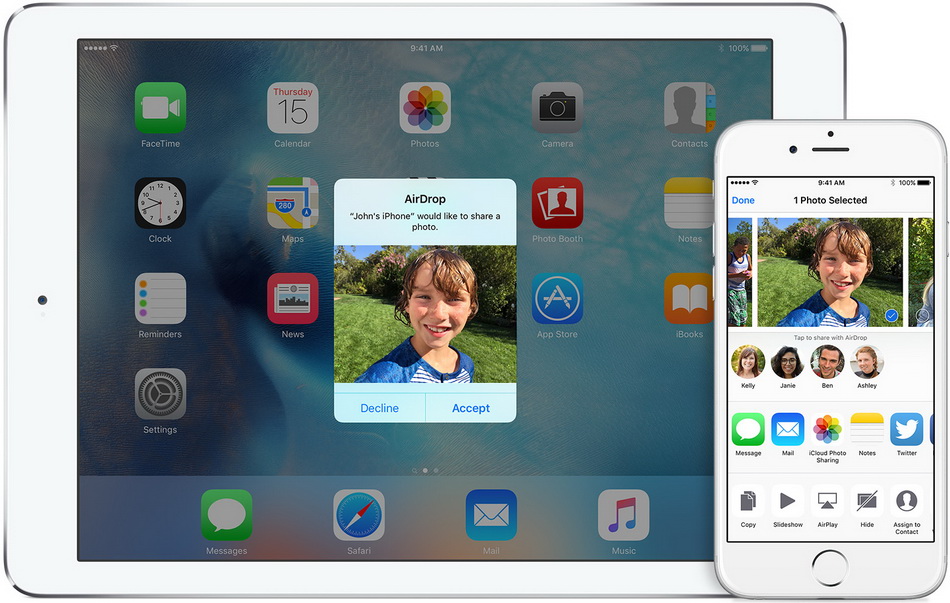
Another way to transfer music from iPad to iPhone wirelessly is via AirDrop. It is also a well-known transferring tool between iOS devices. You can open it in "Control Center" and actualize two device file transferring. Detailed steps on how to airdrop from iPad to iPhone are shown as below.
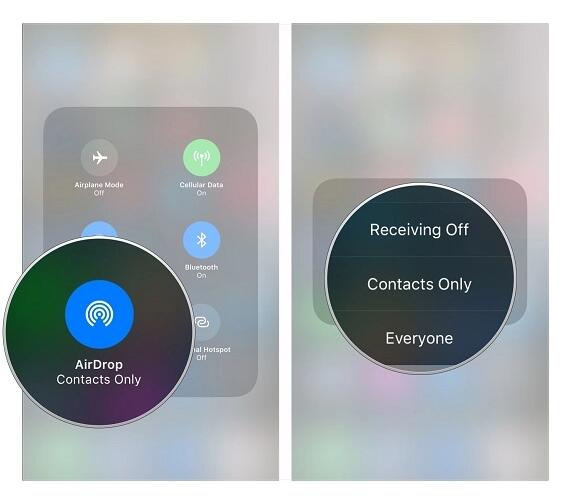
Step 1: To AirDrop from iPad to iPhone, you need to activate AirDrop on both devices. When you tap on AirDrop, Bluetooth will be automatically opened. If not, you can turn it on by your own.
Step 2: Choose a mode among "Receiving Off", "Contacts Only" or "Everyone" in the pop-up window. Here we recommend you to choose "Everyone" on both devices.
Step 3: Now, locate the song, select it, and choose "Send" icon. Then, you will see available AirDrop recipient. Next, choose iPhone recipient and start transferring music from iPad to iPhone. Your iPhone will receive a note asking your approval for accepting the file. Approve it and receive songs from iPad.
Part 4: How to Transfer Files from iPad to iPhone Using iCloud?
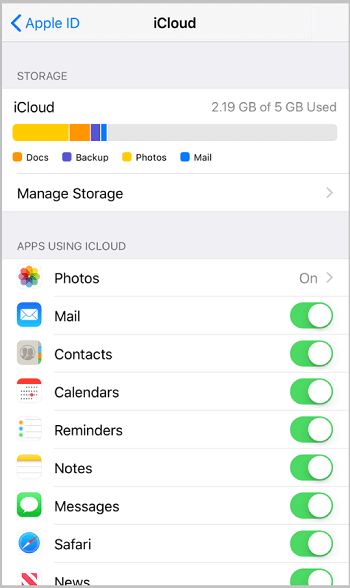
Additionally, iCloud can be used to transfer data among different iOS devices without any additional download and installation. However, there are only 5G free iCloud space for every Apple ID. If you don’t mind, you can follow the parts below to transfer files from iPad to iPhone using iCloud.
Note:
- iCloud Library includes photos, contacts, calendars, notes, etc.
- iCloud Drive allows apps to store documents and data in iCloud.
- iCloud Backup includes App data / Apple Watch backups / Call history / Device settings / Health data / HomeKit configuration / Home screen and app organization / iMessage, text (SMS), and MMS messages, Photos and videos on your iPhone, iPad, and iPod touch / Purchase history from Apple services, like your music, movies, TV shows, apps, and books / Ringtones / Visual Voicemail password (requires the SIM card that was in use during backup).
4.1 How to Transfer Files from iPad to iPhone via iCloud Library
You can directly sync data from iPad to iPhone via iCloud library. It is quite easy to enable the function.
Step 1: First of all, You should turn on the iCloud option on your iPad, so that the files will be synced automatically under the same iCloud account, which can be viewed on all of your iOS devices.
Step 2: Then, sign in your iPhone with the same iCloud account and turn on the corresponding option via Settings.
Step 3: Finally, all the files you have synced to iCloud could be viewed on your iPhone.
4.2 How to Transfer Files from iPad to iPhone via iCloud Drive
If your files are less than 50 GB in size, you can also use iCloud Drive to store your files for your iOS devices. Here are the steps to transfer files from iPad to iPhone via iCloud Drive.
Steps:
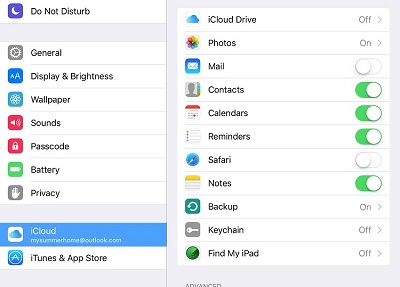
- On your iPad, go to Settings and choose iCloud option. Then, scroll down to locate the iCloud Drive. Enable this option.
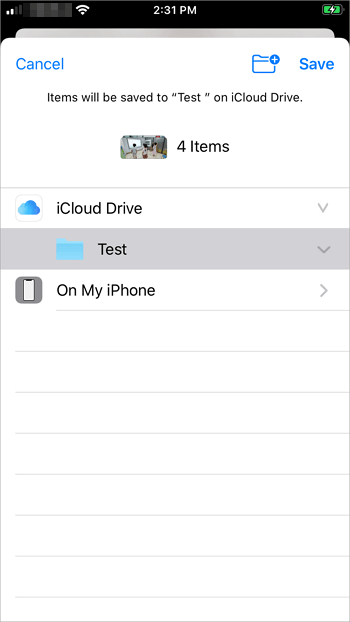
- Open the Files app on your iPad and select Browse > iCloud Drive. Then, locate your preferred files on your iPad which would be transferred to your iPhone. Next, once the files have been chosen, they can be uploaded to your iCloud Drive.
- Open your iPhone and go to the Files app. Before this, remember to log in your iCloud Drive with the same Apple ID. In the Files app, click on Browse > iCloud Drive, then, all the files uploaded from your iPad can be viewed on your iPhone. In the end, you can select the files and save them to your iPhone.
title 4 - Part 1: How to Post an Article on WordPrss Blog
With iCloud backup, you can also transfer files from iPad to iPhone following the guide below. Here you may need to reset your iPhone.
Step 1: Back up your iPad with iCloud. Simply go to Settings > iCloud and turn on the iCloud backup option, then your files on your iPad would be backed up to iCloud.
Step 2: Restore your iPhone. Go to Settings > General > Reset > Erase All Contents and Settings. If you restore your iPhone by accident, in order to restore the data on your iPhone, you can seek help from Leawo iOS Data Recovery to recover all the lost data on your iPhone.
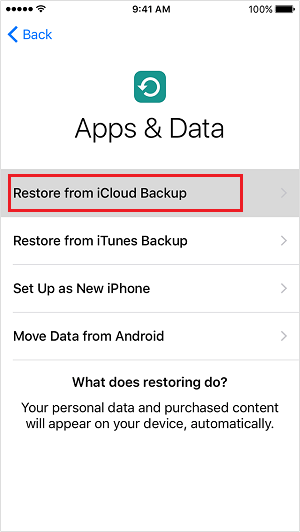
Step 3: Restore your iPhone by tapping Restore from iCloud Backup. Then, sign in to iCloud with the same Apple ID. Choose the iCloud backup and wait for the transfer to be completed. During the transfer process, you must make sure the Wi-Fi connected and wait for the iCloud backup to be synced to your iPhone. Once it is done, all the files have been transferred from your iPad to the iPhone.


 Try for Free
 Try for Free

