Keynote is a presentation software developed by Apple Inc. With an announcement of new version for iPhone, now Keynote is also available in iPhone. Being a presentation software as popular as Keynote, the PowerPoint is widely used by people from all industries. How can this two presentation software be compatible with each other? Can Keynote be played on PPT? Is there any solution to convert Keynote to PowerPoint? Just check the following passages.
Outlines of the writing:
Can you Open Keynote files in PowerPoint?
PowerPoint is the traditional software equipped in the Windows. Keynote is only available on OS X and for the Windows user, there is no native Keynote version on Windows. So it is the only solution to export your Keynote files to PowerPoint so that it is compatible with the Microsoft PowerPoint. However, the original animations and transitions on the exported presentations might be ineffective and only some simple presentations are recommended to be transported by this way.
Then can we utilize the tool to convert Keynote to PowerPoint? Please follow what the passage says.
How to Convert Keynote to PowerPoint?
As we mention above, the simple presentation in Keynote is available to be converted to PowerPoint and keeps the basic functions. For example, for the presentation only with pictures and words, it makes no difference to play it on Keynote or PowerPoint. And the process of conversion is also quite easy. A few steps taken can successfully make it done.
Convert Keynote to PowerPoint: Using iPhone or iPad
iPhone or iPad are two of the most popular tools in the world. But few of the users would use it for editing a Keynote file. However, it is more portable than the mac to convert Keynote to PowerPoint.
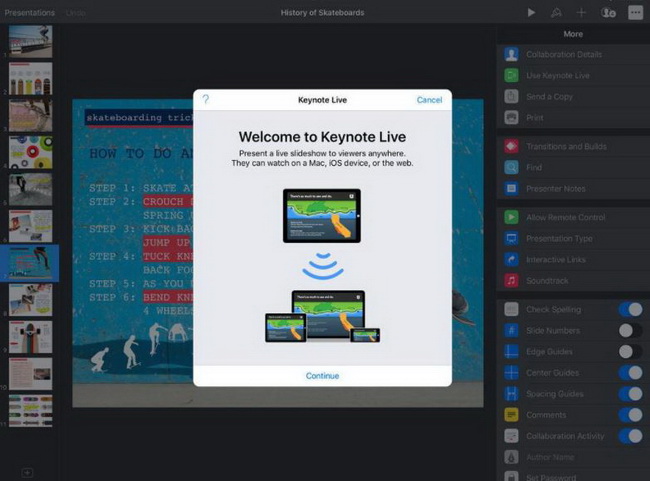
- 1. Just open the Keynote Presentation and there is a button with 3 dots where you can find more more options via tapping this more button.
- 2. Then tap Export.
- 3. From the export interface you can choose an output format for your presentation.
- 4. Choose how you want to send your presentation, with mail or message, etc.
Convert Keynote to PowerPoint via Mac
For the mac users who want to convert Keynote to PowerPoint, just follow the similar steps.
- 1. Open the Keynote presentation that you want to convert.
- 2. Click the Export To icon to select the format.
Tips: from the interface that appears you can choose a different format or set up any additional options such as requiring a password to open an exported PDF, choosing the format for an exported PowerPoint presentation, or adjusting the timing of the presentation which is exported as a movie file.
- 3. Click Next.
- 4. Create a name for your file and select a folder for it to be reserved.
- 5. Choose the path by which you want to send your files such as Mail, Messages, AirDrop, or Notes, etc.
Convert Keynote to PowerPoint via iCloud
Being different with the former solutions, converting Keynote to PowerPoint via iCloud requires an Apple ID logged in before using it for conversion.
- 1. Sign in to iCloud.com with your Apple ID.
- 2. Click Keynote.
- 3. In the presentation manager, click the More button on the file selected on your own and then choose “Download a Copy”. If the presentation is already open then just click the tool-like button to choose“Download a Copy”.
- 4. Select an output format for the presentation and then begins to download to your browser’s download location.
Going Other Way — PowerPoint to Keynote
It looks not so difficult to convert Keynote to PowerPoint for the mac or iPhone users, and will it be difficult for converting PowerPoint to Keynote? The answer is positive. Here means that converting PowerPoint to Keynote is even easier than the way upside down.
You just need to open Keynote on your Mac and select the option of importing an existing file. Just select the PowerPoint presentation as the imported file and start to import it. That’s the whole process.
And for the iPad users how can this be done? Firstly, you need to figure out how to send the PowerPoint presentation to your iPad either by email or upload it to iCloud Drive, DropBox, Google Drive, or another Cloud storage service.
Then select the presentation file from the storage cloud’s app. Open the file and tap the Share button. From the pop-up options list choose the “Copy to Keynote” button. Finally, your iPad will import and automatically convert the file to Keynote.
How to Turn Converted PowerPoint to Video with Leawo PowerPoint to Video Pro?
We have discussed about conversion between PowerPoint and Keynote via the built-in app of iPhone, iPad or mac. The users don’t have to spend too much effort to do it. When we teach in the class or brief in the meeting, PPT is always the first choice. But it would be more convenient to display the PPT in the format of video so that the user doesn’t have to slide the PPT one by one manually. For video converter, we highly recommend the Leawo PowerPoint to Video Pro.
-
Leawo PowerPoint to Video Pro
- Convert PowerPoint to 180+ pop video formats with 100% high quality
- Compatible with PowerPoint 2000/2002/2003/2007/2010/2013 of 32-bit and 64-bit
- Detailed output video profiles for web services and end-devices like YouTube, iPad, iPhone and more
- Add specific logo or background music to your output video presentation
- Batch conversion for PowerPoint files with absolutely no number limit
Step 1: Add PowerPoint files
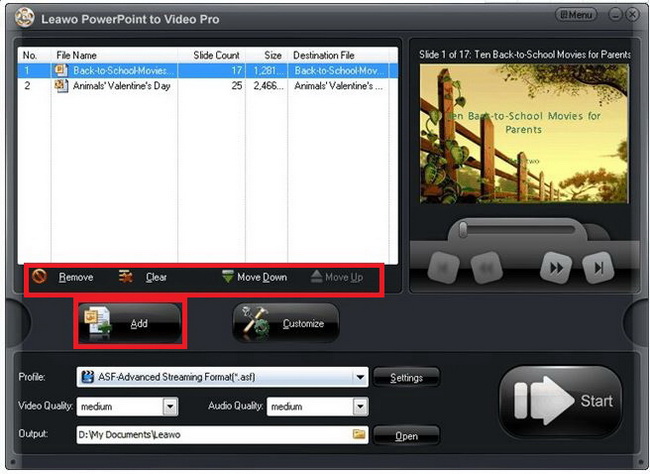
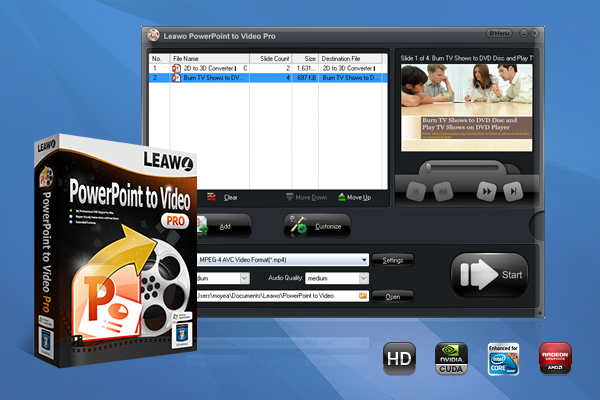
After the app is installed, run the program. From the main page of the program you could see several options for different functions. Click the “Add” button to upload the source file to the program. You can add one PPT or several PPT only with one click. After the PPT files are uploaded to the program, you can click the “Remove” button to remove the selected file or click the “Clear” button to remove all the files at one time. The icon “Move Down” and “Move Up” are used to adjust the sequence of the PPT.
Step 2: Output Settings
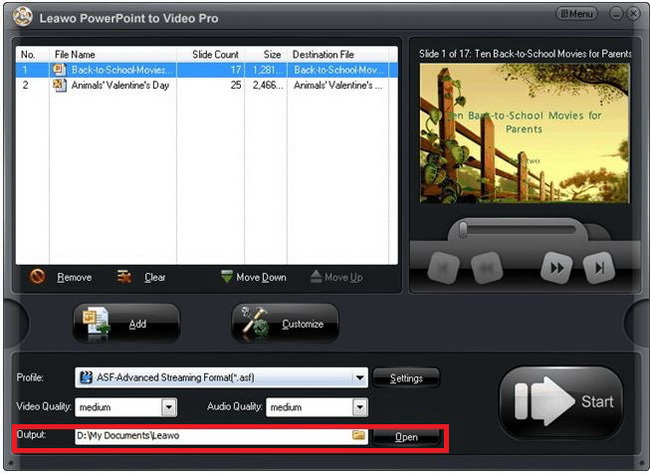
On the bottom area of the main page there are some options to set the output format, video/audio quality and output directory.
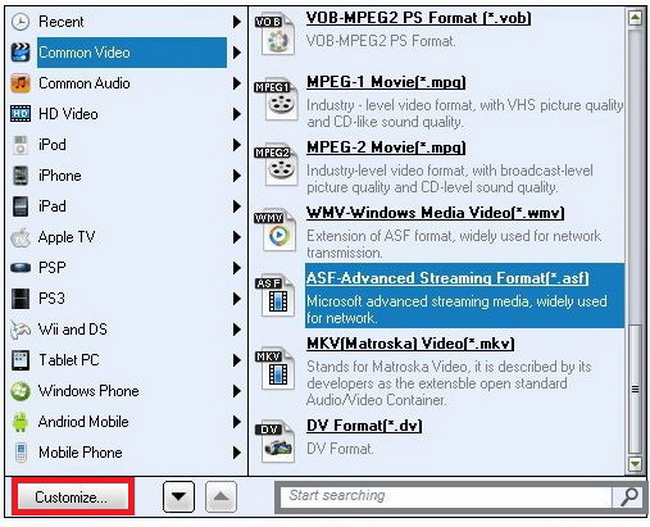
In the “Profile” box, you can select the output profile format from the down-drop list. A lot of video/audio formats can be applied to the setting. You can also search for the targeted format by using the searching tool. You could also click the “Customize” button to adjust the layout of profile, like hiding infrequent used profiles.
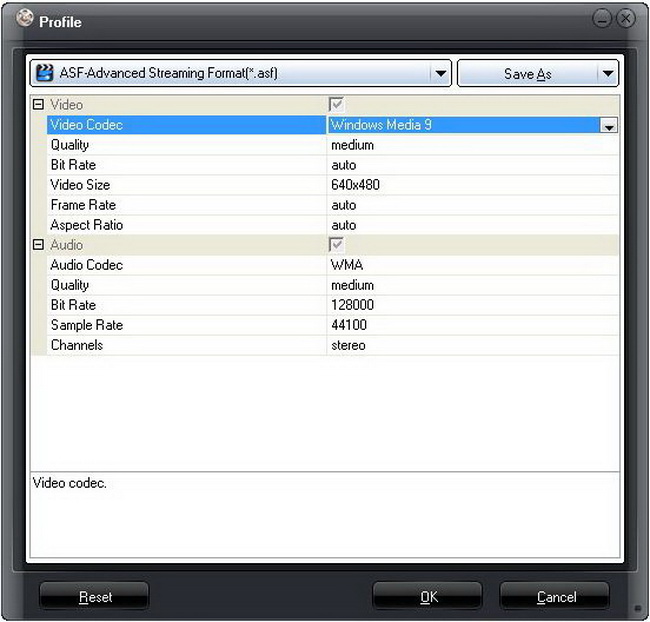
After the output profile is settled down, you can adjust the output profile parameters by clicking the “Setting” icon. Parameters such as video quality, bit rate and video size can all be adjusted in the pop-up panel. You can reset the setting anytime you want to get rid of the former settings and start again by clicking the “Reset” button. If you want to save the video profile which has been set just click the “Save As” button to save it to the designated position in your PC.
After all the settings are finished, turn to the bottom of the main page and click the folder-like icon to set the output directory for restoring the output profile. And you can open the output directory by clicking the “Open” button.
Step 3: Customize the PPT
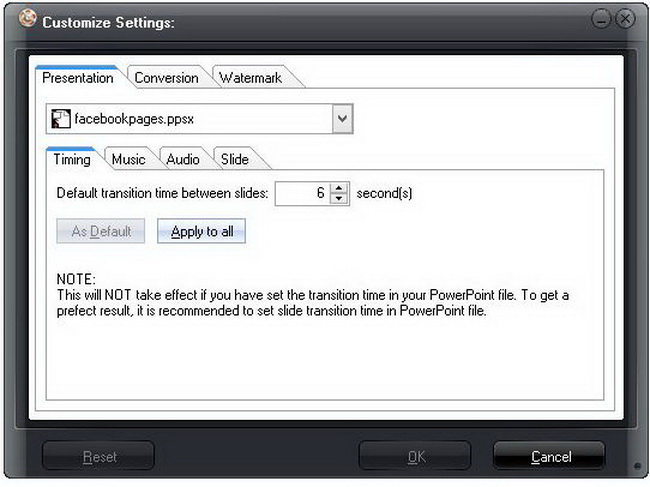
The app allows you to customize the PPT in three aspects of Presentation, Conversion and Watermark.
In the “Presentation” panel you can set the Timing, Music, Audio and Slide respectively for the PPT.
In the “Conversion” panel you can choose the installed version of PPT for conversion, set priority codec and choose whether to rename the profile or override it all in one panel.
If the user has concerns over the copyright of the PPT, he can insert the watermark in the PPT in the “Watermark” panel. You can also customize the video layout from the built-in function of “Watermark”. Talking about the layout of video, if you want to make your PPT look more attractive, you can read the article of free PowerPoint template to search for the pretty PowerPoint template.
Step 4: Convert the PowerPoint to Video
Once all the settings above be completed, just click the “Start” button to start the process of conversion.
Tips: when the “Start” button is clicked, there is a pop-up interface for you to confirm the conversion process. If you have fully noted the items just click the “OK” button to go to the next step.
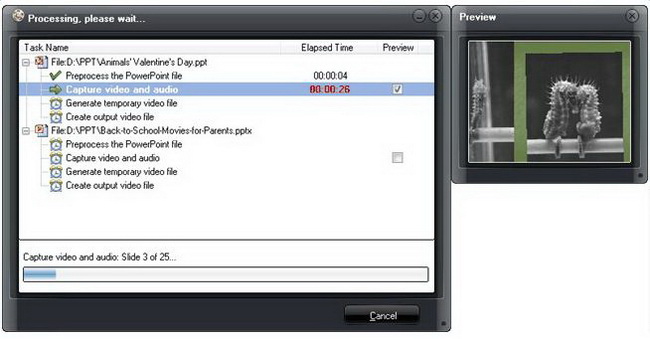
While the conversion is in progress, the processing panel will show the progress of the conversion. You can tick the small square below the “Preview” to preview the converting video.
If you find the video size too big to restore, you can check the article of resizing the video for help.

