Windows Movie Maker is a popular program for video enthusiasts to make customized video clips. As a part of the Windows Essentials software suite, Windows Movie Maker allows its users to create and edit videos, and then publish them on OneDrive, Facebook, Vimeo, YouTube, Flickr and other platforms. Generally speaking, Windows Movie Maker has a pretty good compatibility and is able to handle most of the mainstream video formats. However, when it comes to AVCHD videos, there is not much that Windows Movie Maker can do. AVCHD videos are usually high-resolution camcorder footages. Because it’s not like other mainstream video formats, in order to edit this kind of video with Windows Movie Maker, you have to convert AVCHD to Windows Movie Maker supported formats and then import it into the program. But as a video format that is not very commonly seen, AVCHD is not widely supported by most of the video converter programs. So it’s not easy to convert AVCHD to Windows Movie Maker. If you are bothered by the question of How to import AVCHD to Windows Movie Maker, then you are in the right place. Because in today’s article, we are going to introduce some best AVCHD to Windows Movie Maker converters and how to import AVCHD to Windows Movie Maker easily.
Part 1: About AVCHD and Windows Movie Maker
Before we start talking about how to import AVCHD to Windows Movie Maker, let’s have a better understanding of the video format and the video editor program.
AVCHD is short for Advanced Video Coding High Definition. It is a format for digital camcorders to save recorded footages. Developed by Sony and Panasonic, the format was initially released to save high definition video footages in 2006. So, if you have a Sony or Panasonic camcorder, then it’s very likely that the high definition video footages that come out of the camcorder is stored in the AVCHD format. Because AVCHD has different purpose and file structures, many video players or video editors can’t accept and process AVCHD files.
If you are reading this, you are probably familiar with Windows Movie Maker. As mentioned above, Windows Movie Maker is a popular video editor tool developed by Microsoft. The accepted formats for Windows Movie Maker import are WMV/ASF, MPG (MPEG-1), AVI (DV-AVI), WMA, WAV, and MP3. As you can see, AVCHD is not one of them. Although there are many Windows Movie Maker alternatives, many people still love the simple and easy-to-use video editor tool. So in order to import AVCHD to Windows Movie Maker, you have to first convert the AVCHD file.
Part 2: Import AVCHD to Windows Movie Maker with Leawo Video Converter
The first method to import AVCHD to Windows Movie Maker is using a professional video converter to convert AVCHD to Windows Movie Maker supported format. Among all of the video converter program that supports AVCHD format input, Leawo Video Converter is the most recommended one and also my personal favorite.
Leawo Video Converter is a professional video converter program that supports more than 180 video formats as input and output. When you convert your AVCHD video with Leawo Video Converter, you will have the original high resolution and high quality of your AVCHD retained in the output result, and still have a high converting speed at the same time. Leawo Video Converter also has a video editor built-in, allowing you to do some pre-editing before you convert your AVCHD and import AVCHD to Windows Movie Maker.
What I like about Leawo Video Converter is that the program has a simple user interface design. Anyone can convert a video to Windows Movie Maker supported format within minutes. In case you want to know more about how to convert AVCHD to Windows Movie Maker with Leawo Video Converter, here is a detailed guide for you.
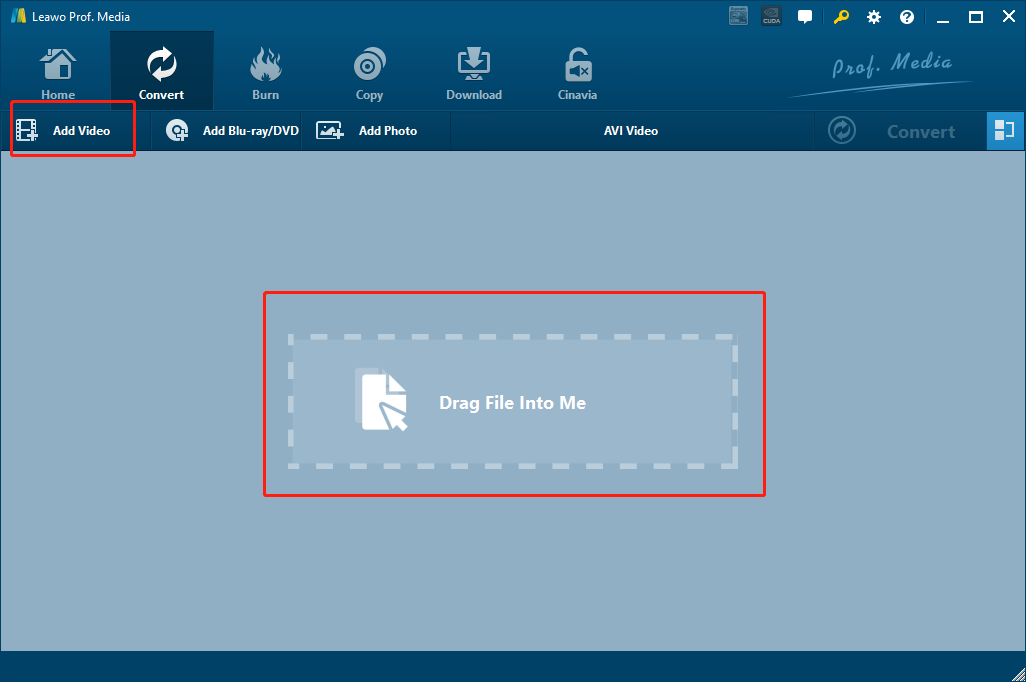
Step 1: Download and launch Leawo Video Converter. When you’re at the homepage of the program, click on “Video Converter” to enter the “Video Converter” function module. To import the source video file, simply drag and drop the video into the center of the program interface, or click the “Add Video” button and find your source video file manually.
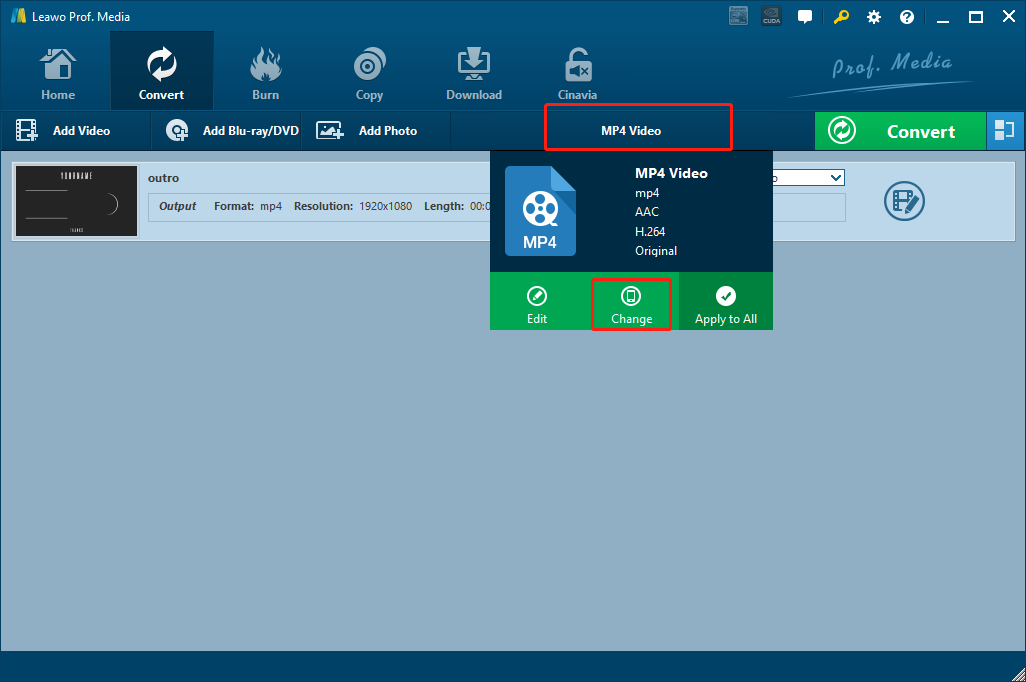
Step 2: After you have imported the original video file, you have to set an output format for the conversion. In order to make sure that your converted file can be accepted by Windows Movie Maker, it suggested that you use MP4 as the output format as it’s one of the most compatible digital video formats nowadays. As you can see from the area next to the green “Convert” button, the default output video format in Leawo Video Converter is “MP4 Video”. So if that’s what you want, you can just keep it default and do nothing about it. If you want to change the output format to something else, just click the “MP4 Video” and then click “Change” to go to the format selection page.
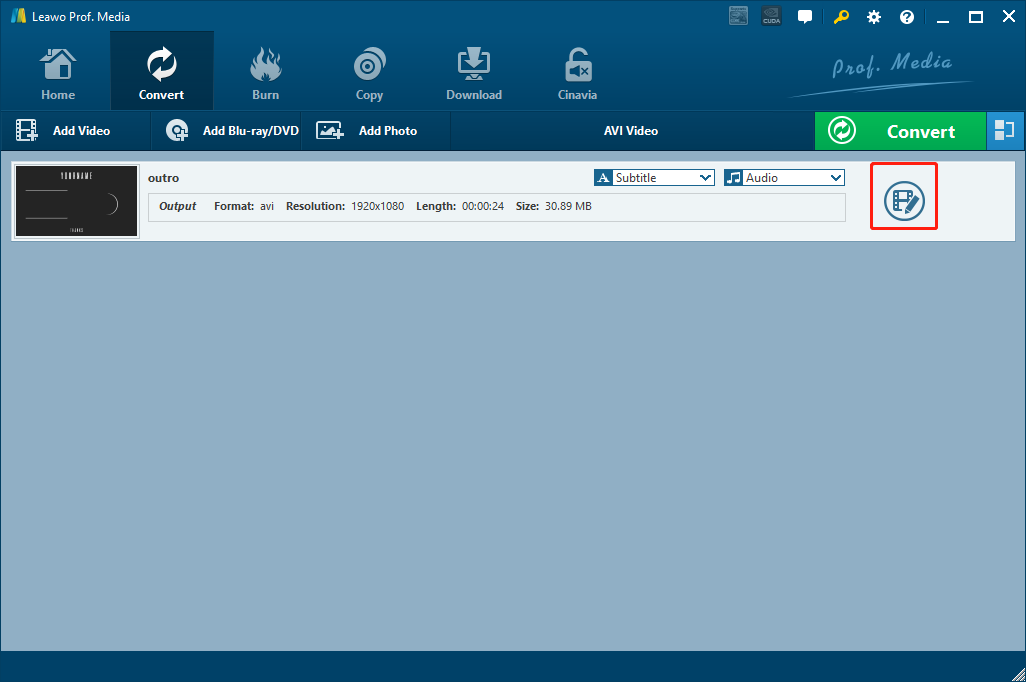
Step 3: Leawo Video Converter provides various video editing options. If you click the “Edit” button at the right side of the imported video, you will be brought to a video edit panel, On the panel, you can see various edit options provided by Leawo Video Converter listed at the left bar. Click on edit option and you will have detailed parameters on the right. Once you are done editing the video, just click “OK” to confirm the adjustments and go back to the main video list window to proceed.
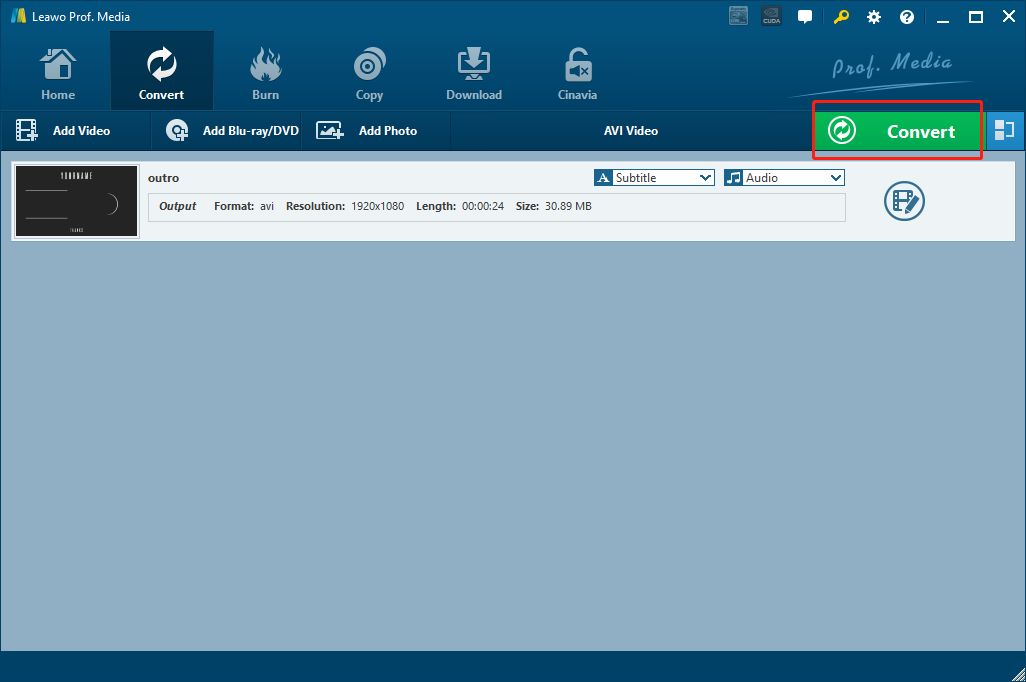
Step 4: Once you have done all the settings and adjustments you need, you can proceed to begin the conversion. Click the green “Convert” button to call out the convert settings panel. On the panel, you have to set an output directory, and then click the “Convert” icon below to start the conversion task. When the conversion is finished, you should be able to import AVCHD to Windows Movie Maker successfully because it has been converted to a Windows Movie Maker supported format.
Part 3: Import AVCHD to Windows Movie Maker with online video converter
A professional video converter like Leawo Video Converter can help you convert and import AVCHD to Windows Movie Maker effectively. However, if you don’t have a video converter program on your computer and you don’t intend to install one, you can also convert AVCHD to Windows Movie Maker without a converter program, but using one of the online video converter tools. Comparing to professional video converter programs, online converters might have a lot of restrictions on many aspects, but they are indeed useful and handy if your video is small in size.
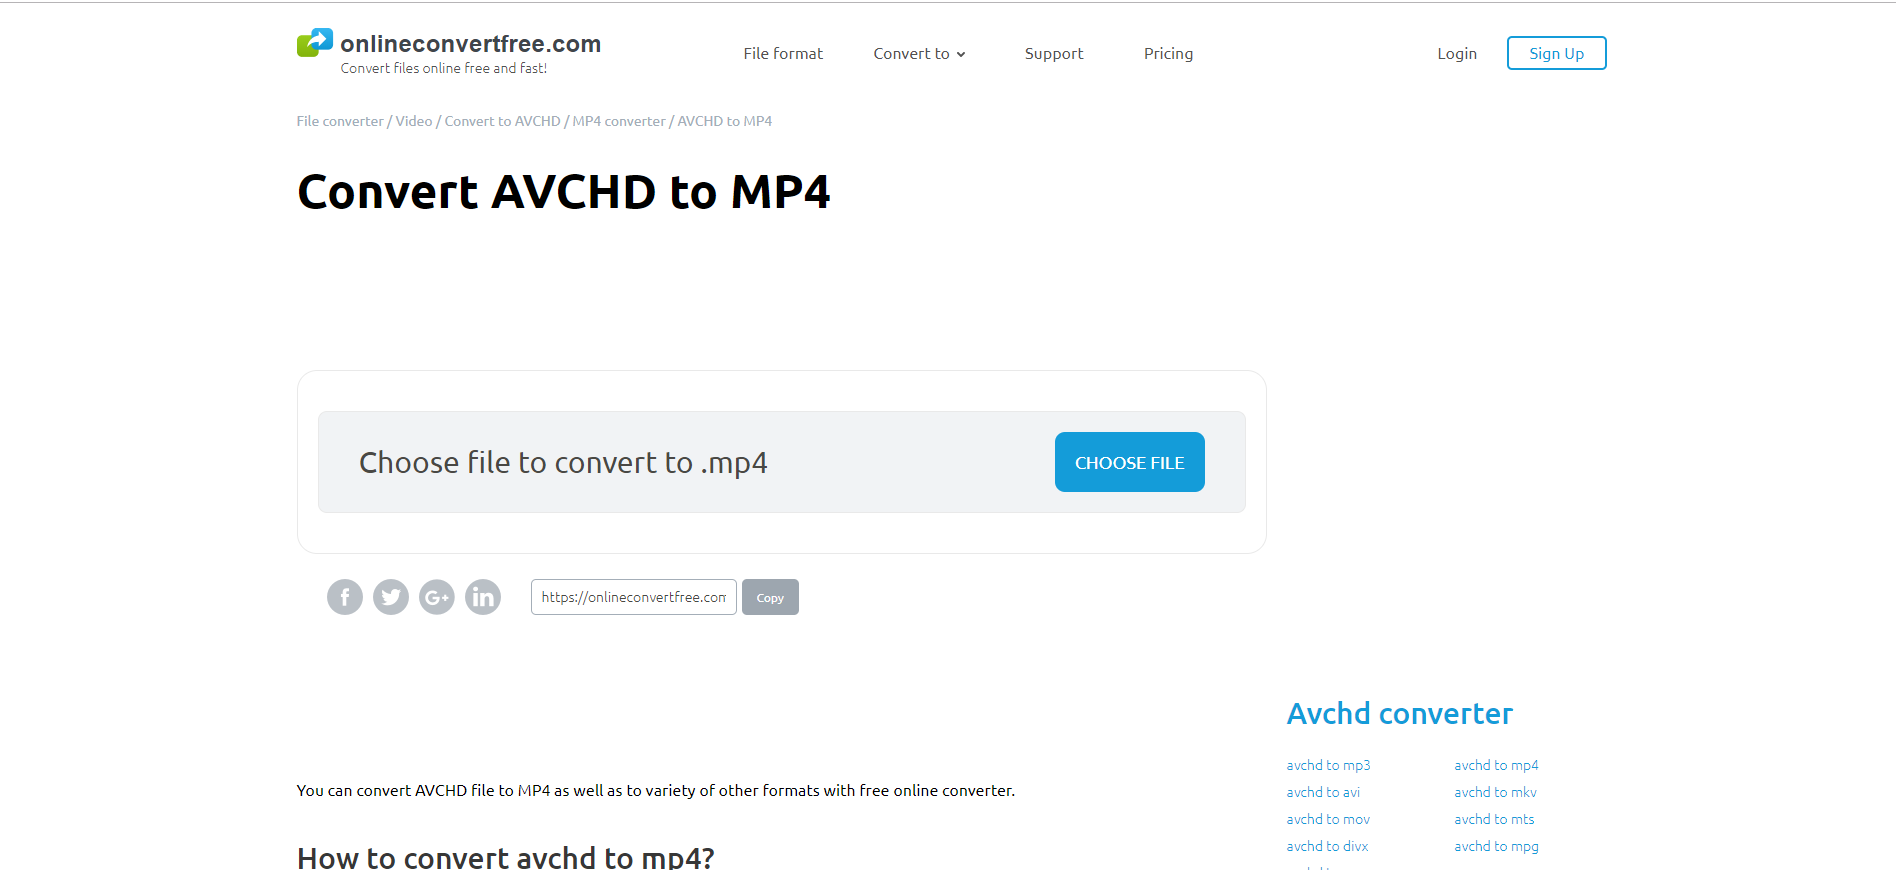
Converting AVCHD to Windows Movie Maker online is not hard. All you need to do is finding an online converter tool that supports AVCHD input. There are not many online converters that support AVCHD input. But luckily, we have handpicked an online converter that can definitely help you. Now let’s take a look at how to convert AVCHD to Windows Movie Maker with the online AVCHD converter Onlineconverterfree.com.
Step 1: Go to the homepage of OnlineConverterFree. OnlineConverterFree is an excellent online converter tool for converting videos, audios, documents and so on. What’s good about this online converter is, it supports converting AVCHD files to various target file formats.
Step 2: Click the blue “CHOOSE FILE” button to choose a file from your computer for uploading.
Step 3: Once your AVCHD file is selected, there will be a dropdown box for you to choose output format. As mentioned above, it’s still recommended that you convert your AVCHD to MP4 because it’s generally more compatible.
Step 4: Finally, click the “CONVERT” button to start the AVCHD to MP4 conversion. When the conversion task is done, you will be able to download the file back to your computer.
Part 4: Import AVCHD to Windows Movie Maker with Windows Movie Maker Code Pack
Converting AVCHD to Windows Movie Maker supported format is a simple way to import AVCHD to Windows Movie Maker, but it’s not the only way. Another way to fix this problem is to update the Windows Movie Maker codec pack. Windows Movie Maker doesn't include native support for formats like AVCHD, but you can download codec updates so that the program can open and save these formats. Although Windows Movie Maker can automatically install codecs when the auto update feature is turned on, it doesn’t work nowadays because Microsoft has ceased the support for Windows Movie Maker. So in order to install a complete codec support, it’s better that you download a third-party codec pack manually for your Windows Movie Maker and install it yourself. Here is how you can do it.
Step 1: Search for a “Windows Codec Pack” to download. You should download a codec pack that fits your operating system. For example, if you are using Windows 7, then you should download “Windows7 Codec Pack”.
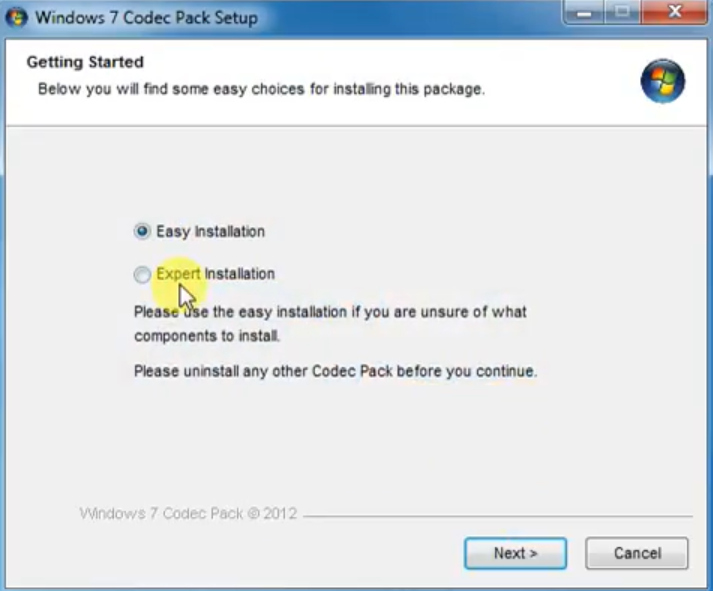
Step 2: Double click the downloaded file to open the setup guide. You can choose “Easy Installation “for a simpler processor “Expert Installation” for a better control over the installation process.
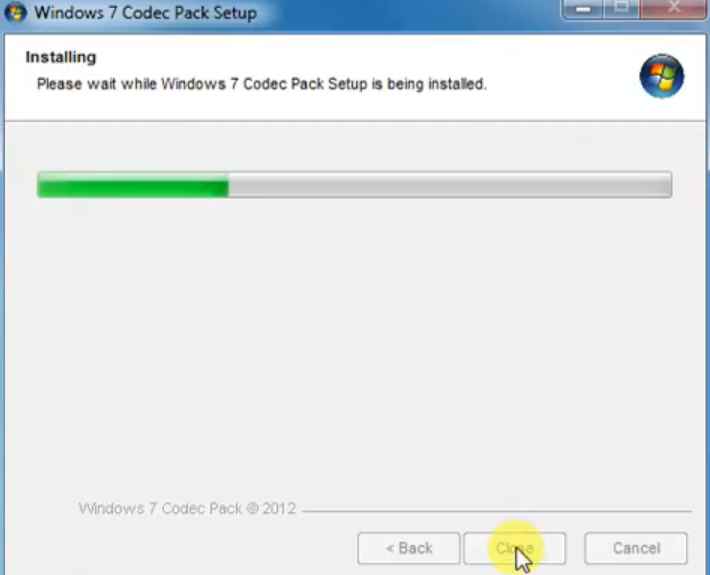
Step 3: Accept the term offered in the installation guide and click “Next”. The Windows 7 Codec Pack will successfully be installed on your computer after the installation is finished.
Step 4: Try the video you couldn’t open before. If you still can’t open it, reboot your computer and try again. If the video still doesn’t open, you can search for another codec pack for Windows and install it. There are many third-party codec packs that are very powerful and inclusive. Install one and try again.

