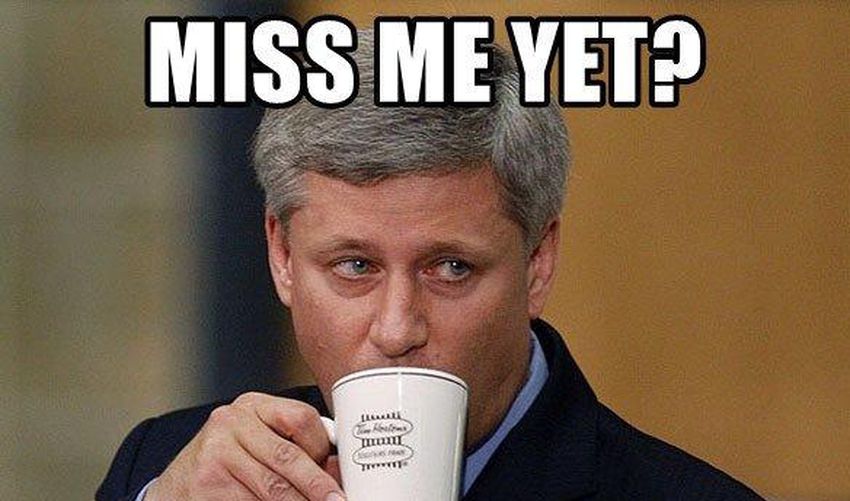
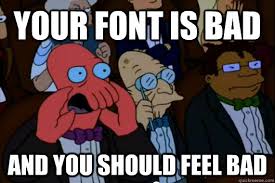
Meme, pronounced as “meem” can be easily described as something that defines the use of the internet today. They are an increasingly important aspect of viral marketing and social engagement. Memes are even more perfect with social media, as both concepts are about connecting people online. Most memes are combine photos and captions, intended to elicit humor. While the vast majority of memes are images, there are also video memes. Memes collect emotions, ideas and actions into an easy to translate format. Memes are also popular in the consumer world, and companies use them to share information in a fun and memorable way, showcase company culture in a unique way, humanize their brands through demonstrating personality, and to obtain higher engagement with their target audiences.
Today, we will explore the five most used meme fonts, how to customize memes and how to put a meme font to a video.
Outline
Part 1: 5 Most Widely Used Meme Fonts
Where to find memes?
The best way to find memes is through social media apps like Twitter, Instagram and Reddit. In fact, Reddit has dedicated subreddits for memes. Here are the best meme subreddits:
We can all agree that images are instantly recognizable when we encounter a meme, but a meme is incomplete without the text. The fonts, and even the text style have are just as important and they also play a critical role. So what font is used for memes? Here are the five most used meme fonts:
1. IMPACT. This is otherwise known as the original or classic meme font. The first-ever global viral meme, “Happy Cat” used this font, and the specific text was “I CAN HAS CHEEZBURGER”.
2. Comic Sans MS. This font evokes an internet culture of the early 2000s. This fun font also owns a special role in the meme culture.
3. Montserrat. The most viral meme today make more use of this font, because it is thinner and more square as compared to Arial, another popular meme font. Because it is very similar to the Twitter font, it blends with Twitter memes.
4. Arial. Arial is the meme font to use if you want the image and text to be the center of attention on your meme, although it is slightly thicker in comparison to other fonts.
5. Dancing Script. If you want a very classical and elegant vibe to your memes, then this font is the way to go. It is also just as popular as the rest of the fonts mentioned above.
Now that we have shown you the most popular meme fonts, we will now show you how to customize your memes by using ImgFlip, an online meme generating tool.
Part 2: How to Customize Memes with ImgFlip
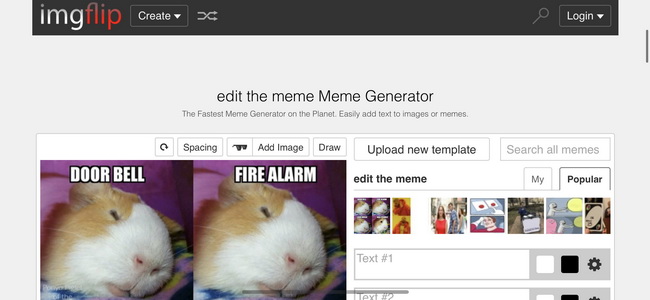
If you have no idea how to make your own memes, or having a hard time choosing an appropriate image for your meme, then ImgFlip will provide you lots of proven images that you can instantly use to kickstart your meme creation. While they provide lots of proven images and a powerful search engine, they do not necessarily have all the images that you might be looking for. If you cannot find a particular scene, an actor, an event, or anything you want to make a meme from, then you can always upload your own images to the site. To customize memes with ImgFlip, follow the steps below.
Step 1: Visit ImgFlip. If you want to use ImgFlip Pro, then you need to create an account, otherwise you do not need to create a user account if you intend to use the website for free.
Step 2: Add your image. You can upload your own images, paste the image URL or use their search engine to find the best image for your meme. You can select multiple images for one meme.
Step 3: Upload or select the template. You can make adjustments to the image by spacing, drawing or rotating the images.
Step 4: Edit the text. On the text box, enter the text you want for your meme. To customize the text, click the gear icon and select your font, font size, font shadow, caps, alignment, and shadows.
Step 5: Generate and download your meme. Click the “Generate” button once you have finished making your meme. If you want to get read of the watermark from ImagFlip, then make sure you are using the pro version of the service.
Part 3: How to Put Meme Font to a Video
Believe it or not, the fonts we mentioned above will go well with a funny or video, if you intend to make video memes. The good news is with Leawo Video Converter Ultimate, you can easily add custom fonts to your video captions and make video memes before you convert them. You can heavily rely on this video editor for all your conversion tasks. The built in video editor, which in this case allows you to add meme fonts through the watermarking feature also allows you to trim, remove noise, interlace, crop, adjust parameters etc., before you convert your videos. The coolest feature about the video editor is it also converts normal 2D videos to 3D videos. With support for a greater number of file formats for both input and output (over 180+ for both video and audio for conversion), this is easily one of the best video converters available today.
Most importantly, it will preserve 100% of the original video quality, after all nobody wants to lose quality from their videos. Download and install it on your Windows or macOS computer, then follow the steps below on how to put meme font on a video.
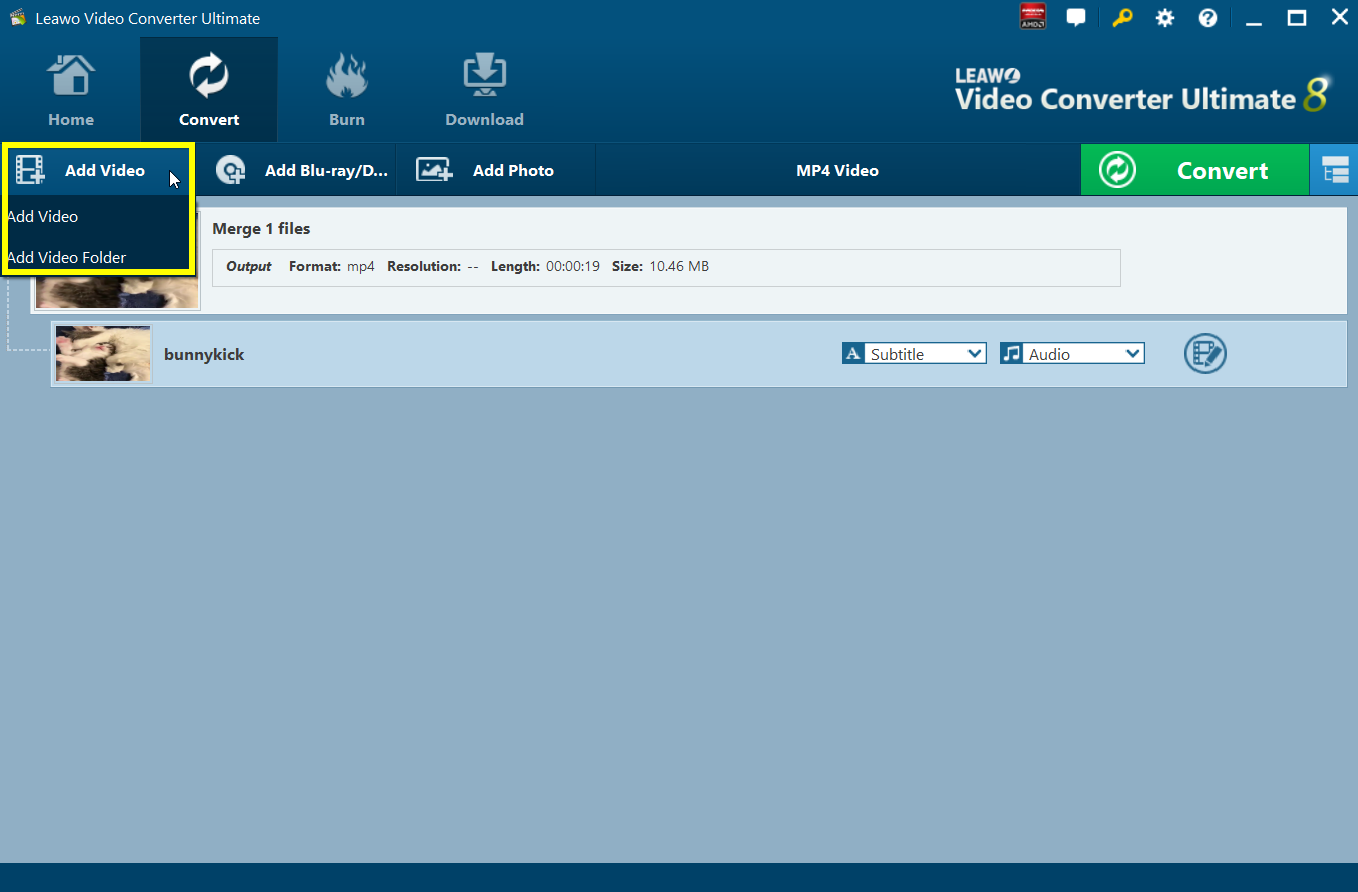
Step 1: Import your videos/ movies
Click on the Add Video icon to import the videos, or directly drag them to the main menu. Once the videos have been imported, they will be displayed on the list.
Step 2: Add the meme fonts to the videos
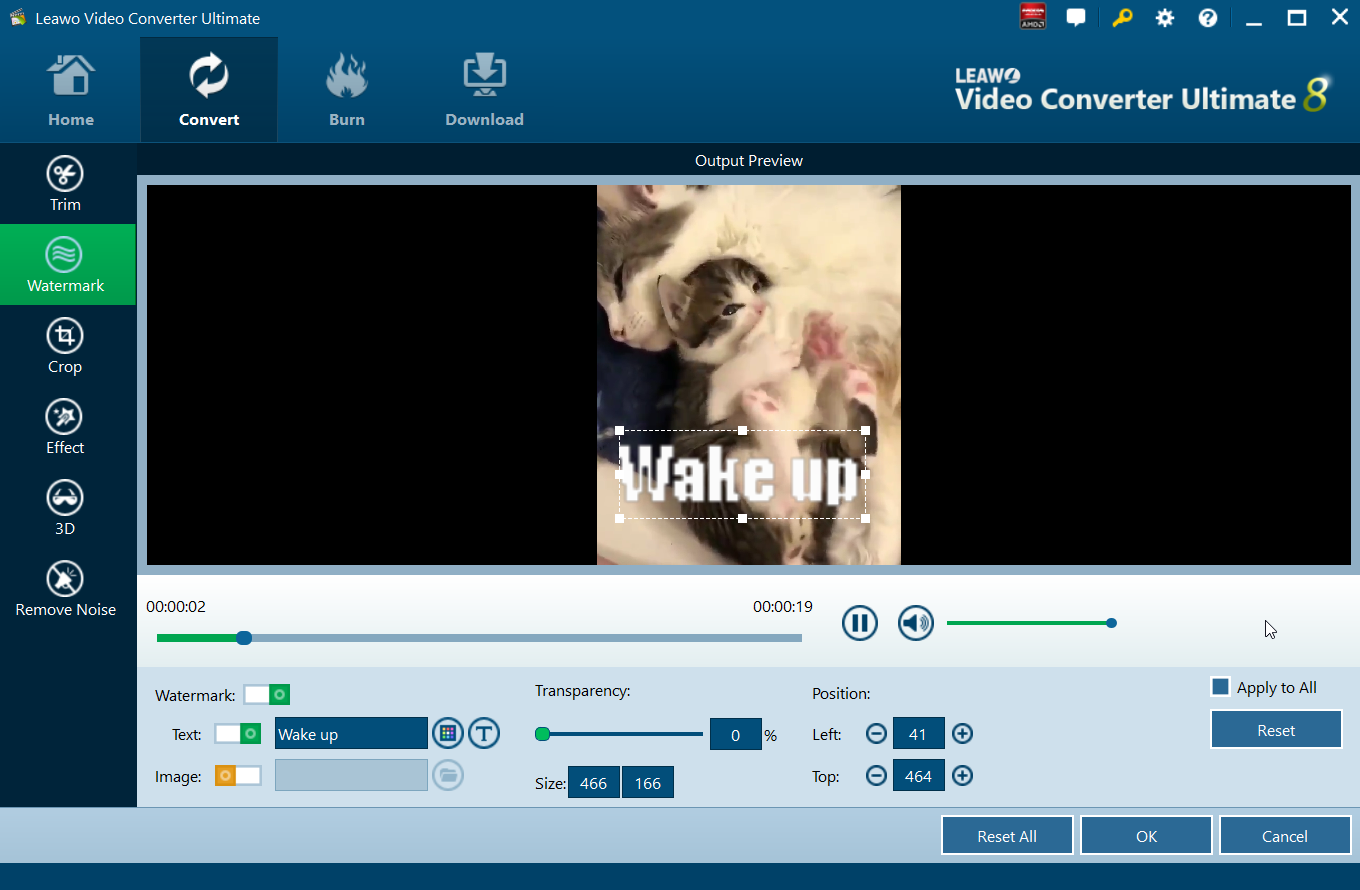
The video editor allows you to add your meme fonts easily. To enter the editing menu, click the editing icon placed next to each video. Enter the Watermark panel of the editor, where you should see the editing options for the text. Adjust your fonts, their sizes and colors accordingly.
Step 3: Select the output format
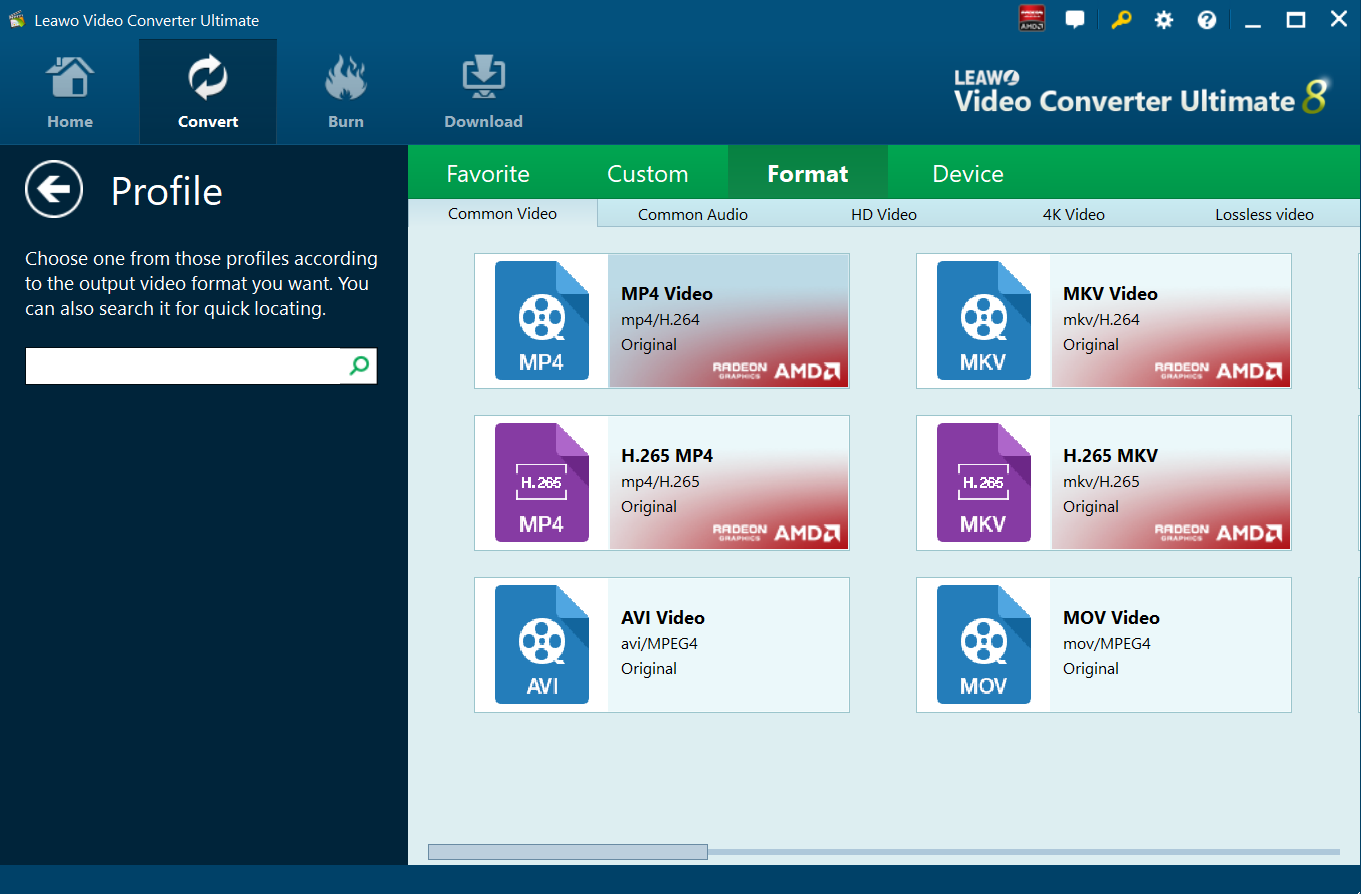
Click the box beside the green “Convert” icon (which is normally displayed as ‘MP4 Video’ tab). Afterwards, click Change to enter the Profile settings panel, then navigate to the Format section and select an appropriate video format accordingly.
Step 4: Adjust video parameters
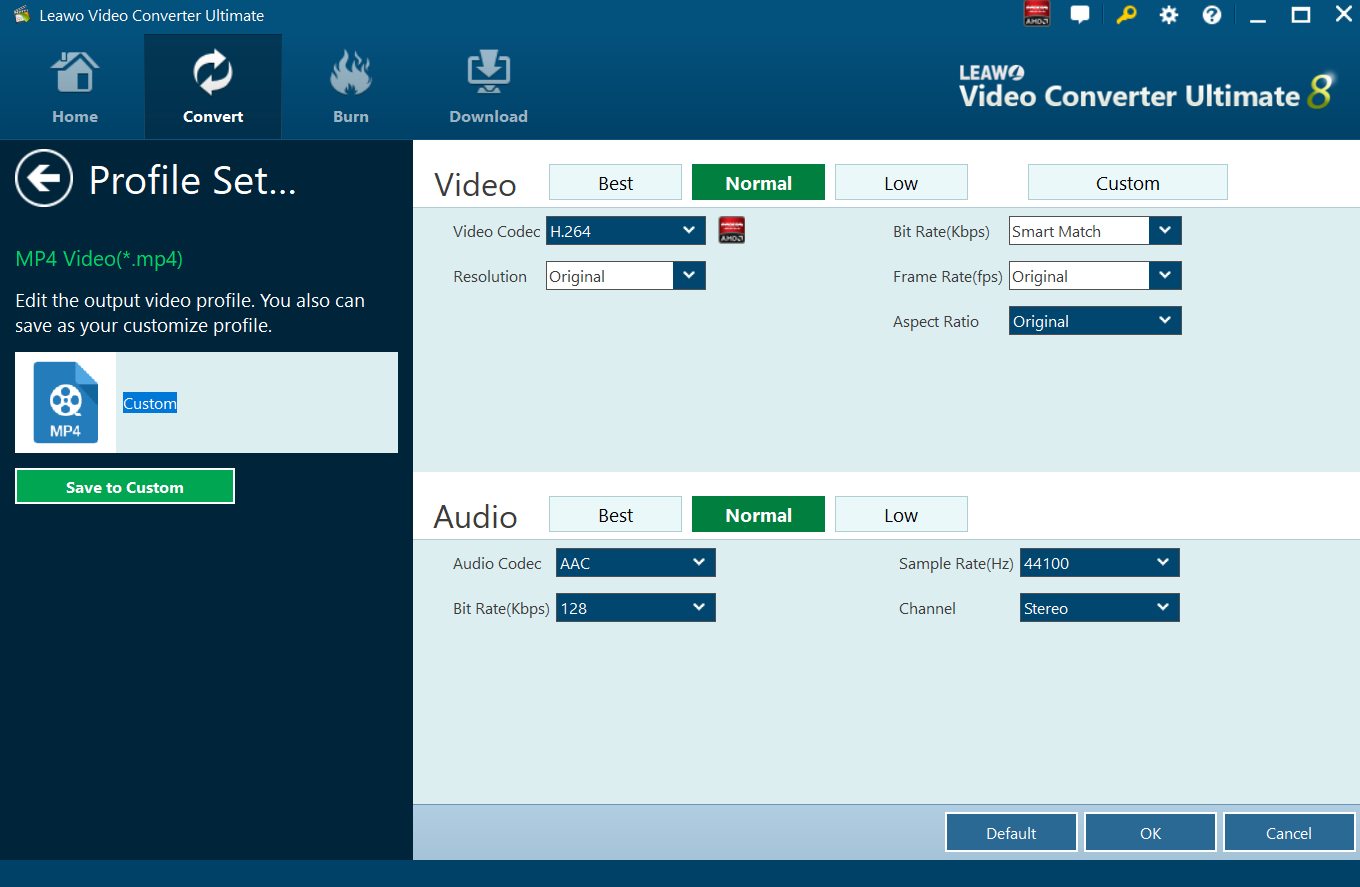
Click the Edit drop down box instead of “Change” in the main menu. It includes “Video Codec”, “Bite Rates”, “Resolution”, “Frame Rate” and “Aspect Ratio”. Adjust them accordingly. You can also adjust the audio parameters.
Step 5: Convert the videos
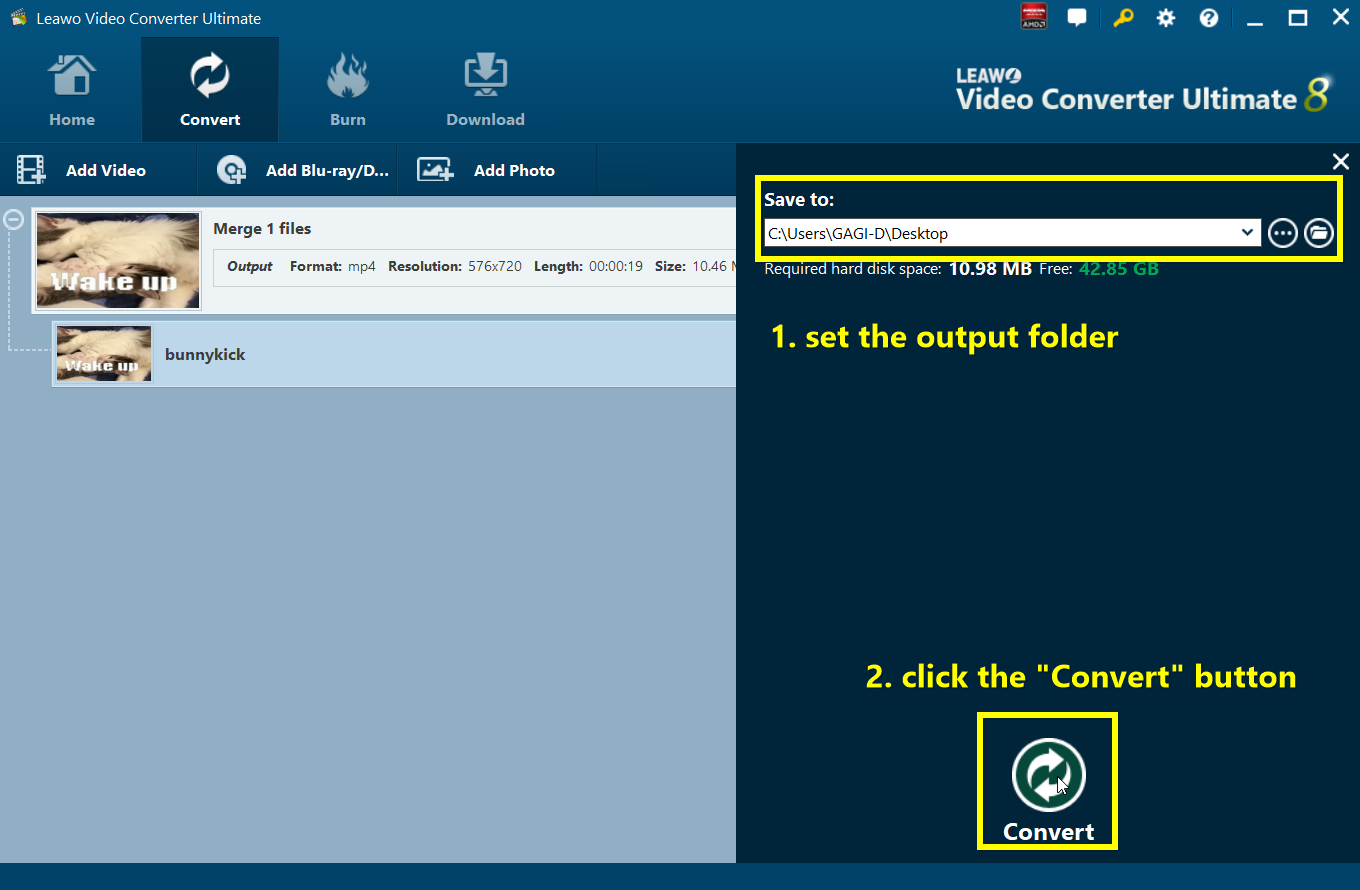
Set the output folder for the output video files. Click the green Convert icon on at the bottom to start converting, and wait for the conversion process to finish.

