"Hi, I've got a lot of my travel photos uploaded to Dropbox, and I found that I'm running out of storage space on Dropbox as I didn't subscribe any storage plan. I'm wondering if I can transfer some of my photos from Dropbox to iCloud on my iPad."
Dropbox is currently one of the most popular cloud storage and file sharing services. You can use it to easily back up your files like photos to it and have access to them on your devices anytime you want. If you want to transfer photos from Dropbox to iCloud on iPad, there are actually a few different means available. Check out the content below to see how to transfer photos from Dropbox to iCloud on iPad.
How To Transfer Photos from Dropbox to iCloud on iPad
1. Transfer photos from Dropbox to iCloud on iPad using the Dropbox for iPad app and iCloud Photo Library.
If you have iOS 11 or later, you’ll have the Files app in iOS to help you quickly transfer photos from Dropbox to iCloud(which we will cover later). But if you haven’t updated your iPad to iOS 11, you can do it the regular way. Here’s how:
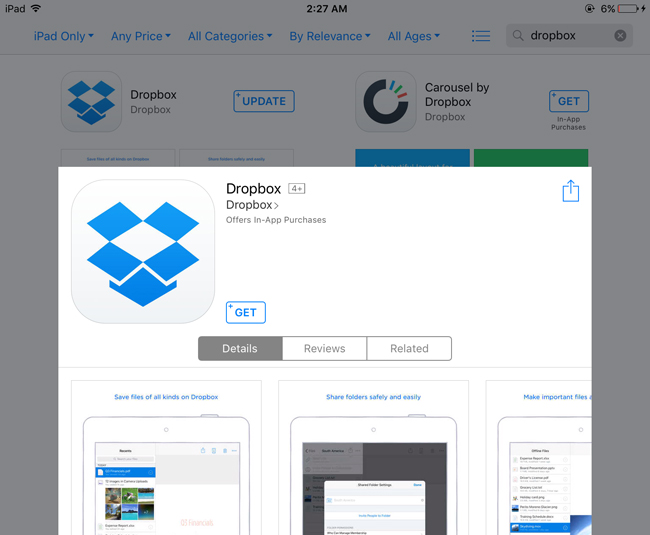
Step 1. Download and install the Dropbox iPad app on your iPad.
Step 2. Launch the Dropbox for iPad app, sign into it with your Dropbox account.
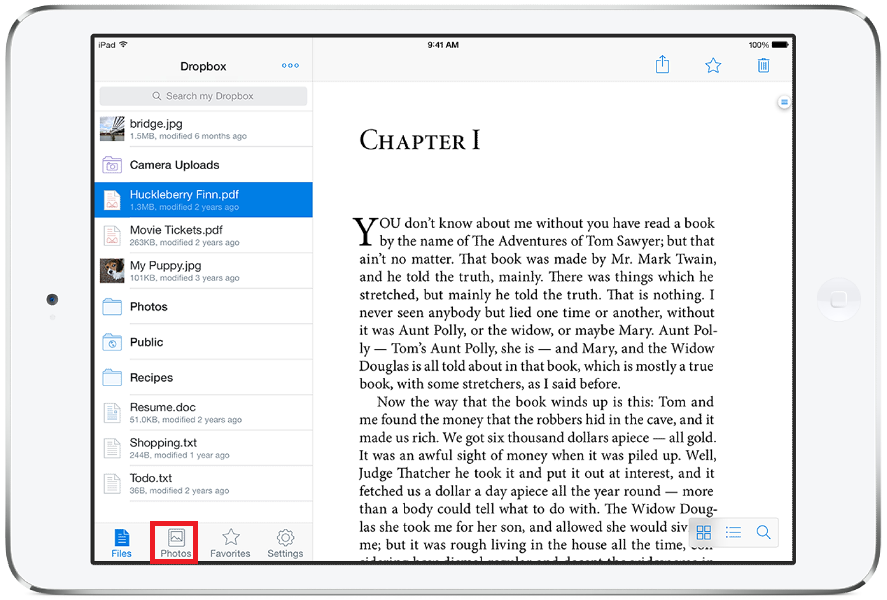
Step 3. On the left column of the Dropbox interface, tap on the Photos tab at the bottom to check out your photos on Dropbox.
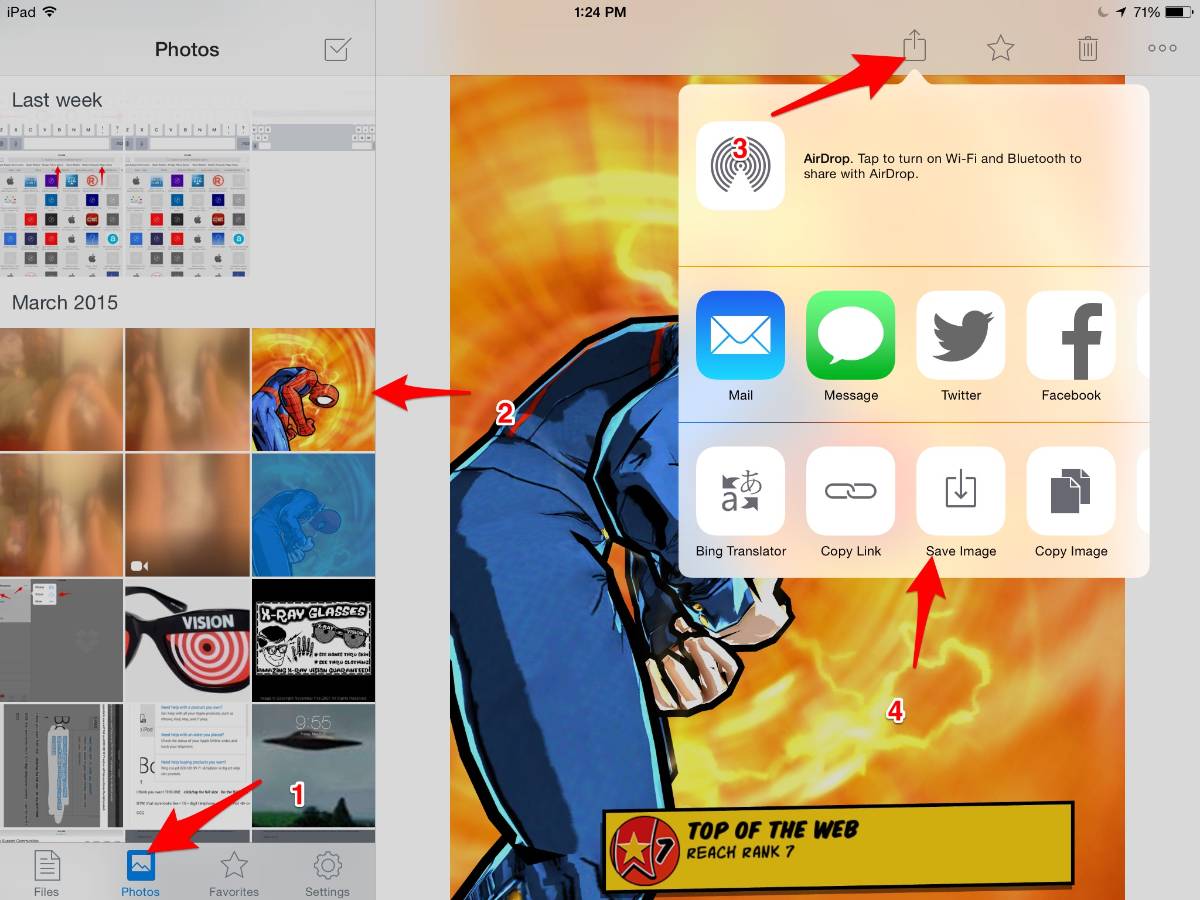
Step 4. Tap on the photo you want to download, tap on the Share icon, and then tap Save Image to save the photo to your photos app on iPad.
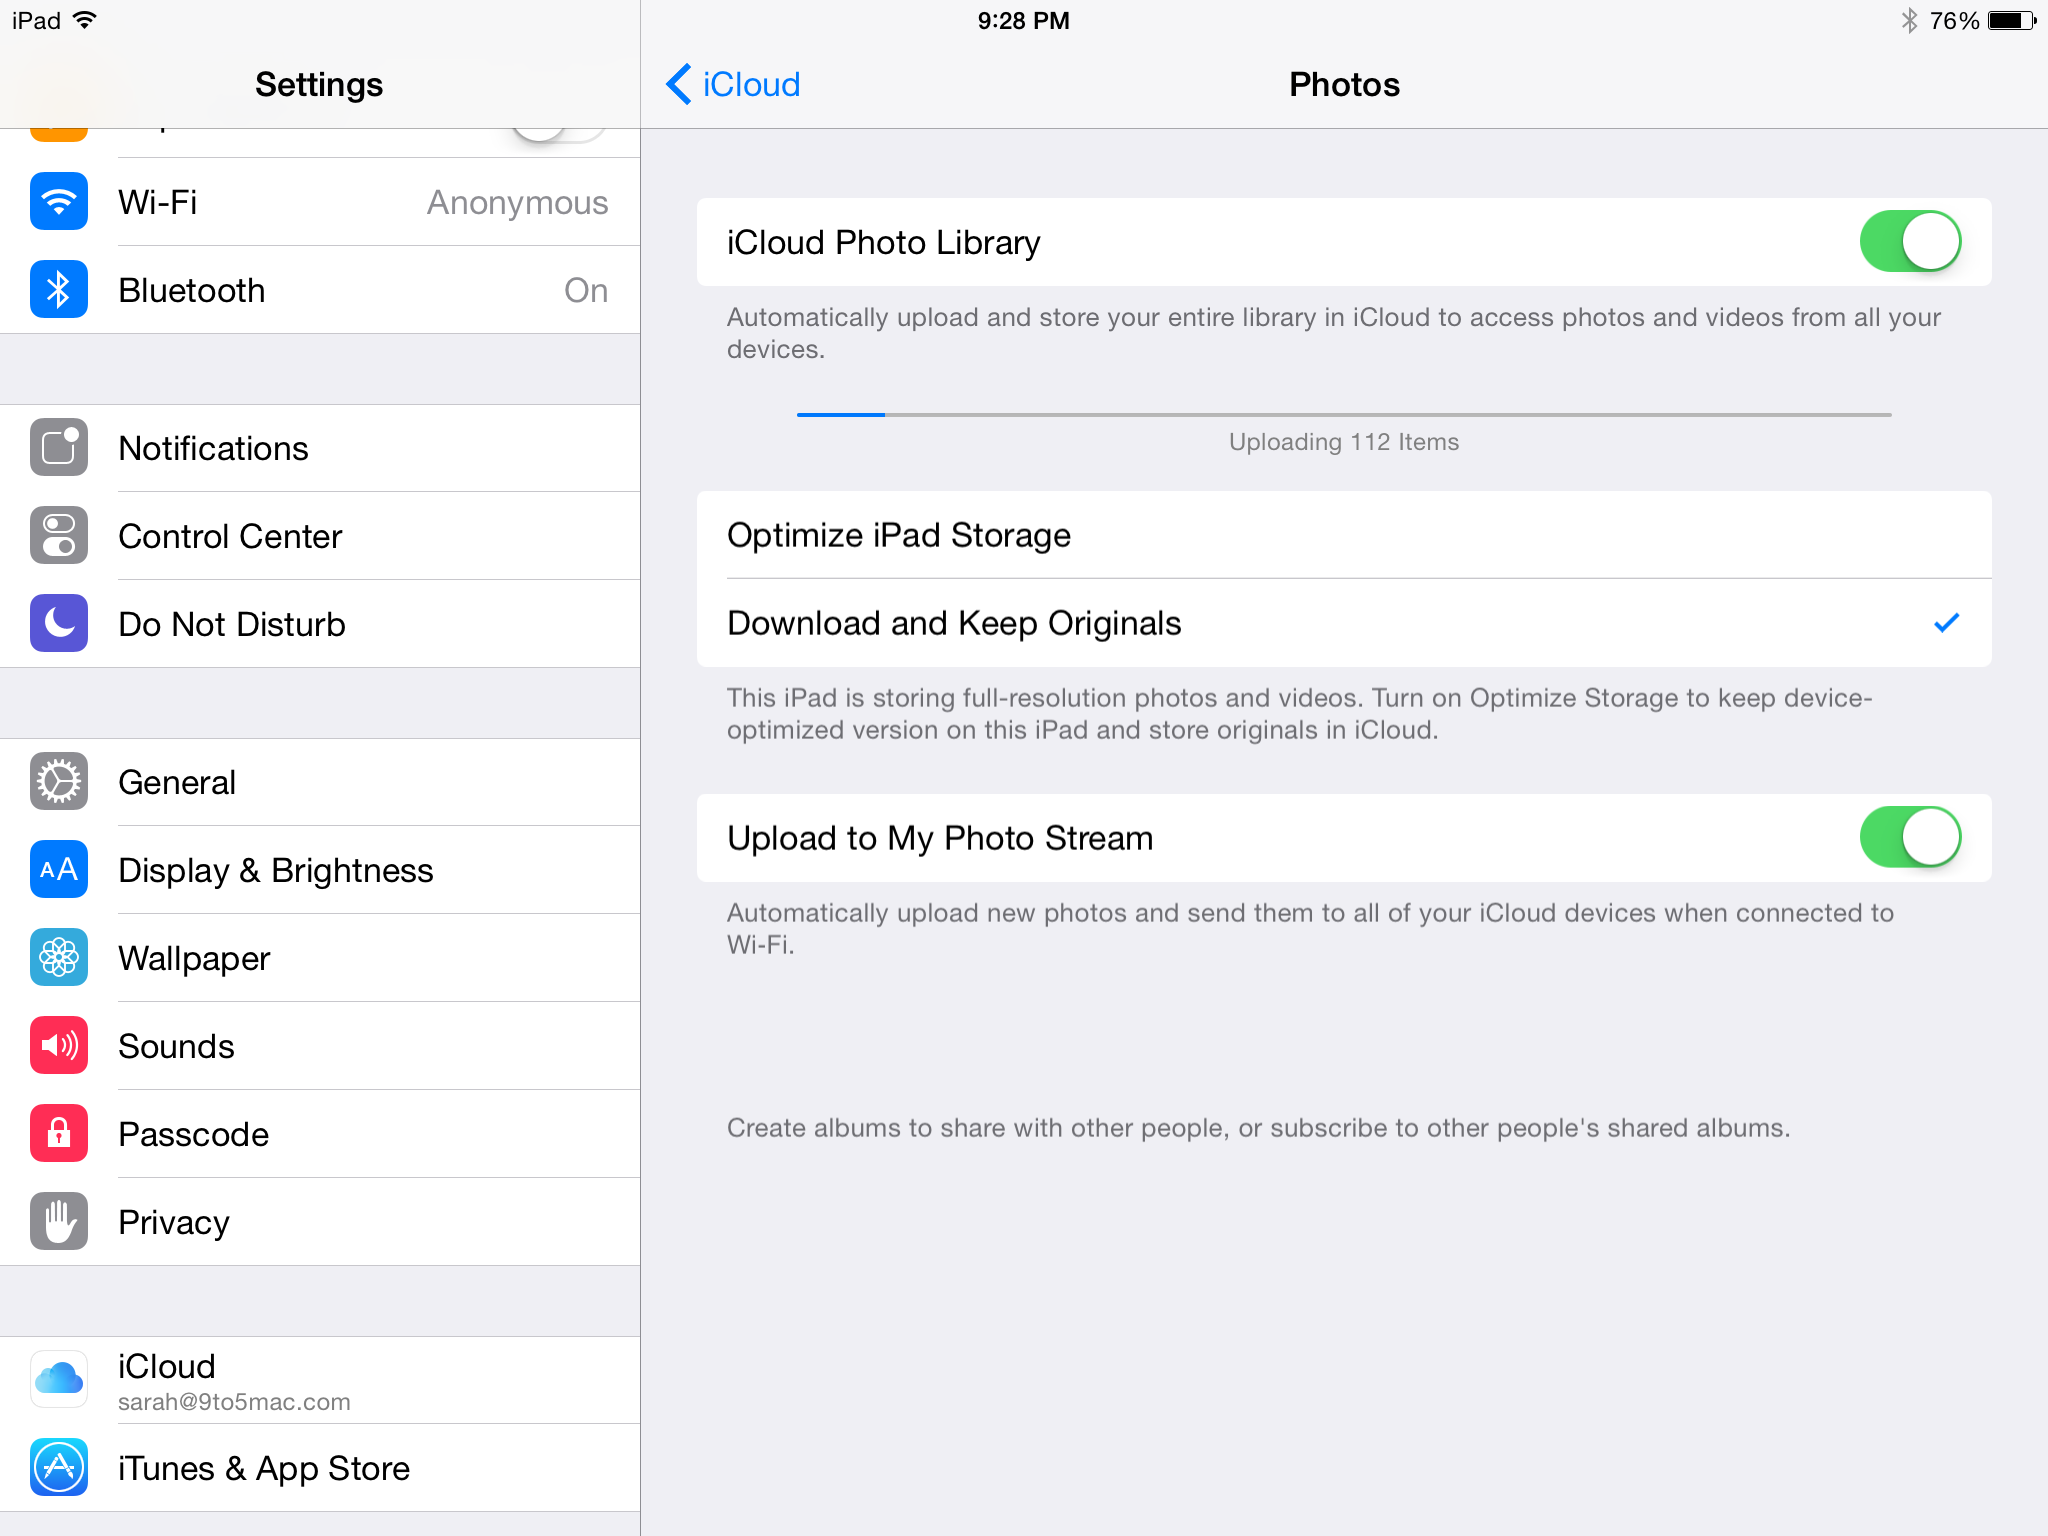
Step 5. On your iPad, go to Settings>[your name]>iCloud>Photos and toggle iCloud Photo Library on.
After turning on iCloud Photo Library on your iPad, your photos will be uploaded to iCloud automatically every time your iPad is connected to a Wi-Fi and your battery is charged. This is how you can transfer photos from Dropbox to iCloud on iPad running iOS 10 or earlier.
2. Tranfer Photos from Dropbox to iCloud on iPad running iOS 11 or Later Using the Files App.
The brand new Files app is a neat little feature that a lot of iOS device users have been longing for. You can use it to directly transfer photos from Dropbox to iCloud on iPad directly within the Files app. But the Dropbox for iPad app is still needed in the process so you'll have to go download it from the App Store first. Here’s how :
Step 1. Download and install the Dropbox iPad app on your iPad.
Step 2. Launch the Dropbox for iPad app and sign into it with your Dropbox account.
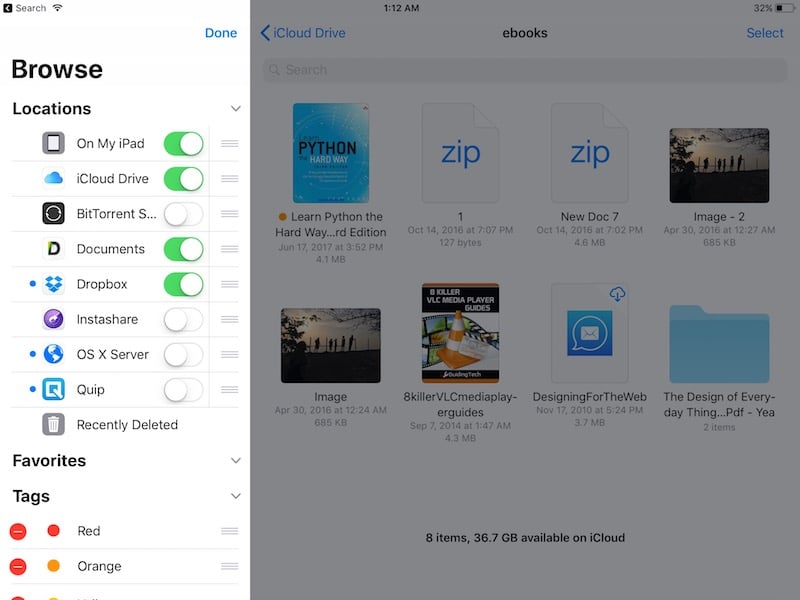
Step 3. Launch the Files app on your iPad. You should be able to find the Dropbox option under the Locations tag on the left column. If you can’t find Dropbox on it, tap on the Edit button in the top right corner of the left column and then toggle Dropbox on.
Step 4. Tap on Dropbox on the left column to view the files you’ve stored on it. Long press one photo to select it and keep selecting other photos to pile them. Keep holding the photos and use another finger to tap on iCloud Drive on the left column to open the iCloud Drive folders, and then release the photos after you've found the ideal location for them.
How to Recover Deleted Photos on iPad that You Haven't Backed Up
Cloud storage service is a good option for us to back up important photos. It can make sure that our photos are stored in a safe place and we get to view them anytime we want. But we don’t always back up our photos in time. If you have the experience of deleting a photo and having no backups, you should know how frustrating that is. But that doesn’t mean it’s impossible to get the mistakenly deleted photos back. In fact, with the help of the right program, you can easily recover deleted photos from iPhone or iPad in a way that’s much easier than you’d think. Check out Leawo iOS Data Recovery, it’s the perfect solution to this kind of problem. It can directly recover lost or deleted photos and other types of data like messages, bookmarks directly from your devices without needing any backup. With it you don’t have to worry about forgetting to back up your photos or being unable to get the deleted photos back. Here’s how you can recover deleted photos from iPhone and iPad using this iOS data retrieval program.
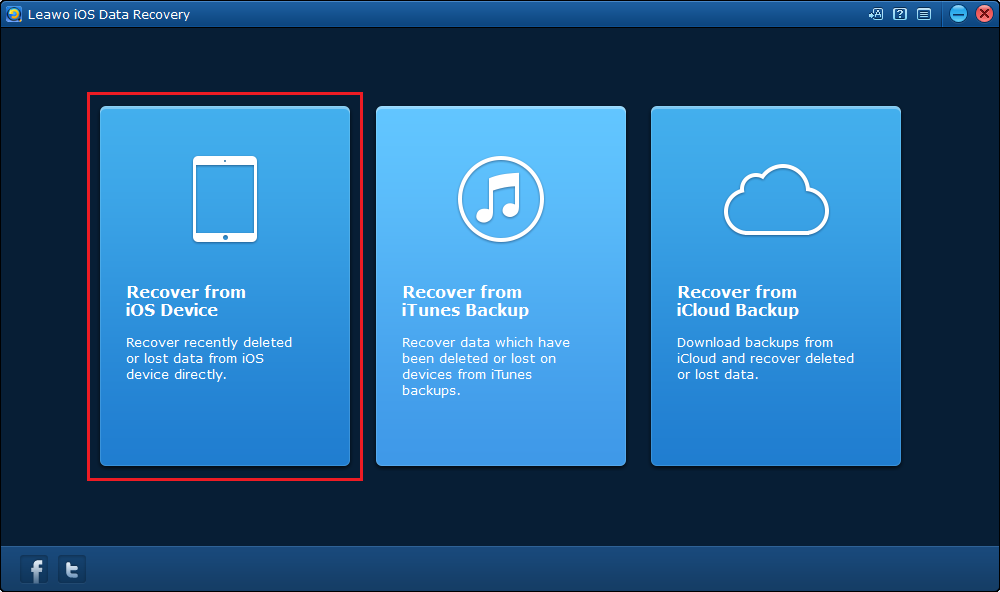
1. Start the program from your desktop, and on the interface, click on the first tab from the left: Recover from iOS Device.
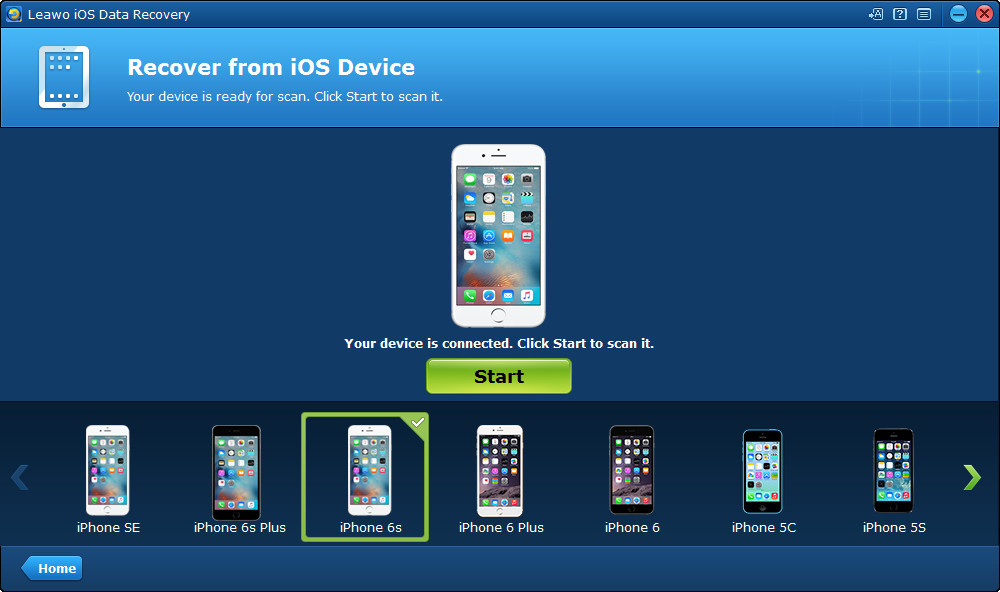
2. Connect your device to your computer via a USB cable. And then a Start button will show up in the center of the interface. Click on the Start button and this program will start to scan your device to search for the deleted files.
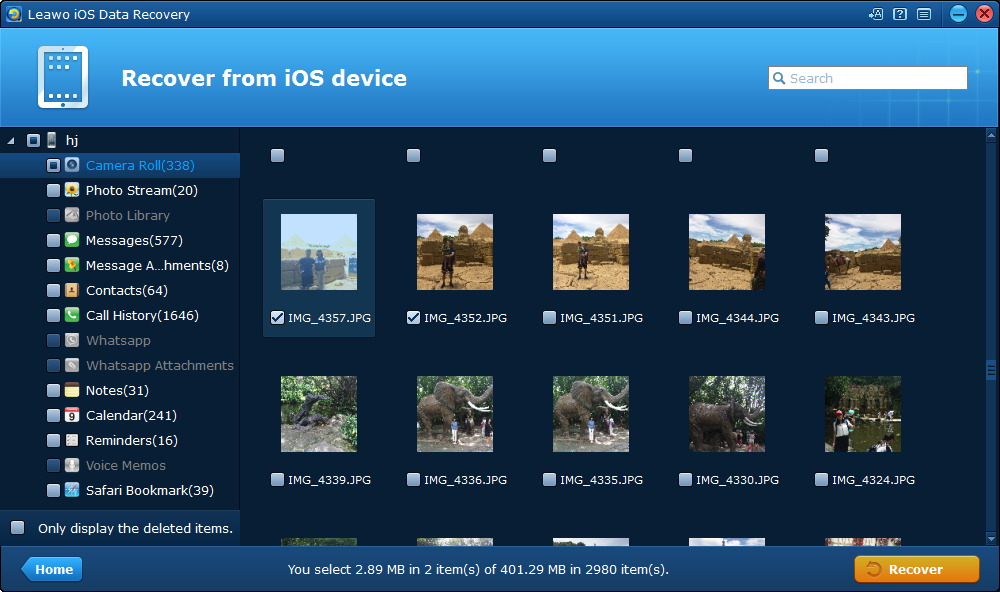
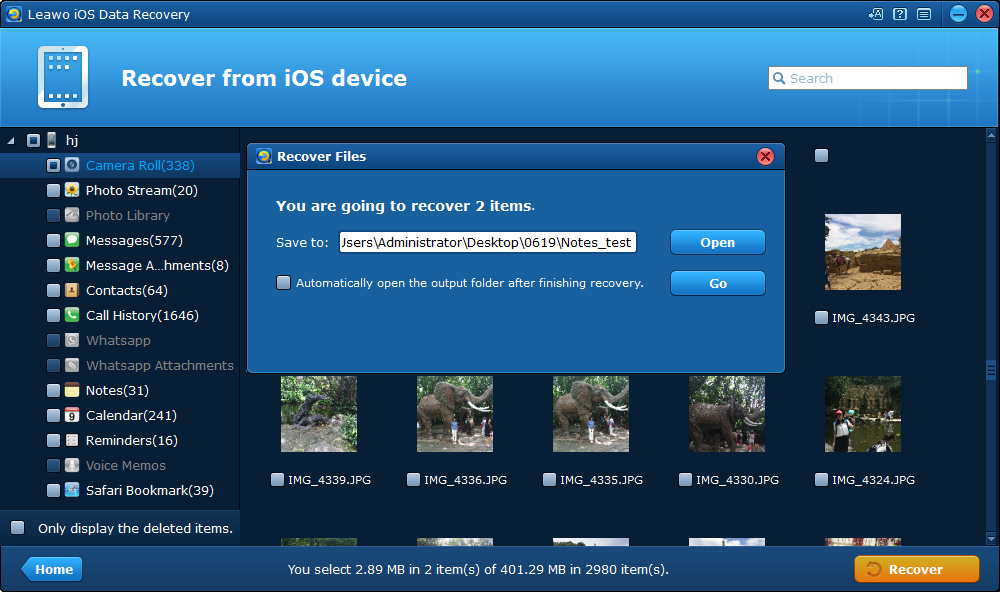
3. After the scanning process is finished, you can check out all of your photos(including the deleted ones) by clicking the Camera Roll tag on the left sidebar. To view the deleted photos only, enable the Only display the deleted items option at the bottom of the left column. Select the photos you want to recover and then click Recover.
4. On the following popup, click on the Open button to select a folder to temporarily store the photos you are about to recover. And click on the Go button to start the photo recovery.
After the recovery process is finished, you can open the folder, find your photos and then transfer your photos back to your iPhone.
Taking photos is a good way to memories precious moments, if you do cherish your photos, always back them up, and in more than one way, to be safe.

