"I made some Christmas photo slideshows with Christmas photos shot last Christmas. This Christmas I'll shoot more Christmas photos of my family, especially my little nephew, and then make them into a photo slideshow as well. I would like to burn these photo slideshows into a DVD disc. What should I use and how to burn photo slideshow to DVD disc?"
With the popularity of smartphones and digital cameras, taking photos in holidays and trips becomes trendy. Many people have taken Christmas photos during Christmas games, Christmas gathering, Christmas dinner, and Christmas trip. For better storing and more convenient sharing, some have transferred Christmas photos into photo slideshow or even planned to burn Christmas photos to DVD disc. This guide will introduce you detailed solutions on how to burn photo slideshow to DVD disc, how to transfer photos to DVD, and referrence solution on how to make a photo slideshow with music.
Part 1: Burn Christmas Photo Slideshow to DVD Disc
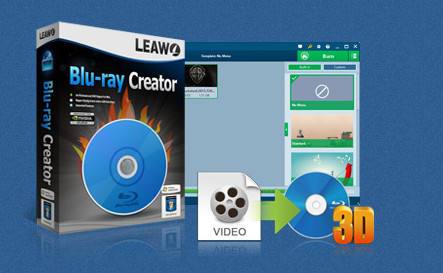
Leawo Blu-ray Creator could help you easily convert and burn Christmas photo slideshows onto DVD disc in a few clicks only. As a top-rated Blu-ray burner, Leawo Blu-ray Creator could act as advanced video to DVD converter and burner to burn video to DVD disc with ease. It could convert and burn Christmas photo slideshows in WMV, MP4, MKV, MOV, VOB, AVI, FLV, etc. to DVD-9/DVD-5 disc, folder, or ISO files. To make Christmas photo slideshow DVD disc, just download this program, insert your blank DVD disc into the disc drive and then follow the below steps.
Leawo Blu-ray Creator
- Burn videos to Blu-ray/DVD disc, folder and/or ISO image file simultaneously.
- Create photo slideshows from various photos and burn to DVD/Blu-ray disc easily.
- One click operation to burn ISO image file to Blu-ray/DVD disc.
- Edit output videos to add image or text watermark, trim video size, adjust effect, etc.
- Create 3D Blu-ray/DVD movies with 6 different 3D effects.
- Add disc menu to Blu-ray/DVD disc, even design disc menu with personal preferrences.
#1. Preparation:
- Start Leawo Blu-ray Creator on your computer. You could download and install the program first via the links provided above.
- Put a writable blank DVD disc into the DVD disc recorder drive.
- Make sure source Christmas photos or Christmas photo slideshows are already on your computer.
- DVD disc recorder drive.
#2. How to Burn Christmas Photo Slideshow to DVD Disc:
1. Load Christmas photo slideshows
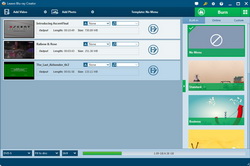
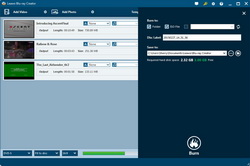
Directly drag and drop Christmas photo slideshows into this program (If you haven't turned your Christmas photos into photo slideshow, click how to make Christmas photo slideshow on Mac to make a photo slideshow on Mac. For Windows users, check the Part 3 content). After adding, select the DVD disc type (select DVD-9 or DVD-5 according to your inserted DVD disc), bit rate and aspect ratio at the bottom of this Blu-ray Creator.
Note:
- To burn Christmas photo slideshow to DVD disc, insert a blank writable DVD disc into the disc recorder drive.
- You could add multiple Christmas photo slideshows as you like at the same time.
2. Edit Videos (Optional)
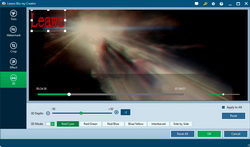
Via right-click, you could select "Edit" option to enter the video editing panel, where you could "Trim" video length, apply image or text "Watermark", "Crop" video size, rotate photo slideshow for a special angle of view, adjust video "Effect", add "3D" effect, etc. You could also directly click the big "Edit" icon in each loaded video title to enter the video editing panel.
3. Set disc menu
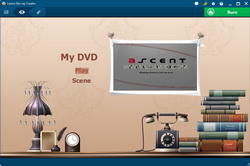
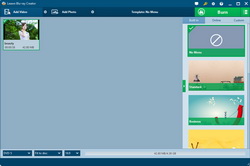
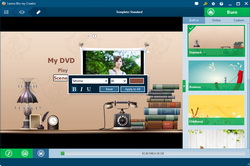
Select a menu as disc menu on the right side bar. Preview selected disc menu model by clicking the middle of it. On the preview window, if you need, click the pencil icon to edit disc menu by changing background music, background image, title position, text font, text color, text size, title content, etc.
Note:
- If you don't want to add disc menu to output DVD disc, you could directly choose "No Menu" option on the right sidebar of the main interface.
- You could download more disc menu templates by clicking the "Online" button from Leawo's online database.
- Edited disc menu would be saved into the "Custom" group for future use.
4. More burning settings
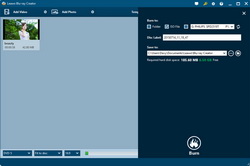
Click the big green "Burn" button on the main interface to finish more burning settings, like "Burn To" (As you want to burn Christmas photo slideshows to DVD disc, select DVD disc drive here. Inserted DVD disc should be writable. If there's no disc option, check whether your DVD disc has been inserted into the disc drive correctly), "Volume Label" and "Save to", etc. Burning Engine and TV Standard are adjustable by clicking the the wheel icon on the top-right corner to open the "Burn" tab.
Note:
- "Burn to" option allows multiple choices, which means that you could choose to create an ISO image file while burning video to Blu-ray/DVD disc as a complete copy of output Blu-ray/DVD disc for saving on your computer hard drive. It requires enough storage space.
- Since you want to burn zombie survival camp videos to DVD disc, select disc recorder drive in which you've inserted a blank writable DVD disc as target under the "Burn to" option.
5. Burn photo slideshow to DVD disc
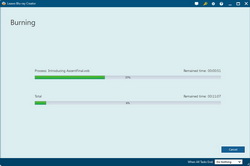
Finally, click "Burn" button on the burning setting panel to burn photo slideshow to DVD disc.
Part 2: Burn Christmas Photos to DVD Photo Slideshow
Besides burning generated Christmas photo slideshow to DVD disc, with Leawo Blu-ray Creator, you could even directly burn photos to DVD photo slideshow with music in a few simple clicks. It could act as a photo DVD maker program to directly burn photos to DVD slideshow directly. You don't need to make a photo slideshow before you try to burn to DVD disc. This Blu-ray Creator would directly generate photos into photo slideshow and then help you transfer photos to DVD disc. With the internal photo slideshow editor, you could even make a DVD photo slideshow with music. This section would show you how to make a photo DVD with music.
1. Add Christmas photos
Click "Add Photos" button to browse and add Christmas photos into this Christmas photo DVD maker. You could also directly drag and drop Christmas photos or Christmas photo folders into this photo DVD maker for burning a photo DVD. Loaded photos would be automatically generated into photo slideshow.
Note:
- To burn Christmas photo to DVD disc, insert a blank writable DVD disc into the disc recorder drive beforehand.
- Set output disc type, aspect ratio and bit rate at the bottom of the program after loading Christmas photos. The output disc type should be in accordance with the disc you've inserted into the disc recorder drive.
2. Edit Photo Slideshow
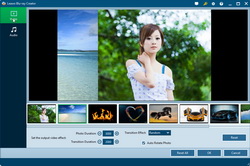
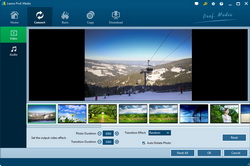
If you want to make a photo DVD with music, right click the generated photo slideshow on the processing panel and then select "Edit" option, or directly click the "Edit" icon in generated photo slideshow title to enter the photo slideshow editing panel. You could then add external photos, remove/adjust existing photos, set photo transition and transition effect, add fovarite song as background music, set background music effect, etc.
3. Set disc menu (Optional)
Save photo sldieshow editing and return to the main interface. Add a disc menu to output photo DVD by selecting one from the right sidebar. Various themes of disc menu template could be selected. You could preview disc menu by clicking the middle eye-shaped icon of selected disc menu. On the menu preview panel, you could click the pencil-icon to edit disc menu and save edited disc menu to "Custom" group for future use.
Note:
- You could download more disc menu templates by clicking the "Online" button from Leawo's online database.
- If you don't want to add disc menu to output DVD disc, you could directly choose "No Menu" option on the right sidebar of the main interface.
- By clicking the pencil-shaped icon on the menu preview panel, you could edit disc menu, including: add background music/image/video, rename titles, adjust the title position and content, text font, size and color, etc.
4. More burning settings
After setting disc menu, return to the main interface. Click big green "Burn" button to call out the burning setting sidemenu, where you can choose to burn zombie survival camp videos to Blu-ray/DVD ISO File, Blu-ray/DVD Folder or/or Blu-ray/DVD disc, input "Volume Label", choose saving destination in "Save to". Since you need to burn photo to DVD disc, choose DVD recorder drive as output target under the "Burn to" option. After these settings, click the bottom "Burn" botton to start burning photos to DVD disc.
Part 3: Bonus – How to Make a Photo Slideshow with Christmas Photos
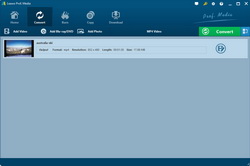
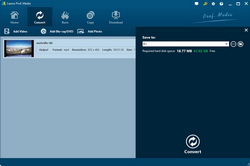
Abovementioned link provides a solution to help Mac users easily make a photo slideshow with music on Mac computer. Windows users could refer to the below steps to learn how to make a photo slideshow with music on Windows computers, by using Leawo Video Converter, which comes with a practical photo slideshow maker to help create photo slideshow with music in simple clicks.
Note:
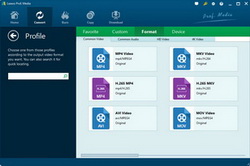
- After setting output format, you could still change the video and audio parameters of selected profile by clicking the "Edit" option on the drop-down list of profile setting. You could adjust video codec, bit rate, aspect ratio, frame rate, audio codec, sample rate, channel, etc.
- On the photo slideshow editing panel, you could add external photos, remove/adjust photos, add photo transitions and transition effect, add background music, set background music effect, etc.


 Dec. 08, 2014 by