The screens on which you view your images, videos, TV shows, movies, documentaries, and pretty much any other sort of media has seen several advancements over the years. It has gotten sharper which allows you to see more sharp and crisper detail, it has gotten smarter which allows it to turn individual pixels on and off (which allows for better blacks and more vibrant colors), and it supports a wider range of aspect ratios among many more advances. But what exactly is the aspect ratio, how does it help with viewing and how is it important? In this guide, we will introduce the aspect ratio, and show you how to change aspect ratio by using iMovie (for macOS and iOS) and another popular program, so that you can take advantage of the screens you use for watching your media.
Outline
Part 1: What is aspect ratio?
Until the late 2000s, the television and monitor screens had been a ‘squared’ or standard design until the world started adopting the ‘rectangular’ or wide screens. During the mid to late 2010s, the world also got introduced to ultra-wide screens, although they are being slowly adopted by the general public. While they are being slowly phased out, standard screens remain popular today, along with their wide and ultra-wide counterparts. Because of the difference in screen shape types, aspect ratios exist.
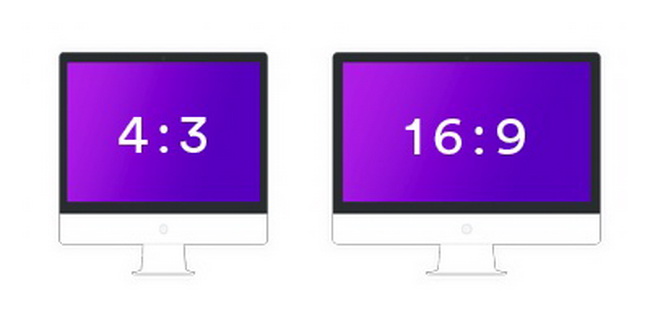
In very simple terms, the Aspect ratio describes the ratio between the width and height of an image or screen. An aspect ratio of 1:1 for example is a square, and the first number always refers to the width while the second number refers to the height. The most common aspect ratios are as follows:
Aspect ratio explained
- Standard ratio, 4:3 (SDTV). Commonly used on computer and television screens.
- Widescreen ratio, 16:9 (HDTV). Commonly used on widescreen televisions and smartphones.
- Widescreen ratio, 16:10. Commonly used on computer displays.
- Ultra-wide screen ratio, 2.35:1. Commonly used on high-end computer displays, or cinemascope.
Why is it important to change aspect ratios?
Changing aspect ratios is important, because it allows the images to be most compatible with your screen type, thereby giving you a better viewing experience. For instance, if you try watching a video with a 4:3 aspect ratio on a 16:9 widescreen, you will end up with squarer images on the center of a rectangular screen along with thick black borders (which may not be appealing all). Therefore, you may need to change the aspect ratio of an image so that it is most compatible with the platform or device you are using. Therefore, how can you change the aspect ratio on videos if you are using video editing software? We explore that down below.
Part 2: How to change aspect ratio on iMovie for Macs?
If you are a Mac user, you most probably have iMovie installed on your computer, as it is free software from Apple that often comes pre-installed. As a basic video editor and movie creator, it has decent features that Apple has been adding over the last few years, which make it a good video editing software. The features include the timeline mode, advanced audio adjustments, green screen controls, an easy-to-use trimmer, trailers and themes, lowered background noise, and more. It also supports a decent amount of video and audio formats for output, such as MP4, MOV, HEVC, and more.
Although it is often criticized for being too basic, Apple continues to add more features to it. Before we begin, it is important for you to note that iMovie supports only widescreen aspect ratios in various resolutions which are as follow:
- 1920×1080 (1080p)
- 1280×720 (720p)
- 960×540 (540p)
- 854×480 (480p)
Therefore, to change the aspect ratio in iMovie on Mac, please refer to the steps below:
Step 1: Launch iMovie, and open the project with the videos you wish to edit. If you don’t have existing projects, create one.
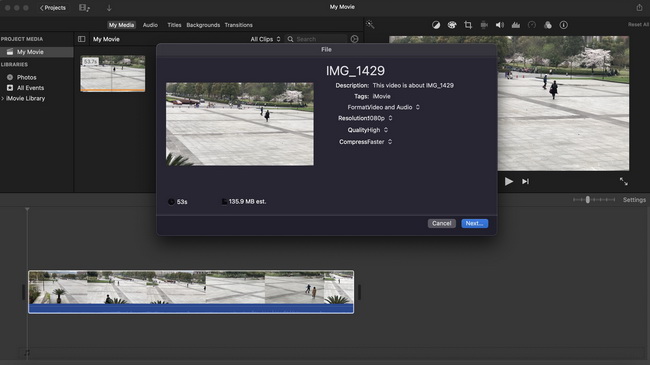
Step 2: When you have made other adjustments to your video, get ready to start exporting the video with your desired aspect ratio. Click ‘File’ on your menu bar, followed by ‘Share’ from the context menu then ‘File..’ again.
Step 3: Choose the video quality and compression quality. The higher the quality you desire, the bigger the video for output. To change the aspect ratio, click on ‘Resolution’ to choose the quality.
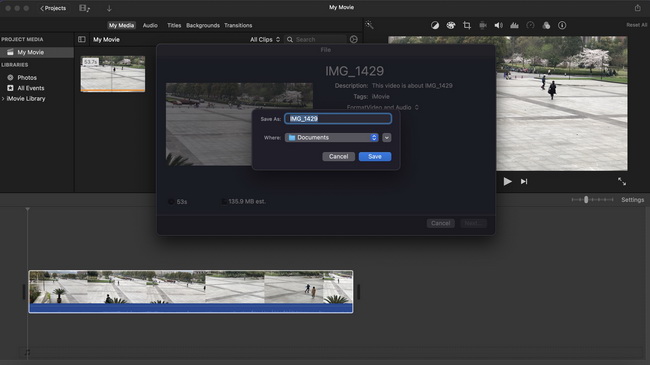
Step 4: Begin the conversion. Click ‘Next..’ then choose the target folder for the save. You can also name the output file accordingly. Once you confirm everything, click on ‘Save’ and the file will be exported.
Part 3: How to change aspect ratio on iMovie for iPhone & iPad?
iMovie has also been available on iOS since it was originally launched. If you use iMovie on macOS, you can take advantage of the continuity feature and continue your work on an iOS device (just as long as both devices are signed in to the same iCloud account). Like its desktop counterpart, the mobile version of iMovie pretty much has the same features, which in the case of aspect ratio means it only supports widescreen aspect ratios. To use it for change aspect ratio, follow the steps below:
Step 1: Open iMovie on your iOS device, then open the project with the videos you wish to edit. You can also create a project, and import the videos you wish to edit.
Step 2: Make all the necessary adjustments to your videos, then get ready to start exporting the video with the desired resolution.
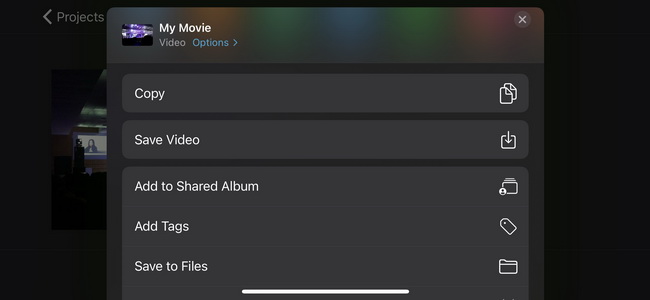
Step 3: Get ready to export the video. Go back to the home page where you should see all your projects. Select the project that you just finished to edit then click the share icon to bring the share menu.
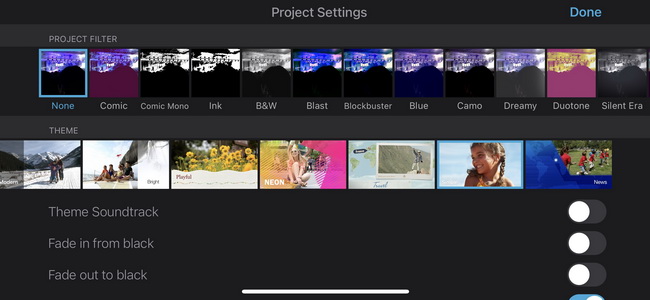
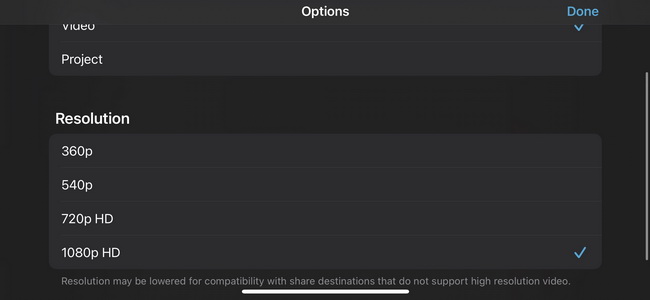
Step 4: When you see the share menu, click on options to choose the video resolution.
Step 5: Choose the resolution. Scroll down to the Resolution section, and choose a desired resolution for the output video. When you have finished, tap ‘Done.
Step 6: Save the video. When you tap ‘Done’ from the previous step, tap on ‘See Video’ to begin exporting the video.
Part 4: Another all-around item to change aspect ratio for video
iMovie is great, especially given the fact that you can work on your projects on multiple devices because of Apple’s iCloud continuity feature. However it has its own flaws, for instance, it also does not fully support the most common video formats like MP4. Most users have described importing some MP4 files as cumbersome because first need to convert them to H.264 codecs for best results.
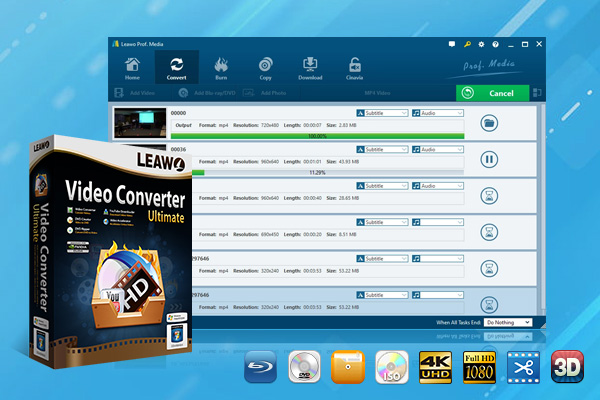
Moreover, iMovie only supports widescreen aspect ratios, and if you want standard and ultra-wide aspect ratios, you have to resort to other options. To avoid the hassle and change the aspect ratio directly without converting your videos to other formats, and to have more options for choosing the right aspect ratio, you can always rely on Leawo Video Converter Ultimate. Here are a few more reasons why you should choose this software:
-
Leawo Video Converter Ultimate
Convert Video from 2D to 3D
Output for Any Apple and Android Devices
Download Videos and Audios from 1000+ Sites
Professional Photo Slideshow Maker and Burner
Greatly Enhance Blu-ray/DVD/Video Output Effects
Leawo Video Converter Ultimate has a lot more features that you can learn about from the product page. We highly recommend you try this software for all your video conversion needs. To change the aspect ratio on your videos, please follow the steps below:
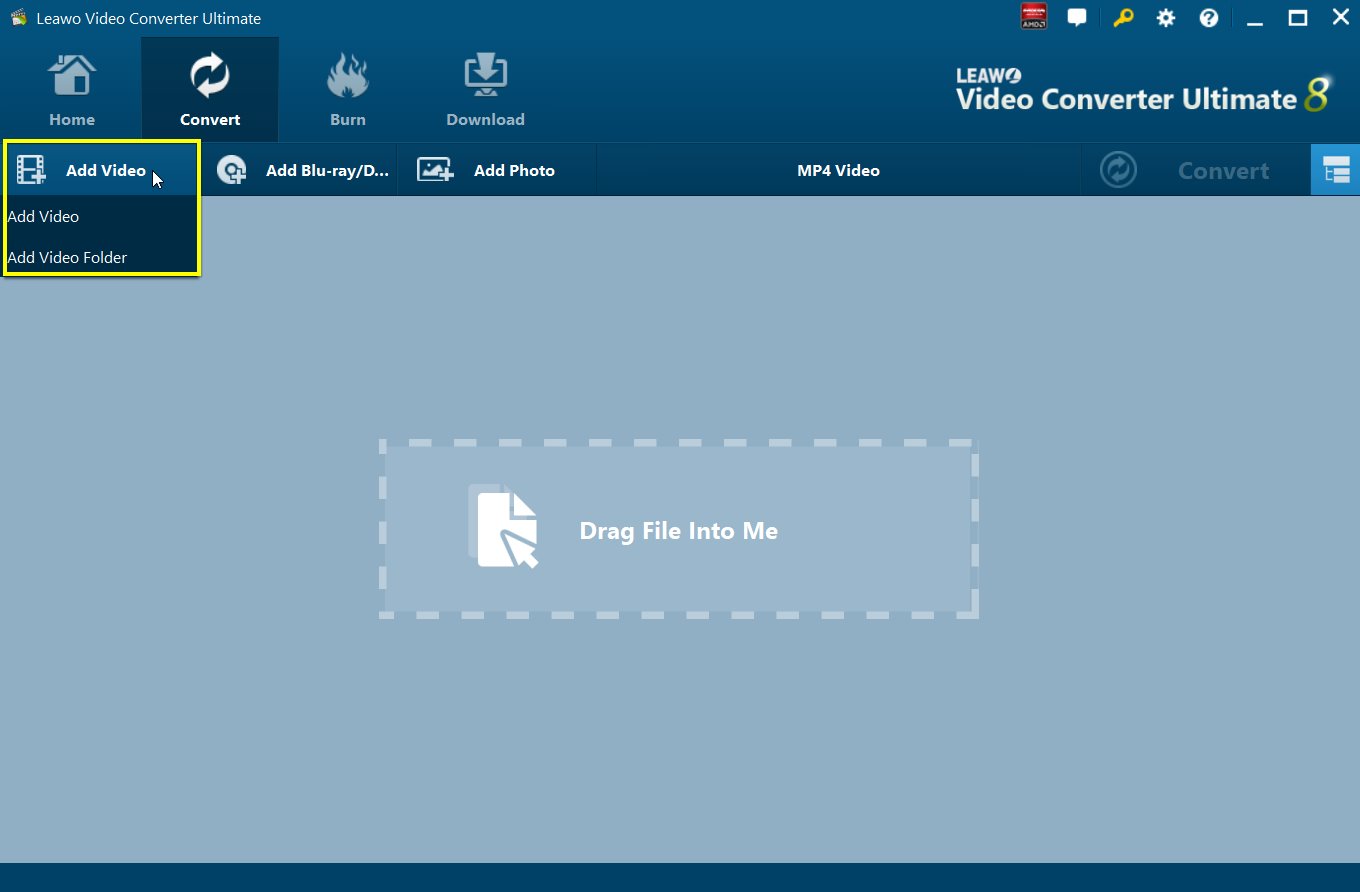
Step 1: Import the video(s)
Click the “Add Video” button to open a dialogue box where you can search the videos, or simply drag them right into the application.
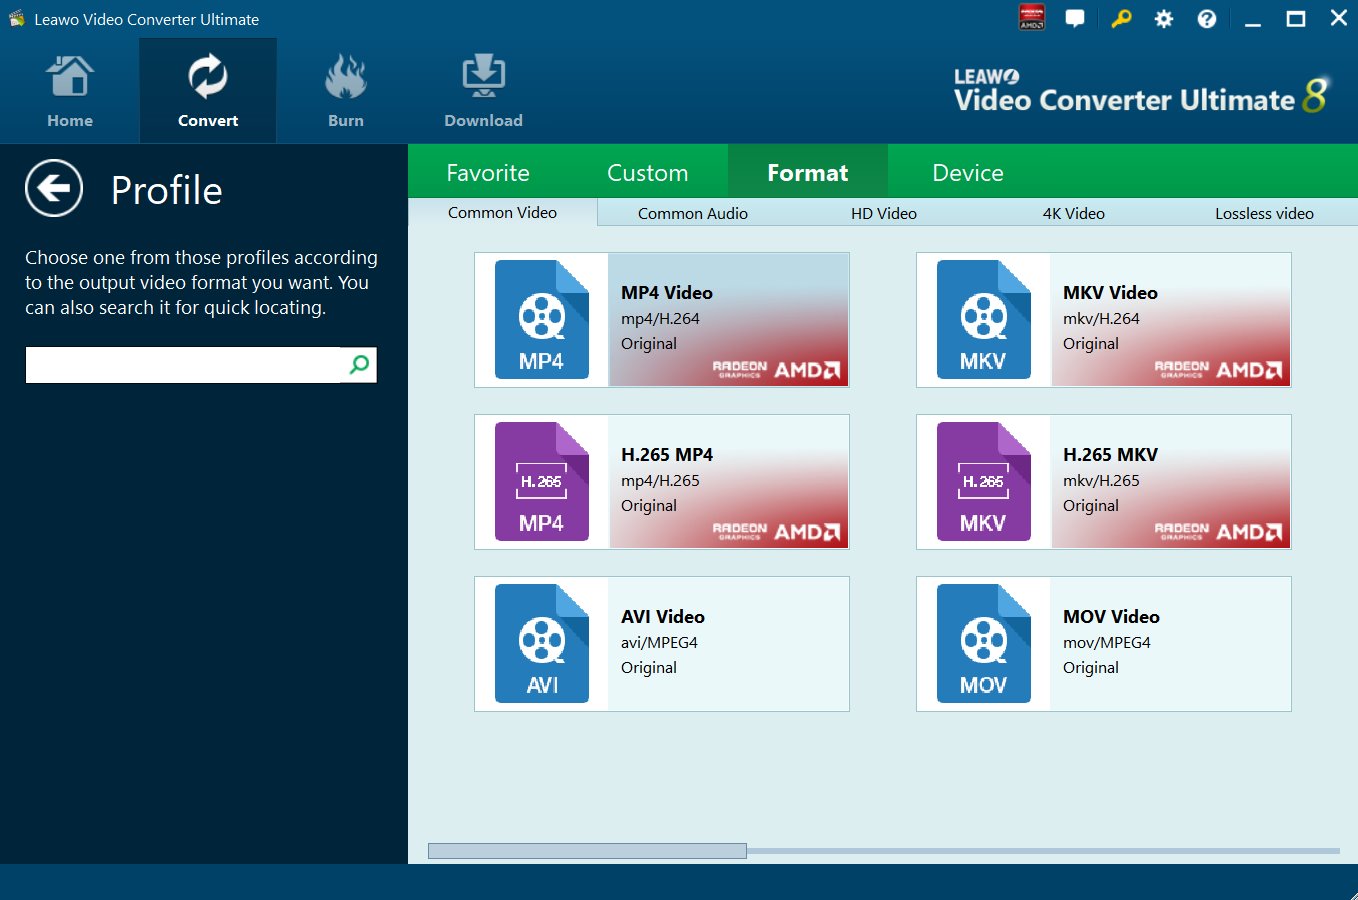
Step 2: Select the output format
Next to the green “Convert” button, there is a button labeled as “MP4 Video”. Click it, then click “Change” from the drop-down menu. Next, you click “Format”, then under “Common Video” find and select “MP4 Video” or a video format of your choice.
Step 3: Change the aspect ratio
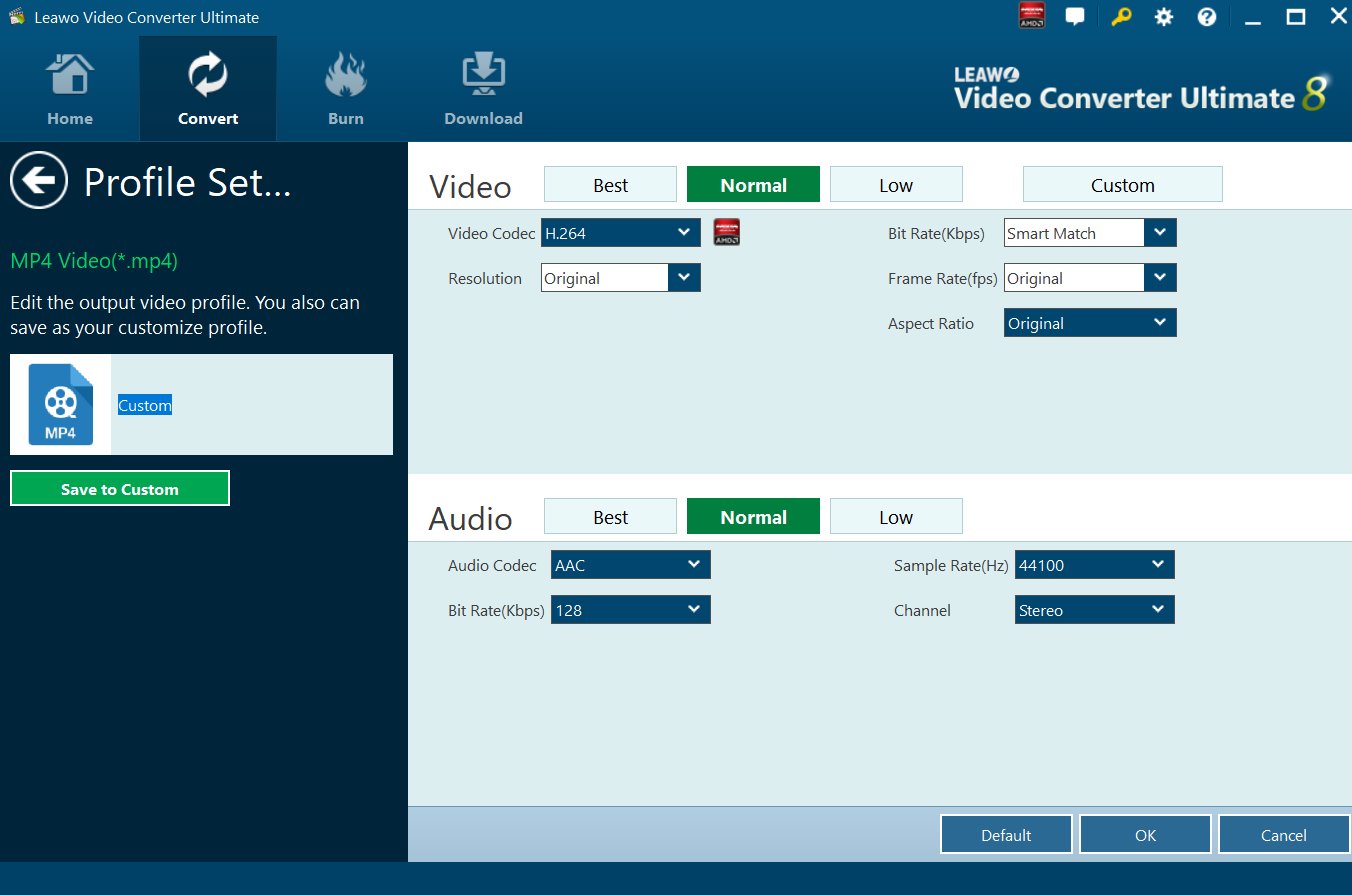
To change the aspect ratio, click the “Edit” button when you have selected the output profile from the previous step. That should take you to “Profile Settings”, where you should see the Aspect Ratio button under the Video section. Choose your desired option, then click “OK”.
Step 4: Start conversion
Click the green “Convert” button. Please set a directory under the “Save to” box which is near the top of the sidebar which pops up. Click the “Convert” button at the bottom of the sidebar to start converting your video(s).

