"Hi do you know what are the DaVinci Resolve 14 supported video formats? I have some video files and would like to import video to DaVinci Resolve for editing, but have failed for times. How could I import video to DaVinci Resolve and what are DaVinci Resolve supported video formats?"
If you happen to have the same questions as above, this guide would be your best helper. It shows you the DaVinci Resolve supported file formats and how to import video to DaVinci Resolve easily.
Part 1: Introduction to Davinci Resolve Video Editor
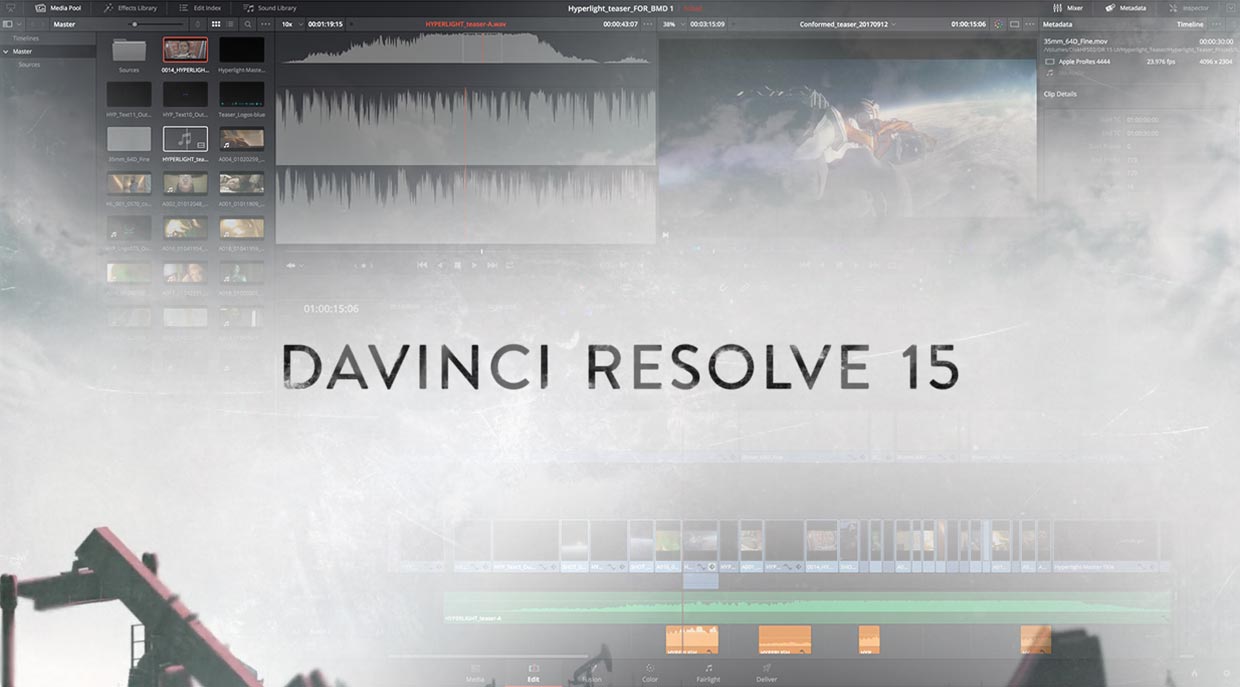
DaVinci Resolve (the latest version is DaVinci Resolve 15) is the world’s first solution that combines professional offline and online editing, color correction, audio post production and now visual effects all in one software tool.
DaVinci Resolve is a potential software tool for video editors and is commonly used by professionals. There are so many tools and features to explore inside, but if you are a beginner then you may not be able to use it so interactively.
With fairly little video formats supported, DaVinci Resolve is actually a hard editor for you to import video files. The below content would show you what DaVinci Resolve supported file formats are and how to import video to DaVinci Resolve, and how to convert videos to DaVinci Resolve in case your video files are not accepted by it.
Part 2: Davinci Resolve Supported Video Formats
DVR extends its support to four different types of file formats and the list covers all popular sets, hence you can process your media files fast.
1. Supported Video formats and codecs include but are not limited to: QuickTime, AVI, R3D, MXF, Prores, DNxHD, MXF, DPX, CIN, EXR.
2. Some of the most commonly processed image file formats are: .tif, .psd, .png, .dng, .jpg, .exr and .dpx.
3. It also allows FCPXML/EDL/AAF files.
4. Popular audio file formats supported by DVR: AAC, MP4, AIFF, WAVE and Broadcast Wave etc.
For the complete supported list, please check the DaVinci Resolve Supported Formats and Codecs (Note: this list is applicable to DaVinci Resolve 12.5. The later versions should be applicable to these codecs as well).
Part 3: How to Import Video to DaVinci Resolve Editor
To import video to DaVinci Resolve video editor, you could firstly try direct drag-and-drop. The second method to import video to DaVinci Resolve is to make use of the File option. It’s very simple: open the “File” menu, browse and locate the videos you want to import to DaVinci Resolve, choose the videos, and then click the “Open” button to import video to DaVinci Resolve video editor.
Or, you could import video to DaVinci Resolve via the "Media Browser" feature built in DaVinci Resolve.
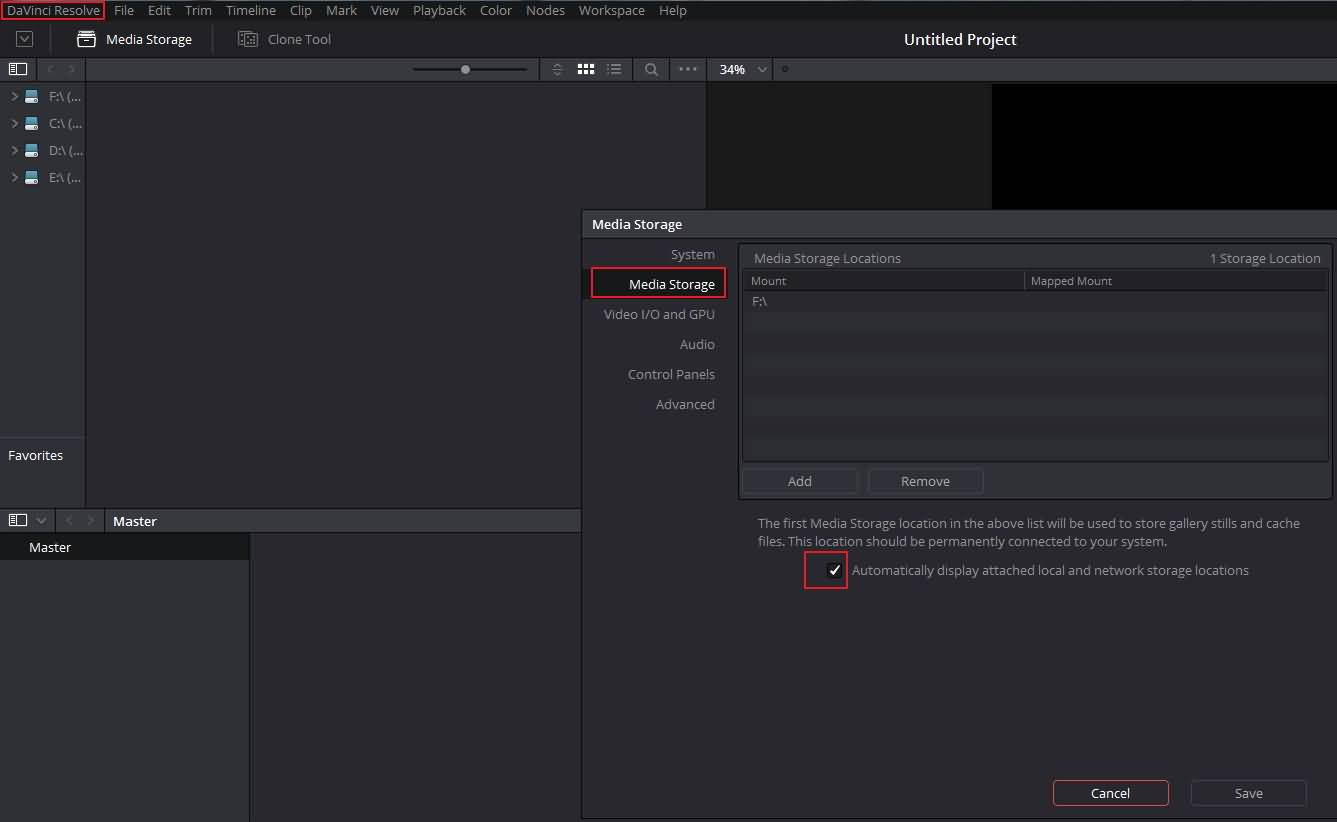
Once the project has been created, then you simply click on "Preferences" at top left corner of DVR.
Step 1: Set your hard drive for DVR interaction and then check the option "automatically display attached storage locations".
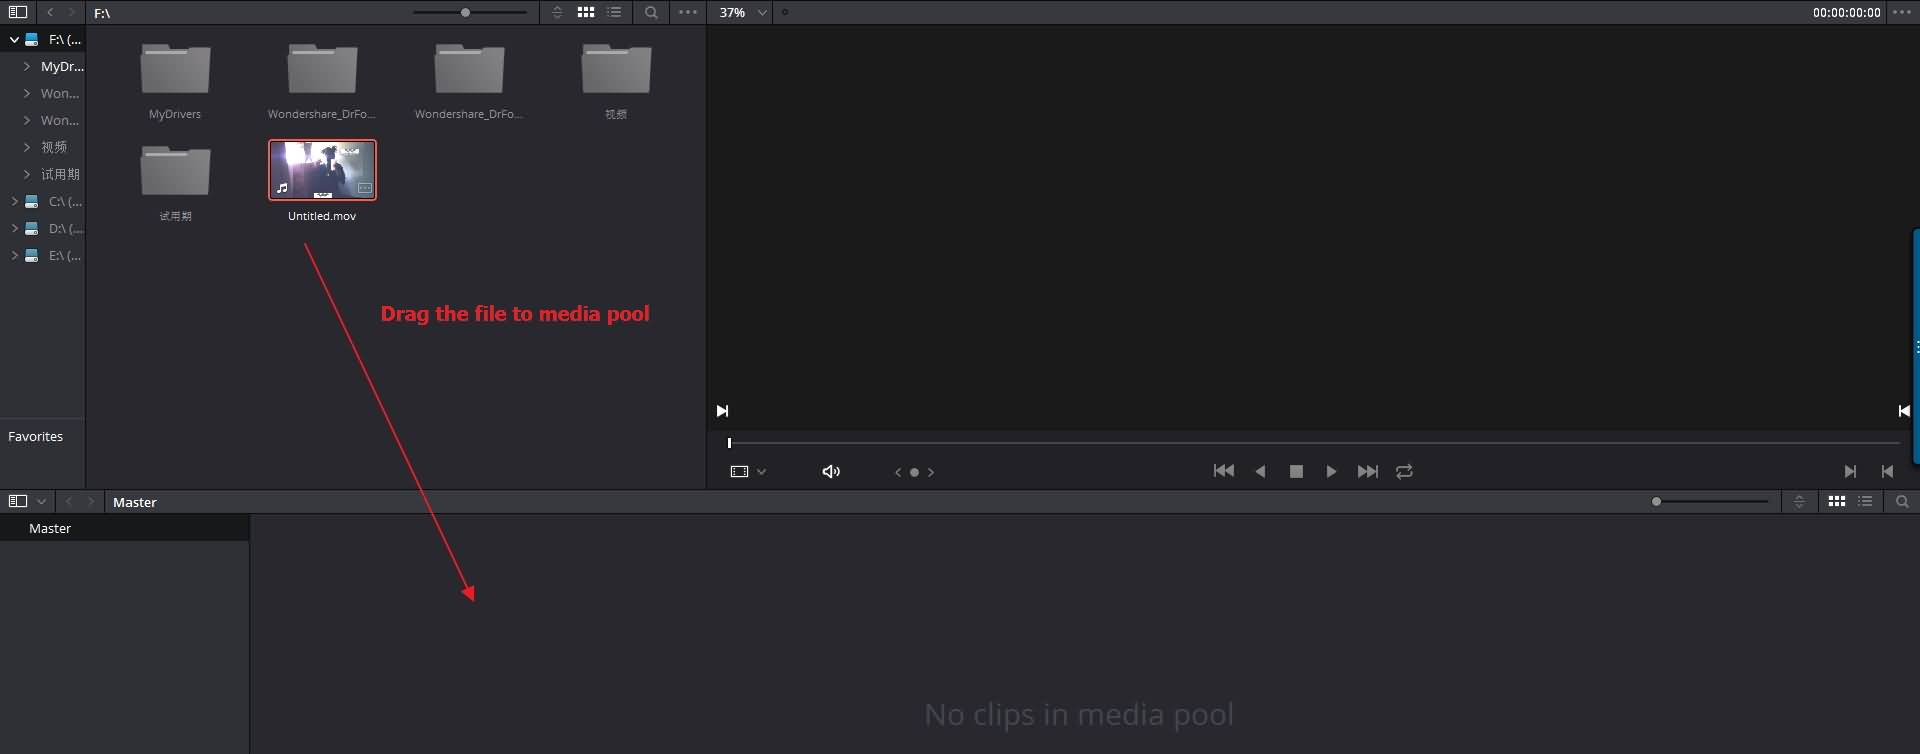
Step 2: Search for your desired files in the "Media Storage Browser", the viewer window will help you to preview all selections.
Step 3: Now select your required file and simply drag and drop the file from the Media Browser window to the "Media Pool".
Now, you have successfully imported video to DaVinci Resolve editor. You could then do further editing work to the imported video files.
Part 4: How to Convert Video to Davinci Resolve Video Formats
As mentioned above, DaVinci Resolve video editor only accepts formats and codecs in QuickTime, AVI, R3D, MXF, Prores, DNxHD, MXF, DPX, CIN, EXR, etc. What should you do if your files are not saved in these formats and codecs? Don’t worry. Leawo Video Converter would help you finish the conversion.
Leawo Video Converter is a professional video converter and audio converter combo software program that could help you convert video and audio files between hundreds of formats like MP4, AVI, FLV, MOV, MP3, AAC, etc. When acting as a DaVinci Resolve video converter, it could convert video to DaVinci Resolve supported file formats like AVI, QuickTime, etc. Therefore you could freely import video to DaVinci Resolve editor for editing.
Download and install Leawo Video Converter on your computer first. And then follow the below steps to learn how to convert video to DaVinci Resolve supported formats.
Step 1: Open Video Converter
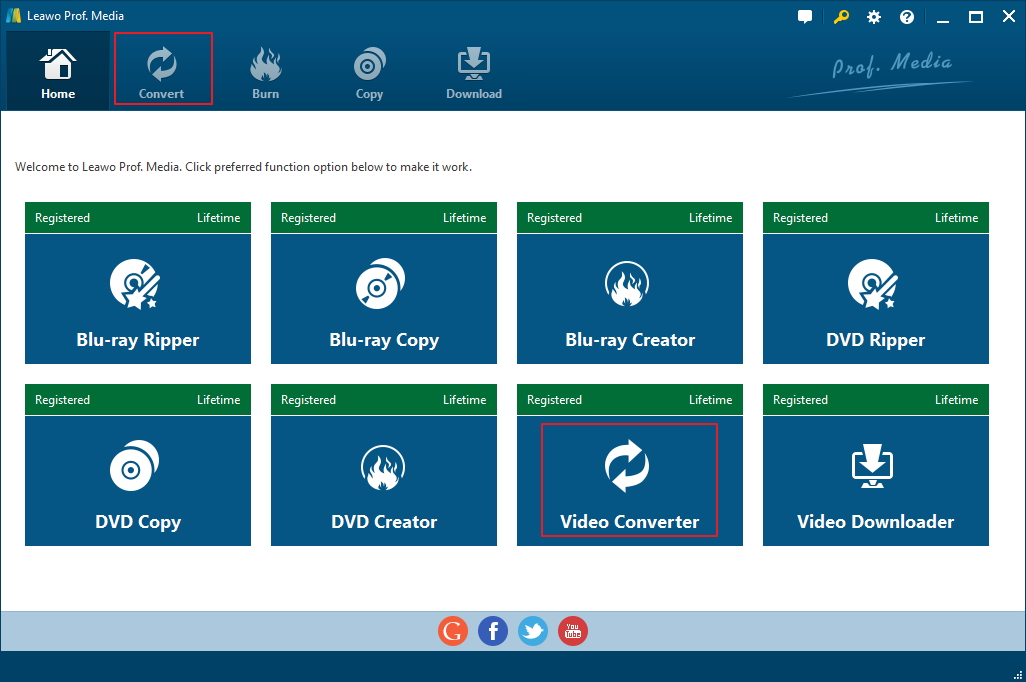
After downloading and installing, you will find that Leawo Video Converter is actually a function module of Leawo Prof. Media. On the main interface of Leawo Prof. Media, click the “Video Converter” option.
Step 2: Add source video files
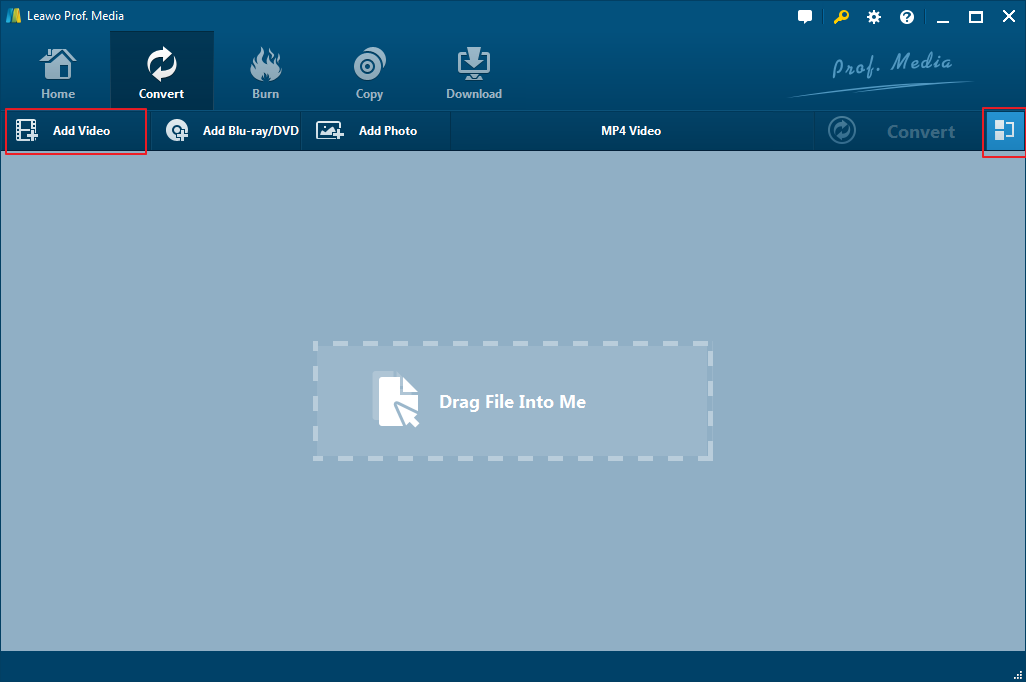
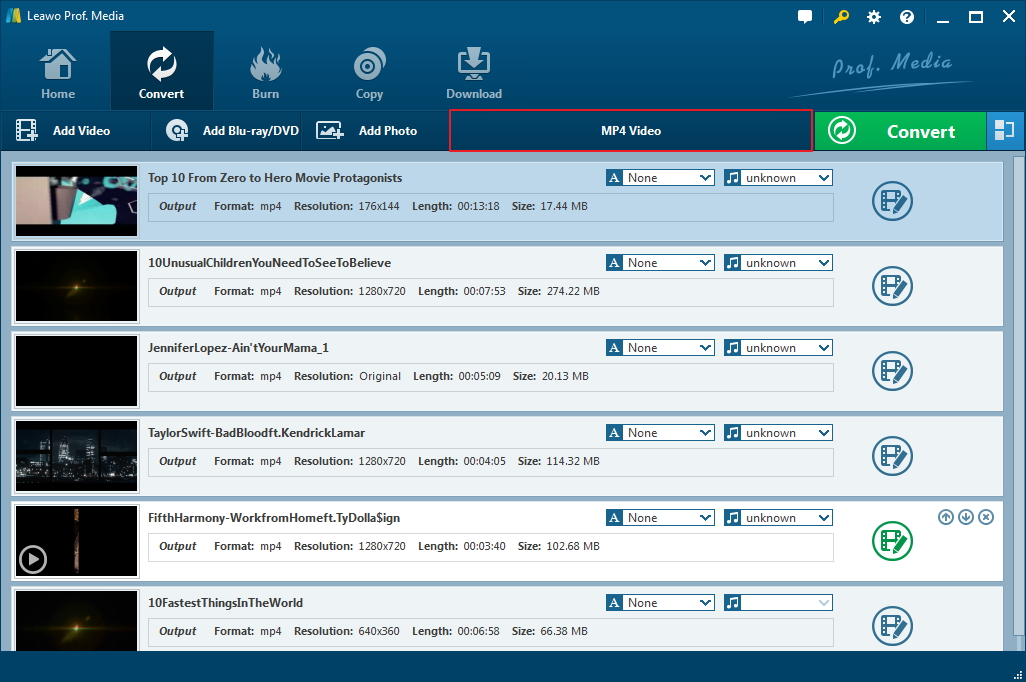
Click the "Add Video" button to browse and add video files or video folder from local drive. You could also directly drag and drop source video files into this program. It supports batch conversion, therefore you could add multiple videos at a time.
Step 3: Choose output format
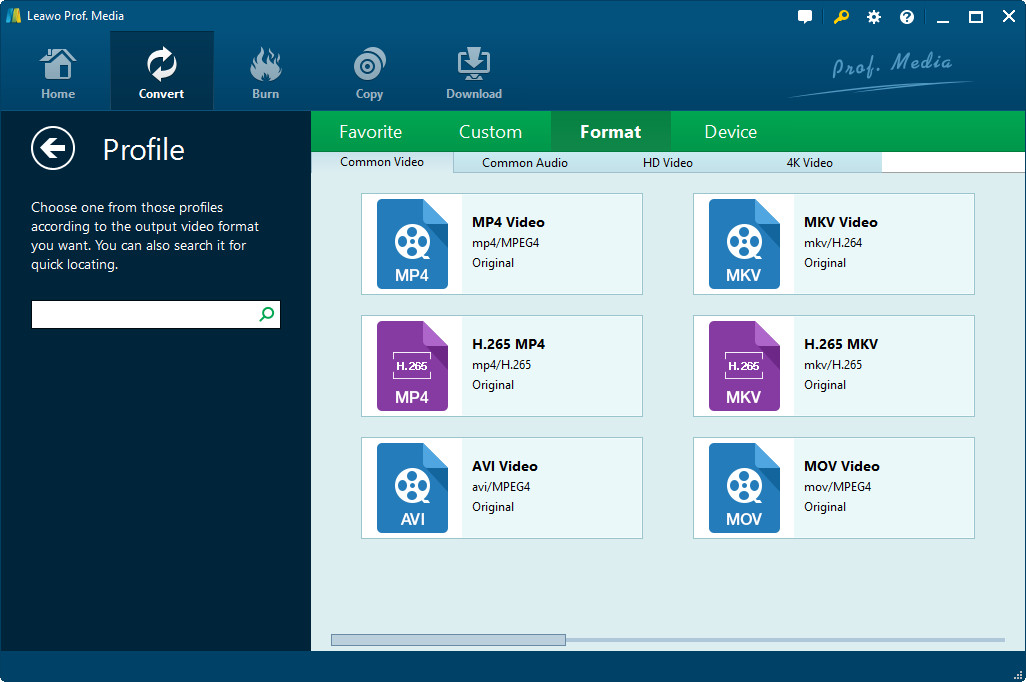
Click the button next to the “Add Photo” button and then on the drop-down panel select “Change” option to enter the “Profile” panel.
On the “Profile” panel, choose output format as output format from either “Format” or “Device” group. Since you need to convert video to DaVinci Resolve supported formats, you could choose “AVI Video” from “Format” group.
Step 4: Edit video and audio parameters
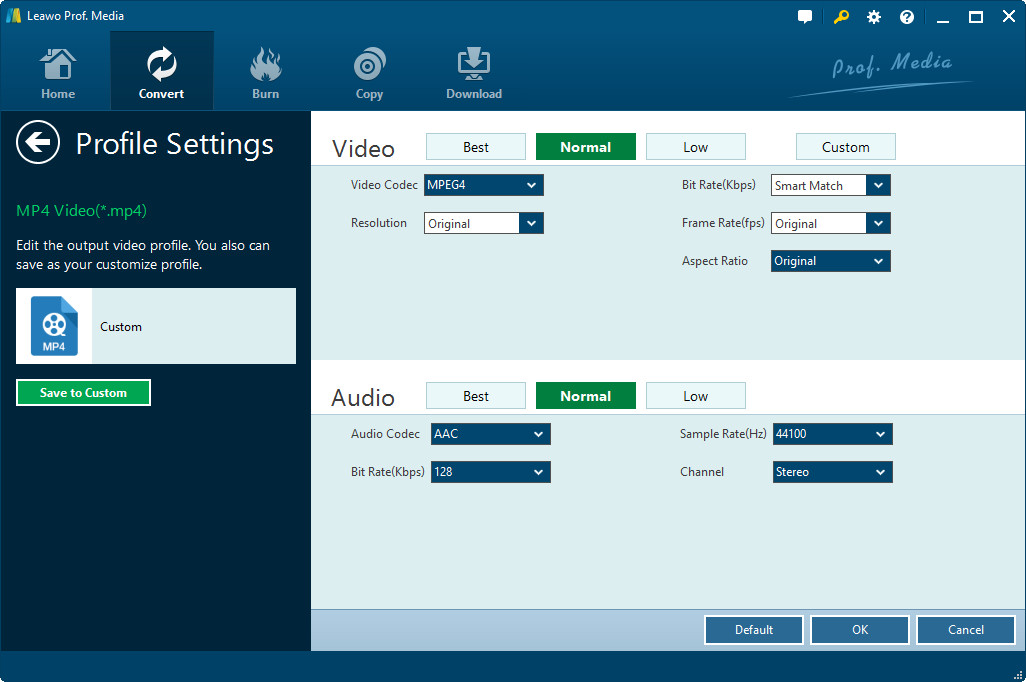
Click the button next to the "Add Photo" button and then choose "Edit" option to check if the video codec is right for DaVinci Resolve editor. On the popup "Profile Settings" panel, you could adjust video quality, video bit rate, video resolution, frame rate, audio quality, audio bit rate, etc. Select DaVinci Resolve compatible video codec (see above) in the "Video Codec" box.
Step 5: Edit video (optional)
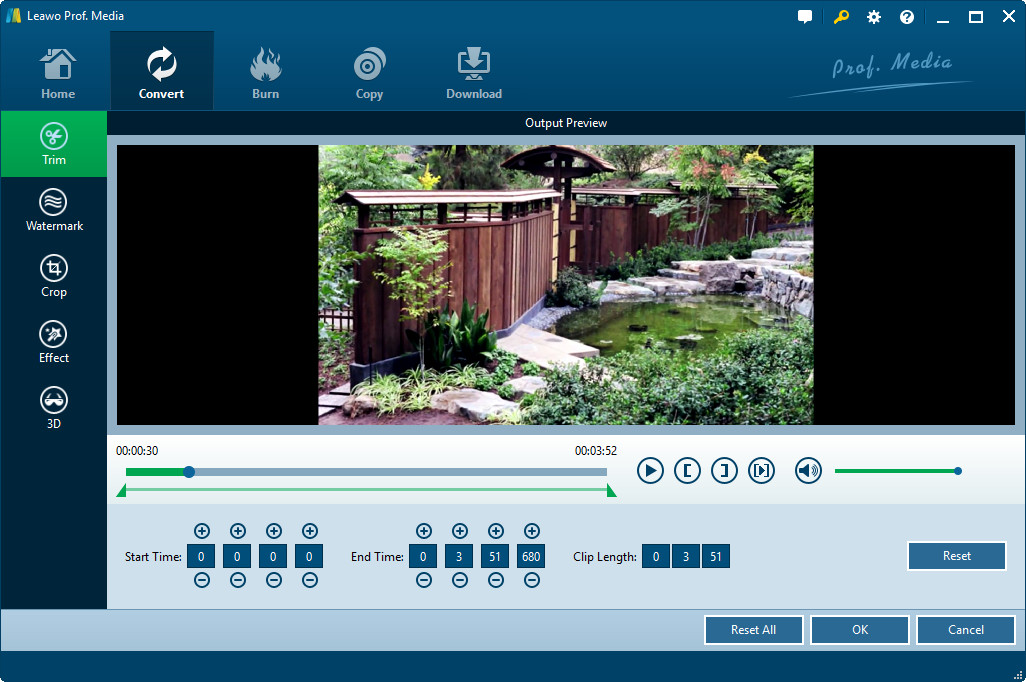
Leawo Video Converter offers a built-in video editor that enables you to trim video length, crop video size, etc. You could then further make the file size smaller. You could trim video length to separate a long video into several short clips, crop video size to remove black margin, etc.
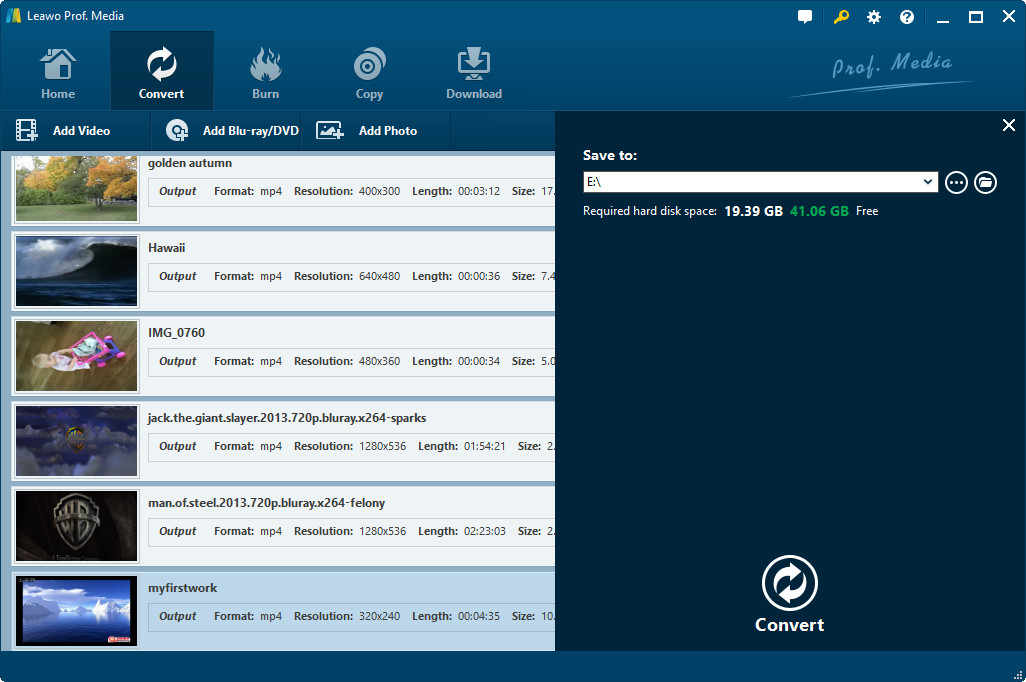
Step 6: Set output directory
After editing, click “OK” button to return to the main interface. Then click the big green “Convert” button to set output directory in the “Save to” box.
Step 7: Convert video to DaVinci Resolve supported formats
Finally, click the bottom “Convert” button on the sidebar to start to converting videos.
After converting, the videos now would be DaVinci Resolve compatible. You could then freely import these videos to DaVinci Resolve video editor for editing.


 Sep. 08, 2021 by