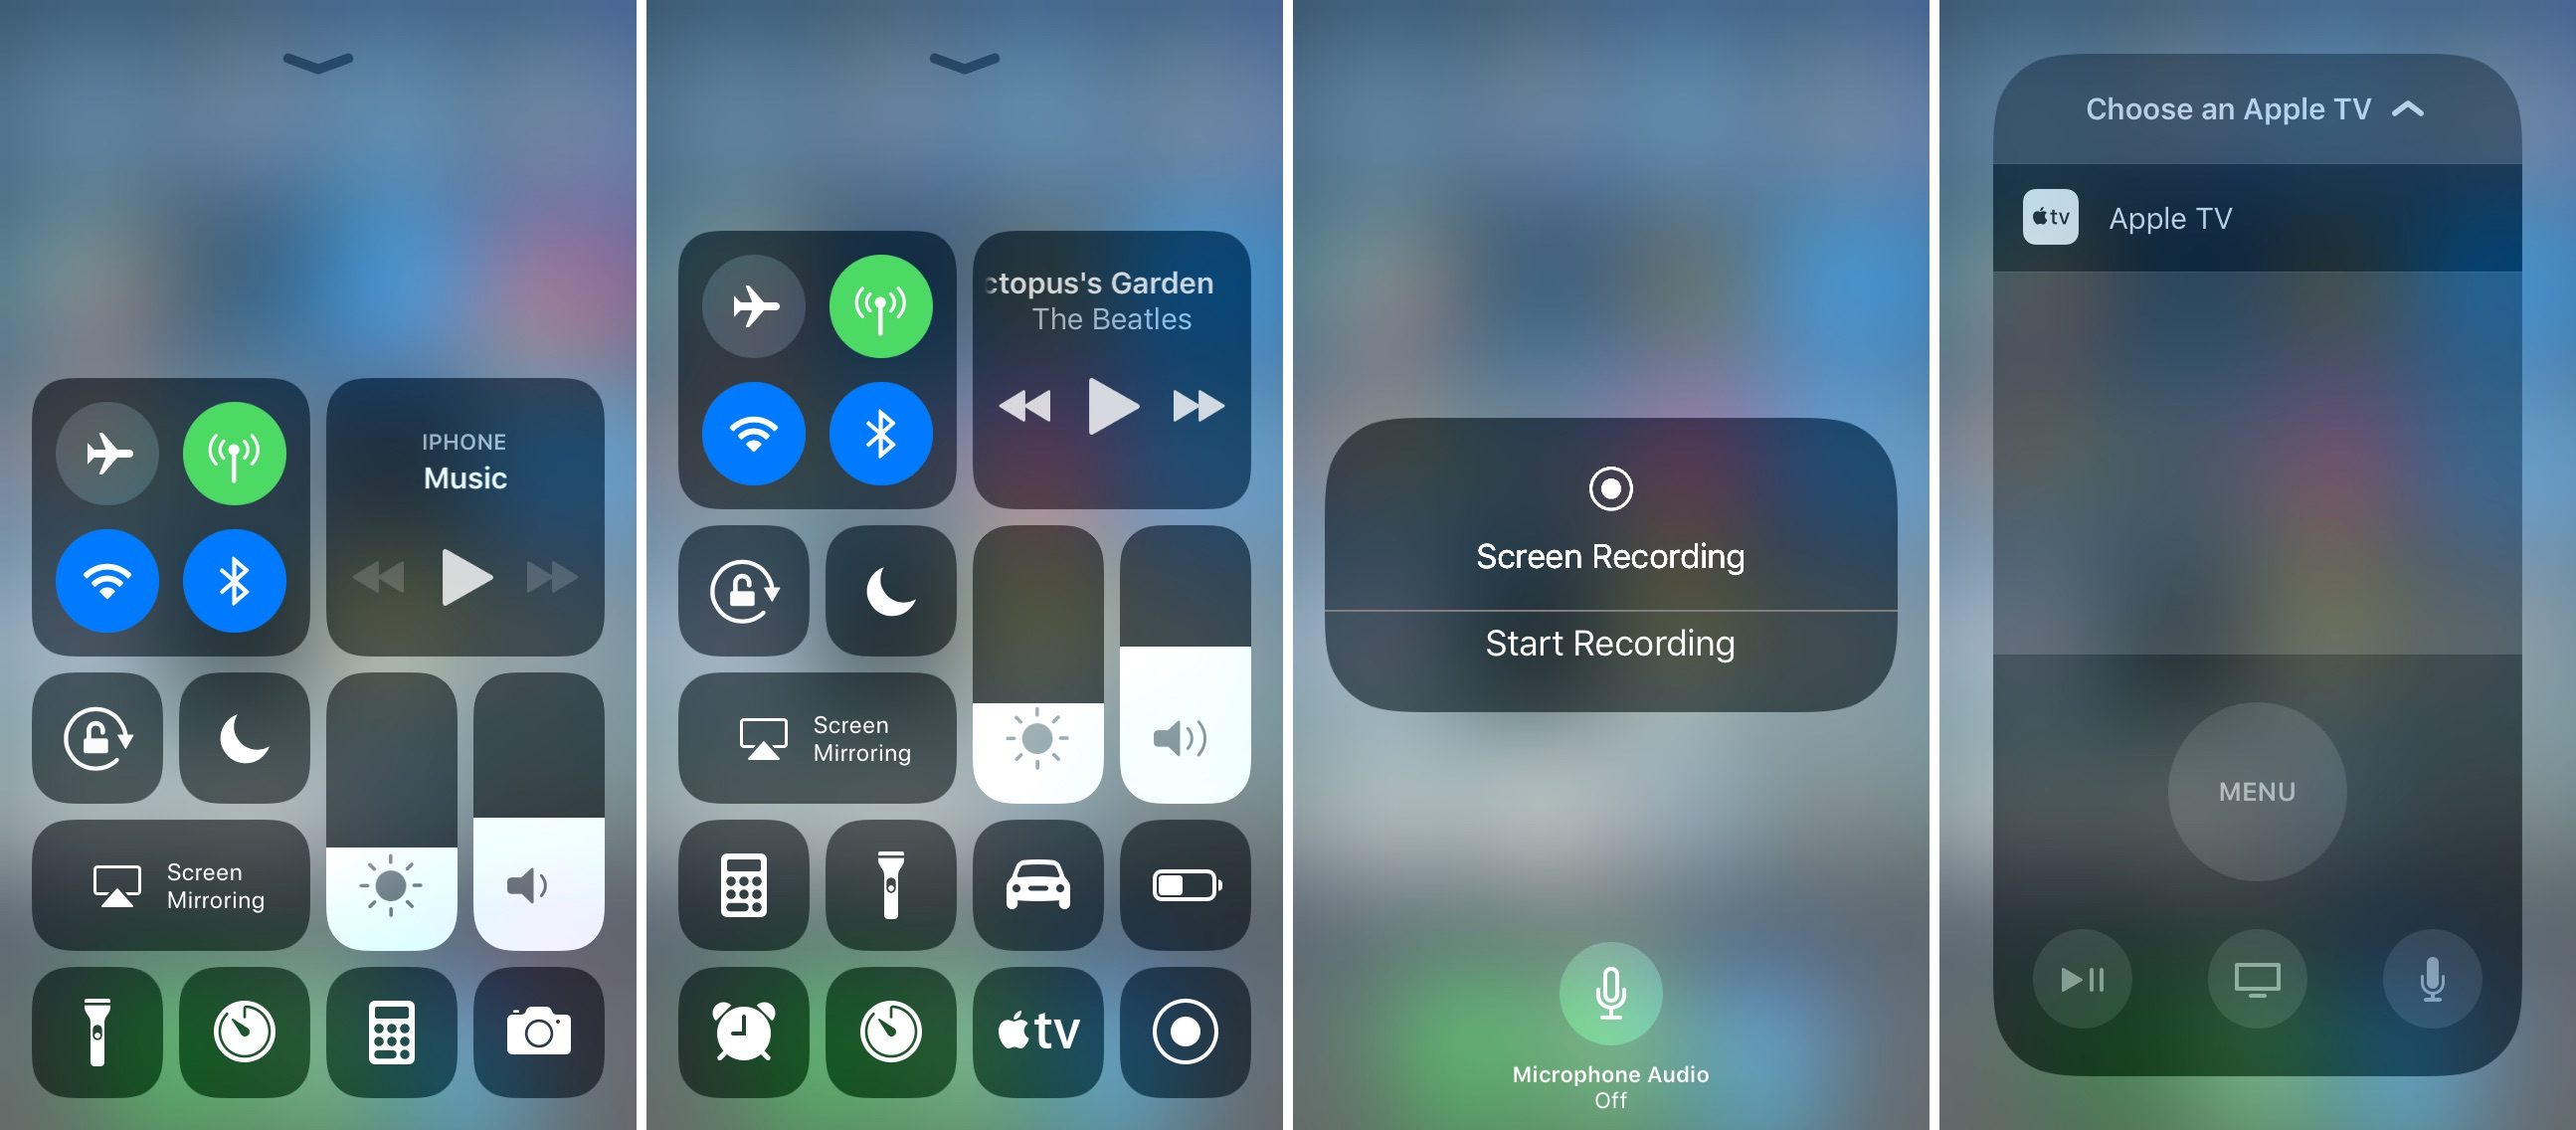
If you are still using iOS 10 on your iPhone or iPad, you should consider updating to iOS 11 because it’s got a lot of new features that makes it way more user friendly than iOS 10. For example, you would find the iOS 11 control center to be completely different from the one you find in iOS 10. Those iOS 11 control center icons, background are totally different. It’s also more user-friendly than ever before. Here are several improvements on the iOS 11 control center over iOS 10.
1. The iOS 11 Control Center is now customizable
On iOS 10, you can’t customize the control center. The icons on the control center in iOS 10 are limited and all of them are set. You can only get access to limited features and settings in the control center and you can’t change them. But on iOS 11, it's a whole new story.
Now on iOS 11, Apple added a few new shortcuts and you get to choose which of them to show in the Control Center. But several icons in the Control Center are still fixed. But that’s no problem because they are there for a good reason. They are all frequently-used features.
The fixed options include: Airplane mode, cellular, Wi-Fi, Bluetooth, music playback, screen orientation, Do Not Disturb, screen mirroring, screen brightness, and volume controls.
Customizable options include: Accessibility shortcuts, Alarm, Apple TV Remote, Calculator, Camera, Do Not Disturb While Driving, Flashlight, Guided Access, Home app, Low Power Mode, Magnifier, Notes, Screen Recording, Stopwatch, Text Size, Timer and Voice Memos.
These fixed options stay on top of the customizable options.
How to Customize the Control Center on iOS 11
For people who are not familiar with the control center on iOS 11, here’s how to customize it.
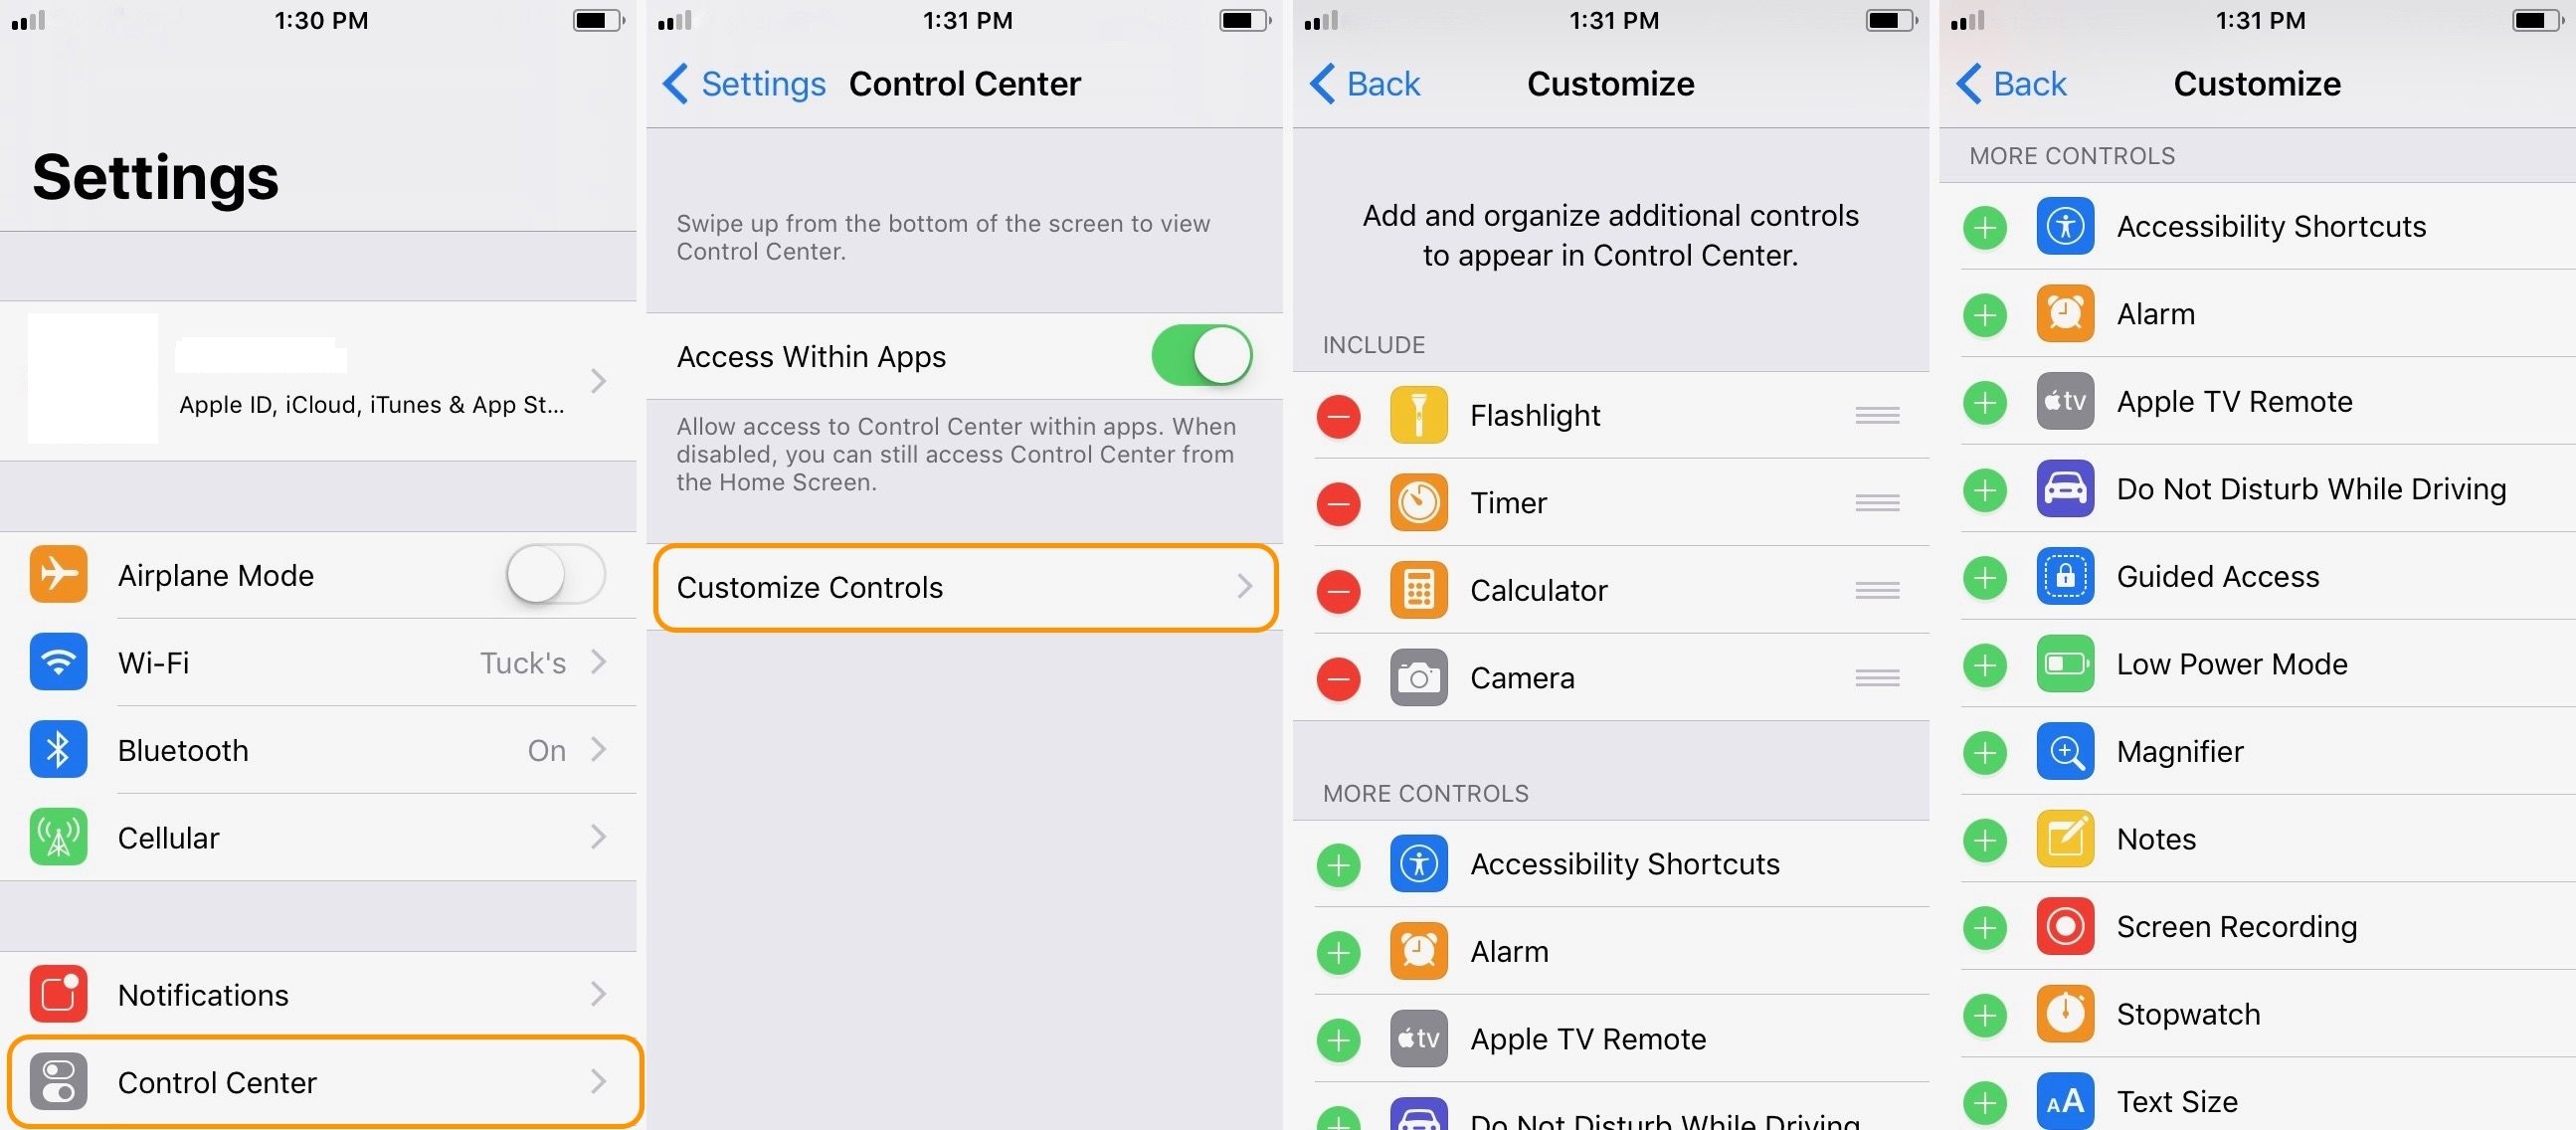
On iOS 11, customize control center by going to Settings>Control Center>Customize. Under INCLUDE, tap and hold the symbol on the right of every option to move it to the ideal position. You can also remove an option from the control center by tapping on the red button on the left. Under MORE CONTROLS, tap on the green button on the left to add an option to the control center.
2. More options added to the iOS 11 Control Center
Now when you open the control center, it’ll take up the whole screen. And that gives us more space to put more icons on it. The iOS 11 control center offers users with more options and shortcuts to different features and settings. For example, people have been longing to have the cellular data switch on the control center and Apple’s finally making that happen in iOS 11. And that’s not the only surprise you’ll find in the control center. One important new feature in iOS 11 is the new built-in screen recorder. You can use it to record your screen easily and you can add the shortcut of it to the control center and access this feature right in the control center.
Here are all the new icons you can add to the control center: accessibility shortcuts, alarm, Apple TV Remote, Do Not Disturb While Driving, Guided Access, Home app, low power mode, magnifier, notes, screen recording, stopwatch, text size, and voice memos.
If you just updated to iOS 11, here are several useful tips you might need when getting used to the new system: how to record screen on iOS 11, how to turn on/off auto brightness on iOS 11, how to use dark mode on iOS 11.
If you are still using an old version of iOS, I would suggest that you update to iOS 11 as it's got a lot of new and useful features.
Before you start to update to iOS 11, be sure to back up your iDevice first to prevent data loss, which happens at times during system update. If you did find signs of data loss after the update, try using a third party data recovery program to help you get back your lost data on your iDevice.
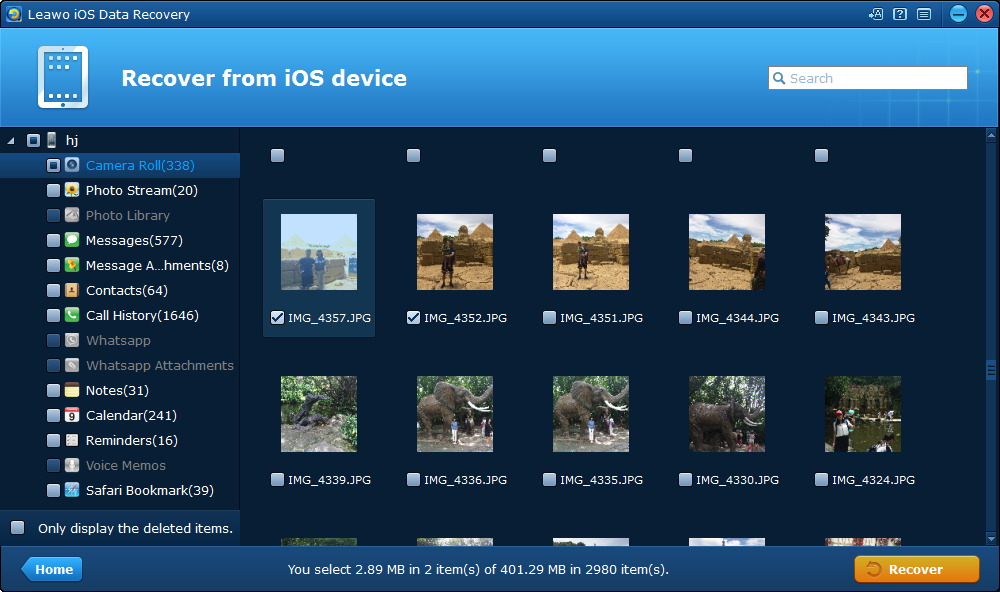
Here's a program to help you get back your lost data: Leawo iOS Data Recovery. You can use it to recover data from your iOS device easily. No matter if the data are deleted or lost during update, it'll be able to help you get them back. Here’s how to use it.
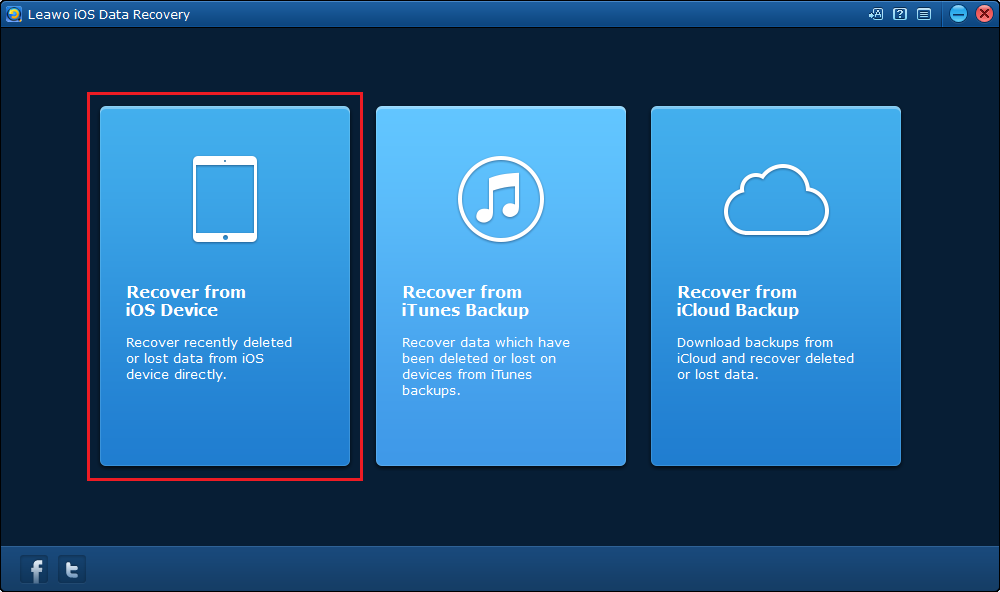
1. Open the program on your computer. Click on the first option from the left:Recover from iOS Device.
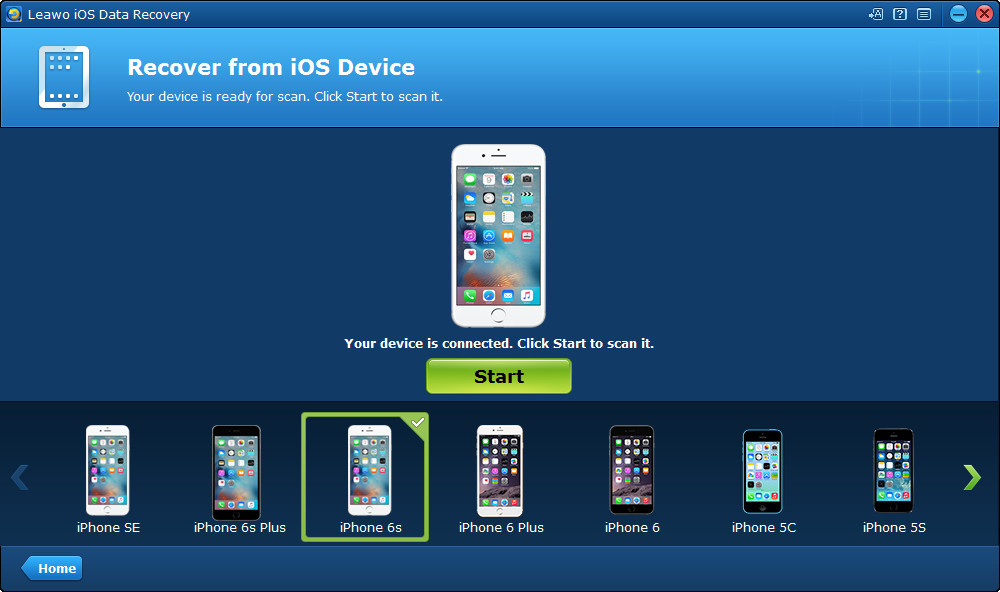
2. Plug your iDevice to your computer, and then click the Start button in the center. The program will start to scan your iDevice.
3. After the scan, enable Display deleted items only and the program will only show you the files missing on your iDevice. Select the file you want to recover and click on the orange Recover button.
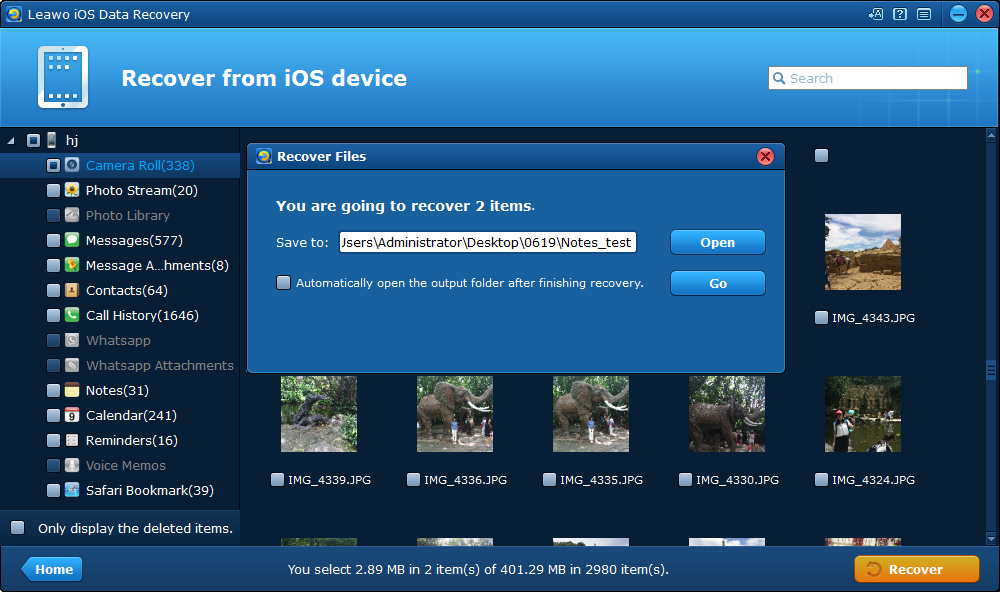
4. Next, set the output directory for the files you are recovering by clicking the Open button. And start the recovery by clicking the Go button.
Some users have reported that their iDevice became slower after updating to iOS 11, if that’s a deal breaker to you, then you should think it through before updating to iOS 11. But if that doesn’t bother you, you should totally give iOS 11 a try.

