“Hi, do you know how I can create a bootable USB drive? I just downloaded the Windows 10 OS in ISO image file and would like to install it on my computer. But the problem is that I don’t know how I can create a bootable USB drive of the Windows 10 ISO image file for auto installation when I insert it to the USB port. Can you please help me burn a bootable USB drive? Appreciate to any advice.”
In the past, Microsoft Windows was installed by disc, CD- or DVD-ROM, or the floppy disc – and optical data carriers are also gradually disappearing from the scene. However, what if you have no disc recorder drive on your computer? You could actually create a bootable USB drive, using it to run the OS setup program, just like a CD or DVD drive for OS installation. It’s quicker and more compact that an optical data carrier, and so is perfectly suited for setting up (or resetting) a system – there are also many other possible uses.
In this guide, we would like to share several ways to create a bootable USB drive for OS installation.
Part 1: Why You Need a Bootable USB Drive?
There are quite a few reasons for you to create a bootable USB drive. Firstly, due to various causes such as a virus, serious system failure, defective hard drive, or partition problem, your computer can’t boot itself normally. In such case, using a bootable USB drive to reboot your computer or even reinstall your computer system would be a standard solution.
Secondly, your computer has been overloaded and performs badly in response. In such case, a bootable USB drive would be useful to release the pressure of your computer and improve the computer performance by reinstalling the computer OS. Even if no such PC emergency is present, it’s a good idea to have a Windows image for data backup on a USB-capable storage medium (could also be an external hard drive) on hand.
You can also use a bootable USB to upgrade Windows 7 or 8 to Windows 10 if a previously automatic upgrade doesn’t function correctly. The drive also serves as a “clean” reinstallation of the operating system if it’s become too slow as a result of accumulated garbage.
Experienced computer experts and IT professionals also like to use a bootable USB as a “portable operating system” (the concept is known as “Windows2Go” for Microsoft). With this, you can use your preferred Windows version with all your favorite tools and personal data on foreign computers without having to fuss with the operating system already installed (regardless of whether it’s Windows or something else).
Part 2: How to Create a Bootable USB Drive on Windows?
To create a bootable USB drive manually, you can use the Command Prompt as a Windows default program. To create a bootable USB drive as a Windows installation media, we require at least 4 GB for minimum capacity. Larger capacity is better.
Here are step by step to create a bootable USB drive as the Windows installation media.
- -Insert your USB flash drive to your running computer. As the first step, we need to run Command Prompt as administrator. To do this, we need to find cmd by typing 'cmd' in the search box on Windows Start Menu. After search result for 'cmd' appears, right click on it and select "Run as administrator".
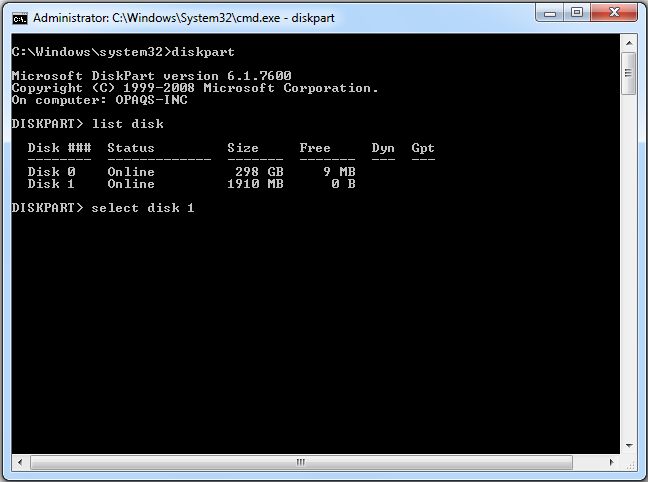
- -Type 'diskpart' on Command Prompt (without quotes) and hit Enter. Wait for a while until the DISKPART program run.
- -Type 'list disk' to view active disks on your computer and hit Enter. There would be seen that the active disks shown as Disk 0 for hard drive and Disk 1 for your USB flashdrive with its total capacity.
- -Type 'select disk 1' to determine that disk 1 would be processed in the next step then hit Enter.
- -Type 'clean' and hit Enter to remove all of data in the drive.
- -Type 'create partition primary' and hit Enter. Creating a primary partition and further recognized by Windows as 'partition 1'.
- -Type 'select partition 1' an hit Enter. Choosing the 'partition 1' for setting up it as an active partition.
- -Type 'active' and hit Enter. Activating current partition.
- -Type 'format fs=ntfs quick' and hit Enter. Formatting current partition as NTFS file system quickly.
- -Type 'exit' and hit Enter. Leaving DISKPART program but don't close the Command Prompt instead. We would still need it for next process.
- -By default, Command Prompt's active directory for Administrator permission is on C:\Windows\System32>. We will navigate Command Prompt to set on DVD (F:) as its active directory. Just type 'f:' then hit Enter, and the active directory changed to F:.
- -Type 'cd boot' and hit Enter. Active directory changed to F:\boot>.
- -Type 'bootsect /nt60 d:' and hit Enter. Creating boot sector on D: drive (USB flash drive).
- -Type 'exit' and hit Enter to close the Command Prompt. Until this step we have made a bootable USB drive sucessfully, and the flash drive is ready to be used as a boot media.
To install Windows from a bootable USB drive, you just need to copy the whole installation files contained on the DVD installer to flash drive. To do this, open the Command Prompt as in previous steps. Once it opens, type 'xcopy f: \ *. * d: \ / E / H / F' and then press Enter. Wait until all the files in the DVD installer copied to the flash drive. Now bootable USB drive is ready to be used for installing Windows from flash drive and you're done.
Part 3: Create a Bootable USB Drive with Rufus
There are many methods to make a Bootable USB flash drive. But Rufus is the easiest one as it doesn't require doing difficult steps with command prompt or downloading complicated software.
Just follow the below steps and you are good to go.
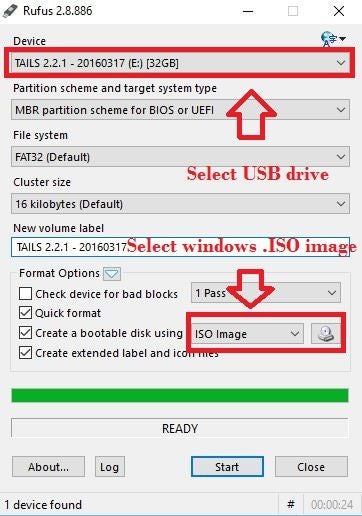
- Open Rufus Bootable USB making tool.
- Select the Windows .ISO image next to the “Create a bootable disk using” box.
- Select the USB drive which you want to make Bootable under the “Device” box.
- Click on “Start” button to start burning bootable USB drive.
- Wait for the process to finish
See, it’s really easy thing to create a bootable USB drive with Rufus.
Part 4: Create a Bootable USB Drive with Ubuntu
You could also create a bootable USB drive with Ubuntu. With a bootable Ubuntu USB stick, you can install or upgrade Ubuntu, test out the Ubuntu desktop experience without touching your PC configuration, boot into Ubuntu on a borrowed machine or from an internet café, use tools installed by default on the USB stick to repair or fix a broken configuration.
It’s extremely easy to create an Ubuntu USB drive stick:
- Insert your USB stick (select ‘Do nothing’ if prompted by Ubuntu)
- On Ubuntu 18.04 and later, use the bottom left icon to open ‘Show Applications’
- In older versions of Ubuntu, use the top left icon to open the dash
- Use the search field to look for Startup Disk Creator
- Select Startup Disk Creator from the results to launch the application
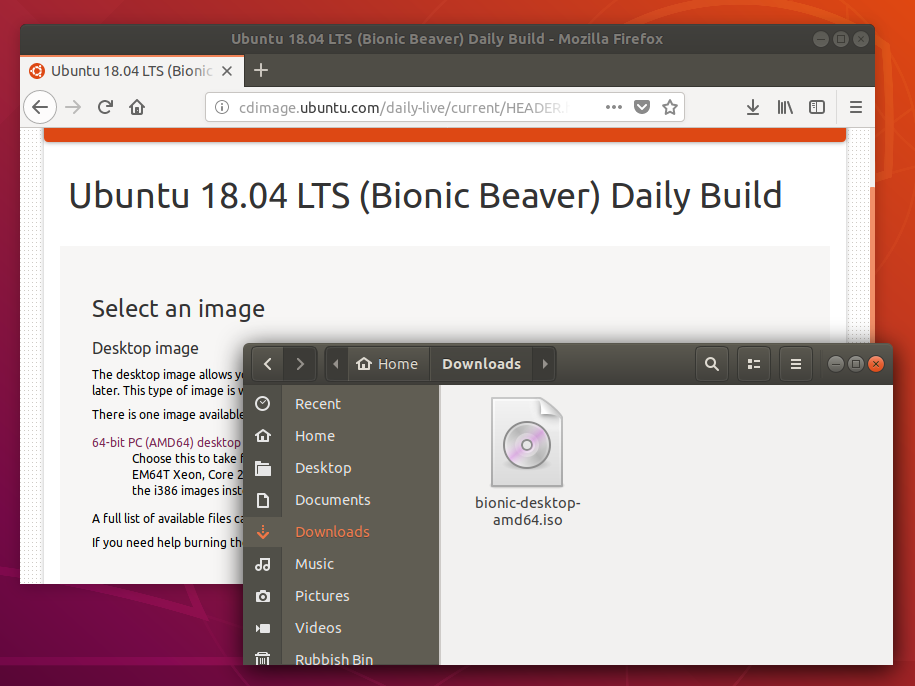
- When launched, Startup Disk Creator will look for the ISO files in your Downloads folder, as well as any attached USB storage it can write to.
- Click Make Startup Disk to start the process.
- Before making any permanent changes, you will be asked to confirm the USB device you’ve chosen is correct. This is important because any data currently stored on this device will be destroyed.
- After confirming, the write process will start and a progress bar appears.
Then, you only need to insert the bootable Ubuntu USB drive stick to your computer for uses.
Extension: Easiest Way to Burn Video to ISO File for USB Drive - Leawo DVD Creator
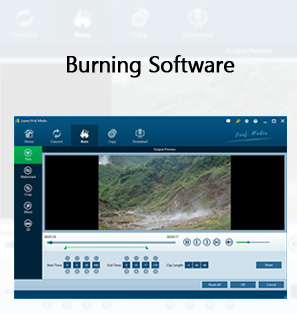
The above solutions are all about burning bootable USB drives for Windows and Ubuntu computers. However, sometimes we also need to burn videos to ISO files for saving on USB drive. In such case, you need a professional video to ISO burner tool, while Leawo DVD Creator is the best ISO burner for USB drive you could ever get. As a professional DVD burner software tool, Leawo DVD Creator could not only help you convert and burn video files more than 180+ formats to DVD disc, folder and/or ISO image files like MP4 to DVD, MKV to DVD, WMV to DVD, MOV to DVD, YouTube to DVD, etc., but also burn ISO file to USB for either backup or safekeeping.
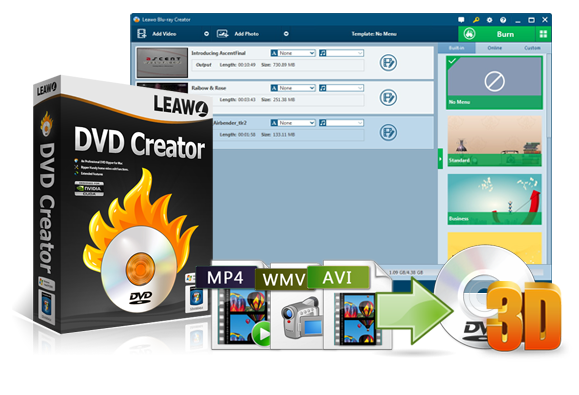
DVD Creator
☉ Convert videos like MP4, AVI, MKV to DVD format fast.
☉ Create DVD-5, DVD-9 disc, folder or ISO image without quality loss.
☉ 1-click operation to create photo slideshows and burn to DVD.
☉ Easily editable effects, 2D to 3D conversion support.
☉ Built-in menu templates and edit disc menu with personal preferences.
The main features of Leawo DVD Creator include:
- Burn videos in various formats to DVD disc, folder and/or ISO image files.
- Burn photos into DVD slideshow video and photo slideshow editable.
- Edit videos before burning to DVD content: trim, crop, add image or text watermark, adjust effect, apply 3D effect, etc.
- Choose disc menu from preset menu templates, and even design disc menu.
- Create either NTSC or PAL DVD content according to personal needs.
- Burn ISO image files to DVD disc in one click.
Among all these solutions, the first 3 solutions are helpful for you to create a bootable USB drive to reinstall computer system or reboot your computer. With Leawo DVD Creator, you could create playable DVD content and save in various places like computer hard drive, USB drive or disc.

