If you have saved lots of photos in the photo albums, you can transfer iPhone photo album to PC to make space for other files you want to store in your iPhone. The 5 ways in this guidance will direct you to solve how to transfer photo albums from iPhone to computer perfectly. Now, let’s begin to read the following contents to help you in case you need.
Here are many ways to help you to organize your photos:
Transfer Photos from iPod to Computer Library
How to Edit Photos on iPhone?
How to Import Photos from PC to iPod
- Part 1: How to Transfer Photo Albums from iPhone to Computer with Windows Explorer
- Part 2: How to Transfer Photo Albums from iPhone to PC with iCloud
- Part 3: How to Transfer Photo Albums from iPhone to PC with iCloud Drive
- Part 4: How to Transfer iPhone Photo Album to PC with Dropbox
- Part 5: How to Transfer Photo Albums from iPhone to PC with iTransfer
Part 1: How to Transfer Photo Albums from iPhone to Computer with Windows Explorer
Windows Explorer is a direct method to help you to transfer iPhone photo album to PC. This solution is quite simple to handle. The detailed steps are as follows.
1. Pick up your iPhone and use a USB cable to plug it into your PC. Click “Trust” on iPhone.
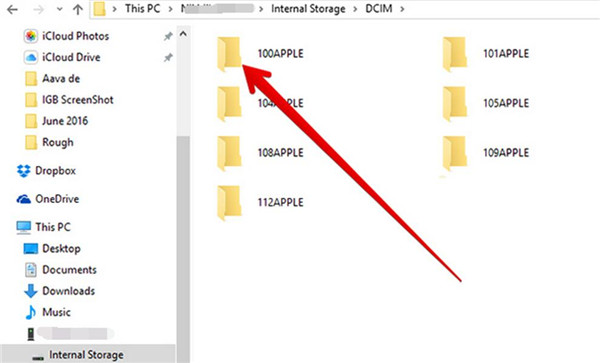
2. On computer, you need to open “Windows Explorer”. Afterwards, you need to go to “iPhone icon > Internal Storage > DCIM”. Your photo albums will show in this folder. Then you can copy and paste them to a location on your computer. Thus the problem of how to transfer photo albums from iPhone to computer is solved perfectly.
If you do not want to use Windows Explore to assist you to deal with how to transfer photo albums from iPhone to PC, you can continue to read other methods in this tutorial.
Part 2: How to Transfer Photo Albums from iPhone to PC with iCloud
iCloud can be used to save various files, such as photo albums, notes, contacts and so on. You can also take advantage of it to transfer iPhone photo album to PC. The following introductions will display you how to realize your goal.
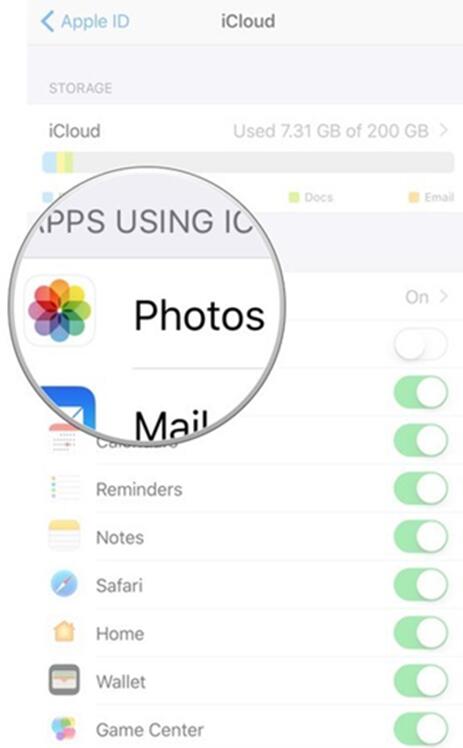
1. On iPhone, click to open “Settings” and then type in your “Name/Apple ID”. Afterwards, you need to click on “iCloud > Photos” to enable the “iCloud Photo Library”. When your iPhone is connected to Wi-Fi, your iPhone photo albums will be synced to iCloud automatically.
2. On your computer, open a web browser to log into iCloud.com with the same Apple ID you have just employed on your iPhone. After that, click on the panel of “Photos”, and you will see all photo albums you have synced from your iPhone. Choose one album, such as “All Photos”, to click on. Then you can select all pictures in this album and tap the download button to transfer them to your computer folder.
As for how to transfer photo albums from iPhone to computer, you can use this method. If you do not want to use the web version of iCloud to assist you to solve this problem. You can also use the iCloud Drive program on PC and on iPhone to help you.
Part 3: How to Transfer Photo Albums from iPhone to PC with iCloud Drive
You need first to install iCloud Drive app on your iPhone and computer. To deal with the problem of how to transfer photo albums from iPhone to PC, you can use this effective tool. Now let’s begin to check out the steps to get rid of this problem in detail.
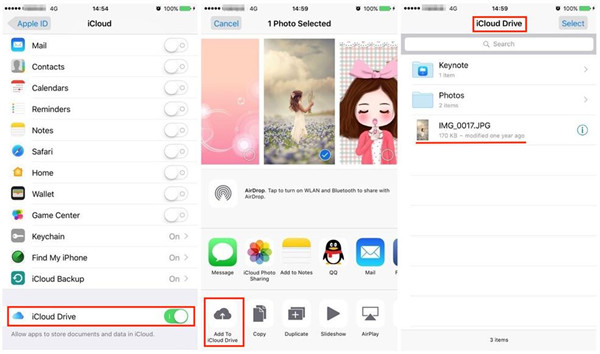
1. On your iPhone, you need to enable the “iCloud Drive” panel by clicking of “Settings > Apple ID > iCloud > iCloud Drive”. Then you need to choose one photo album on your iPhone. After that, click to select all photos in this album, and tap the share button. In the next panel, you need to choose “Add to iCloud Drive”. Thus, the photos in this album will be accessible in your iCloud Drive app.
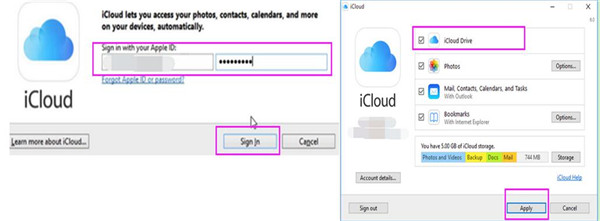
2. On your computer, click to open iCloud for Windows and then log into it with the Apple ID you are using on your iPhone. Afterwards, click on the panel of “iCloud Drive” and choose other necessary features to check. Click on the “Apply” button to confirm your settings.
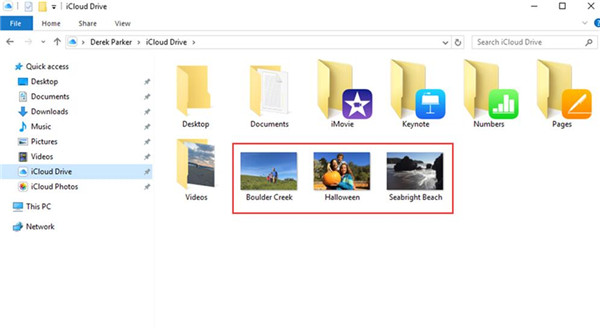
3. You can find the iCloud Drive folder in the File Explorer’s Quick Access List. Relocate the photo album you have just transferred to iCloud Drive space. Then you can copy and paste them to a folder on your computer to finish the process to transfer iPhone photo album to PC.
Note: Permit the verification code on your iPhone when you log into iCloud on computer.
The ways to transfer iPhone photo album to PC are various. The following part will show you how to employ Dropbox to make it.
Part 4: How to Transfer iPhone Photo Album to PC with Dropbox
Dropbox is a good alternative to iCloud. You can use it to create a Dropbox folder on PC and then the folder will sync with your iPhone. You can also upload the files on your iPhone to the space of Dropbox and then download them to your computer folder via Dropbox program. The detailed process is as follows.
1. Open Dropbox software on iPhone and head to the “Uploads” tab. Tap the “+” icon and choose the photo album you want to transfer to your computer. Choose a location to save the photo album on Dropbox app. Wait until the upload process is over.
2. On your computer, run Dropbox program and click on the Dropbox folder. Click on the name of the photo album and copy it to a location on your computer.
This method to send photo album from iPhone to PC is not difficult to handle. If you want to choose a more effective and efficient 3rd-party program to help you, you can continue to read the 5th part of this guidance to check out how to transfer photo albums from iPhone to computer with iTransfer.
Part 5: How to Transfer Photo Albums from iPhone to PC with iTransfer
When you encounter the problem of how to transfer photo albums from iPhone to PC, you can use Leawo iTransfer to assist you. iTransfer is a powerful tool to solve many transfer problems. You can use it to manage files among computers, iTunes and iDevices, such as photos, notes, contacts, songs and etc. As for the detailed steps to send photo album from iPhone to PC, please read the following contents.
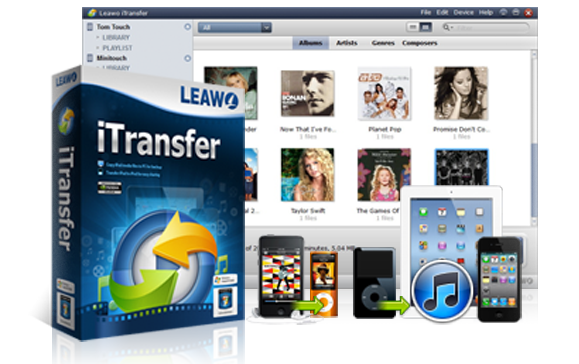
Leawo iTransfer
☉ Transfer files among iOS devices, iTunes and PCs with ease.
☉ Transfer up to 14 kinds of data and files without iTunes.
☉ Support the latest iOS devices like iPhone 7, iPhone 7 Plus, etc.
☉ Play back, view, and delete data and files on iOS devices.
1. Launch iTransfer and Connect iPhone to Computer
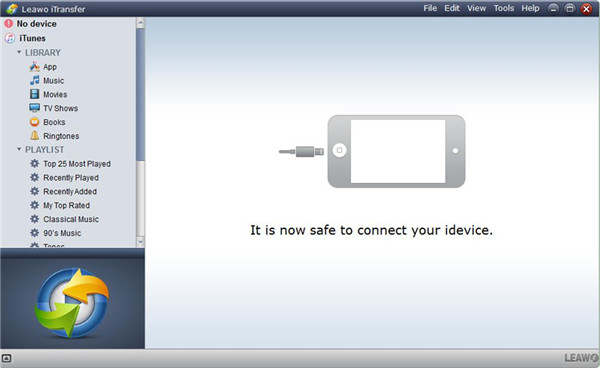
Launch iTransfer on your computer and then connect iPhone to PC. The tool will detect your iPhone information automatically to prepare to send photo album from iPhone to PC.
2. Choose Photo Album to Transfer
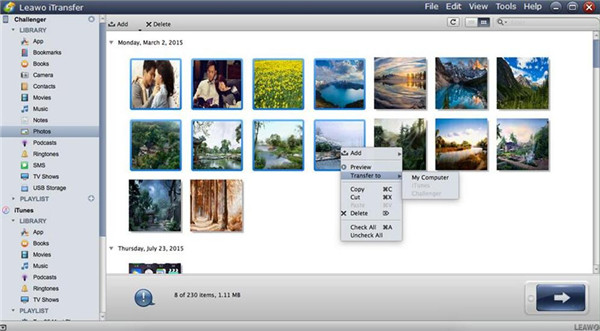
If you would like to send photo album from iPhone to PC with iTransfer, you need to go to click on the iPhone icon. Then you need to click on “LIBRARY > Photos” to check all photo albums on your iPhone in the right part of the interface. Choose the photos in the album that you want to transfer to your computer and right click on one of them. After that, you need to tap “Transfer to > My Computer”. Click the “Change” button to choose a location on your PC to store the transferred photos. In the end, you need to tap “Transfer Now” to initiate the transfer procedure. When this process comes to an end, you will obtain the iPhone photo albums on PC.
This guidance has given you 5 methods to solve how to transfer photo albums from iPhone to computer. You can select one to have a try to help you. I strongly recommend you use iTransfer to send photo album from iPhone to PC, for it is the most professional tool for solving transfer problems.

