iPod touch is one of the greatest creations of Apple, it looks like iPhone but is shorter and thinner than iPhone. Users can get full experience of using iPhone from iPod touch, except for making phone calls. iPod touch has the same Retina display as iPhone, and the iOS that iPod touch uses is powerful and multifunctional. Many people use iPod touch to listen to music, read ebooks and take pictures. Sometimes when we surf the Internet with our iPod touches, we would like to download some favorite pictures using iPod touch over Wi-Fi, and after sometime, we will get tons of photos in the iPod touches. Those pictures takes a lot of storage space of the iPod touch, so it is necessary for users to know how to transfer photos from iPod to computer
- Part 1: Why Do You Want to Transfer Photos from iPod to Computer
- Part 2: Transfer Photos from iPod to Computer with Leawo iTransfer
- Part 3: Transfer Photos from iPod to Computer via Windows Explorer
- Part 4: Transfer Photos from iPod to Computer using iCloud
- Part 5: Transfer Photos from iPod to Computer through AirDrop (Mac only)
Part 1: Why Do You Want to Transfer Photos from iPod to Computer
When talking about why you want to transfer photos from iPad to computer, you may have a lot of reasons. Here we take some as examples:
Part 2: Transfer Photos from iPod to Computer with Leawo iTransfer
iTunes is regarded as the first choice for most Apple users when we want to transfer files to computer. However, when we want to transfer photos from iPod to computer with iTunes, we will get stuck. iTunes is a one-way transfer tool, and it only allows us to transfer files from computer to iPod touch, but never transfer files back. If we sync the iPod touch with iTunes, the software will erase the files on the iPod touch and we won't be able to find the files back.
At this moment, you may need the iPod transfer software to help you solve the problem. Leawo iTransfer is an easy-to-use iPod transfer tool, and it helps on the iPod touch photo transfer issue. Leawo iTransfer can be used for transferring files among iOS devices, iTunes and PCs, and it will never erase files from the devices, so when moving photos from iPod touch to computer, we can try Leawo iTransfer. The following guidance is about how to transfer photos from iPod touch to computer with Leawo iTransfer. And you can free download it to have a try
Run Leawo iTransfer and Connect iPod touch
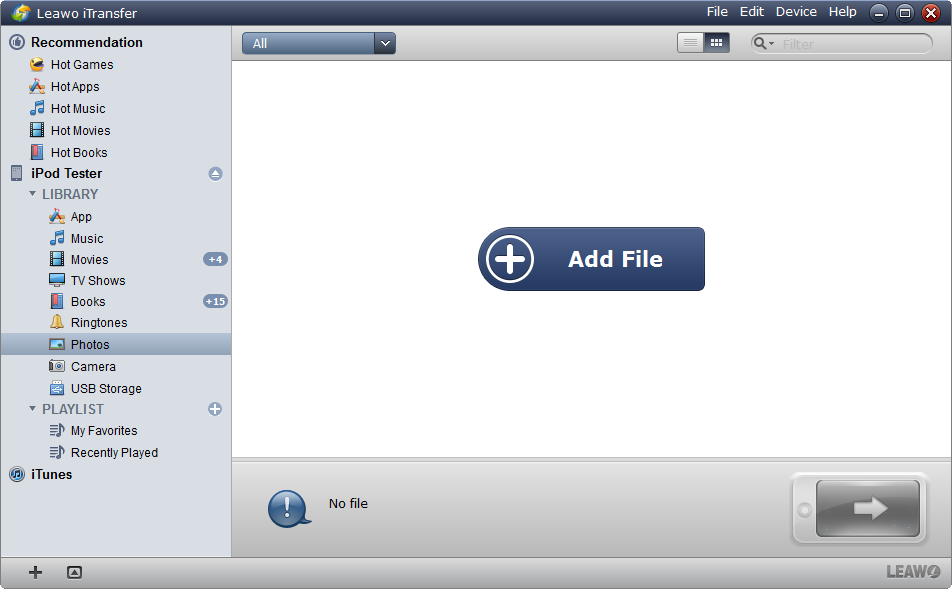
Launch Leawo iTransfer after installing it on your computer. When the software indicates that it is safe to connect the device, plug the iPod touch to computer via the USB cable. The software will recognize the device and detect the files of the iPod touch automatically. Then the iPod touch Libraries will be shown on the left sidebar.
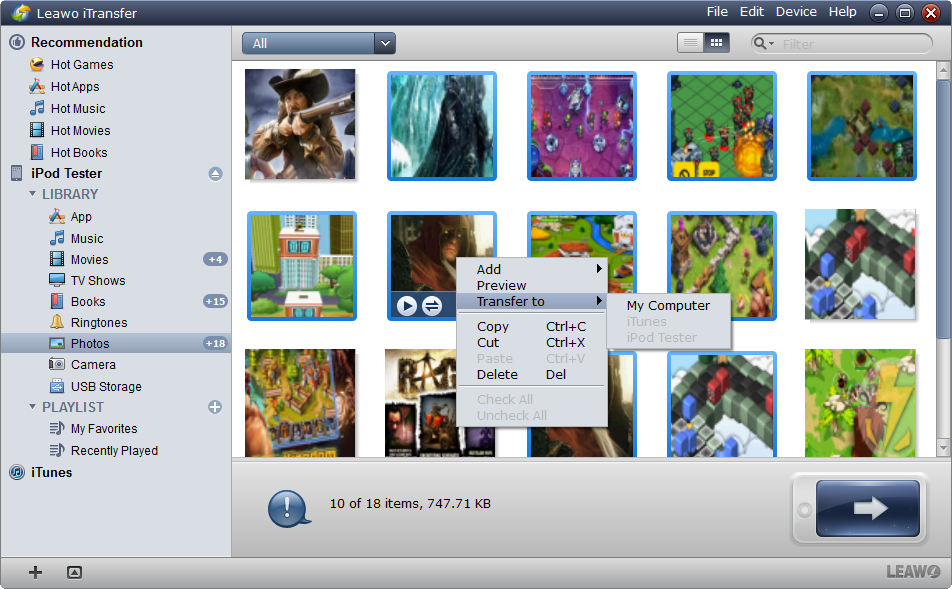
Select Photos
Click "Photos" on the left sidebar and all the photos of your iPod touch will be shown on the right part of the software. Click the transfer button (a right arrow in a dark-blue rectangle) at the right bottom to copy all the photos from iPod touch to computer. Or you can hold Ctrl key and click the photos to choose, and then right click the chosen photos to "Transfer to > My Computer".
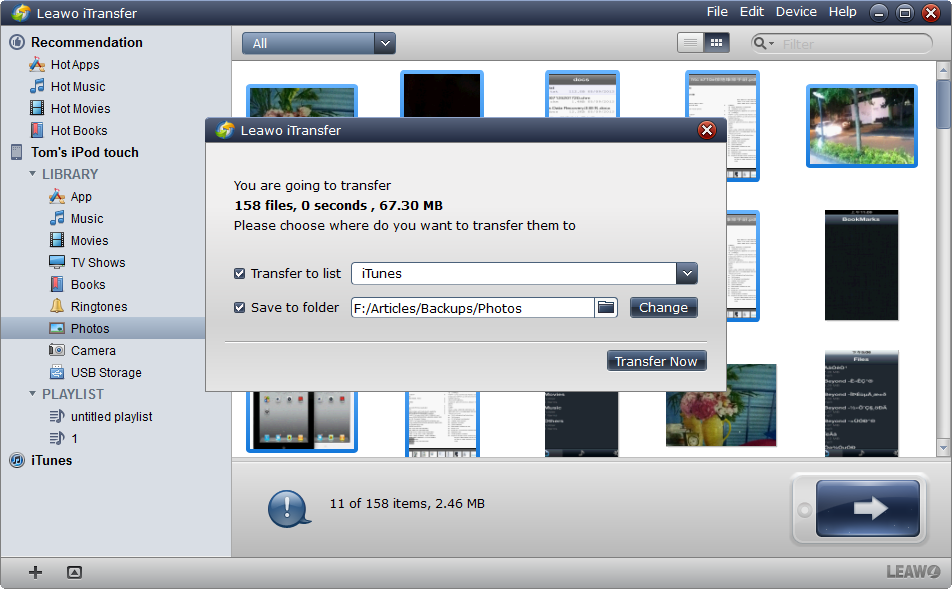
Transfer Settings
After choosing photos, a dialog of transfer settings comes out. You are allowed to choose the target folder to save the photos. Check "Transfer to List: iTunes" and then you are able to transfer the photos to iTunes. Check "Save to Folder" and click "Change" and choose the target folder to put all the photos. Click "Transfer Now" to start to transfer photos from iPod touch to computer.
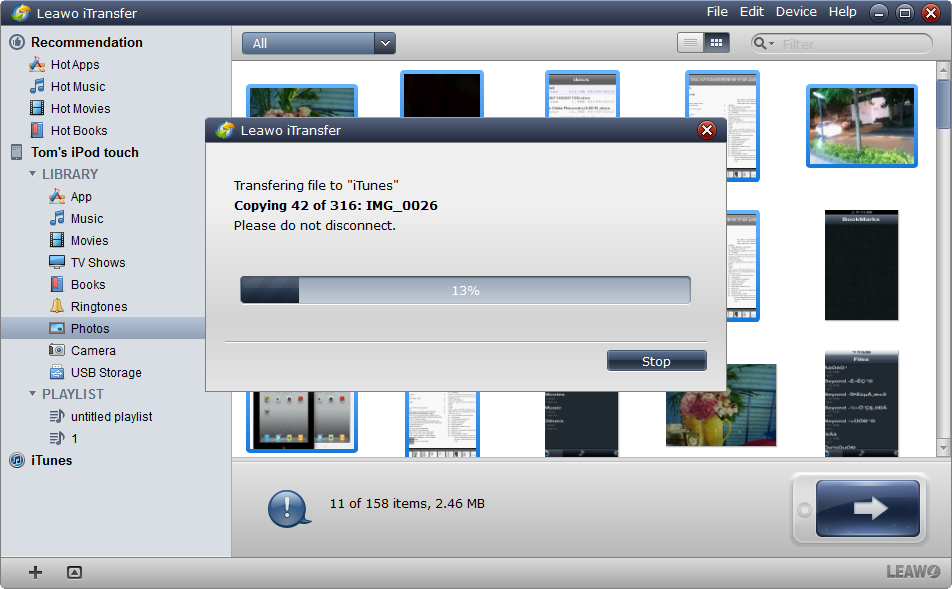
Transferring Photos from iPod touch to Computer
When the photo transfer begins, a dialog of transfer process pops up, and a progress bar shows the percentage of the transfer process. Normally speaking, the photo transfer will be finished in seconds, and when the photo transfer finishes, the photos will be in the target folder. While transferring photos from iPod touch to computer, please don't disconnect the iPod touch, otherwise the photo transfer will stop.
With the above steps, you may have known how to transfer photos from iPod touch to computer with ease. Of course, you are able to delete the useless photos of the iPod touch in batch with Leawo iTransfer. You can click "Ctrl +a" to select all the photos, and then right click the chosen files and choose "Delete". Then you can delete the useless photos and free the storage space of the iPod touch.
Actually, with Leawo iTransfer, you could not only transfer photos from iPod to computer. But also, you could transfer data from computer to iPod, iPhone and iPad directly without using iTunes, for example transferring videos from PC to iPhone without iTunes, etc.
Part 3: Transfer Photos from iPod to Computer via Windows Explorer
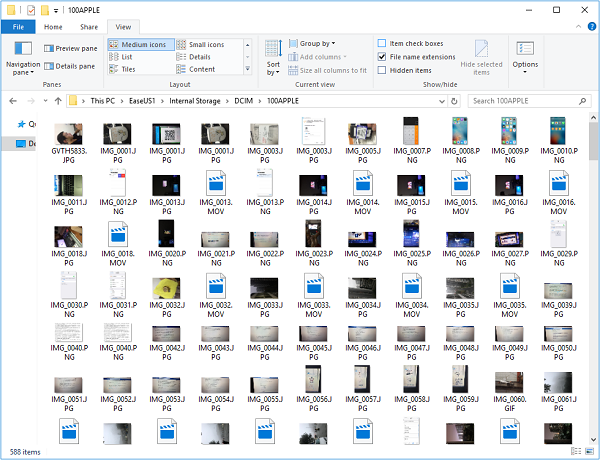
If you are using a Windows computer, the Windows Explorer would be helpful for you in transferring photos from iPod to computer. You don’t need to install a 3rd-party iOS data transfer tool to fulfill the data transfer task from your iOS devices (iPad, iPhone and iPod) to computer. You could selectively transfer photos from iPod to computer via Windows Explorer, which will be absolutely time-consuming. However, you can’t selectively transfer photo albums from iPod to computer by using Windows Explorer since it offers you no album option.
The below steps would show you how to transfer photos from iPod to computer in detail:
1. Connect it to your PC/laptop. When a prompt pops up on your iDevice asking you whether or not to trust this computer, click “Trust” option.
2. On your computer, open “This PC” to open Windows Explorer.
3. Then, you will see your iPod name. Click it and then go to “Internal Storage > DCIM” to choose photo folders you want to transfer. Open the folder and then you will be able to choose pictures for transferring from iPod to computer.
4. You could also directly copy the entire photo folder to your computer from iPod.
5. After copy-and-paste, disconnect your iPod with computer. You will then see all photos and videos on your computer.
With Windows Explorer, you could both photos and videos from iPod to computer.
Part 4: Transfer Photos from iPod to Computer using iCloud
Apple has made iCloud an online data sharing and transferring service that enables you to share data and files between iOS devices, PC and Mac. No matter you have installed iCloud on your computer or not, you could easily sync photos from iPod to computer using iCloud.
To transfer photos from iPod to computer, you need to do the following things:
1. On your iPod, open “Settings > [your name] > iCloud > Photos” option to turn on iCloud Photos. This will help you automatically sync your photos from iPod to iCloud.
2. If you haven’t installed iCloud on your computer, open your computer browser and log into iCloud.com with your Apple ID you’ve signed in on your iPod. Then, navigate to “Photos” tab, select photos synced and click the Download icon to download photos to your computer hard drive.
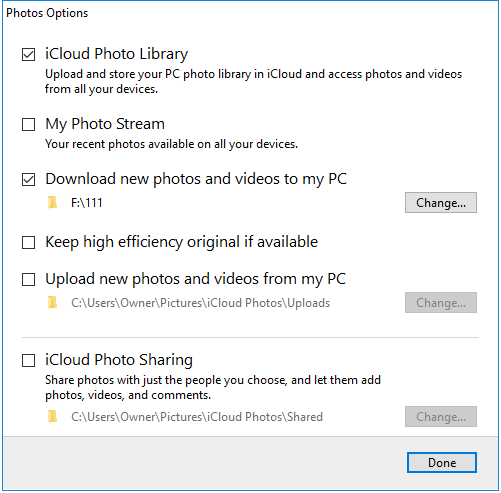
3. If you have installed iCloud on your computer, click the iCloud icon on the stock tray, and then click “Open iCloud Settings” option. Check “Photos” to click the “Options” button next to it. Click on “iCloud Photo Library” option first, then check “Download new photos and videos to my PC” option. You could change the download path by clicking the “Change” option.
4. After that, click “Done” button.
By doing so, once your iPod is connected to the Internet via WiFi, photos on iPod will be synced to your computer automatically.
Part 5: Transfer Photos from iPod to Computer through AirDrop (Mac only)
If you have a Mac computer only that runs on OS X 10.5 or higher, and your iPod device runs iOS 6 or later, you could make use of AirDrop to transfer photos from iPod to Mac computer wirelessly. It’s totally free.
The below steps would show you how to AirDrop photos from iPod to Mac computer in detail:
1. Make sure your iPod runs iOS 6 or later and your Mac runs OS X 10.5 or later.
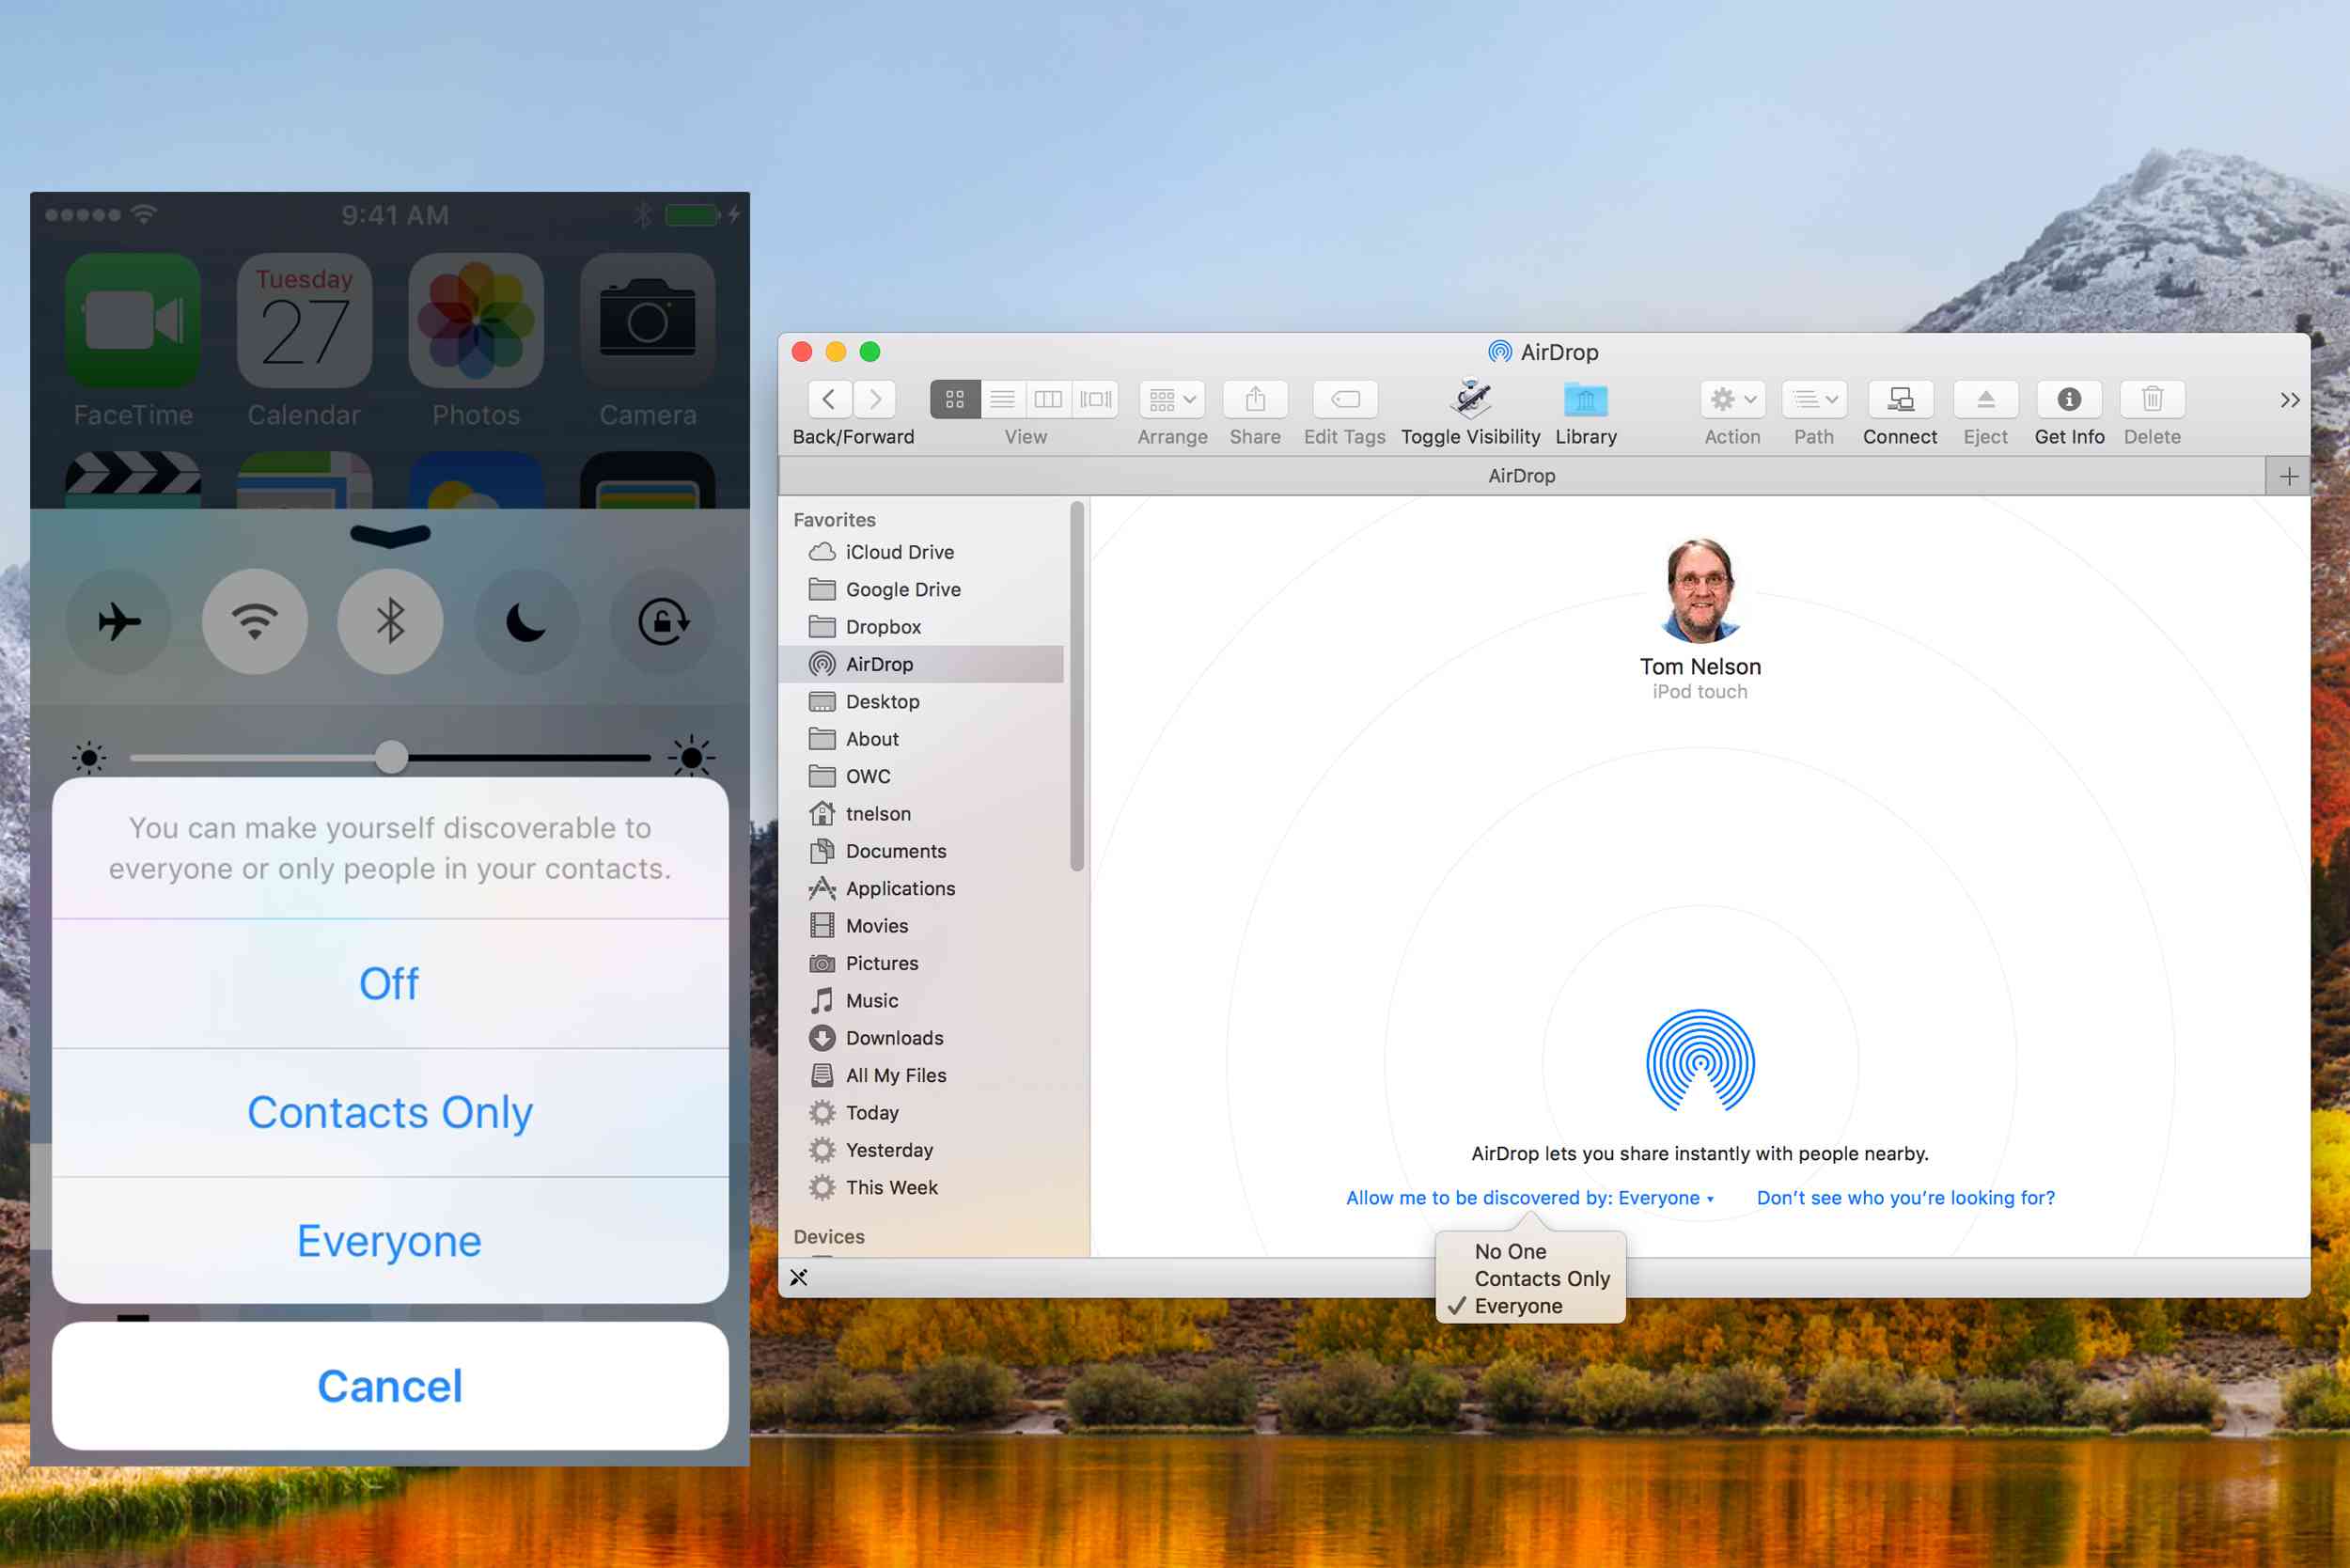
2. Make sure you have turned on AirDrop on both iPod and Mac computer.
3. On your iPod, open the photo you want to transfer, tap on the “Share” button. You could choose more photos to transfer if you need to. Then find your Mac ID and click Send to send and transfer iPod photos to Mac.
4. On your Mac, a notification will pop up and remind you of a file sent to you.
You are able to open it to download the file and get iPod photos and pictures transferred from iPod to computer.


 Try for Free
 Try for Free

