Leawo Prof. Media 13 for Mac can help users copy and back up their Blu-ray/DVD with ease. Learn how to use it to copy a Blu-ray/DVD disc in several different ways.
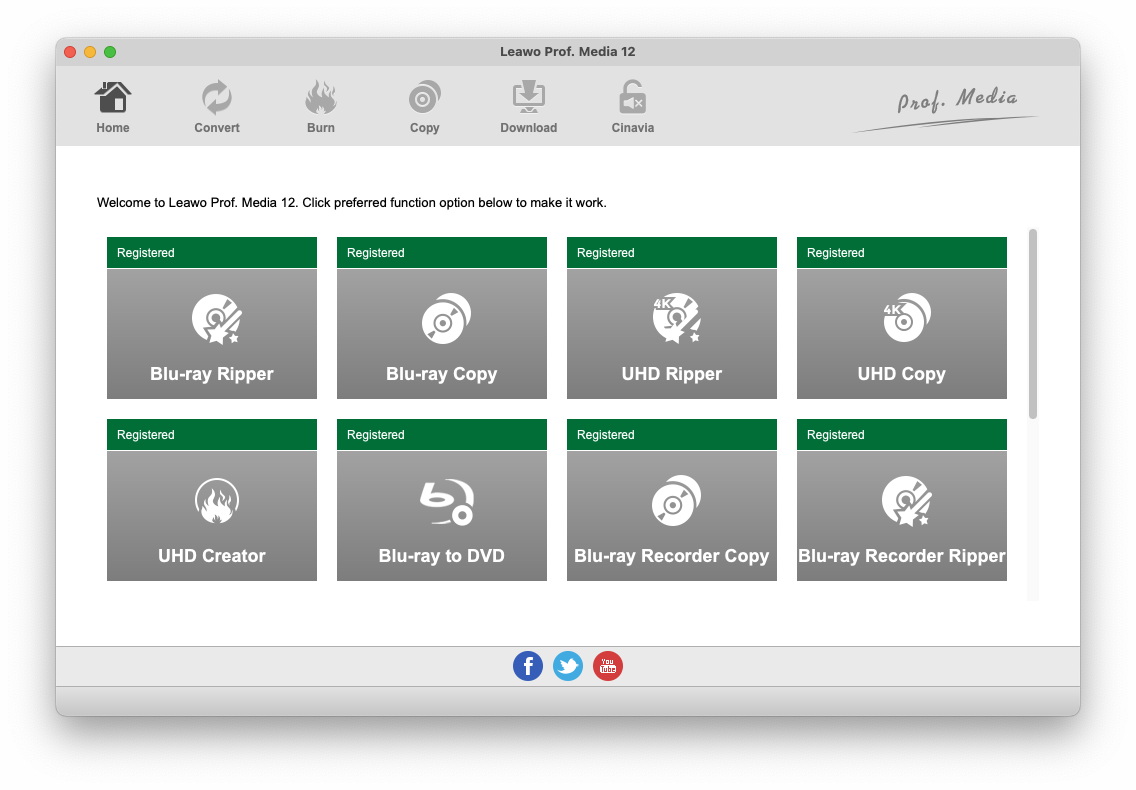
To copy Blu-ray/DVD with Leawo Prof. Media 13 for Mac, first click the Blu-ray Copy icon from the main interface or the Copy button from the upper-left area of Prof. Media to load the copy module.
After opening the copy module, the first thing to do is have the source Blu-ray/DVD files imported to the program. Click the Add UHD/Blu-ray/DVD button from the upper-left corner of the blank area. You will have 3 options on the following drop-down menu for importing source Blu-ray/DVD files.
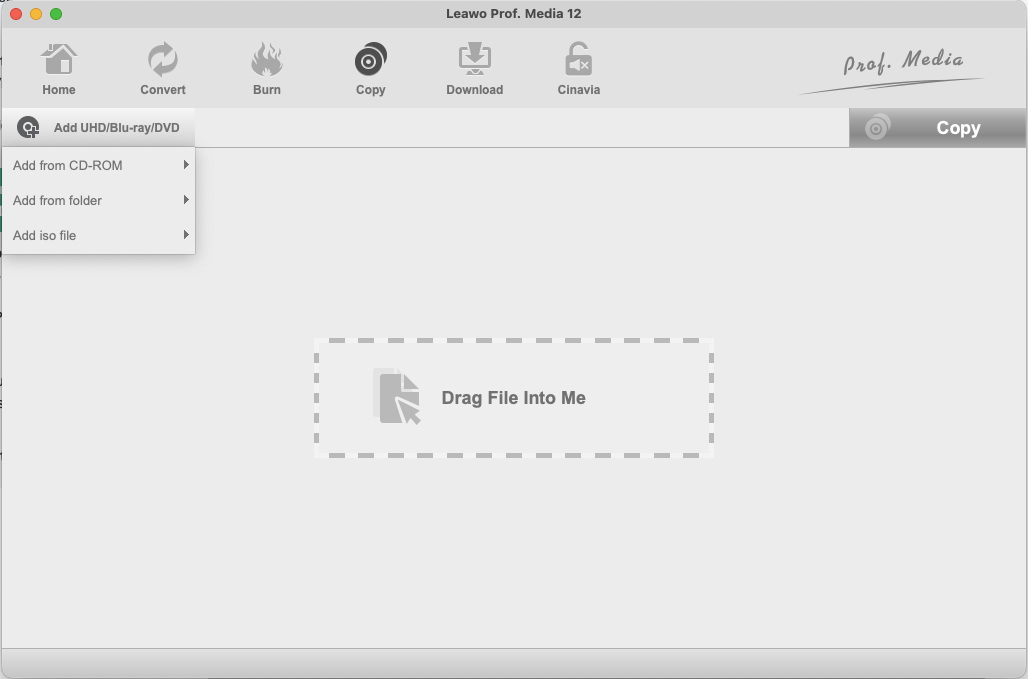
To load the Blu-ray/DVD content of the Blu-ray/DVD disc in your disc drive, click  Add from CD-ROM and continue to click the option that follows.
To load a Blu-ray/DVD folder from your hard drive to the program, click  Add from folder.
To import a Blu-ray/DVD ISO image to the program, choose  Add iso file.
The following page will have all the content in the disc listed on the left column. First click on the disc type button  and select disc type for the copy among BD50, BD25, DVD-9, DVD-5. You can compress a large capacity disc to a lower capacity like BD50 to BD25, BD25 to DVD-9 or DVD-9 to DVD-5 but upconversion like BD25 to BD50 is not supported.
After setting the disc type, select a copy mode from Full Movie, Main Movie and Custom Mode. The 3 modes are to help you quickly pick out certain content in the disc to save in the copy. Here’s what content they’ll pick after you choose them
Full Movie will have all the content in the disc including videos, subtitles and audio tracks selected for the copy.
Main Movie will only help you select the main movie, which, by default, is the longest video in the disc to save to the copy. And only one set of subtitles and audio track will be selected. You can reselect the subtitles and audio tracks directly from the respective lists on the left sidebar.
Custom Mode allows you to select the videos, subtitles and audio tracks manually from the respective lists. You can use this mode to select multiple videos, audio tracks and subtitles to save to the copy.
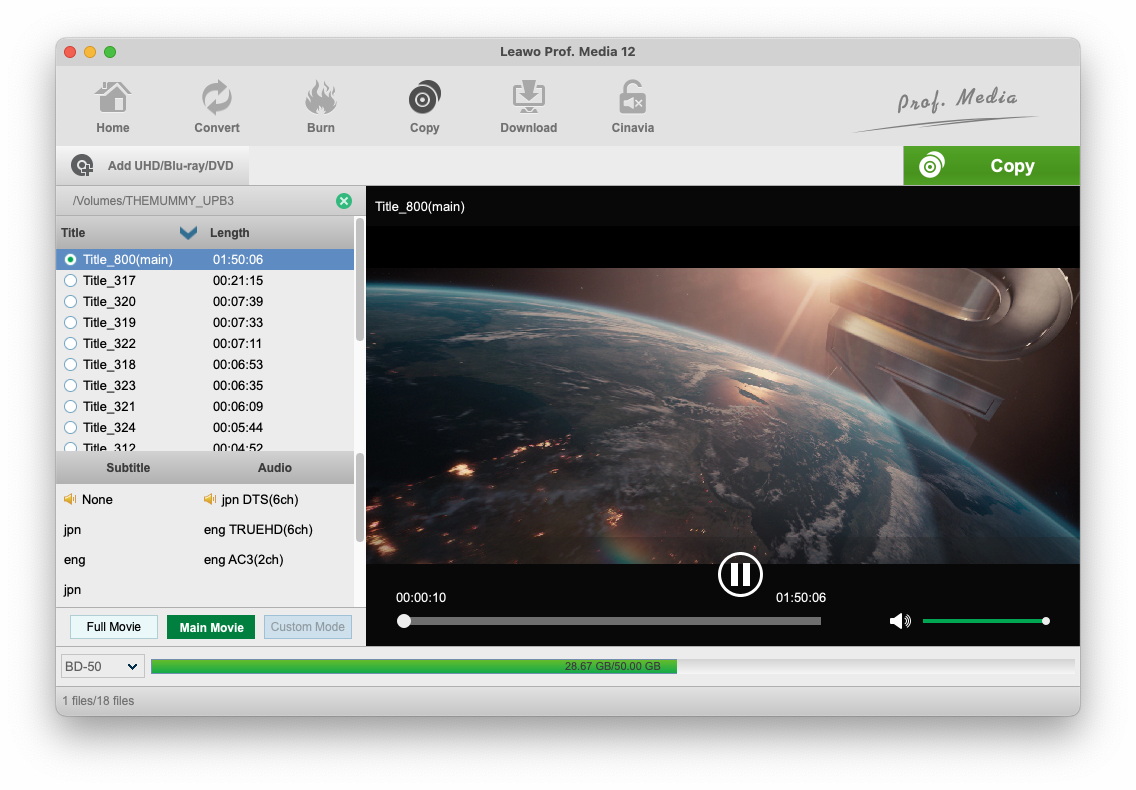
You can play the videos on the list using the video player on the right side.
Click the Copy button from above the video player to display a sidebar. On the top of the sidebar there are 3 options.
1. To copy Blu-ray/DVD to your Mac’s hard drive as a folder, check the Folder option.
2. To save the Blu-ray/DVD content to your hard drive as an ISO image, check ISO File.
3. To directly copy a Blu-ray/DVD to another recordable Blu-ray/DVD disc, check the third-option and select the recordable disc from the drop-down menu. To do this, you will need a new.
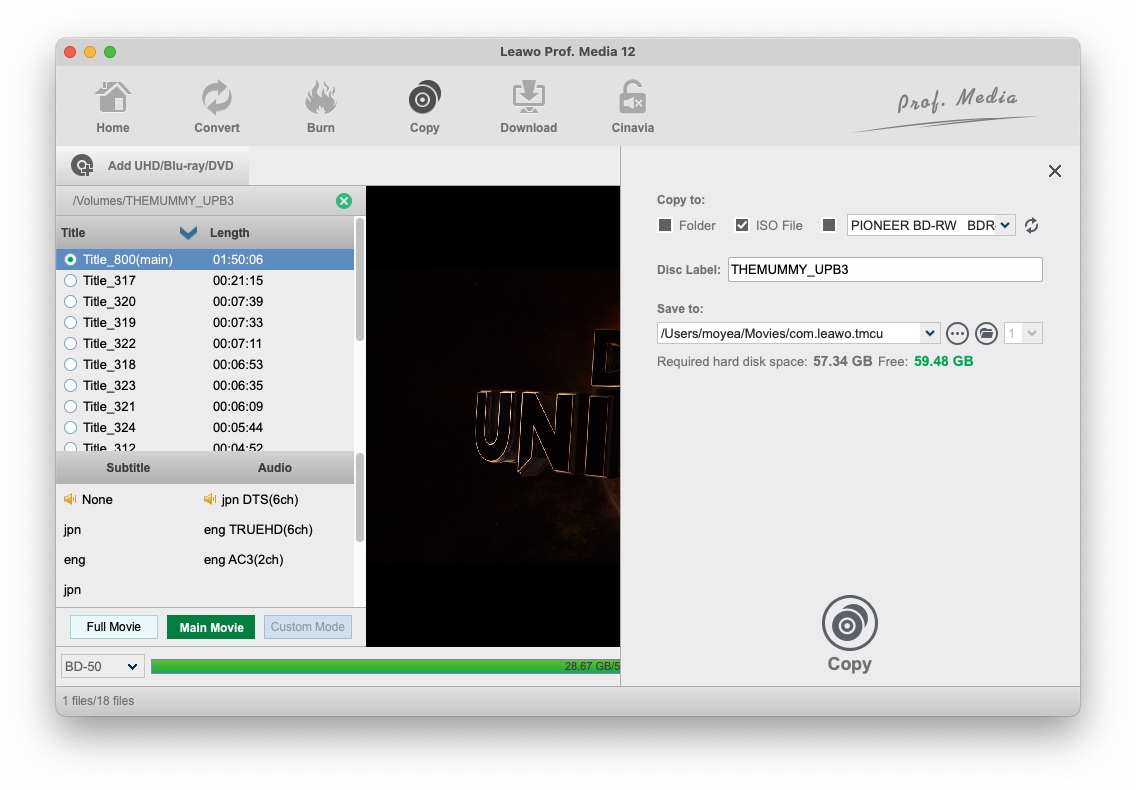
If you choose to go with one or both of the first two options, you need to set the output directory for them in the box under Save to. Rename the Blu-ray/DVD folder or ISO file by entering a new title in the Disc Title box. And then you can start copying your Blu-ray/DVD disc by clicking the Copy button at the bottom.
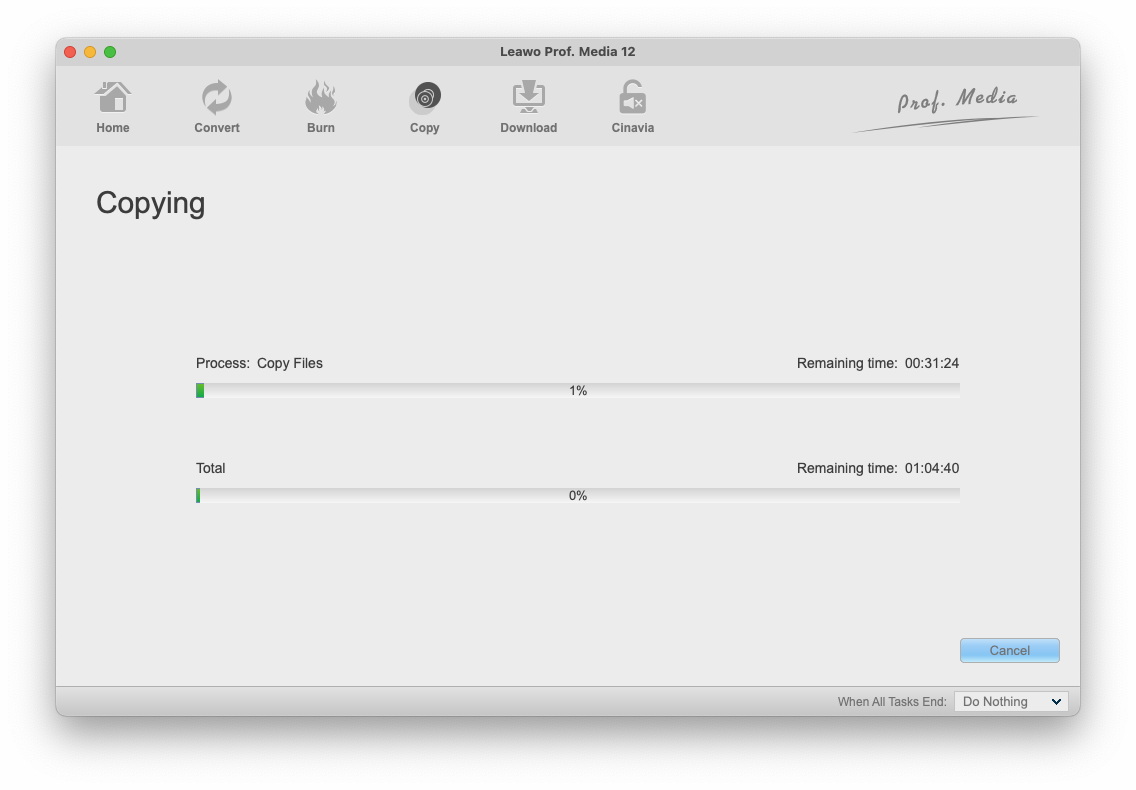
During the copy process, you can cancel it by clicking the Cancel button in the bottom-right.