Leawo Prof. Media 13 for Mac enables users to convert 4K Blu-ray/Blu-ray/DVD and videos to videos and audios in different formats. Learn how to convert 4K Blu-ray/Blu-ray/DVD and videos in this page.
Leawo Prof. Media 13 for Mac includes several different 4K Blu-ray/Blu-ray/DVD processing modules and a video converter module that can help you convert common and multi-angle Blu-rays/DVDs to common video files and convert videos between different formats. Check out how to convert 4K Blu-ray/Blu-ray/DVD/video in the content below.
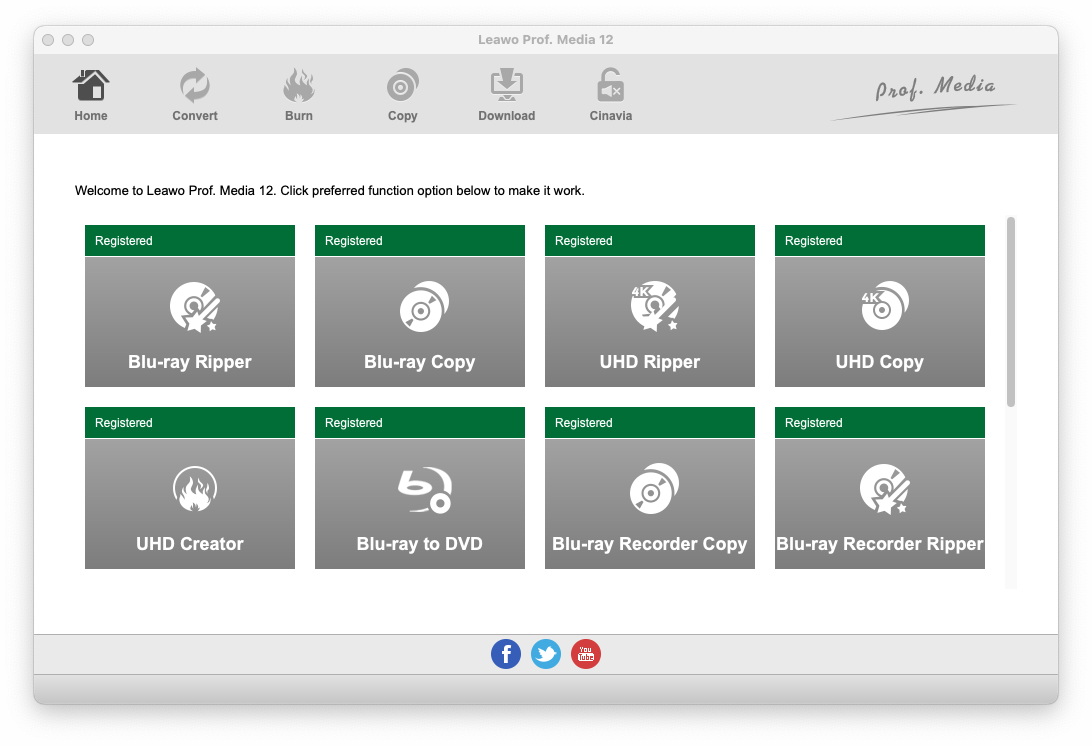
Fire up Prof. Media 13 for Mac and on the main interface of the program, click the Convert button in the upper-left area to open the Convert module. Depending on what kind of media file you want to convert, you can also click the Blu-ray Ripper/UHD Ripper/DVD Ripper/Video Converter icon to enter corresponding modules. The interfaces of all these modules are the same.
After entering the Convert module interface, the first thing to do is import source media files to the program. Here’s how:
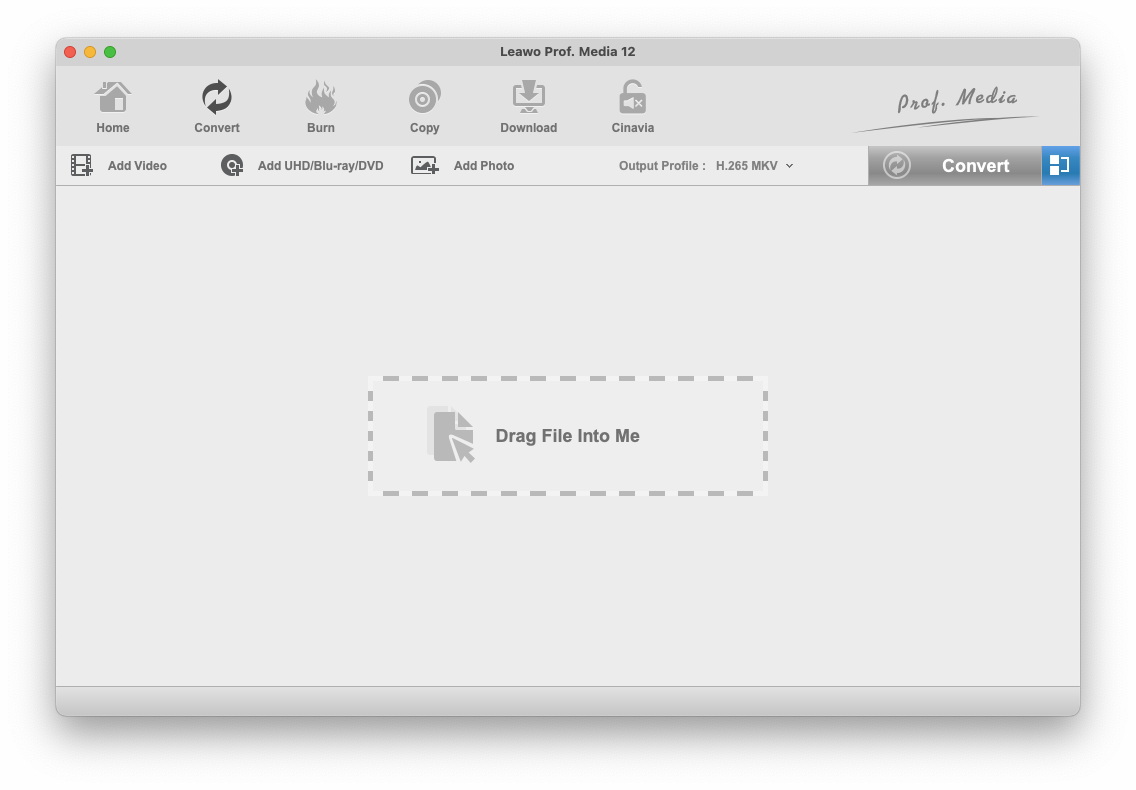
a. To import a video file to the program, click  Add Video from the upper-left and then select either Add Video to add a single video or Add Video Folder to add a video folder to the program.
b. To import 4K Blu-ray/Blu-ray/DVD content, click  Add UHD/Blu-ray/DVD. The following drop-down menu contains 3 options. If you want to convert a Blu-ray/DVD movie from a 4K Blu-ray/Blu-ray/DVD disc, select Add from CD-ROM and click the option that follows. If you have a 4K Blu-ray/Blu-ray/DVD folder or 4K Blu-ray/Blu-ray/DVD ISO file on your computer, select the respective options and select them from the file importing window to import them to the program.
If you are converting a video to a new format, just skip to Step 2.
If you are converting a 4K Blu-ray/Blu-ray/DVD movie, then you will see the following interface after loading the 4K Blu-ray/Blu-ray/DVD content to the program. There are 3 buttons on top of the video list on the left.
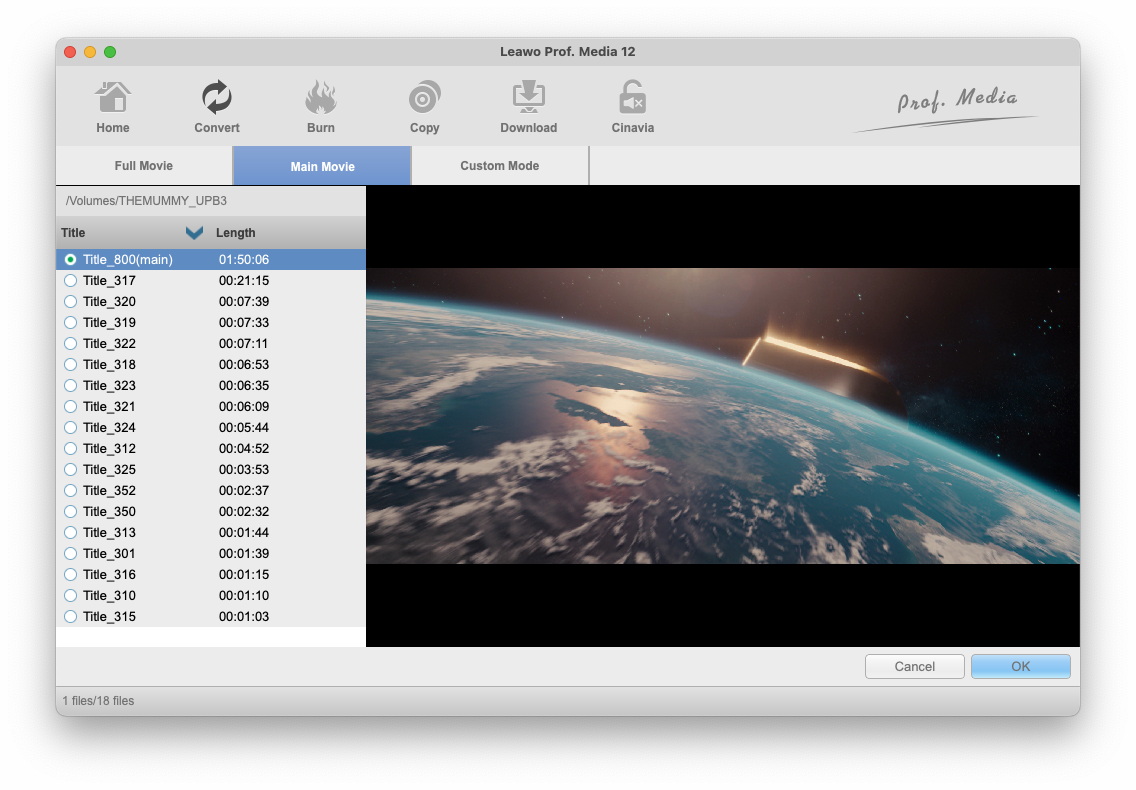
Usually a 4K Blu-ray/Blu-ray/DVD disc, folder or ISO image will have multiple videos packed inside, and the 3 buttons are for you to choose which titles to convert. Here’s what the 3 modes are for.
Full Movie is for converting all the videos.
Main Movie will only convert the main movie which is the longest video by default.
Custom Mode is provided for you to select the videos you need by yourself from the video list. You can select multiple videos from the list for converting.
Once you have imported source 4K Blu-ray/Blu-ray/DVD files, you could now select subtitles and audio tracks, open the Chapters switch if source 4K Blu-ray/Blu-ray/DVD titles include multiple chapters to choose chapters for converting, select desired angles if needed, etc.
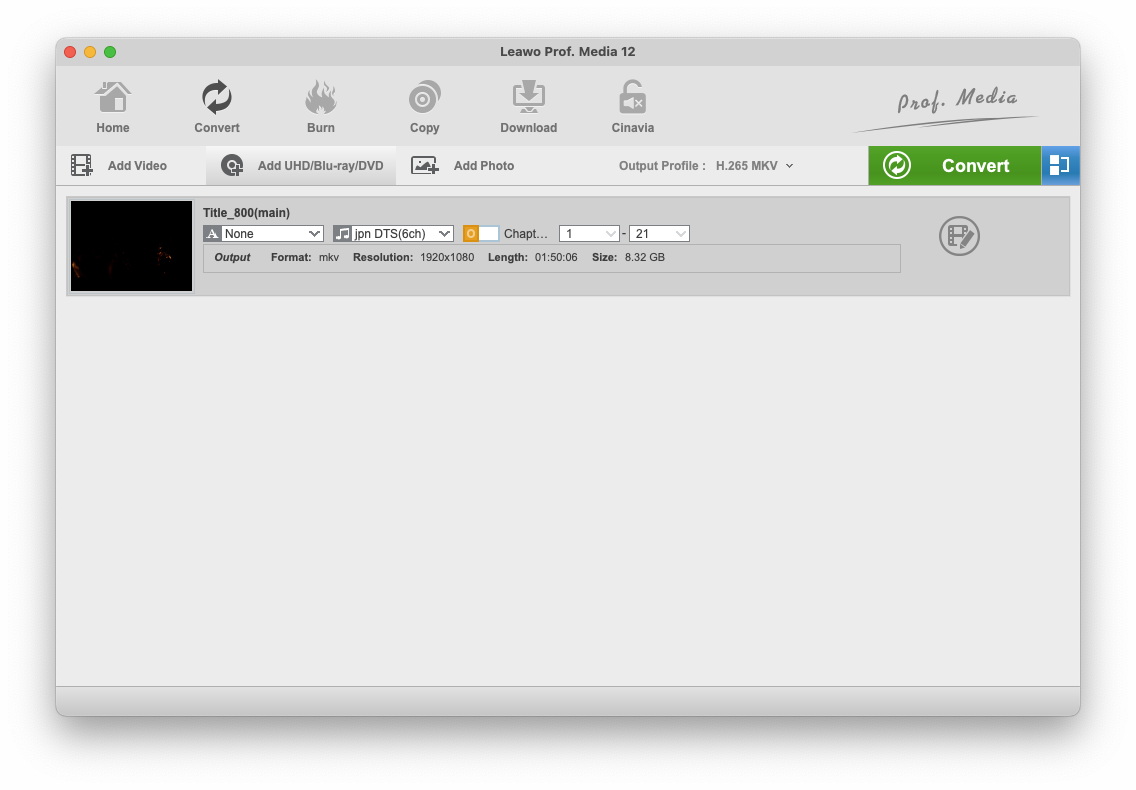
After picking a button and the video you need (if needed), click OK to proceed to Step 2.
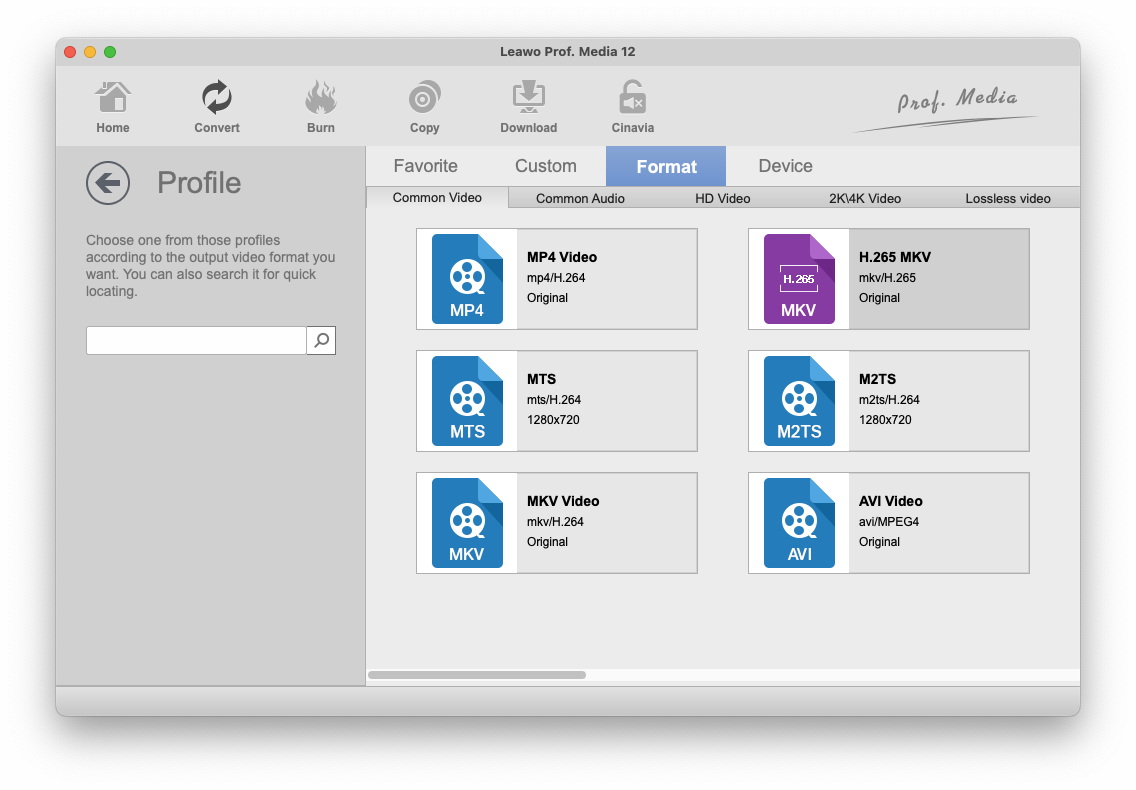
All the videos, no matter if they are videos or 4K Blu-ray/Blu-ray/DVD movies originally, will be listed on the following interface. Here’s how to set the output format. You should find a button with the MP4 Video label on it. It’s the Format button that shows you what the default output format is. Click on it to display a menu below it and then click Change on the menu. The following panel contains all the supported output formats. Find an ideal format for your files and click on it to set it as the default output format. After clicking on the format you need, you will also return to the video list

Note that there is an extra Angle drop-down box on the media item when you import the multi-angle 4K Blu-ray/Blu-ray/DVD content. And you can choose to retain certain angle when converting.
In addition, If you are converting a 4K Blu-ray/Blu-ray/DVD movie from a 4K Blu-ray/Blu-ray/DVD disc, you can select the Multi-track MKV profile from Format>Lossless Video to convert the Blu-ray/DVD movie to lossless MKV.
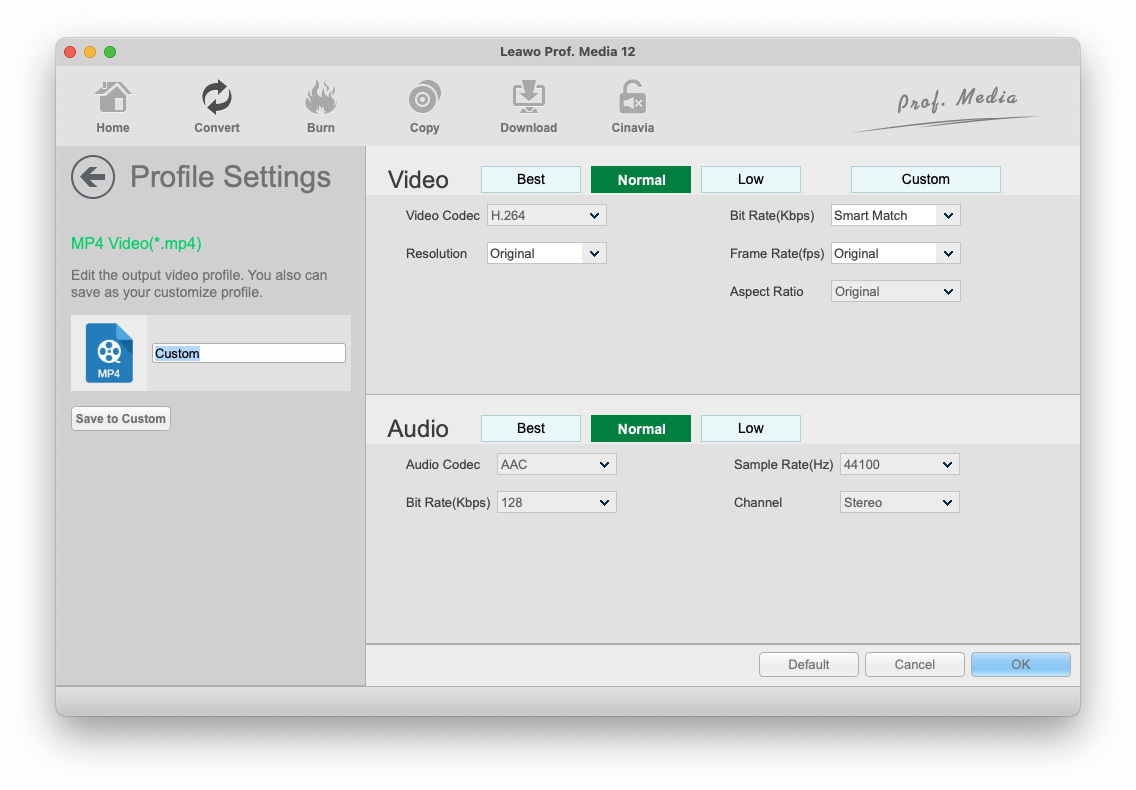
After selecting a format for your files, you can make changes to the parameters of the format. Click the Format button again, which should now be changed to the format you just chose, and then click the Edit button on the left side of the Change button. The following Profile Settings panel provides you with several different video and audio parameters to adjust. After tweaking the parameters, click OK to save the changes and return to the video list.
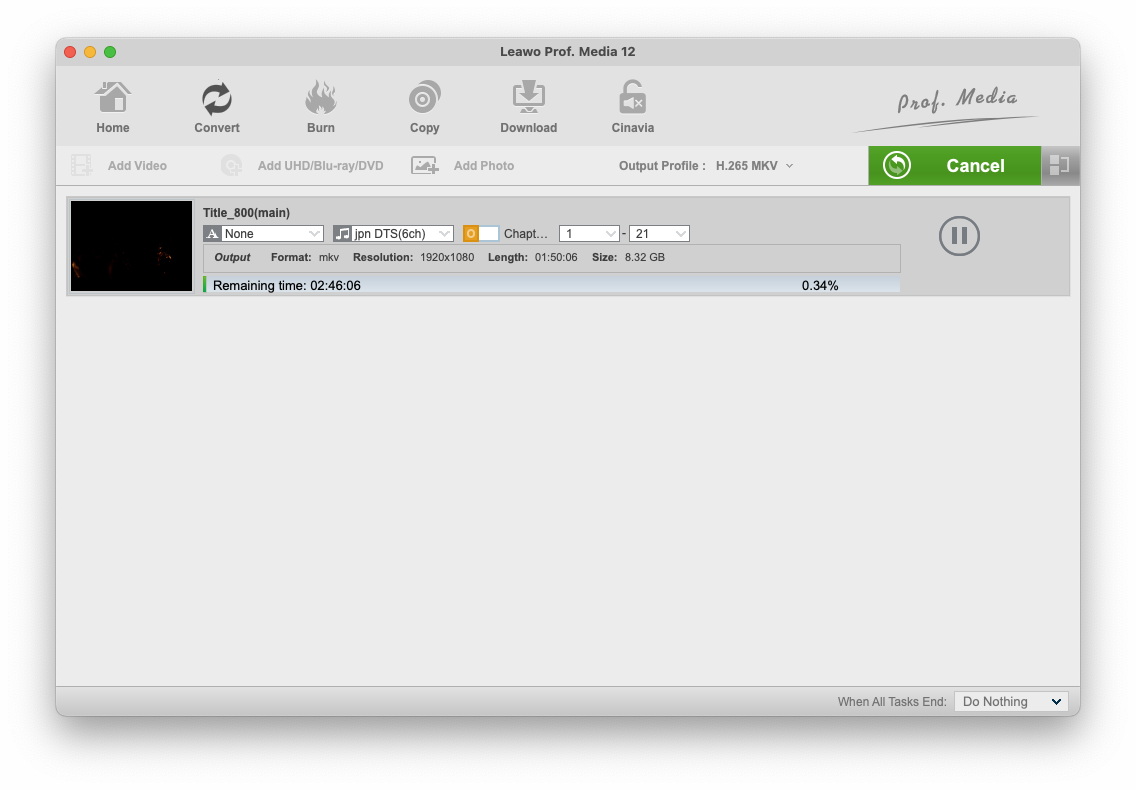
Next to the Format button is a green Convert button, click on it to pop up a sidebar from the right side. The default output directory is on top of the sidebar. You can change it by clicking the  button next to it. And then you can start converting the 4K Blu-ray/Blu-ray/DVD/videos by clicking the Convert
  button on it.

During the conversion process, you can pause a conversion by clicking the Pause  button on the file or cancel the whole process by clicking the Cancel
  button.