This guide shows you how to use the internal photo slideshow maker and photo slideshow burner of Leawo Prof. Media 13 for Mac. It includes detailed steps on how to use Leawo Prof. Media 13 for Mac to make photo slideshow and burn photo to Blu-ray/DVD.
Leawo Prof. Media 13 for Mac has a photo slideshow maker and the ability to burn the photo slideshow video to Blu-ray/DVD discs.
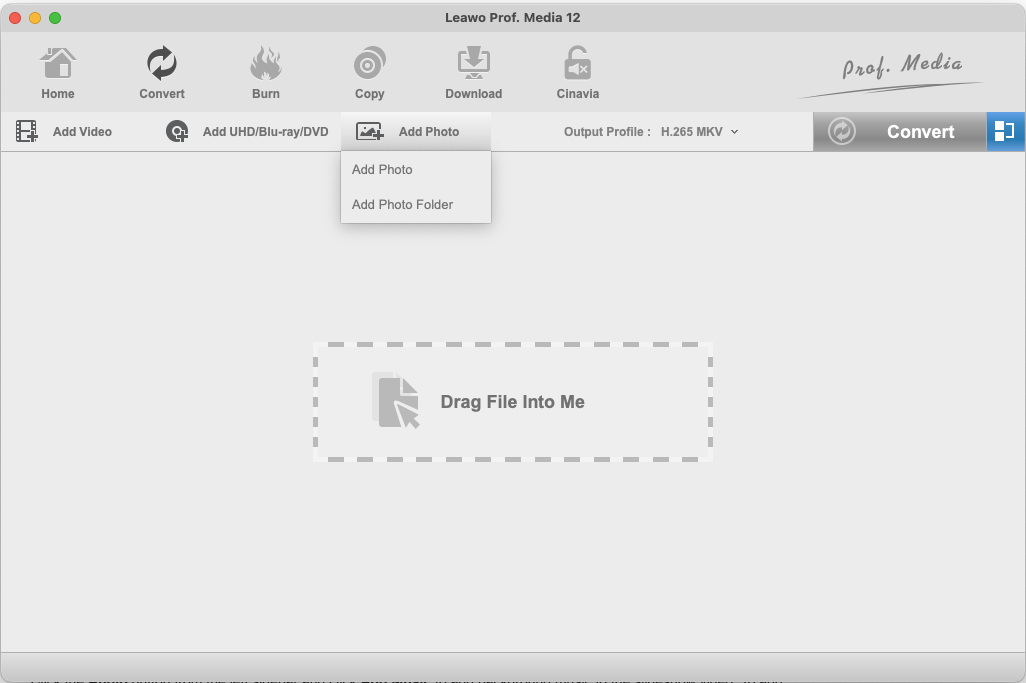
To make photo slideshow we are going to use the Convert module inside Prof. Media. Click the Convert button on Prof. Media’s main interface to launch the Convert module.
Click Add Photo and click either Add Photo to add image files or Add Photo Folder to add folders of image to the program. After the source image files are added to the program, a photo slideshow video will be created automatically.
To preview the photo slideshow, move your mouse onto the thumbnail of the video on the left and click the Play button.
Click on the Edit button on the photo slideshow video to see the video editing options. Click certain photo and click delete button at the upper right corner of the photo to delete the photo from the slideshow. To add more photos to the slideshow, click the Add button. Photo Duration is for setting how long each photo will be displayed and Transition Duration means how long the transition effect will be displayed. Choose what transition effect to use in the Transition Effect drop-down menu.

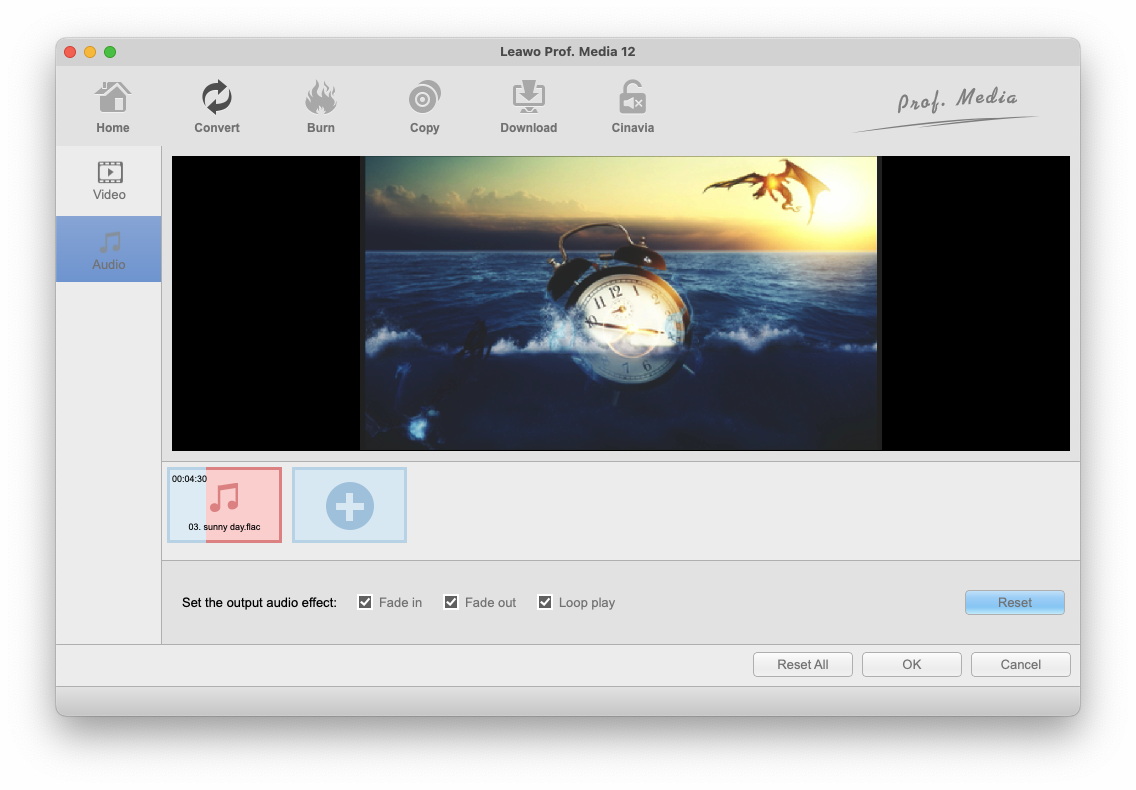
Click the Audio button from the left sidebar and click Add Music to add background music to the slideshow video. To add more music files, click the Add button. To remove a music file, click on delete button on the file. The part of the music files covered in red is the part that exceeds the length of the slideshow video and won’t be played. There are 3 sound effects you can apply to the slideshow video: Fade In, Fade out and Loop Play.
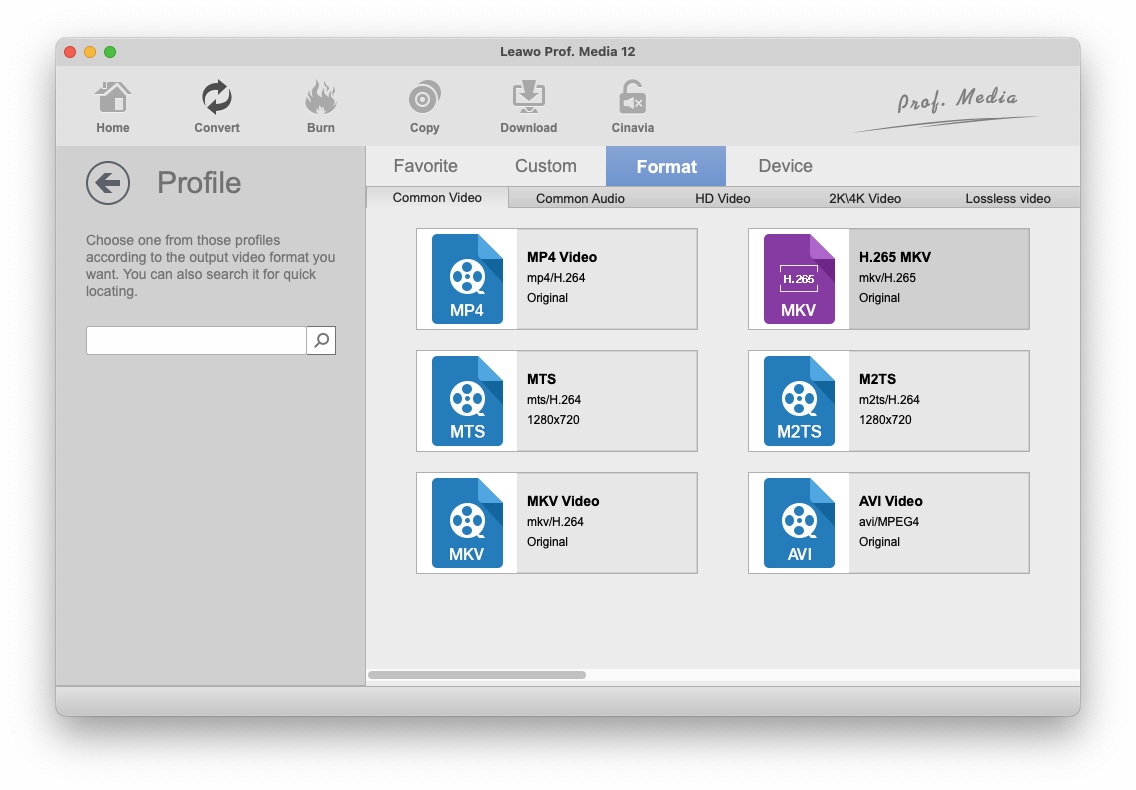
The program provides you with a lot of different video formats to convert the photo slideshow into. There’s a button on the right side of the Add Photo button that shows the format that’s currently set as the default format for the photo slideshow. Click on it and continue to click the Change button on the following drop-down menu. It will take you to the Profile panel with all the supported output video profiles. Find the format you need and directly click on it to set it as the output format for the photo slideshow.
There are detailed settings of the video profile provided for you to adjust. Click the Edit button on the previous drop-down menu to see more settings.

Video parameters you can change include: Video Codec, Quality, Resolution, Bit Rate, Frame Rate, Aspect Ratio and audio parameters include: Audio Codec, Sample Rate, Bit Rate and Channel. After making adjustments to them, you can save the changes for future by clicking Save to Custom. And then click OK to return to the video list.
Find the green Convert button from the upper-right and click on it. You can find the default output directory on the following sidebar. To reset the output directory, click the … button next to it. And you can open the output folder by clicking the folder icon.
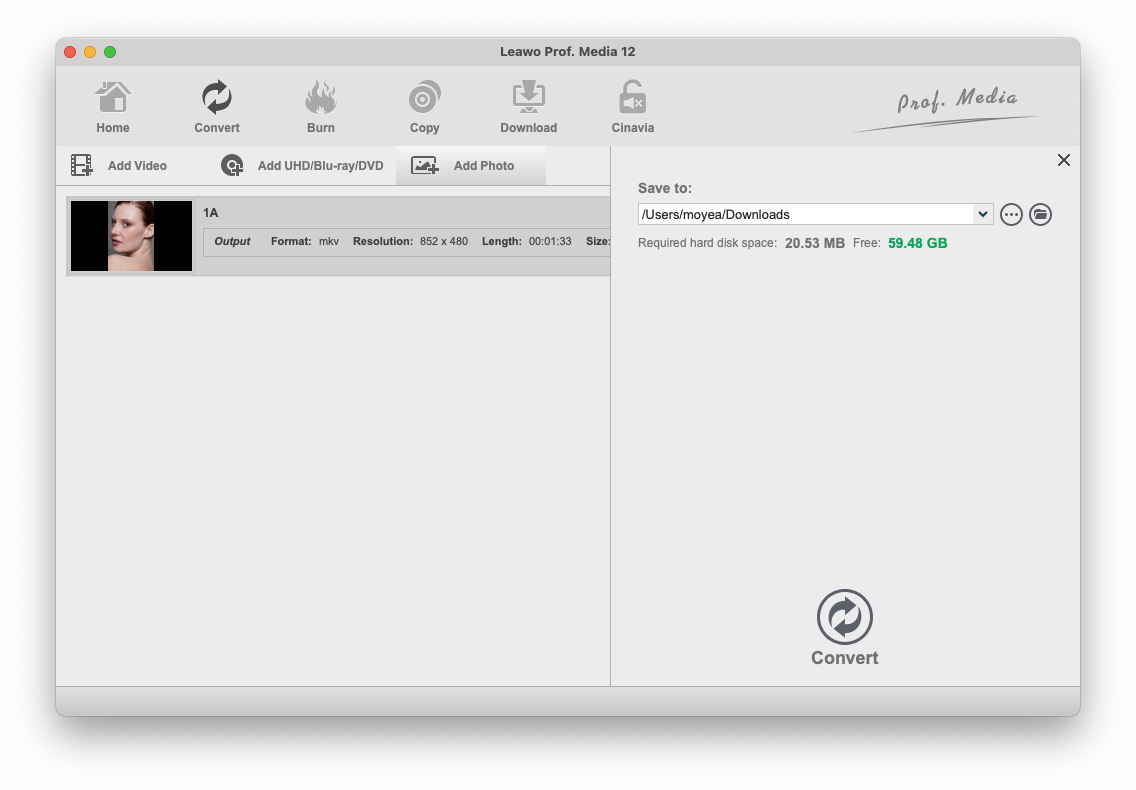
Click on the Convert button at the bottom of the sidebar to start converting photo slideshow to video in the format you previously set.
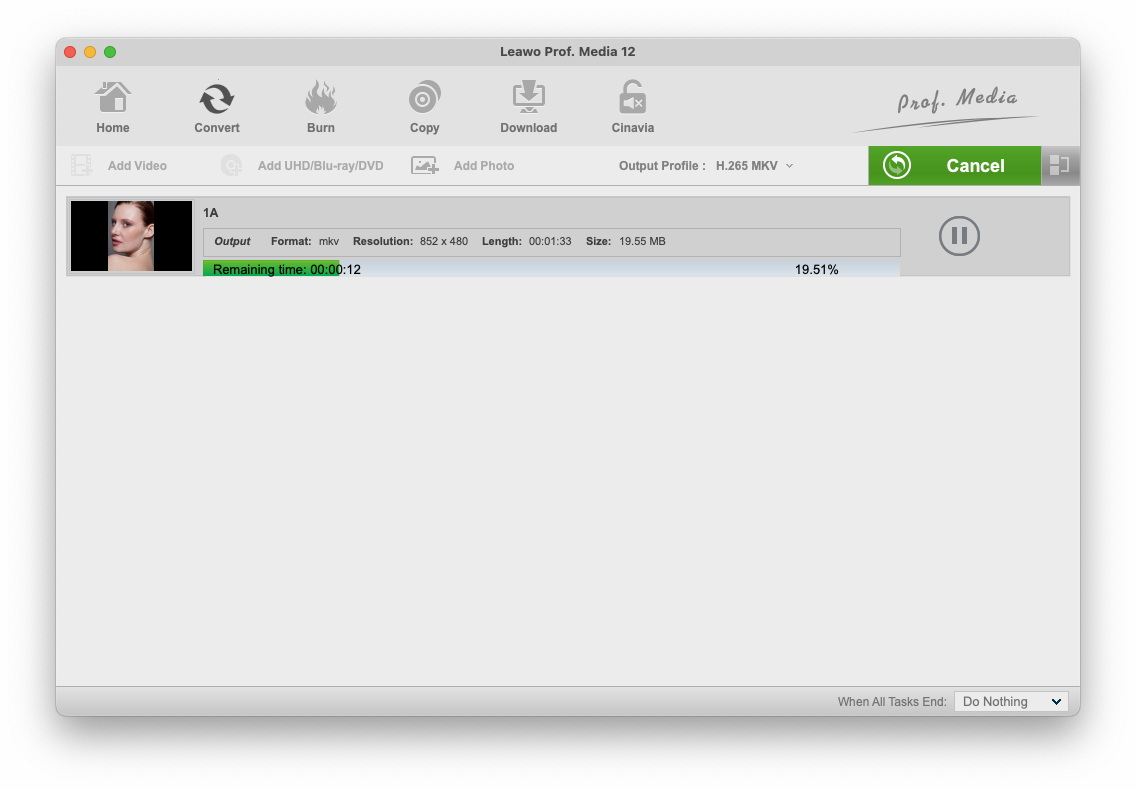
During the conversion process, you can pause it by clicking the Pause button on the file or cancel the whole process by clicking the Cancel button.
To burn a photo slideshow video to a Blu-ray/DVD disc, we are going to need the Burn module. Click Burn from the menu bar of Prof. Media to fire up the Burn module. Click Add Photo and then click Add Photo from the drop-down menu to import source photos to the program. You can also choose Add Photo Folder to add a folder of photos to the program. After the photos are imported to the program, a photo slideshow video will be created using the imported photos automatically.
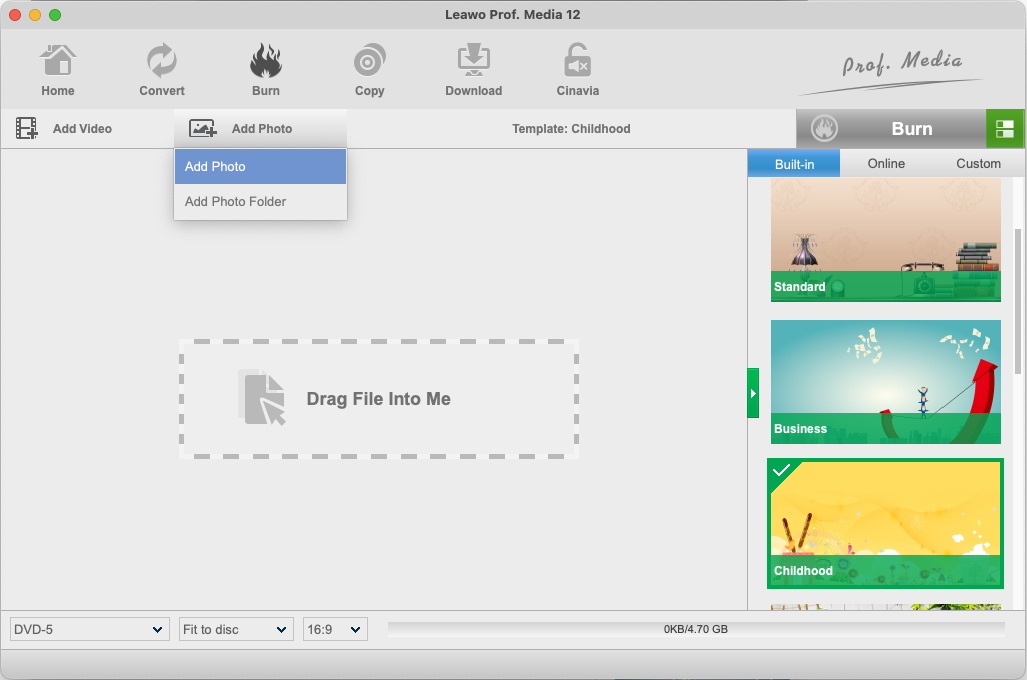
Set disc type, quality and aspect ratio for the photo slideshow in the bottom-left corner. Click the button next to Burn to switch between showing thumbnail and detailed information of the slideshow video. You can click the Edit button to edit the video. Detailed video editing steps can be found in the content above.
Select a disc menu from the provided disc menu templates on the right sidebar. If you don’t need disc menu, choose No disc menu. It has some built-in disc menu templates and some online templates you can download and use. The Custom tab has all the disc menus you previously customized and saved. Move your mouse on one of the templates and you will see a Preview button on it. Click on the preview button to see what the disc menu actually looks like when being used.
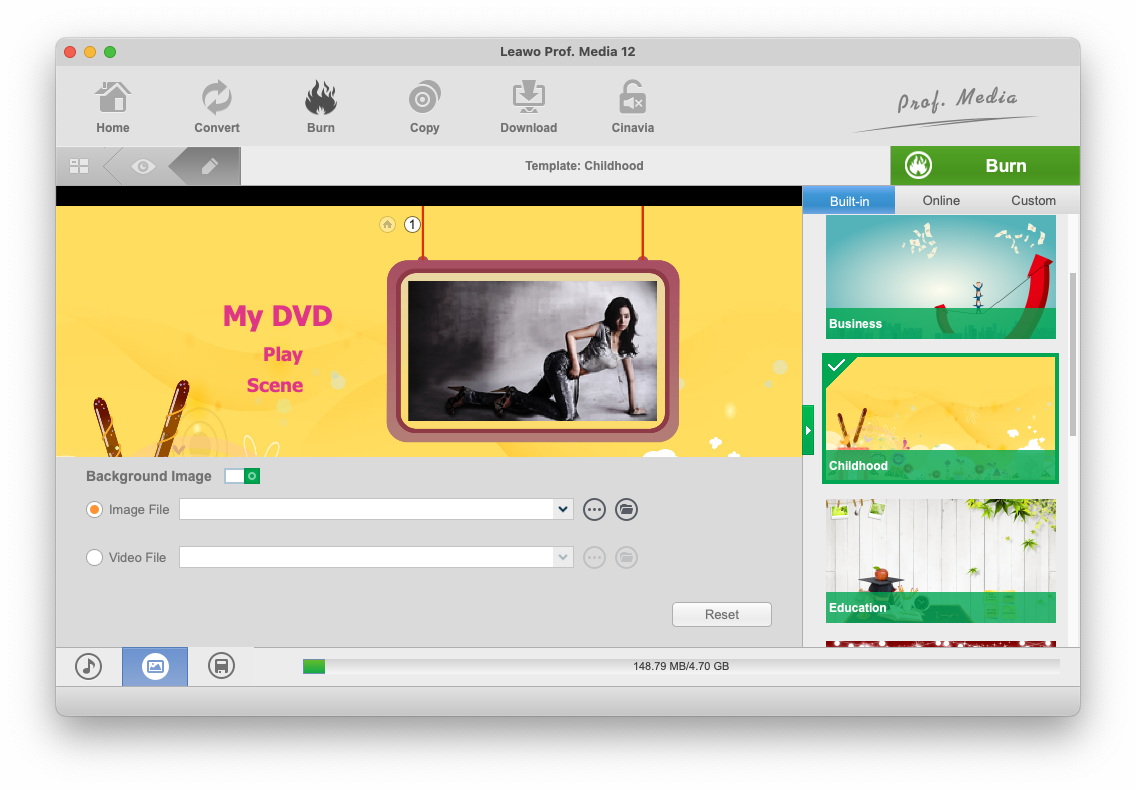
Click on the Edit button in the upper-left to edit and customize the disc menu template.
Basically all the items on the menu can be changed. You can change the text of all the items by double-clicking on them. And you can reposition them as you like by simply dragging them to the ideal location.
Click the photo icon in the bottom-left and then activate Background Image to choose a new image or even a video for background.
Click the Music icon in the bottom-left and then enable Background Music option to add background music to the slideshow. Import music file by clicking the  button next to the Source from box. Set the duration of the music playback and audio effects in the settings below.
After returning to the video list, click on the green Burn  button on top of the disc menu template list to call out a sidebar. On top of the sidebar there are 3 options. To burn the photo slideshow video to a blank disc, put the recordable disc in your disc drive and check the third option to set the disc as the target for the slideshow video. If you are having two or more disc drives connected to your computer, you need to select the right drive with the recordable disc from the drop-down menu of the third option.
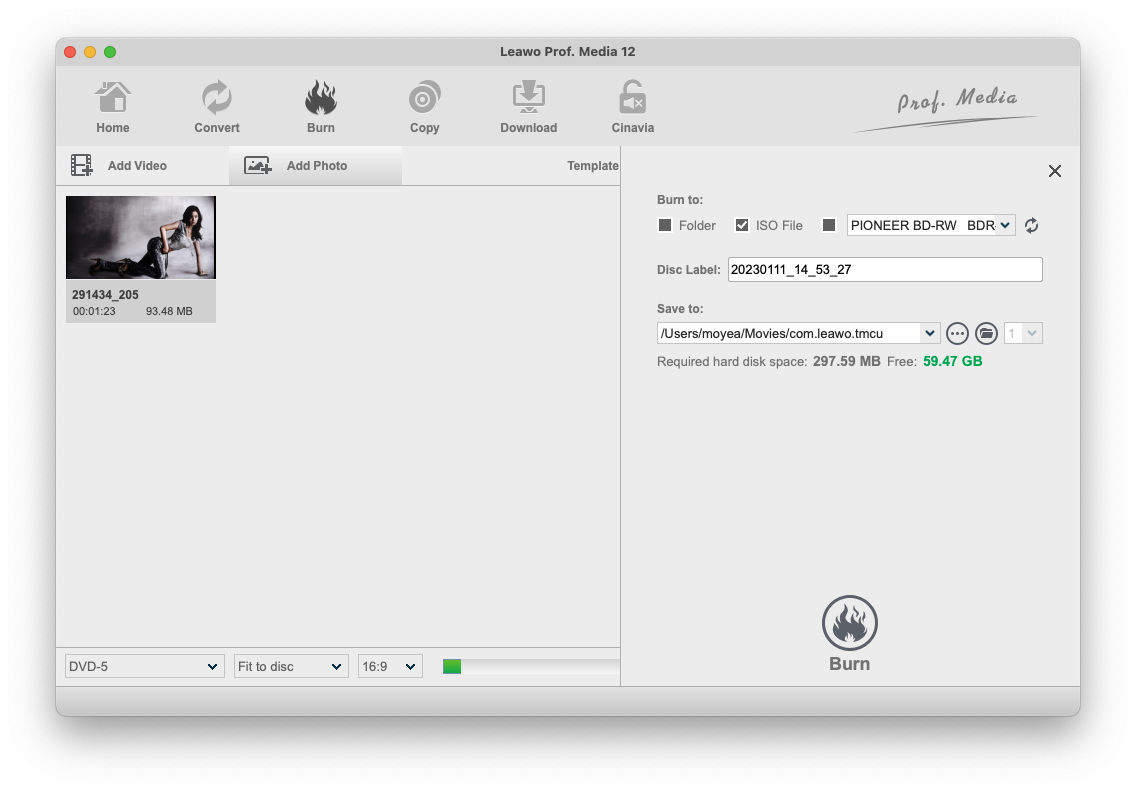
You can also have the photo slideshow video converted into a Blu-ray/DVD folder or Blu-ray/DVD ISO image and save them to your computer to checking the Folder or ISO File options. In that case, you need to set output directory for them in the Save to box. Rename the disc label in the Disc Labels box if you want to. And to start burning the video, click the Burn button at the bottom of the sidebar.

During the burning process, you are allowed to cancel it by clicking the Cancel button in the bottom right corner.