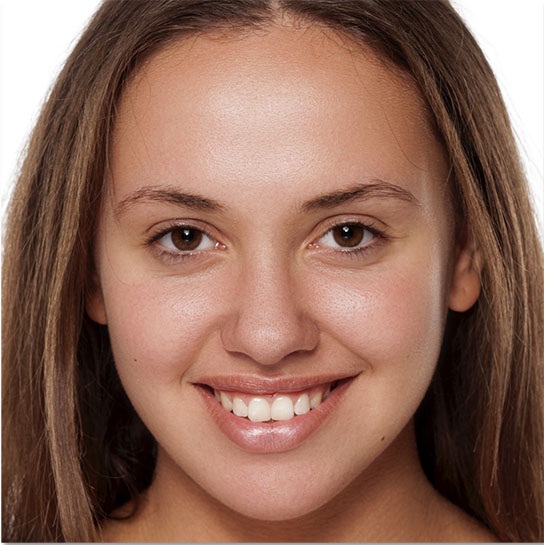
For shutterbugs or ordinary photographers, it is imperative to make the model look amazing in the portrait. To make it, not only are you good at taking great portrait photos, but you are also required to be skilled in using photo enhancing tools to optimize the portrait photo. In this article, three professional and popular photo enhancing and editing tools are recommended for you so that you can retouch skin to remove blemishes and smooth out any imperfections, and finally making flattering portrait photos.
Part 1: How to Get Smooth Skin in Photoshop?
When you tend to smooth skin texture on face, Photoshop may come into your mind. Photoshop is a raster graphics editor developed and published by Adobe Inc. It enables you to edit and compose raster images in multiple layers and supports masks, alpha compositing and several color models. Beside, it offers a lot of enhanced features to remove pimples and other minor skin blemishes. Note that it is expensive and a little bit complicated to use Photoshop. Follow the detailed guide on how to smooth skin in Photoshop.
△ Step 1: Make a Copy of the Portrait Photo
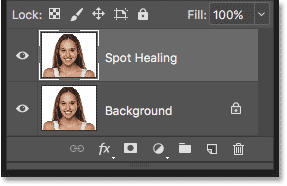
When the portrait photo is newly-opened in Photoshop, the Layers panel shows the photo on the Background layer. Copy the Background layer by pressing and holding the Alt (Win) key on the keyboard, clicking on the Background layer and dragging it down onto the New Layer icon. In the Duplicate Layer dialog box, name the layer like “Spot Healing” and then click OK to show a copy of the photo on a new layer.
△ Step 2: Use Spot Healing Brush to Complete the Initial Skin Cleanup
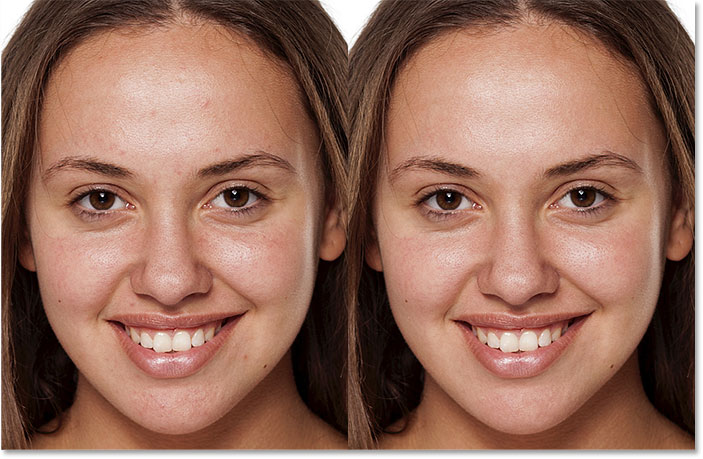
Choose the Spot Healing Brush from the Toolbar, and then make sure that the Type option in the Options Bar to Content-Aware. And then you can click on any unwanted skin blemishes with the Spot Healing Brush to remove them, Photoshop will heal the skin with good skin texture from the surrounding area.
△ Step 3: Apply the Gaussian Blur Filter
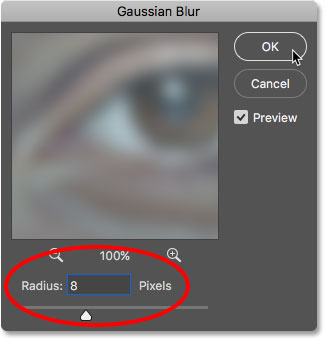
Duplicate the “Spot Healing” layer, and then select the layer, go up to the Filter menu in the Menu Bar, choose Blur, and then choose Gaussian Blur. You can set the Gaussian Blur radius according to actual situation. Mostly, you can set the Gaussian Blur radius to one third of that, which is 8 pixels. Click OK to close the dialog box and apply the blurring.
△ Step 4: Add a Layer Mask
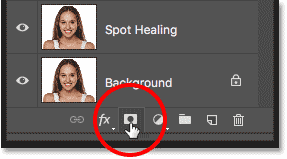
In the Layers panel, click the Add Layer Mask icon. A black-filled layer mask thumbnail appears on the layer, which hides the smoothing effect from view. And then you select the Brush Tool from the Toolbar to set Foreground color (the brush color) to white and start painting on the layer mask to carefully smooth skin.
△ Step 5: Create New Fill Layer and Get Smooth Skin
Click the “Create New Fill Layer” button below the Layers panel, select “Curve” from the drop-down menu that pops up, and lighten the image in the Curve Adjustment panel. Finally, click File > Save to save the edited photo in desired format for output.
Part 2: How to Get Smooth Skin in Lightroom?
Not only does Photoshop smooth skin, but Lightroom smooth skin easily. Lightroom is a creative image organization and image manipulation tool developed by Adobe Systems, as part of the Creative Cloud subscription family. Actually, Lightroom is often used as a powerful photo editor that help you create, edit, organize, store, and share your stunning photos across any device. When you applied Lightroom, you can smooth skin by using an Adjustment Brush and various sliders. Here is the guide on how to get smooth skin on face with Lightroom.
△ Step 1: Zooming In For a Better Working View
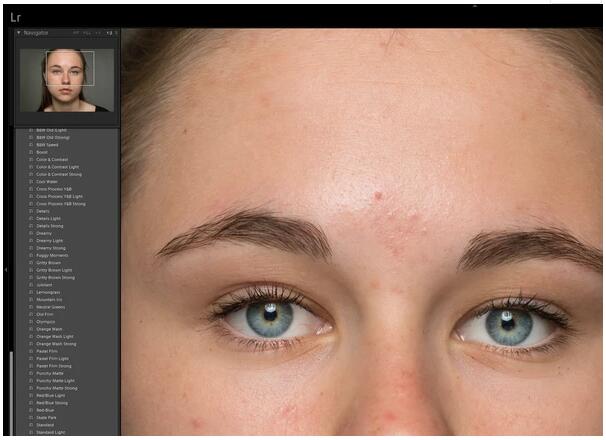
First, import your photo into Lightroom, and then go to VIEW > ZOOM IN from the drop down menu at the top of the page to zoom into the location you would like to retouch. Simply press the letter “Q” to enter the heal mode and use Lightroom’s spot removal tool to remove wrinkles and blemishes.
△ Step 2: Select the Adjustment Brush and Soften Skin Effect
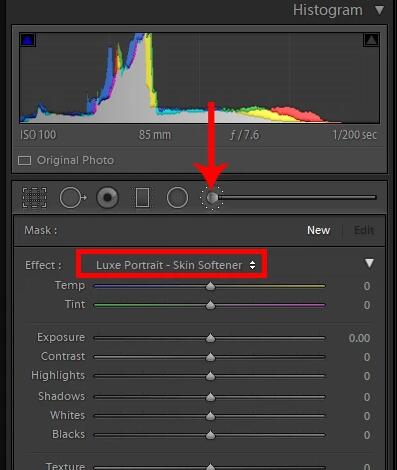
Choose the “Skin Softener” brush from the Luxe Portrait Collection. And drag the sliders to adjust clarity and sharpness.
△ Step 3: Apply the Soften Skin Effect
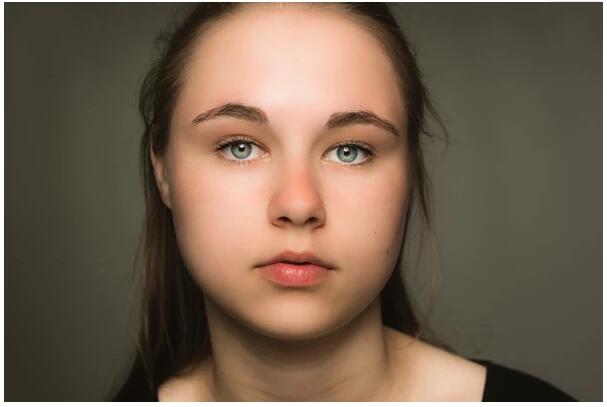
Simply start brushing over the parts of your photo that you would like to soften and smooth skin. To better view the areas you have brushed over, select mask overlay option to apply a red mask by default. And then select the erase tool and start to brush over the parts you would like to remove the effect from. Once you’ve perfected your photo, click done. You have got the skin texture of the portrait perfectly retouched.
Part 3: Using Photoshop & Lightroom Alternative – Leawo PhotoIns
What is Leawo PhotoIns?
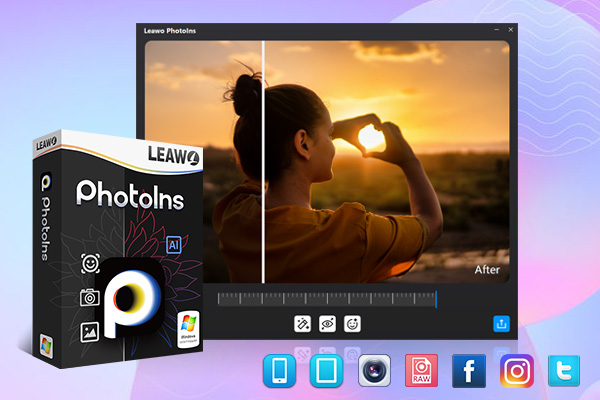
Leawo PhotoIns, as one of the best Lightroom alternatives, is a powerful AI portrait enhancer that perfects portrait photos automatically and intelligently. It enables you to easily retouch skin, remove freckles, enlarge eyes, adjust lighting and more with only a few clicks. Besides, it detects the exposure and then adjusts the brightness, making your portrait photos look more flattering. With the photo enhancer, you can absolutely fix and improve the colors of your photos, giving the right tone and color balance to perfect the tints. What’s more, the smart dehaze feature of PhotoIns helps you remove the haziness and fogginess from your portrait photos. Note that it supports RAW, JPEG, TIFF, and PNG files, capable of enhancing multiple photos automatically at a time.
It is so easy and convenient to use so that even a newbie can simply optimize your portrait photos as you like. After installing the photo enhancer, you can follow the guide below on how to use PhotoIns to smooth skin texture on face.
How to Smooth Skin Texture on Face with Leawo PhotoIns?
◎ Step 1: Download Leawo PhotoIns
Choose the appropriate version, then download and install Leawo PhotoIns on your computer.
-
Leawo PhotoIns
- Enhance portrait photos easily with advanced AI technology
- Fix photo exposure and white balance issues automatically
- Optimize photo colors and perfect photo tints
- Make photos perfectly clear with smart dehaze
- Boost photo lighting and color quality
- Process RAW and JPG files
◎ Step 2: Add Portrait Photos
Launch Leawo PhotoIns on your computer, and then you can add photos for AI enhancing by clicking “Add Photo” button to import source photos from your computer. Besides, you could upload photos by directly dragging them to the main interface of PhotoIns.
◎ Step 3: Optimize Portrait Photos
Leawo PhotoIns integrates an internal photo AI enhancer which enables you to optimize photos in batch or just one by one. This photo AI enhancer automatically adopts “AI enhance” tech to AI optimize portrait photos for you, including retouching skin, removing freckles, enhancing eyes, adjusting lighting and more.
1. Optimize photos in batch
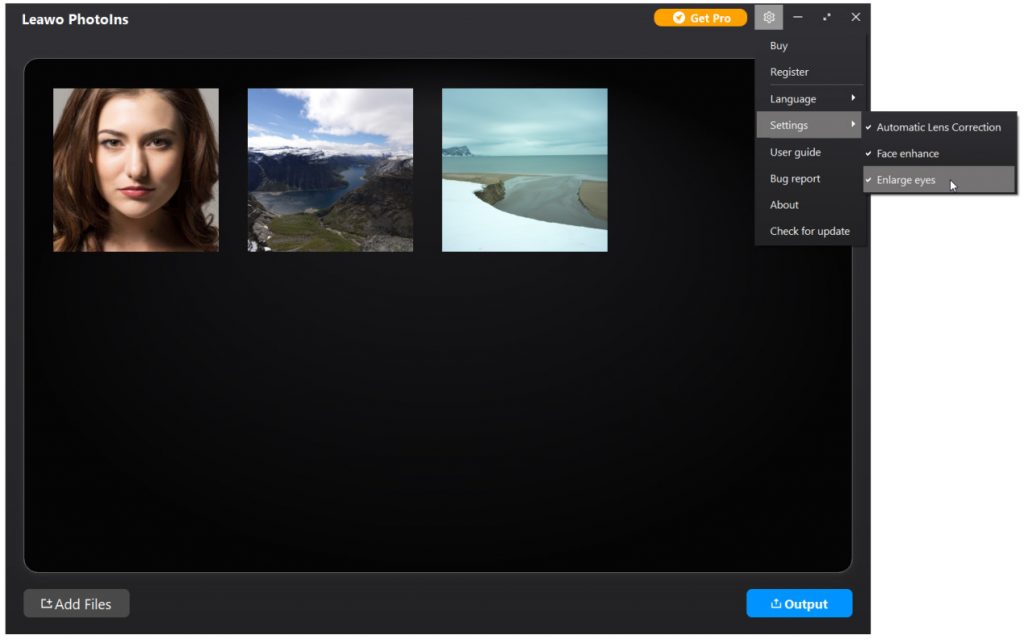
To AI enhance photos in batch after loading source portrait photos, just click the “Settings” button on the top-right corner, and then choose the “Settings” option on the drop-down panel to enable “Automatic Lens Correction”, “Face enhance” and/or “Enlarge eyes” features. Next, PhotoIns will automatically enhance all the loaded photos in batch accordingly. Then, you can click the blue “Output” button for output settings.
2. Enhance photos one by one
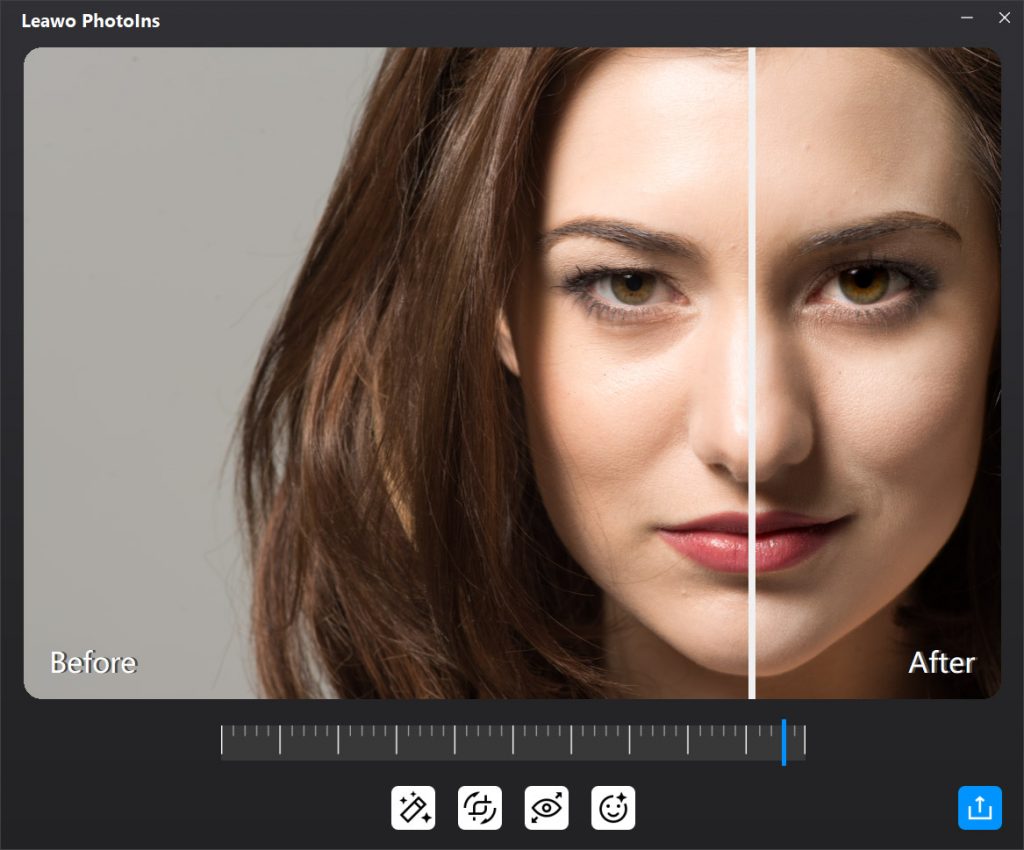
Despite of enhancing photos in batch, you can also optimize photos one by one according to your specified need. Except for AI enhance, you can apply/remove other AI photo enhancing features including “Automatic Lens Correction”, “Face Enhance” and “Enlarge Eyes” to edit a photo.
- ☼ The “AI Enhance” feature is enabled by default and can’t be disabled, automatically and intelligently enhancing loaded photos for output.
- ☼ The “Lens Correct” feature is for RAW photos only, used for correcting the lens for RAW photos.
- ☼ The “Eyes Enlarge” feature can enlarge the eyes of the portrait in source photos to make the portrait look more stunning.
- ☼ The “Face Enhance” feature can retouch skin, remove freckles, enhance eyes, adjust lighting and more.
To adjust the AI enhancing degrees for a photo, you can use the effect adjuster bar right below the previewer. When you drag the bar from left to right, you can instantly preview the photo effects between “Before” and “After”. When you finish the enhancing effect, click the close button on the editing interface to save all editing features you have applied.
◎ Step 4: Save Output Settings
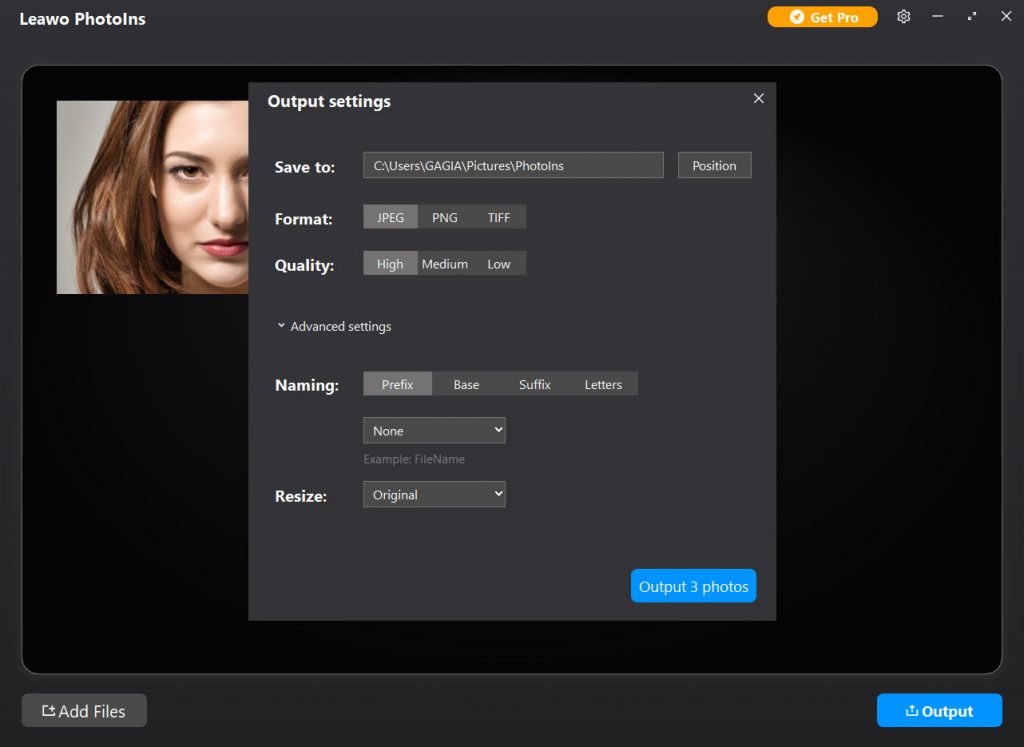
When you have completed the AI enhancing, click the blue “Output” button to open the “Output settings” window, where you can choose output path, select the photo file format, set the output photo quality, name and resize the photo.
◎Step 5: Output AI Enhanced Photos
Click the blue “Output
Part 4: Photoshop vs. Lightroom vs. PhotoIns
There is no doubt that the three useful tools recommended here are advantageous for smoothing skin texture of your portrait photos. They all have their own pros and cons. You can learn more of them from the comparison chart below.
| Products | Leawo PhotoIns | Photoshop | Lightroom |
| Enhance portrait photos automatically with advanced AI photo enhancer | YES | NO | NO |
| With an effect adjuster bar to adjust the photo AI enhancing degrees | YES | NO | NO |
| Retouching skin, removing freckles, enhancing eyes, adjusting lighting | YES | YES | YES |
| Fix photo exposure issues automatically | YES | NO | NO |
| Fix and improve the colors | YES | YES | YES |
| Adjustment features: Texture, Clarity, Dehaze, Vibrance and Saturation | YES | YES | YES |
| Lens Corrections | YES | YES | YES |
| Process multiple photos in batch | YES | NO | YES |
| Support a RAW image | YES | YES | YES |
| Occupying less ROM | Yes | No | No |
| Price | $9.95/Year | $239.88/Year | $118.88/Year |
All in all, you may have found that the best way for beginners to smooth skin is to use Leawo PhotoIns. As an AI photo enhancer, PhotoIns can optimize your portrait photos automatically and intelligently. It is easy to use, cost-efficient, convenient and friendly for both professionals and beginners. While Photoshop and Lightroom are powerful and high-performance but expensive and complicated to some extent, only some professionals are skilled in editing photos for advanced use. Anyway, in this article, no matter you want to know how to retouch skin texture automatically, or how to get smooth skin on face carefully with specified features, you will find your way.

