How to Record PowerPoint Presentation with Audio and Video?
PowerPoint, first developed by Forethought for Macintosh computer in 1987 and purchased by Microsoft in 1990, comes with all features you need to create a presentation. It is a complete presentation graphics package, offering word processing, outlining, drawing, presentation management tools, and more. As a visual aid for presentation, PowerPoint contains key information you want to share. When information is presented visually in addition to oral or written forms, people tend to retain more and respond better. Nowadays, although actual presentation is still important, online presence means more. Actually, you can record a presentation on PowerPoint in real-time while you are presenting. In today’s tutorial, we will introduce 2 ways on how to record PowerPoint presentation with audio and video. Walk through to learn more.
Related readings:
How to Fix PowerPoint Not Recording Audio?
How to Record Zoom Meeting Without Permission?
How to Record Google Meet Without Permission?
Menu
Part 1: How to Record PowerPoint Presentation Using Built-in PowerPoint Recorder?
Microsoft PowerPoint provides a built-in function of recording slideshow with audio narration. The recording can be saved as a video file. Before recording a presentation on PowerPoint, you should have a computer with sound card, speakers, and a microphone plugged in. If needed, a webcam can be added optionally. However, the built-in PowerPoint recorder only records slideshow one by one instead of in one continuous file. Therefore, do not speak during slide transitions in case of voice loss. To record a PowerPoint presentation using the built-in recorder, follow the detailed steps below.
Step 1: Prepare your PowerPoint presentation
On your computer, find the target PowerPoint file and double-click to open it. Before starting to record a PowerPoint presentation, you can first strategically think about how to engage viewers instead of reading the words on slides.
Step 2: Head to Record Slide Show option
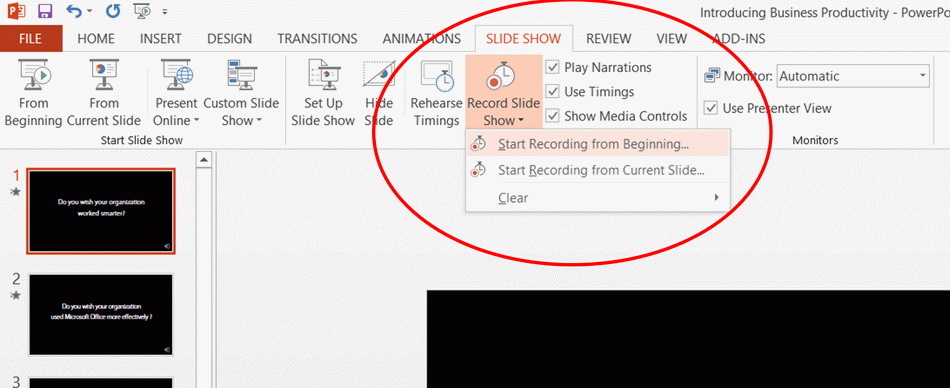
On the top menu bar of PowerPoint, go to Slide Show > Record Slide Show. Then, in the drop-down menu, you can choose to record from the current slide or record from beginning.
Step 3: Start to record PowerPoint presentation with audio
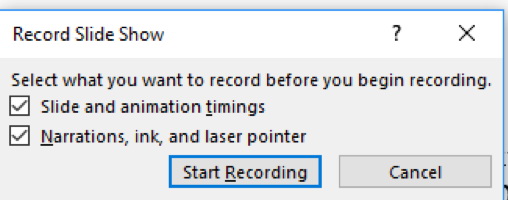
After choosing where to record, a window will pop up asking “Select what you want to record before you begin recording.” You can click the boxes next to Slide and animation timings, and Narrations and laser pointer to enable corresponding feature. Once you click the Start Recording button, it will begin to record the PowerPoint presentation immediately.
Step 4: Control PowerPoint recording
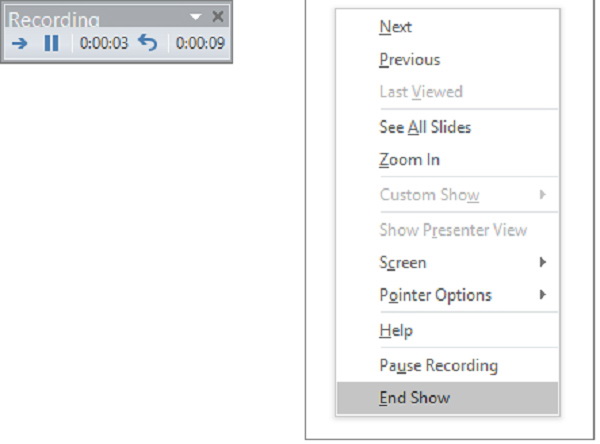
To move forward to the next slide, left-click the mouse, or press the right arrow key on your keyboard. If you want to pause the presentation, right-click on anywhere of the screen and choose the Pause Recording option. To exit the presentation in advance, press the Esc key on your keyboard, or right-click on anywhere of the screen and choose the End Show option.
Step 5: Verify the quality of the recording
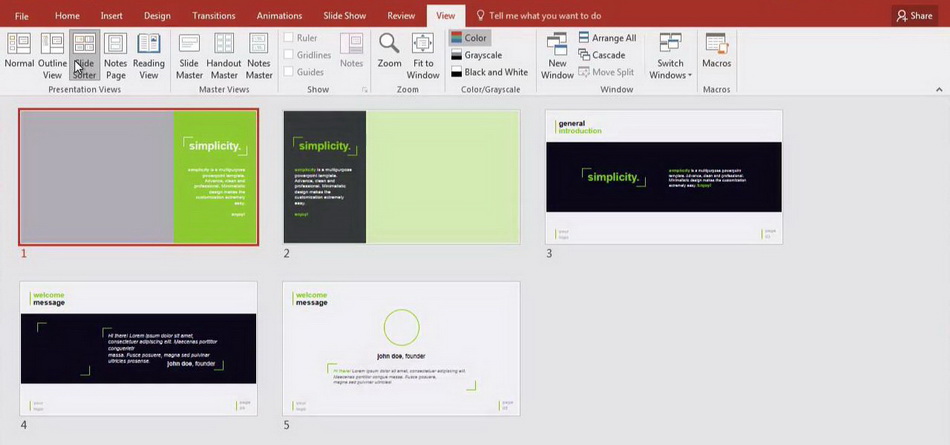
Click View > Slide Sorter, and all slides will be tiled on the screen. There should have a speaker icon with the duration of the slide in the bottom-right corner of each slide. You can click to verify the quality of the recording.
Step 6: Output PowerPoint recording
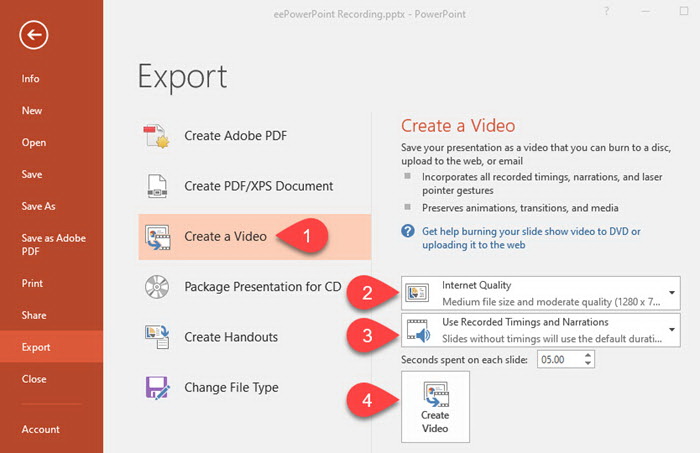
If you are satisfied with your audio narration, you can then output the recording. Click File > Save As, and an output directory window will popup. In the Format section, you have to save the PowerPoint presentation with a .pptx extension instead of .ppt. Otherwise, your audio narration will be lost and you have to re-record the presentation. Alternatively, if you want to save the recording as a video file, go to File > Export > Create a Video. After setting video quality, timings and narrations, click the Create Video button in the bottom to output the presentation in video file.
Part 2: How to Record PowerPoint Presentation with Audio and Video Using Leawo Screen Recorder?
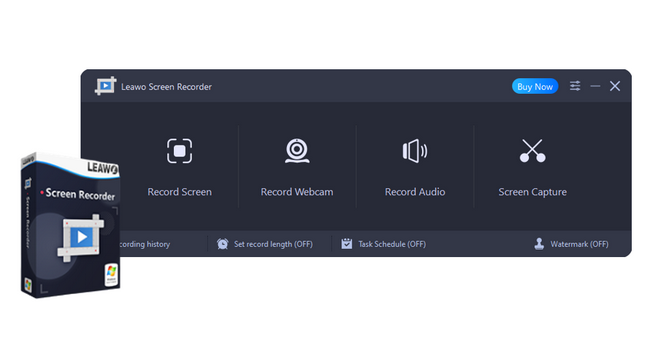
There are many limitations on recording presentation with the built-in PowerPoint recorder. For example, you can’t continuously record PowerPoint presentation, annotations and real-time drawing can’t be added on recording to highlight key points, and more. Fortunately, all these problems can be easily solved by third-party software. As one of the best screen recording software, here Leawo Screen Recorder will be recommended. It is a multifunctional screen recorder with 4 modules, including screen recorder, audio recorder, webcam recorder and screen capturer. Each module can be used separately or together. What’s more, you can freely add audio narration, cursor movement, mouse click animation, real-time drawing, webcam, and many other effects to your recordings. Therefore, it is an excellent tool to record presentation on PowerPoint. For more details, read the following.
Step 1: Download Leawo Screen Recorder
Click either button below to download Leawo Screen Recorder to your computer. Then, follow the onscreen instruction to install and launch this software.

-
Leawo Screen Recorder
- Record all activities on your computer screen as HD screencast.
- Record video from your webcam.
- Record any audio from your computer an/or microphone.
- Capture anything on your computer screen as screenshot.
- Add drawing, annotations, watermark, mouse animation, and BGM to recordings.
- Output in high quality with multiple formats selectable.
Step 2: Set output preferences
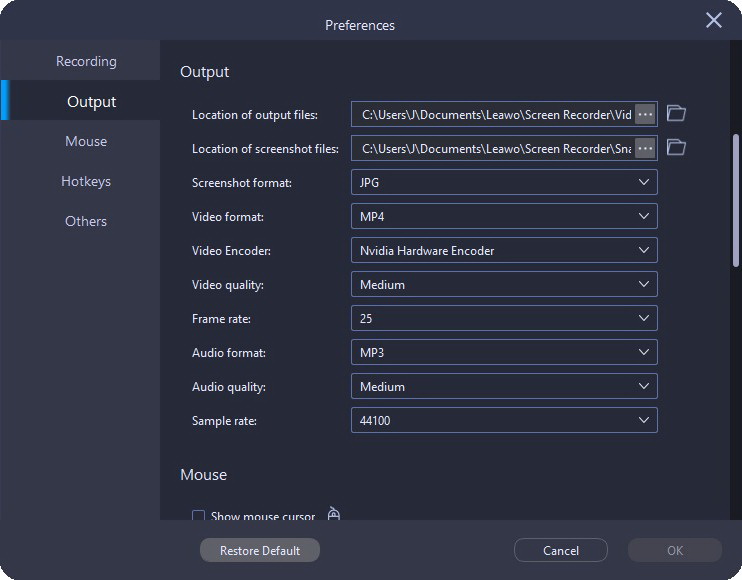
On the Home screen, click the three-bar icon and choose Settings option in the drop-down menu. You can set output preferences like video format, video encoder, frame rate, etc. under Output tab.
Step 3: Select recording region
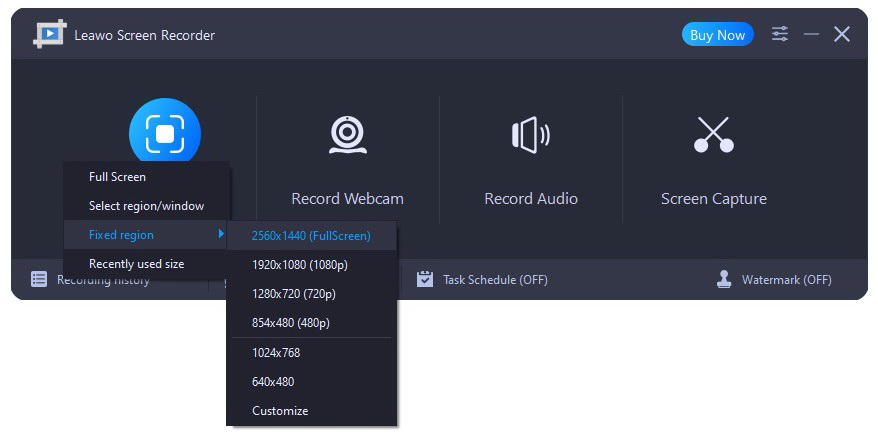
Unlike the built-in PowerPoint recorder that can only record the whole screen of the presentation, Leawo Screen Recorder provides you with 4 options to select recording region, including Full Screen, Select region/window, Fixed region, and Recently used size. Choose any of them at will to move forward.
Step 4: Set recording device
In the secondary pane, you can click the buttons of System Sound, Microphone and Webcam to enable or disable the corresponding feature. If you want to switch to another recording source, click the triangle button next to each button and choose available source in the drop-down list.
Step 5: Start to record PowerPoint presentation with audio and video
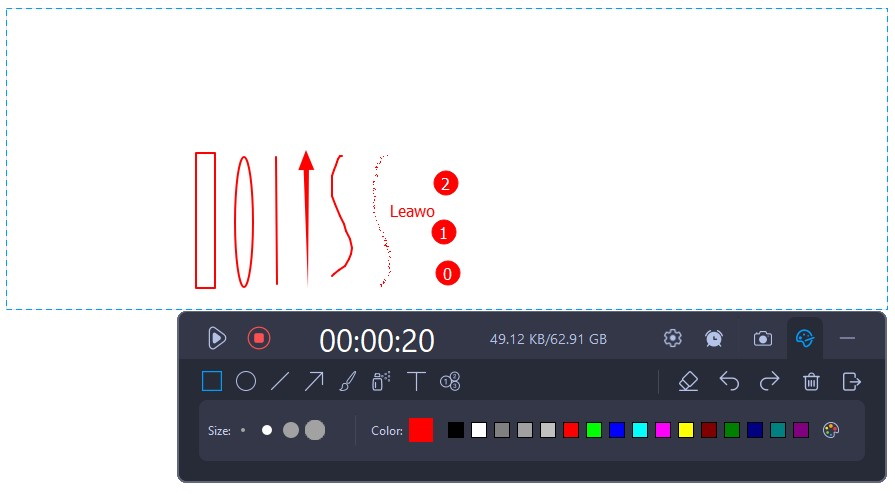
Click the REC button to start recording presentation on PowerPoint with audio and video. In the pop-up widget near the recording frame, you can click the clock button to schedule recording task, click camera button to take screenshot, and click the palette button to add annotation and doodle in real time.
Once the presentation is over, click the red button to stop recording. The, on the Record History panel, you can freely manage your recordings.
Part 3: Built-in PowerPoint Recorder vs. Leawo Screen Recorder
After introduction, you may have a general understanding of recording PowerPoint presentation using 2 different tools. Then, how to choose the one that best fits your need? Here comes a comparison table between the built-in PowerPoint recorder and Leawo Screen Recorder.
| Features | PowerPoint Recorder | Leawo Screen Recorder |
|---|---|---|
| Record PowerPoint presentation with audio narration | Yes | Yes |
| Record a continuous PowerPoint presentation | No | Yes |
| Freely choose recording area | No | Yes |
| Add annotation and real-time drawing to recording | No | Yes |
| Highlight key points when recording | No | Yes |
| Add mouse click effect and cursor animation | No | Yes |
| Overlay webcam to recording | No | Yes |
| Take screenshot while recording | No | Yes |
| Add watermark on recording | No | Yes |
| Schedule recording task | No | Yes |
| Set output recording quality | Yes | Yes |
| Ease of use | Yes | Yes |


 Try for Free
 Try for Free

