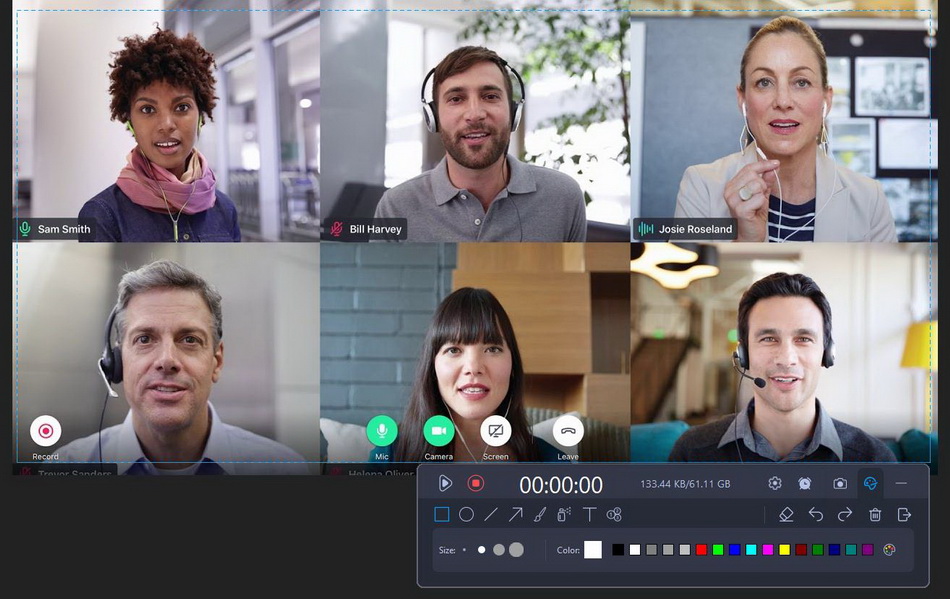
Since technology keeps pulling each other closer through the Internet, there are so many things we can do remotely such as chatting online, sharing content, and of course, holding meetings. In this mature environment, people can arrange online meetings on different apps like GoToMeeting and Zoom. As a well-known online conferencing program, GoToMeeting provides a wide range of features for users to carry out real-time experiences. By allowing users to communicate with clients and co-workers, this platform is able to maintain good quality while streaming videos and audio. Besides conducting web conferences, users are also given options to record video meetings, store videos online or at local drives, and share GoToMeeting recordings with colleagues. If you are new to this program and wonder how to record a GoToMeeting, this guide will demonstrate a couple of handy methods.
Related readings:
How to Record Google Meet Without Permission?
How to Record Zoom Meeting Without Permission?
Menu
Part 1: How to Record a GoToMeeting as Organizer Using Built-in Recorder?
Similar to the methods of Zoom video meeting, permission from all attendees is necessary. To be more precise, it is required to have an organizer account so that both organizers and co-organizers can record and stop at any time. If you would like to save GoToMeeting recordings on Cloud, this feature also needs the authority from your admin. Once the account is associated with an advanced plan, your GoToMeeting recordings can be shared directly within the interface. The special version for administrators is coming with more features like unlimited GoToMeeting recordings in the cloud with limitless storage. If you have activated your account with organizer plans, you can follow this guide on how to record GoToMeeting.
Step 1: Go to Admin Center of GoToMeeting on browser
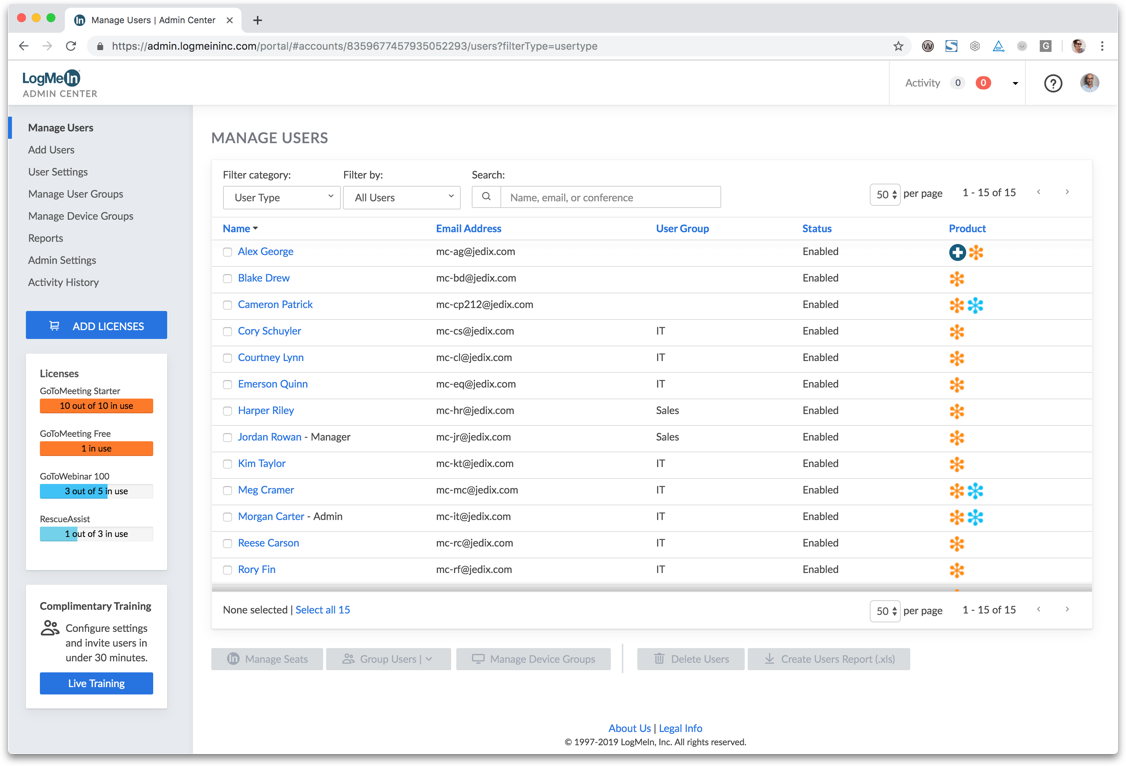
Open the browser and input GoToMeeting to access the site. Go to the Admin Center where users can manage to enable multiple product features seamlessly. This page even allows you to troubleshoot some common issues and track down utilization by running stable reports.
Step 2: Enable recording GoToMeeting feature
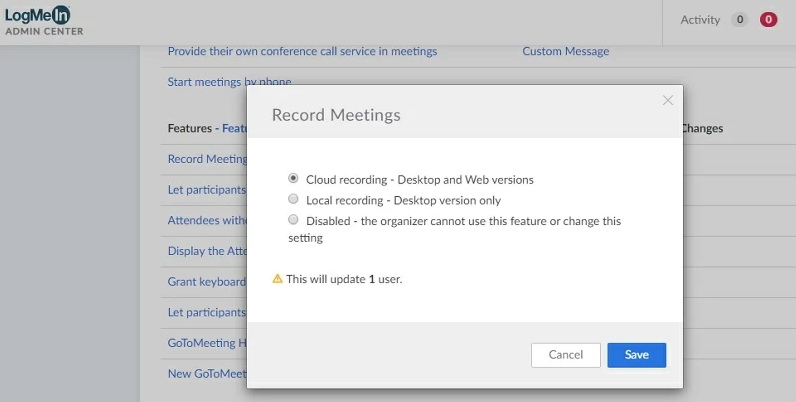
Navigate to the user settings from the left sidebar. Select the GoToMeeting label on the top and you will see a long list of items. Look for the Record Meetings option under the Features section and click on Cloud recording listed in Status. Enable the GoToMeeting recording option you prefer. You can choose local recording or Cloud recording according to the platform you use. Then click Save to apply the changes.
Step 3: Start to record a GoToMeeting as organizer
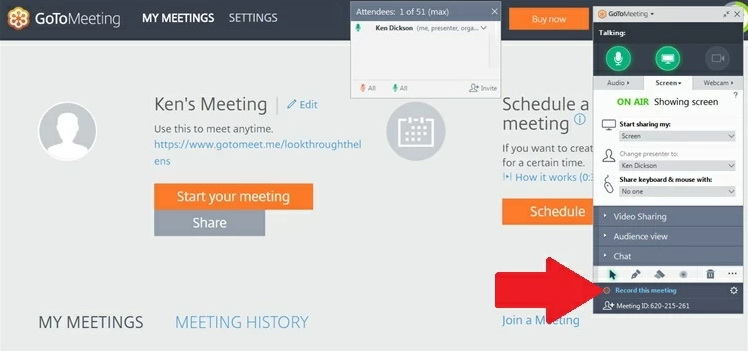
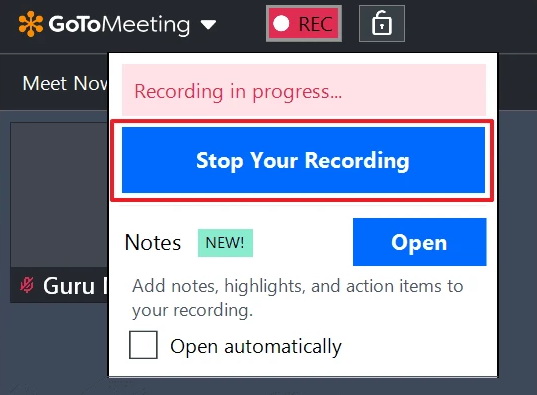
Go back to the main interface of the GoToMeeting where you can start a meeting. There will be a couple of buttons to activate audio, video, screen share, and chatting box. Click the Record and Start Your Recording. When you need to stop, click on the same button to cease the GoToMeeting recording.
Step 4: Stop recording GoToMeeting
When the online meeting is finished, shut down the app and you can see a prompt window coming up. Click on End Meeting for All and your GoToMeeting recordings will be saved either in Cloud or local storage.
Step 5: Check GoToMeeting recording history
Check your GoToMeeting recordings from the History. You can find the History tab in the interface of the main meeting calendar. Click on a specific recording, you can also view it locally, download it to local, share it to others, and delete it.
Step 6: Convert GoToMeeting recording
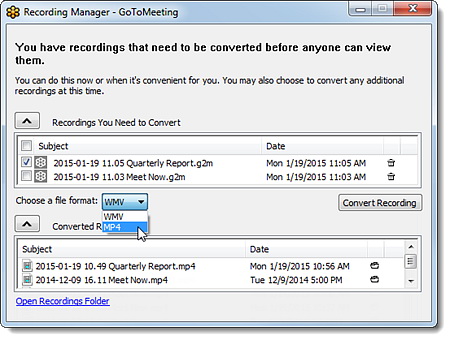
If you want to share with other friends, you need to manually convert the GoToMeeting recording videos into a popular format so that the content can be decoded easily by most apps. To do this, right-click on the GoToMeeting icon at the bottom to call out a shortcut menu. Select Convert Recordings to choose an administrator perspective in order to access the content. Also, you can pick up a range of GoToMeeting recordings and hit Convert Recording.
Part 2: How to Record a GoToMeeting as Attendee Using Leawo Screen Recorder?
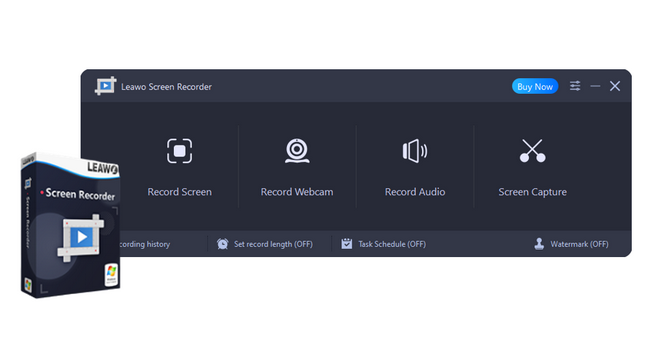
Just mentioned above, to record a GoToMeeting, you should be an organizer with recording permission from all attendees. But what if you want to record a GoToMeeting as attendee? Or what if you want to record a GoToMeeting without permission? In such cases, a third-party screen recorder is needed. Among all screen recording software on the market, Leawo Screen Recorder can be regarded as the best choice for both professionalism and ease of use. Actually, this screen recording software can also be used as an audio recorder, webcam recorder and screen capture. Each module can be activated individually or together. With this software, you can not only screen record GoToMeeting as attendee with annotation, real-time drawing and webcam added, but also record GoToMeeting to audio only. Follow the detailed steps below to record GoToMeeting as Attendee and without permission.
Step 1: Download and install Leawo Screen Recorder
Click the button below to download Leawo Screen Recorder. Then, follow the onscreen instruction to install this software to your computer and launch it.
-
Leawo Screen Recorder
- Record all activities on your computer screen as HD screencast.
- Record video from your webcam.
- Record any audio from your computer an/or microphone.
- Capture anything on your computer screen as screenshot.
- Add drawing, annotations, watermark, mouse animation, and BGM to recordings.
- Output in high quality with multiple formats selectable.
Step 2: Set recording preferences
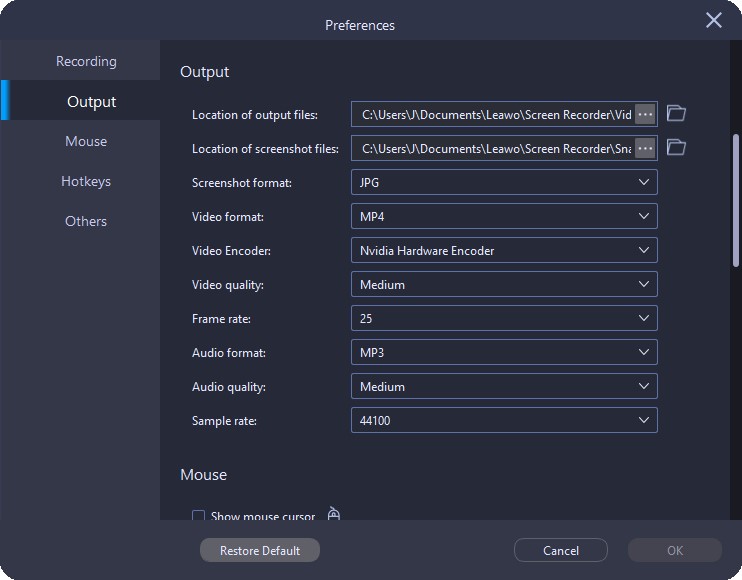
Before recording GoToMeeting, you can go to Settings by clicking the three-bar icon in the top-right corner. Then, click Output tab in the left column, where you can set preferences like output directory, video format, encoder, quality, frame rate, etc. to your recording.
Step 3: Select a mode for recording region
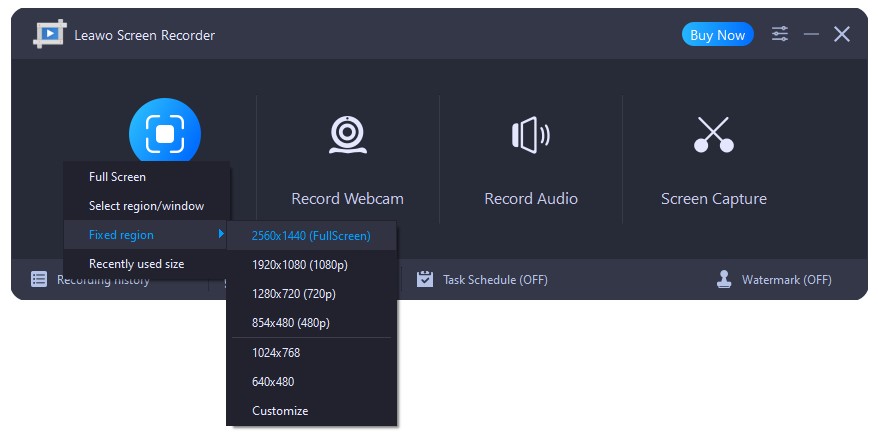
Click Record Screen button on the main interface. Then, in the drop-down menu, you can select a recording region among full screen, selected region, fixed region or recently used size.
Step 4: Set recording devices to record GoToMeeting
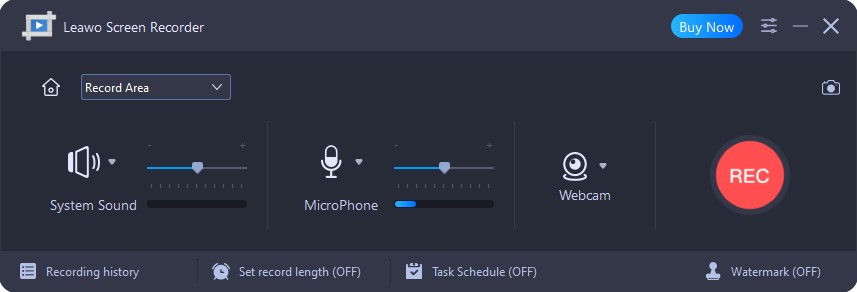
After choosing a recording mode, in the secondary menu, you can click System Sound, Microphone and Webcam to enable or disable the corresponding devices.
Step 5: Start to record a GoToMeeting as attendee
Click the REC button at the right to start recording GoToMeeting a attendee, and a control widget will pop up near the recording frame. You can click the clock button to set a timer, click the camera button to take a screenshot, and click the palette button to add various effects to your recording. Once it is complete, click the red button to stop, and you can view and manage your recording in the pop-up Recording History panel.

