It will be so frustrating that your iPhone will not send text messages when there is something urgent that you wanted to communicate with others. If you're having issues with sending text messages or imessage from your iPhone, then this is likely caused by a software issue and you should be able to fix it without too much trouble. If you are iPhone users, you will find that the post is useful when your iPhone will not send text messages.
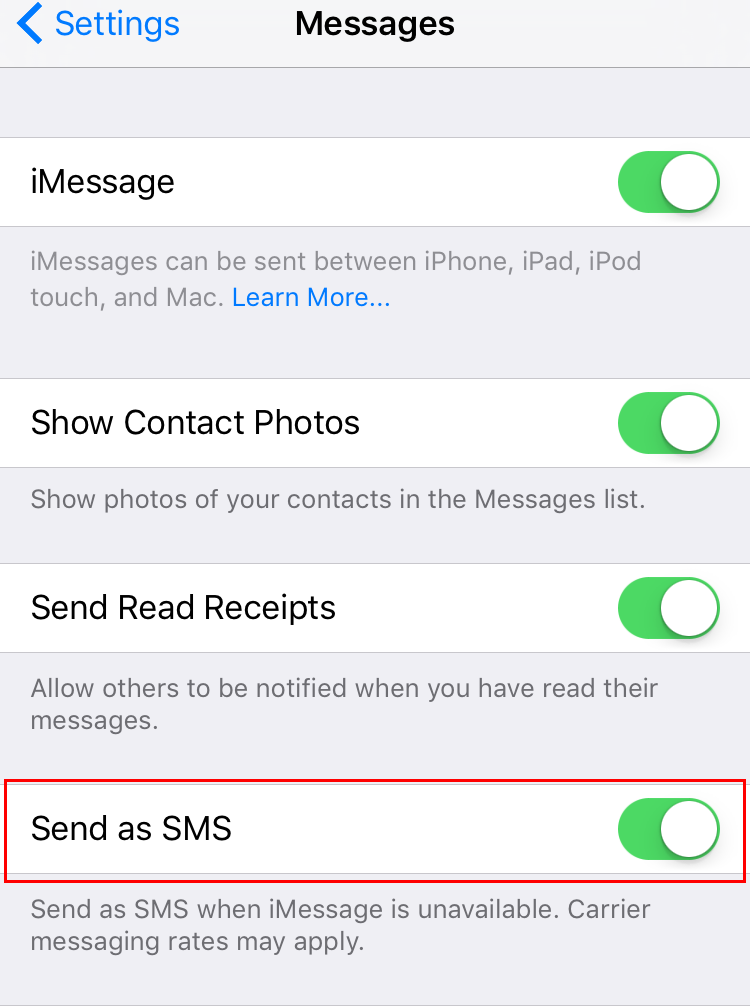
Method 1. Turn on "Send as SMS"
Typically, when iMessage is unavailable, your iPhone should send messages as SMS ones instead, denoted by the green chat bubble as opposed to the regular blue. If, however, your iPhone won’t send texts automatically, you could fix it with the following steps. Most iPhone users have iMessage enabled, but some may have accidentally turned off SMS support.
1. Tap into the Settings app, and scroll down to tap on Messages.
2. Locate the switch for "Send as SMS" and turn this to the ON position. If send as SMS is already on, try turning it off for about 10 seconds and then turn it back on again.
3. Return to Messages and try sending the text message again.
Method 2. Dsiable Airplane Mode
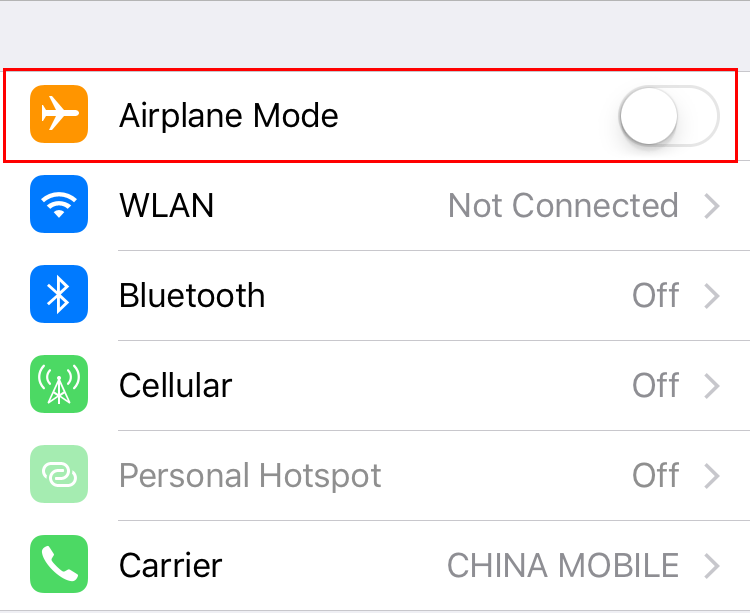
Your iPhone won’t be able to send or receive text messages while it is placed in Airplane Mode. Follow the steps below to make sure that Airplane Mode has not been accidentally enabled on your iPhone. It may help you solove the iPhone text messages not sending problem.
1. Tap on Settings.
2. On the Settings screen, make sure that the toggle for Airplane Mode is set to OFF position. If not, turn off it.
Method 3. Restart Your iPhone
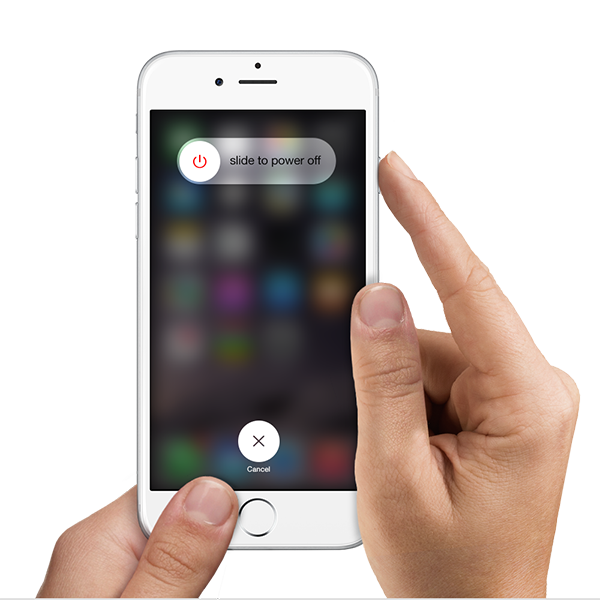
Restarting iPhone may help you get rid of iPhone not not sending text messages issue. It is not a difficult thing for you. Follow the steps below to know how to do.
1. Press and hold the Sleep/Wake button.
2. Drag "Slide to power off" to turn your iPhone off.
Once your iPhone screen becomes black, press and hold the Sleep/Wake button again to turn it back on.
Method 4. Turn off LTE on iPhone
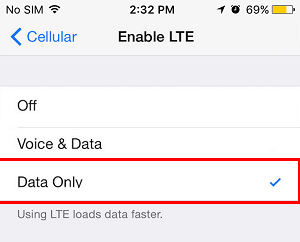
The iPhone 6 and later feature VoLTE—Voice over LTE—and if you live in an area where your carrier is actively expanding or rolling it out, funny things have been known to happen. To remedy them, you can try and use LTE only for data, or not at all. It may not be ideal but should only be temporary.
1. Launch the Settings app on your iPhone.
2. Tap on Cellular.
3. Tap on LTE.
4. Tap on either Data Only or Off.
5. Reboot your iPhone (see above).
Method 5. Restore Your iPhone
If you have tried them all but your iPhone still doesn't send text messages, maybe it is the time for a fresh start. You can restore your iPhone to factory settings using iTunes. Everything you have stored on your device (apps, files and settings you have adjusted according to your needs) will be erased. Therefore, please keep in mind that you have to backup your iPhone before restoring iPhone to factory settings. And you need to install the latest version of iTunes on your PC or MAC. Then go to Settings > iCloud to turn off Find My iPhone.
1. Plug iPhone into the computer with the USB cable. The iTunes on your computer will automatically launch. If not, double-click the icon to start it.
2. Click the name of your iPhone at the upper right corner of iTunes, and then the information of your iPhone will be shown. Click the “Restore iPhone” button in the window to start.
3. iTunes will ask whether you want to back up iPhone before restoring. You’d better choose "Yes" for the reset will erase the contents in your iPhone. Then iTunes will start restoring your iPhone to factory settings.
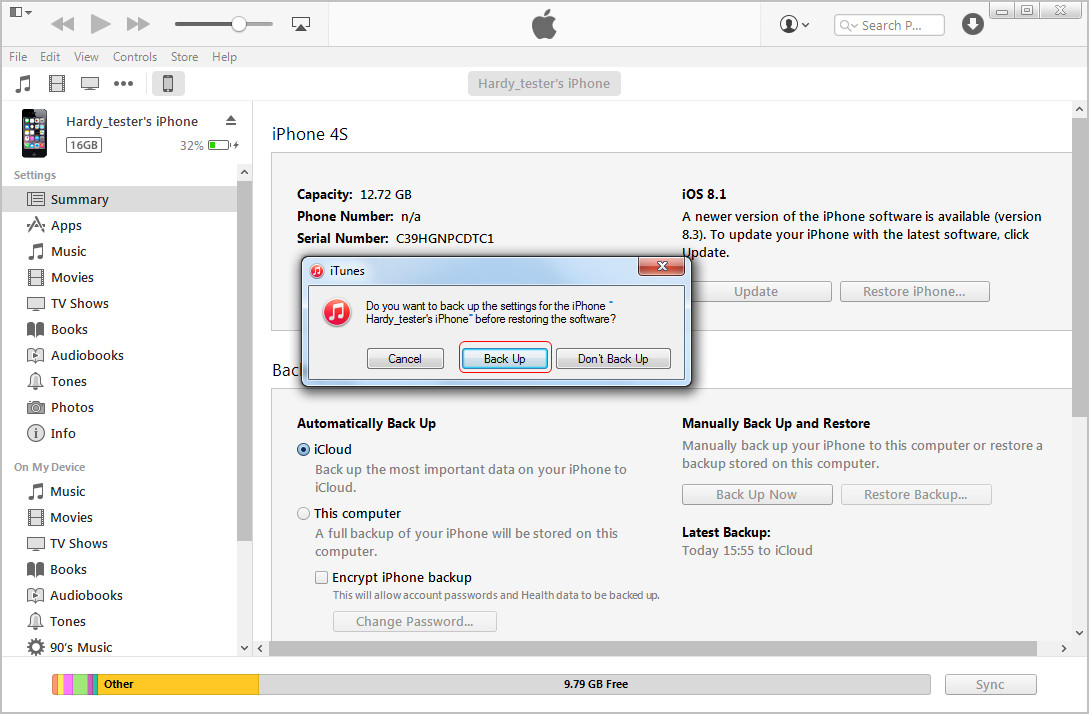
3. Click Restore again to confirm. Then iTunes erases your iPhone and installs the latest iOS or iPod software. After you restore your iPhone to factory settings, it will restart. Now you can set it up as new.

All the solutions above are found effective to fix iPhone messages not sending issue on iPhone 4, iPhone 4s, iPhone 5, iPhone 5s, iPhone 6, iPhone 6 Plus, iPhone 6s, iPhone 6s Plus, iPhone SE and iPhone 7. If you tried the solutions above, and nothing works, contact Genius Bar or the nearest Apple Authorized Service Provider.


