Are you looking for some methods to recover data from locked iPhone? If yes, this article will teach you two effective methods to do a big favour to you in recovering data from locked iPhone without any effort. Most of time, iPhone users would lock their iPhone with passcode in order to prevent others to get access to their device and keep their privacy protected. And some users would change their passcode regularly to make sure their device are kept in high security. But supposed that your passcode is forgotten one day, your iPhone will become unavailable to you, not to say get your data accessible on it. Here we will guide you how to recover data from locked iPhone in two ways, whatever your data has been backed up or not, you can retrieve your data from locked iPhone easily and smoothly with our two methods as below.
Part 1: How to Recover Data from Locked iPhone without Passcode
If you haven’t got your iPhone backed up previously, don’t worry, our super and professional data recovery software - Leawo iOS Data Recovery will help you a lot in recovering data from your locked iPhone. This software can be applicable to any iOS devices like iPhone, iPad and iPod. Any deleted data in different kinds of iOS devices models can be recovered in high efficiency. The lost data can be restored despite your data are loss due to the deletion in mistakes or other reasons. More that 14 kinds of data like contacts are supported to recover with Leawo iOS date recovery. Moreover, this software can be also acted well as a useful backup tool for iOS devices. 100% safety, accuracy and high speed are ensured in this software, the data even can be previewed and selected before recovery. Three recovery modes can be selected in data recovering with this software, that is iOS device data recovery mode, iTunes data recovery mode and iCloud data recovery mode. Below we will introduce you the specific instructions of how to recover data from locked iPhone without passcode via Leawo iOS data recovery in iOS device data recovery mode.
There are also two modes included in iOS data recovery mode, one is Normal Mode, the other is DFU mode. However, only iPhone 4 and iPod touch are supported by DFU mode. For Normal mode, all iOS devices can be applicable to it. Here we will guide you how to complete the data recovery task from Normal Mode as follows:
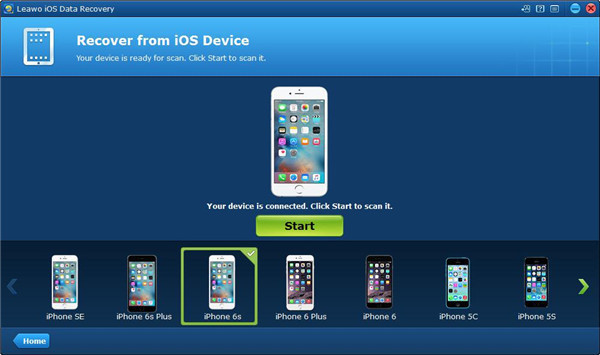
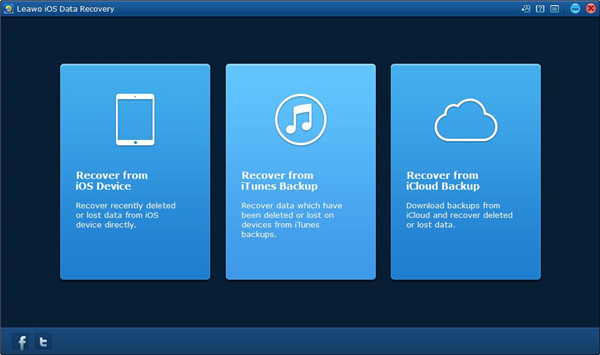
1. Launch Leawo iOS data recovery on computer and connect your device to the computer, choose the fist selection “Recover from iOS device” from the main interface of the software.
2. Your device will be displayed in the device list on the bottom, then choose your own device model and click on the “Start” button.
3. After that, the scanning process will begin.
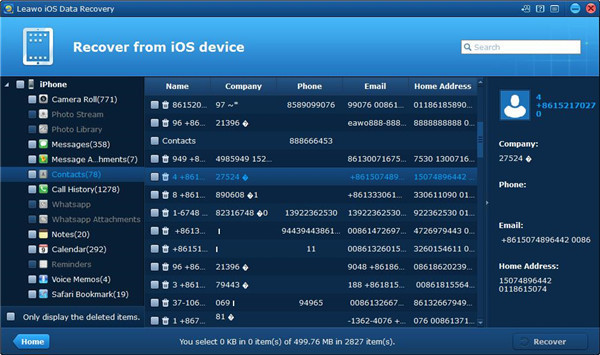
4. Once the scanning process is completed, all the data of your device can be seen on the left sidebar. The specific content of the data will be listed on the right part of the software.
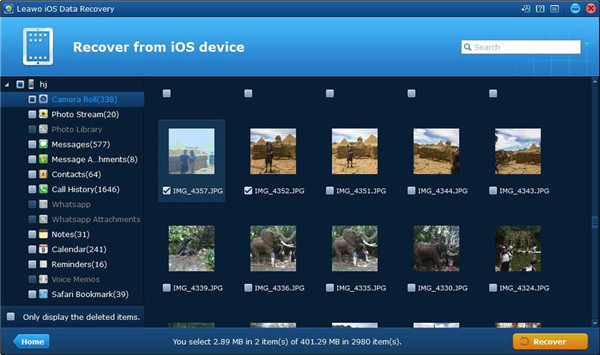
5. Check the data you want to recover and click on the “Recover” button.
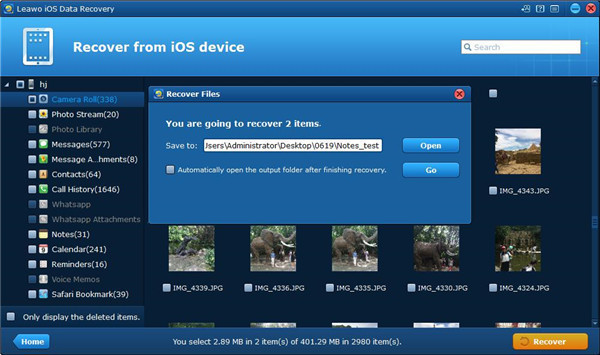
6. Then you will see a pop-up window which requires you to choose a target folder for saving the recovered data on your computer. By clicking on the “Open” button, you can choose the output directory for the recovered files, or you can check the option “ Automatically open the output folder after finishing recover” to enable the output folder to open itself. Finally, click on the button “Go” to begin to recover the data of your device on your computer.
Part 2: How to Recover Data from Locked iPhone using Backups
The second method is to recover the data from locked iPhone by using backups if you have your data backed up before. Below we will guide you how to recover data from iTunes backup and iCloud backup via Leawo iOS data recovery.
Method 1: Recover Data From iTunes Backup
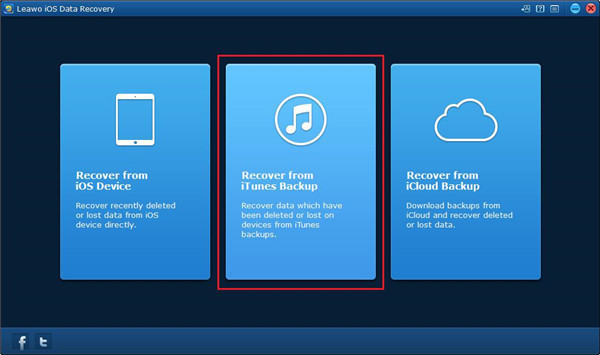
1. Launch Leawo iOS data recovery on your computer and choose the second selection “Recover from iTunes Backup” from the main interface.
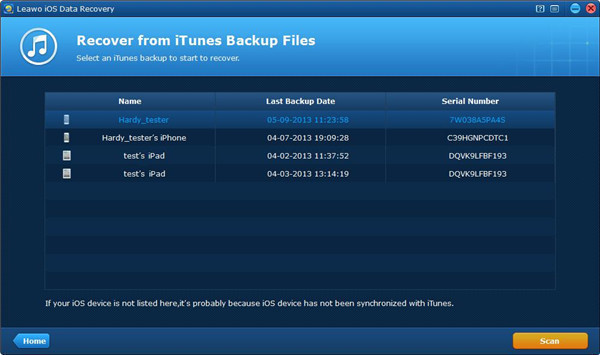
2. Then all backed up data from your different devices via iTunes will be listed for your selection. You can choose the backup from your iPhone and click on the “Scan” button to begin scanning process.
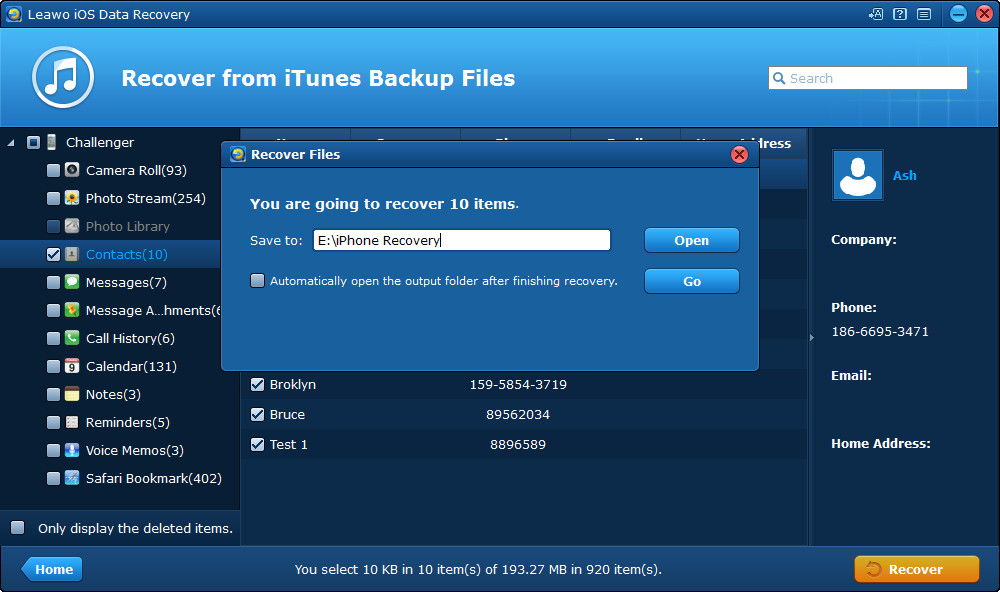
3. All the recoverable data of your iPhone will be shown on the left column once the scanning process is finished. Each type of recoverable data can be checked out by clicking on it, you can choose the data you would like to recover by enabling the checkbox beside the recoverable data.
4. You can click on the “Recover” button on the right bottom after you have chosen the data file you need to recover. Then click on the “Open” button on the pop-up window to choose a target folder for storing your recovered data. Also, you can check option “Automatically open the output folder after finishing recover” to let the output directory open by the software itself. Finally, click on the button “Go” to begin the data recovery.
Method 2: Recover Data From iCloud Backup
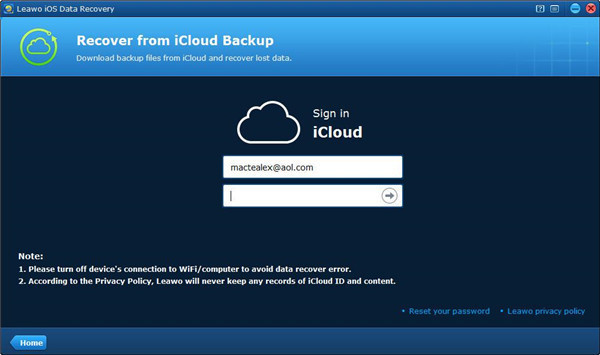
1. Choose the third selection “Recover from iCloud backup” on the main interface of Leawo iOS data recovery.
2. Then you will enter a page which requires you to sign in iCloud by using your Apple ID.
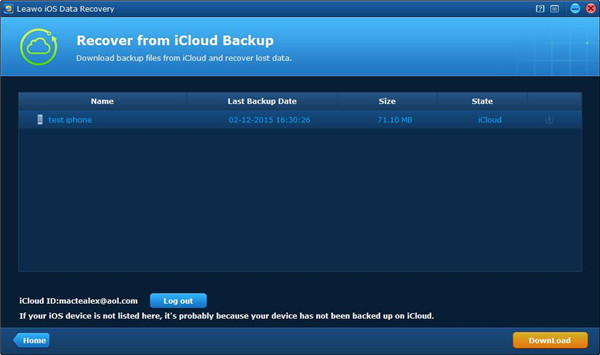
3. When you log in your iCloud account, your backed up data on iCloud will be scanned by the software. And your backed up data will be displayed in the list once the scanning process is completed. Then You can download the backed up files by double clicking on the backed up data or clicking on the “Download” button. You can log out your iCloud account by click on the “Log Out” button before the downloading begin. You also can click on the “Cancel” button to end the downloading during the downloading process.
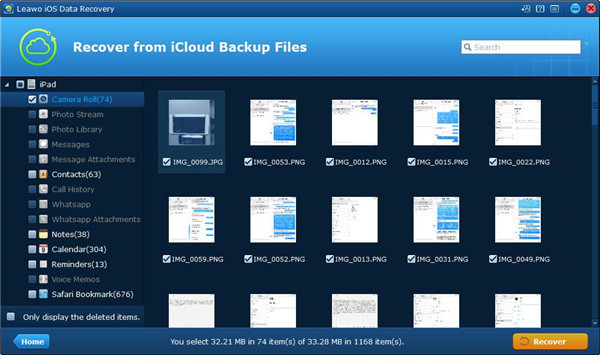
4. When the downloading of backup is completed, the software will begin to scan the backup automatically. All the backed up files will be displayed on the left sidebar after the scanning is finished. You can choose the files that you need to recover by enabling the checkbox.
5. Once you have selected the files for recovering, you can click on the “Recover” button and then a widow will pop up to require yo to choose an output directory for saving your recovered files. The output directory can be set by clicking on the “Open” button. You can also check the option “Automatically open the output folder after finishing recovery” to make the output directory open without manual operation. Finally, click the button “Go” to begin the data recovery.
Part 3: How to Unlock Locked iPhone
If you have forgotten your iPhone passcode, resetting your locked iPhone would be a great solution. Here we will guide you how to unlock your locked iPhone in three ways.
Method 1. Unlock iPhone from iCloud by erasing all data
You can unlock your iPhone via the website iCloud Find My Phone. If your Apple ID was enable in Find My iPhone, the following instructions is able to work for you in unlocking your locked iPhone.
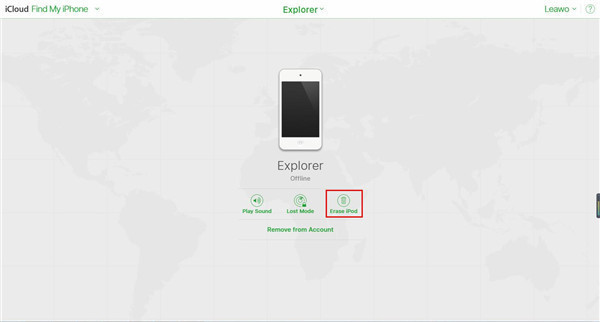
1. Open the website iCloud.com on your computer browser and sign in by using your Apple ID and passcode.
2. Click on “Find My iPhone” and choose “All Devices” on the top of window.
3. Choose your iPhone in the devices list.You iPhone including its passcode will be erased by clicking the option “Erase iPhone”.
4. You can find the most recent backed up data in your iPhone and then restore the backed up data. Setup Assistant on your iPhone can work well to help restore the recent backup from your iPhone.
You should note that this method only work under the condition that your iPhone is running with wireless connection. Moreover, your must have your Apple ID and make sure that go to iCloud to open Find My iPhone. But the most terrible is that this method will delete the setting and data on your iPhone.
Method 2. Unlock iPhone passcode via iTunes
If you still remember your iPhone passcode and have it backed up with iTunes recently, then you can unlock your iPhone in a simple way with iTunes.
1. Connect your locked iPhone to computer via USB cable, then launch iTunes on your computer too.
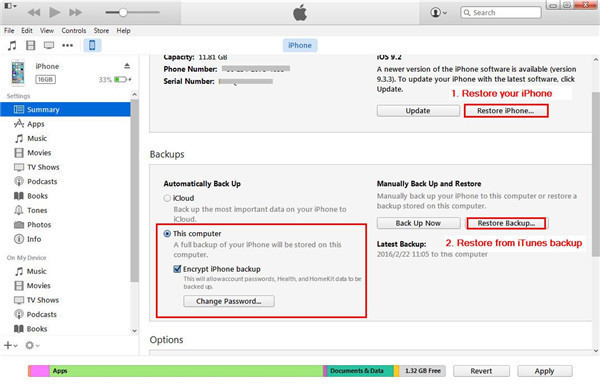
2. Select “Sync” option in iTunes, then enter your passcode when your required to unlock your iPhone.
3. Click on the option “Store” and make your iPhone restore from the backup in the most close date.
Method 3. Unlock disabled iPhone by using Recovery Mode
If you haven’t made your iPhone sync with iTunes or haven’t set it up via Find My iPhone. Entering recovery mode will be available to you as all data on your iPhone including passcode will be deleted thoroughly.
1. Make sure your iPhone unplugs anything.
2. Turn off your iPhone by holding the sleep/wake button, then slide it to right to switch the power off.
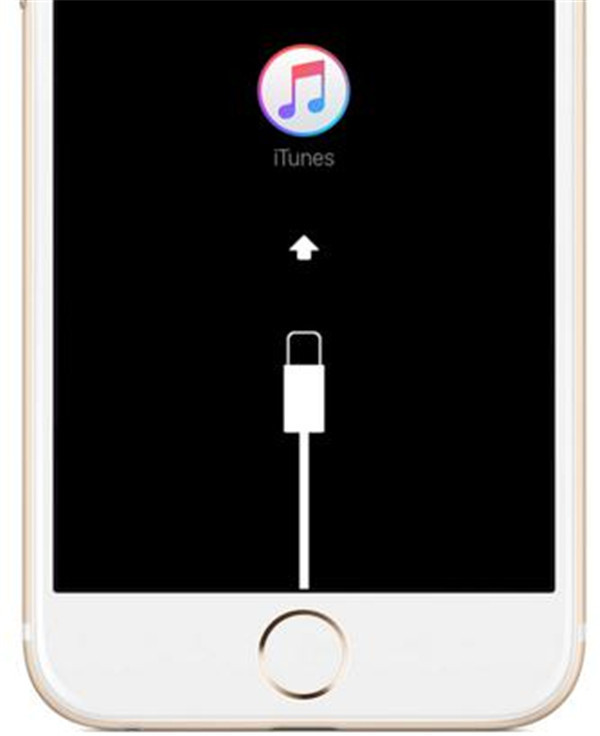
3. The home button must be pressed and held, then connect your iPhone to the computer again at the same time.
4. The home button must be kept holding till the connection to iTunes Screen can be seen.
5. Select “Restore” once the option “Restore” or “Update” show up.
You should note that if the update files takes above 15 minutes to begin downloading, your iPhone will go out of the recovery mode and you have to repeat the process mentioned above to unlock your disable iPhone.
Extension: How to Backup A Locked iPhone through iTunes
If you have backed up your iPhone via iTunes previously without restarting, you may need to back up again to prevent data loss. Probably you are required to enter passcode for your backup.
1. Plug in your iPhone to the computer with USB cable.
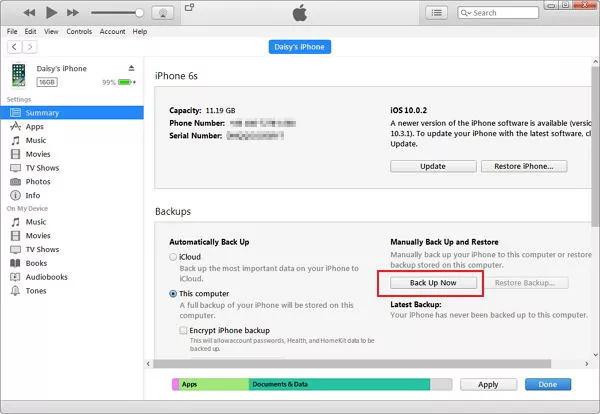
2. Then run iTunes on the computer and click on the icon button “Device” from the tab bar.
3. Choose the option “Back Up Now” to begin to back up your locked iPhone via iTunes.


 Try for Free
 Try for Free


