“No CUDA in HandBrake? why is cuda hardware-accelerated encoding not available in HandBrake? i know that the Windows versions of handbrake has Intel QSV (Intel Quick Sync) if you have a compatible Intel CPU. But I am running an msi gtx 1070 8gb gaming x gpu, and other programs that have cuda encoding, but handbrake doesn't have this option. I could use either of those programs, but would rather use HandBrake because of its simplicity. I get that hardware encoding is lower quality, but it seems this could save a lot of time especially with H.265 encode. So, is CUDA encoding available in HandBrake? And if yes, how to get CPU acceleration with HandBrake?”
Does HandBrake use CUDA to accelerate its encoding process? Many HandBrake must be strongly desiring to know the answer. As one of the most popular video encoding tools, HandBrake offers totally free service for you to convert video, DVD and even Blu-ray files to MP4 or MKV files with high quality. However, the conversion speed has been a big drawback of HandBrake. Some people hence have been wondering if CUDA encoding is available in HandBrake for speeding up the encoding process. If you happen to have the same question. This guide would be exactly what you want. We will show you the best solution to encode your DVD and video files by fully making use of your GPU acceleration graphics card.
Part 1: Is CUDA encoding available in HandBrake?
Firstly, let’s give a frank answer to the question: Is CUDA encoding available in HandBrake. The official answer is NO. GPU acceleration helps deliver a more efficient process to handle computationally-intensive tasks - for example video encoding/rendering. Since its high efficiency in speeding up task processing, GPU acceleration has been widely utilized by lots of programs. HandBrake is one of these programs that have employed GPU acceleration technology.
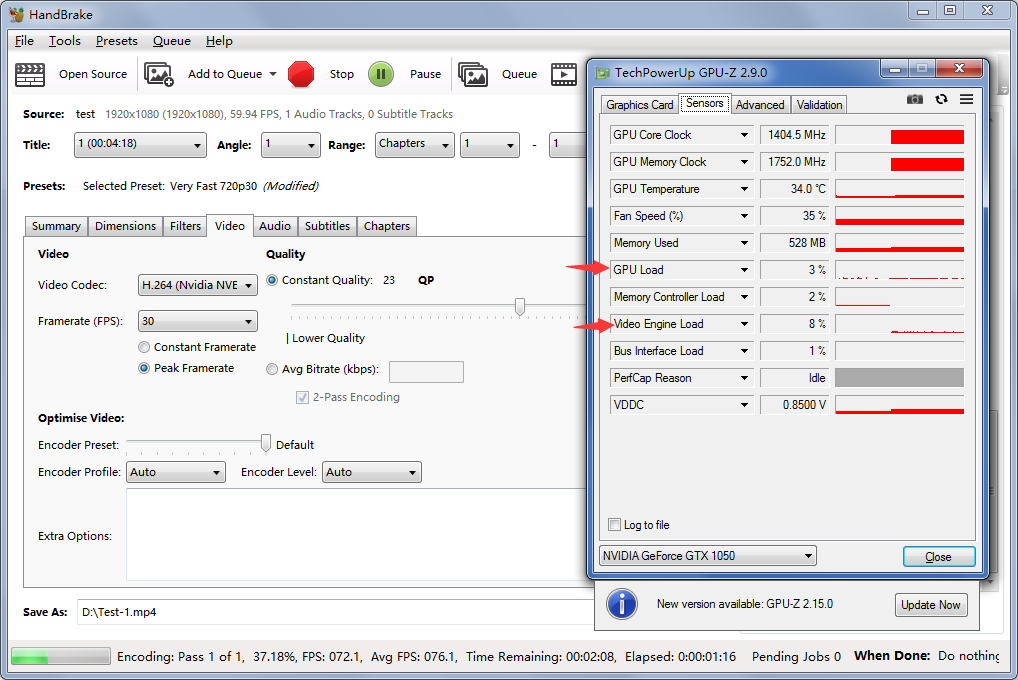
HandBrake utilized Intel Quick Sync Video to achieve high performance for H.264 encoder on a computer having compatible Intel graphic cards. Further, it gave the support of NVIDIA NVENC for encoding acceleration in version 1.2.0. The program performance has been highly improved since then with hardware encoding. But, some users try to make sure whether CUDA encoder can be enabled in HandBrake because of older GPUs not supporting NVENC but CUDA.
CUDA was created by NVIDIA as "a parallel computing platform and programming model enabling dramatic increases in computing performance by harnessing the power of the graphics processing unit (GPU)". A CUDA-enable NVIDIA GPU can provide a faster video encoding. However, it should be noted that HandBrake has never announced the support of CUDA. Even though your computer has NVIDIA GPUs, you will not find any option on HandBrake to let you make use of the CUDA acceleration technology.
Part 2: How to Get GPU Acceleration with HandBrake?
As stated above, CUDA encoding is not available in HandBrake. But HandBrake enables you to encode video with other GPU encoding technologies such as the Intel Quick Sync for H.264 encoder and NVENC encoding. Then, how to get GPU acceleration within HandBrake?
The below steps would show you detailed guide on how to make use of GPU encoding within HandBrake:
- Download and install HandBrake on your computer. Make sure your computer has Intel Quick Sync or NVENC encoding hardware configured.
- Launch HandBrake and then click the “Open Source” button to browse and add your source DVD/video files for encoding.
- After adding source media file, choose title, angle, ranges, etc.
- Then, select the preset for output.
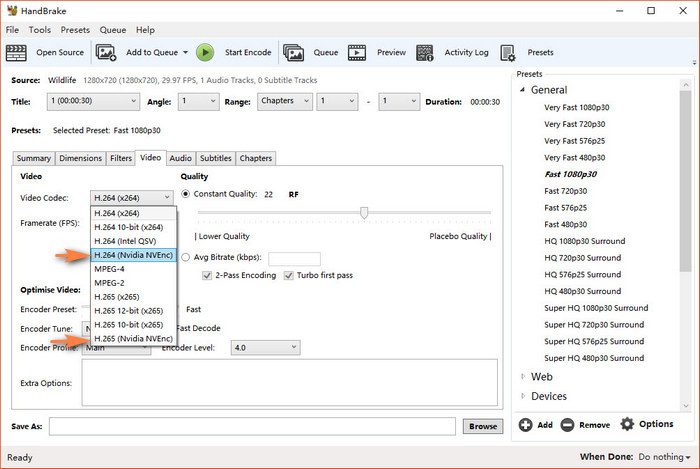
- Go to the top menu bar, select Tools > Preferences > Video. The supported hardware video encoder will be enabled automatically, and the unsupported handbrake encoder options will be grey and can’t be selected. Here takes Handbrake NVENC as an example.
- Choose hardware-accelerated encoder. Under Video tab, open the drop-down list of video codec. Intel QSV option allows you to encode H.264 while NVIDIA NVENC helps encode HEVC/H.264.
- In the “Save as” option, give output file a name and specify a directory to save output file.
- Now, you just need to click “Start Encode” button on the menu bar to get GPU-accelerated encoding.
You could then view the entire encoding process. You will find it’s faster than usual.
Part 3: Handbrake Acceleration Tips
Here are some HandBrake GPU acceleration tips for you to make it more convenient and practical for you to encode media files with HandBrake at faster conversion:
- Supported hardware and configurations of HandBrake in GPU acceleration:
- Nvidia GeForce GTX Pascal (1050+) and RTX Turing (1650+, 2060+) series GPU or better
- Nvidia Graphics Driver 418.81 or later Windows 10
- Experimental Linux support is available in HandBrake’s command line interface
- Support for the Nvidia Nvenc encoder is enabled in preferences on the video tab. If your system is not supported, the option will be disabled.
- Handbrake only supports a few hardware-accelerated encoder software and operating systems. Before starting the Handbrake hardware acceleration process, let’s view the computer configurations that Handbrake officially supports:
|
|
Processor and Graphic Card |
Operating System Version |
|
Nvidia NVEnc Encoder |
Nvidia GeForce GTX 10 and RTX 20 Series. Driver “399.24” or later must be installed. |
Windows 7 SP1 and Later |
|
Intel Quick Sync Video |
Intel Sandy Bridge (2nd Generation Core) CPU’s with Intel HD Graphics better |
Windows 10 (GUI and CLI), Windows 7 SP1 and Later |
|
AMD VCE Encoder |
AMD Radeon RX 400 Series, Vega or better |
Windows 10, Linux (CLI Only when compiled from source with –enable-qsv). |
Part 4: The Best HandBrake Alternative to Encode video with CUDA Acceleration
For those people who are novices to HandBrake, Handbrake is a little complicated and it takes time to learn about the encoding process. And for those veteran, HandBrake lacks some powerful and practical bonus features that make it less satisfied. Therefore, we would like to recommend you an alternative to HandBrake, which offers all features HandBrake has and hasn’t. That’s Leawo Prof. Media, which includes Leawo Video Converter, Leawo Blu-ray Ripper, and other media converters. As a professional Blu-ray/DVD/video converter program that enables you to easily rip and convert Blu-ray/DVD/video files to videos in 200+ file formats. On GPU acceleration, Leawo Prof. Media supports 3 different GPU acceleration technologies that offer up to 6X faster encoding, respectively Intel Quick Sync, NVICIA CUDA, and AMD APPBothLeawoVideo Converter and Leawo Blu-ray Ripper support these 3 GPU acceleration technologies.
In the below guide, we would like to take ripping Blu-ray/DVD movies with CUDA acceleration as example to show you how to use Leawo Prof. Media to encode video with CUDA acceleration. (The operation for converting videos with Leawo Video Converter is similar.)
Firstly, you need to download and install Leawo Prof. Media on your computer. Both Leawo Blu-ray Ripper and Leawo Video Converter are built in Leawo Prof. Media’s “Convert” module.
Step 1: Load a Blu-ray movie
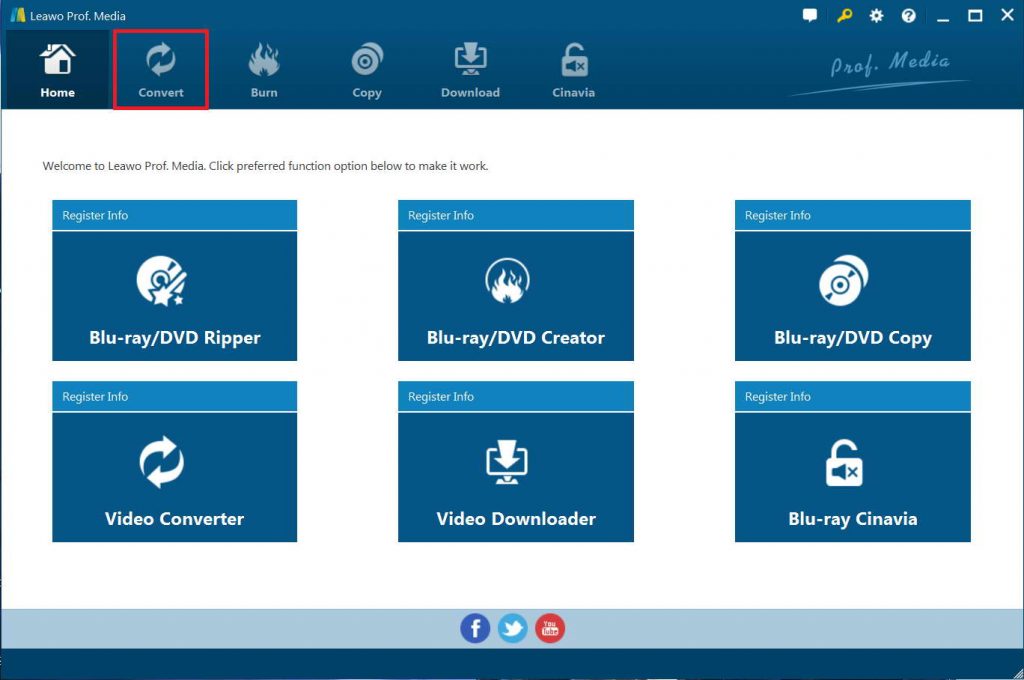
Launch Leawo Prof. Media and then open the “Convert” module on the menu bar. You then come to the Convert module, where you can load Blu-ray movie by clicking “Add Blu-ray/DVD > Add from CD-ROM/Add from folder/Add iso file” according to your need. If you want to convert video, simply click the “Add Video” button to browse and add source video files.
Step 2: Select chapters to convert
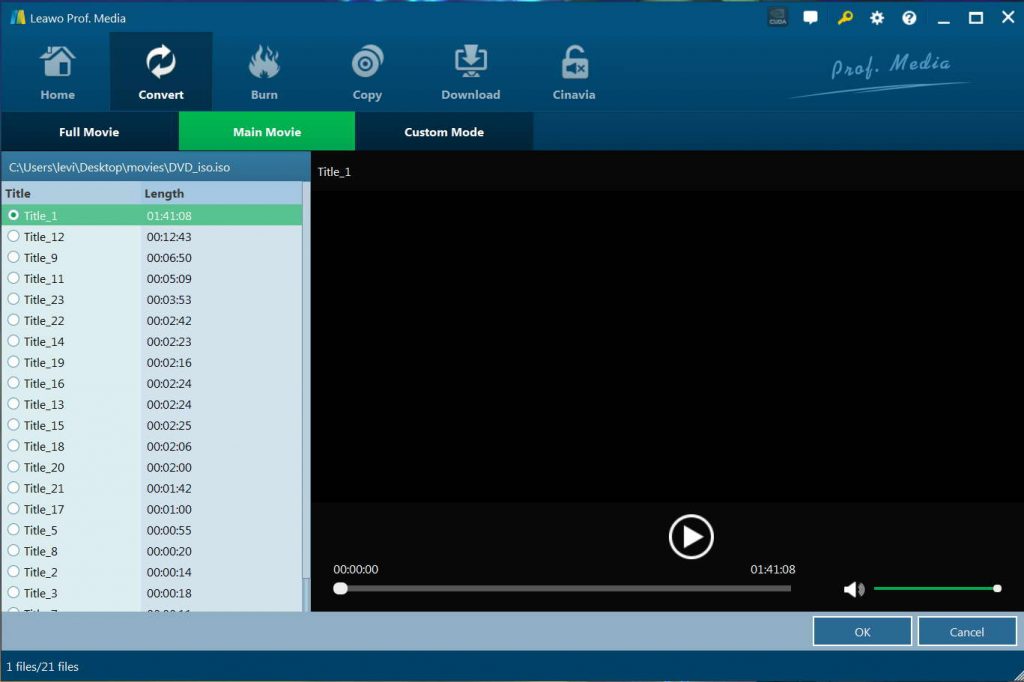
Three converting modes are select-able. “Full Movie” converts the entire movie from source Blu-ray, “Main Movie” converts the longest chapter by default while “Custom Mode” allows you to choose your desired chapter to convert specifically. Video preview is available on the right. Choose one content loading and converting mode according to your needs and then click “OK” button.
Step 3: Select subtitles and audio tracks
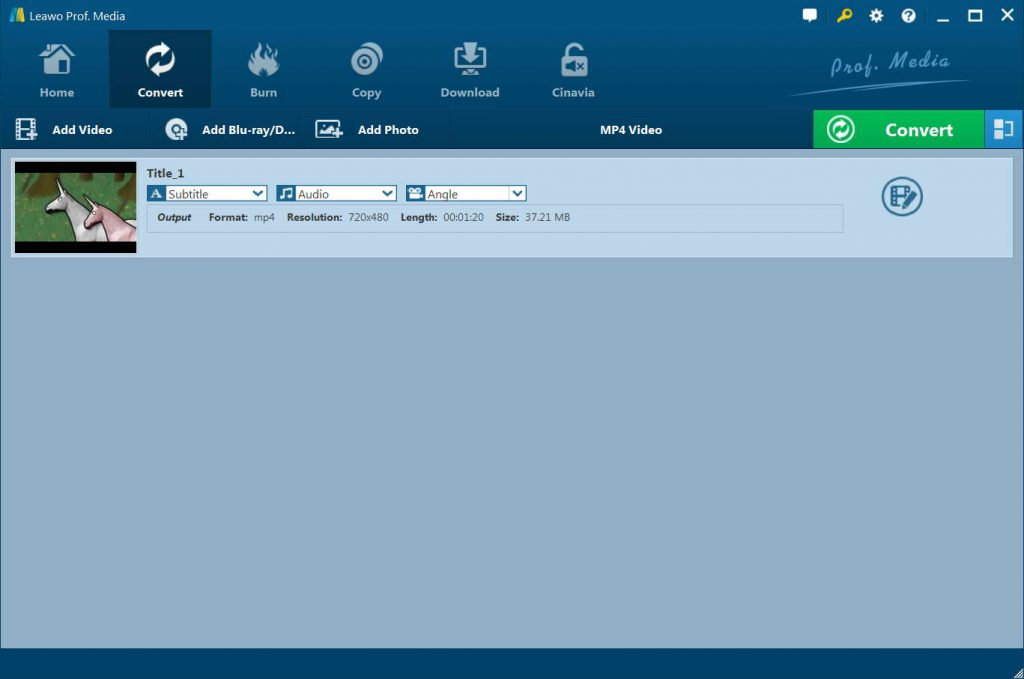
Two drop-down boxes, entitled “Subtitles” and “Audio”, are easy to be found when you are brought to the video list window after the last step. Click each to choose your desired subtitle and audio track.
Step 4: Choose output format
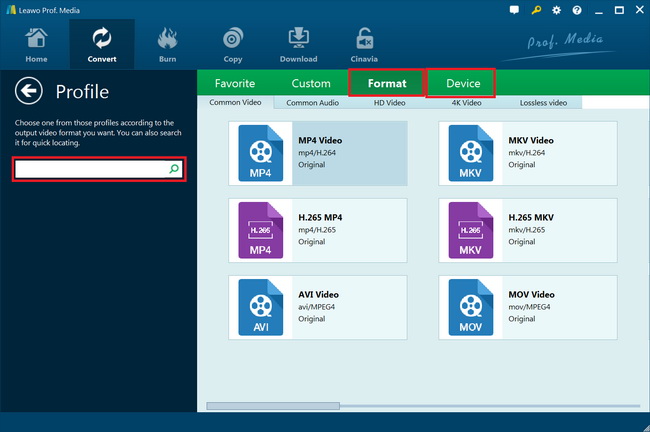
Then, after selecting subtitles and audio tracks, you need to click the clickable button next to the “Add Photo” button. On the drop-down panel, choose “Change” option to enter the Profile panel, where you could select output format from “Format > Common Video/HD Video/4K Video/Lossless video” group.
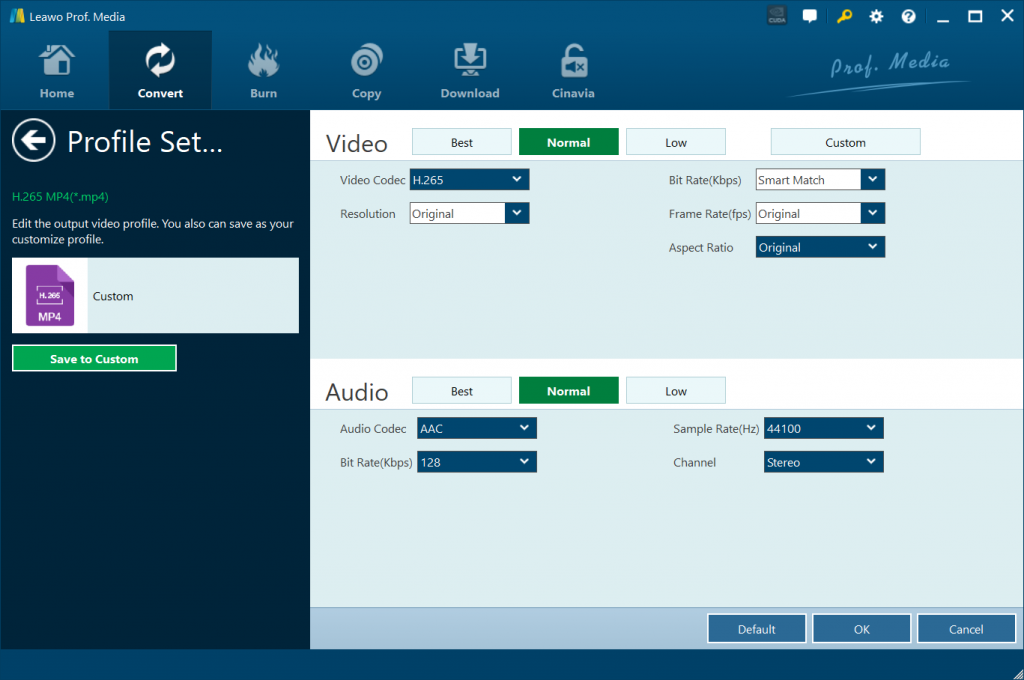
If you need, you could adjust the output file parameters like video codec, bit rate, aspect ratio, frame rate, audio codec, channel, etc. by clicking the “Edit” button on the drop-down panel.
Step 5: Choose CUDA acceleration
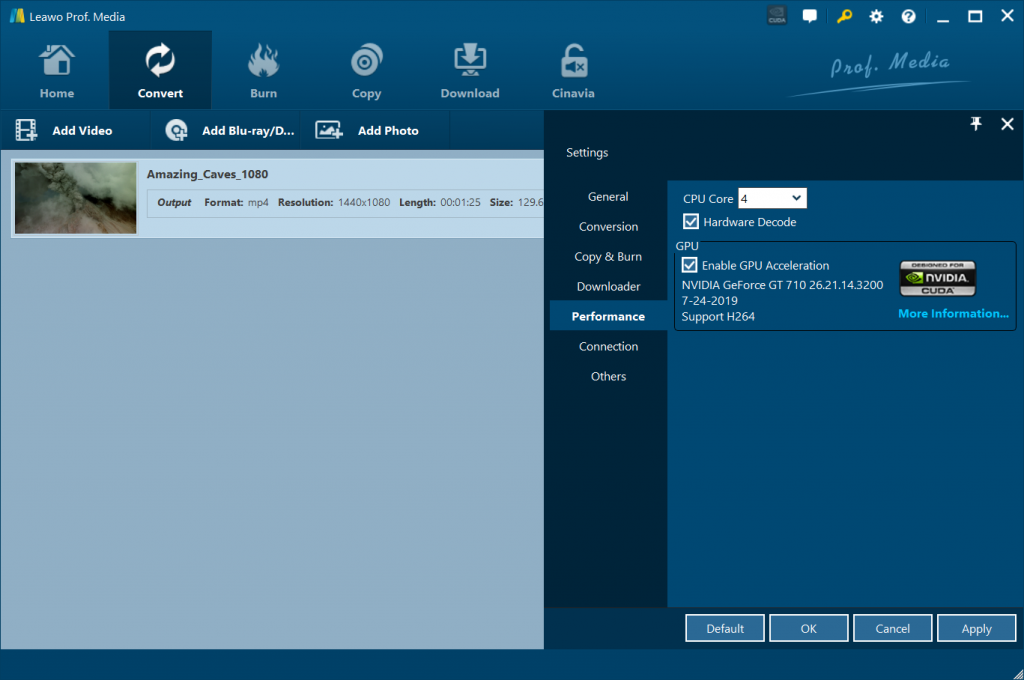
After setting output format, click the wheel icon at the top right corner and then go to the “Performance” tab to check “Enable GPU Acceleration” option, which will enable CUDA acceleration if your computer has CUDA.
Step 6: Specify an output path
When the output profile has been set, click the big green “Convert” button on the main interface, and set your desired output directory in the “Save to” box on the right called-out panel. After that, click the bottom “Convert” button to start converting Blu-ray/DVD movies with CUDA acceleration.
You then only need to wait for the conversion to complete. Compared to HandBrake, Leawo Prof. Media offers more useful features. It supports more video formats other than MKV/MP4 as output, processes encrypted Blu-ray/DVD movies without installing 3rd-party plugins while HandBrake requires libdvdcss, edit Blu-ray/DVD/video files like trimming, cropping, adding watermark, and even applying 3D movie, etc.

