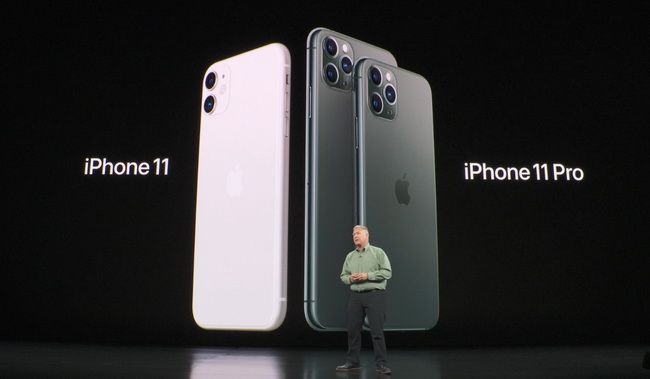
Latest iPhones have introduced the night mode to let users take photos at night just as nicely as when they take photos during the daytime. iPhone 11 and Pro have also got this feature in place that users can feel free to take photos at night with the best performance ever. In this article, we will talk about how to use night mode on iPhone 11 and take a nice photo at night without being affected by the poor lighting conditions. If you are eager to know all the tricks and tips to take a great photo using night mode, this article is exactly right for you.
Part 1: What is the Night Mode
First thing first, night mode is not a new word but it exists for a long period of time. And to make things clear, it is not only restricted to Apple devices but it also applies in other systems and devices, for example, Windows and Android devices.
Night mode does not necessarily mean that your photos are taken at night but it covers a wider definition of night, which also includes poor lighting conditions. Under these circumstances, you still can take crisp, clear photos. So night mode, as the name suggests, lets you take photos in the evening, with lighting that has never before been possible on an iPhone thanks to new hardware and new machine learning algorithms. Though Night mode brightens photos, it also preserves the night time feeling, balancing the light and dark elements of an image. It is kind of the balance between brightening the original scene and preserving the night feeling. With Night Mode, our low-light images come out looking bright, clear, but you can definitely still tell that it's night, or fairly dark.
Back to the technical point of view, night mode is an automatic setting that takes advantage of the new wide-angle camera that's in the iPhone 11 and 11 Pro models. It's equipped with a larger sensor that is able to let in more light, allowing for brighter photos when the light is low. As we know, latest iPhones use A13 processor and night mode uses the new sensor along with machine learning and the Neural Engine in the A13 processor to create Night mode shots.
Part 2: How to take photos in Night Mode on iPhone 11
In principle, when Night mode is engaged, the cameras (yes that is right, cameras) in the iPhone analyze the available amount of light and then the iPhone chooses the number of frames needed to create a suitable image. The camera then takes a series of images for a set amount of time, such as one second, three seconds, five seconds, or in some situations, even longer. That’s why you can feel that your cameras actually blink a few times to take a photo instead of just one blink.
To be frank, Night mode is an amazing feature of the iPhone 11 that will help you get the best shots in low-light situations. To make the most out of it, below tricks and tips need to be considered fully before you take a photo in poor light conditions.
First of all, we need to realize that night mode can automatically kick in when it detects low light scenarios and sometimes we may need to enable night mode manually or we may also be able to tweak the exposure time freely. Like taking photos in normal circumstances, we should keep hands steady when taking photos otherwise, the photos will look dreamy instead of clear and bright. Plus, as you know, in order to take an amazing photo in night mode in iPhone 11, we need to keep the shutter open for a longer amount of time in order to pull in extra light from the scene and take several consecutive shots. In this case, keep your hands steady and allow for letting in light as much as possible. If you are not able to maintain steady hands for seconds/minutes, use a tripod(Check out this tutorial if desired: 5 best selfie sticks for iphone photography enthusiasts). This is very helpful and effortless. Just take the iPhone cameras as professional Sony cameras. They deserve a tripod to take perfect photos.
Second, maintain the subject as steady and still as possible. This rule is very much the same with keeping hands steady because still and steady subjects will lead to clear output photos instead of blurry photos.
Third, always keep in mind that letting in some source of light will be great to your photos. Though we are in low light scenarios, we can manage to get some light for us to take a perfect night mode photo. A tiny light would make a difference in the end.
Fourth, remember to shoot Night mode with Wide or Telephoto. This is because Night mode only works with the rear-facing cameras, and only with the Wide and Telephoto lenses. Don’t use the ultra-wide lens since it lacks optical image stabilization and focus pixels.
The above tips and tricks will be helpful to let you take a photo in night mode on iPhone 11 or Pro.
Part 3: How to transfer night mode photos from iPhone to flash drive
We have learned the tricks and tips to take a photo in night mode on iPhone 11 or Pro. But do you realize the importance of backing up photos in your iPhone 11? It is vital that you can always transfer the iPhone photos from iPhone to a flash drive or computers in case you are running out of space in iPhone. This helps to preserve all your photos in a more cost-effective way. Speaking of how to transfer night mode photos from iPhone to flash drive, you would definitely need a third-party app to help. Leawo iTransfer is such a powerful app that can achieve transferring your photos from iPhone to a flash drive or else effortlessly.
This lightweight yet powerful app provides perfect solutions for iPhone transfer, iPad transfer and iPod transfer issues. Leawo iTransfer is perfectly developed and well capable of backing up iPhone, iPad and iPod (touch) files to computer. It makes the iPhone, iPad and iPod as flash drives so that users can put anything they want into their iOS devices. Moreover, Leawo iTransfer allows users to manage the playlists of the iOS devices and iTunes within the software.
Let’s not boast too much on words but focus on the step-by-step tutorial on how to transfer night mode photos from iPhone to flash drive with the help of Leawo iTransfer.
Step 1: Download and install the app
Click the button below to download and install the lightweight app t your computer.
Step 2: Connect the iPhone to the computer
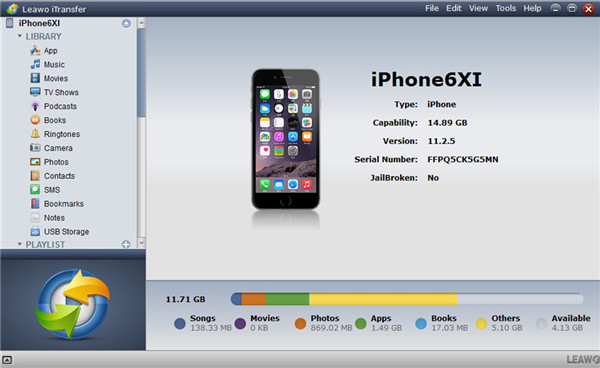
Use the USB cable to connect the iPhone with your computer. Launch the app and it will automatically detect the iPhone. Click the device on the app and all data will be shown on the user interface. Insert the flash drive to the computer.
Step 3: Select the night mode photos to transfer
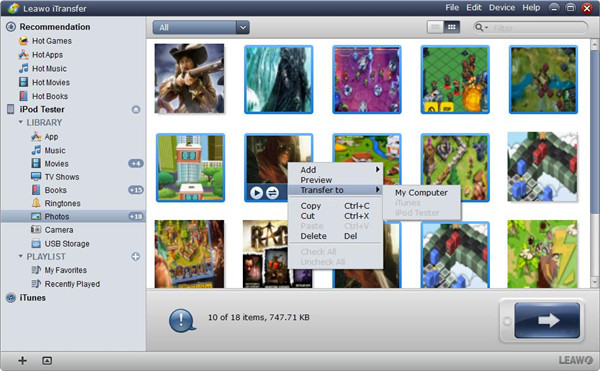
Check the box in front the night mode photos and click Transfer to proceed.
Step 4: Set a directory to save the output photos
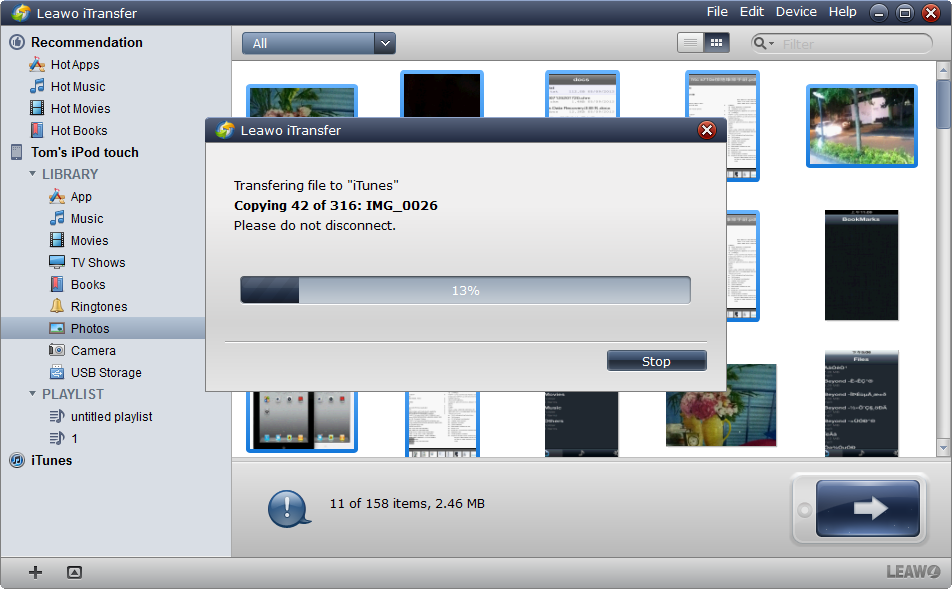
In this case, we would transfer the night mode photos to a flash drive. When you click the Transfer icon, there will pop up a window to let you specify the directory to save the output photo, where you choose to save the photos in the flash drive. Then hit the Transfer Now button to complete the process. You will be able to open the photos in the flash drive when the entire process is done. It is suitable for saving a slew photo and share with each other easily. You only need to take the flash drive and all your photos will be reachable.
Conclusion
For the moment, we have perfectly understood how to use night mode in iPhone 11 to take perfect photos under poor light conditions. This night mode feature significantly improves the photo performance and allows for clear and bright photos taken under low light scenarios. Though this feature is included in iPhone 11 or Pro, you may consider adjusting the exposure time manually to ensure a better output performance. Plus, we have also introduced the tricks and tips to enhance the photo performance taken during night time or low light conditions, for example, use a tripod or turn on wide or Telephoto to shoot a photo in night mode.
It is also worth mentioning that you can freely transfer the night mode photos as well as other iPhone data to your flash drive for better preservation. Leawo iTransfer is a top-ranking app for you to It can be used for transferring files from iPhone to computer. I would suggest you keep a copy of all your data in flash drive or computers in case you will run out of space on iPhone and accidentally lost the data in iPhone.


