Apple’s intelligent personal assistant Siri, by utilizing voice recognition, can do a lot of things. Ever since the first official debut in October 2011 on the iPhone 4S, Siri has been receiving mixed reviews from the public. Some say it’s awesome as it can do a lot of things for us and some say that its voice recognition was terrible. Nevertheless, it’s great to see new things coming to our smartphone. It helps to make our smartphone to get smarter to some extent. Apple’s been making improvements on Siri to make it more usable, although some critics have been saying that it lacks innovation, somehow it did make a lot of things easier for us as it’s still capable of doing a lot of different things for us.
By using the voice recognition engine, you can simply say “Hey Siri” to activate it without using your hands. If we make good use of this feature, we could do a lot of things without having to actually touch the screen of our iPhone. If you are not familiar with Siri, check out this post which shows you how to have hands free Siri using experience.
How to Make Siri Work
To enjoy the convenience of the hands-free Siri feature, you’ll have to activate "Hey Siri" first. Here’s how to make Siri work by saying "Hey Siri" without unlocking your iPhone.
If you haven’t set up Siri when you set up your new iPhone, you can do it anytime you want in iPhone settings.
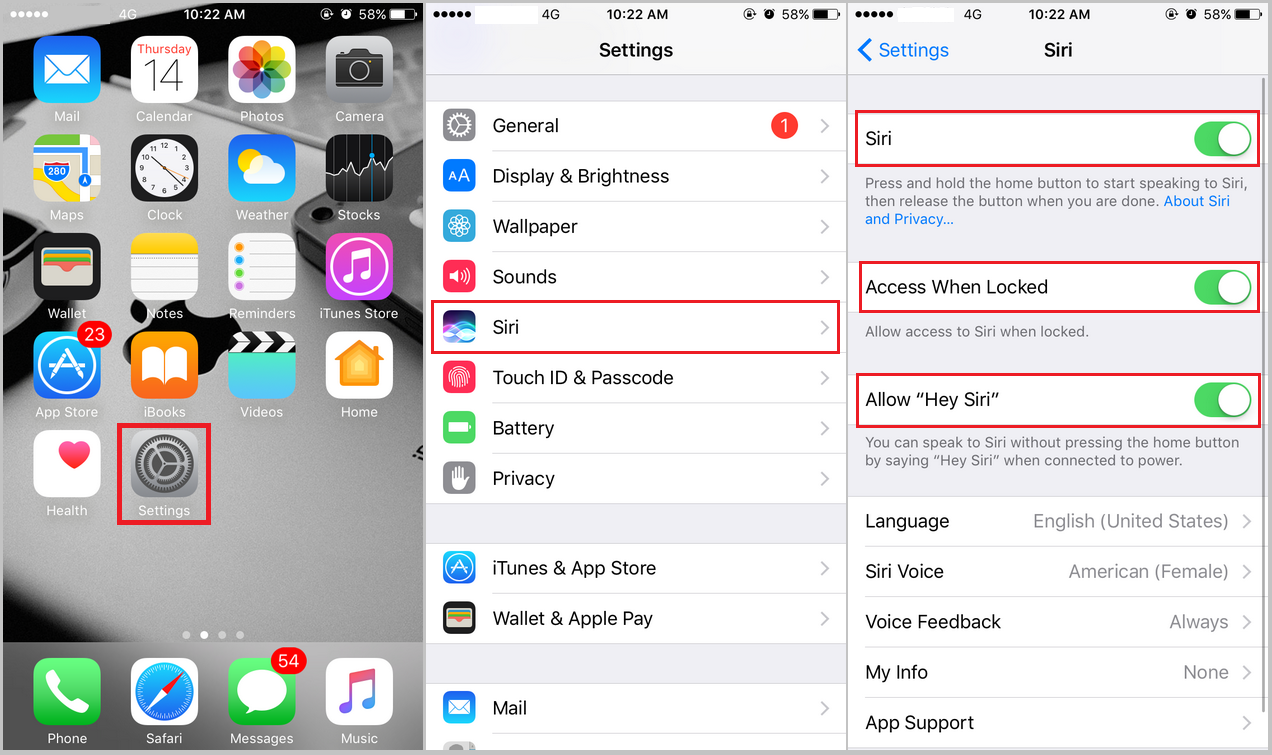
- 1. Tap Settings on the Home screen.
- 2. Tap Siri.
- 3. Tap Siri, Access When Locked, and Allow "Hey Siri" to enable them.
Note:
You can only use Hey Siri to activate iPhone when it’s plugged in and connected to a Wi-Fi network.
How to Familiarize Siri with Your Voice Before Using Hey Siri?
After activating Hey Siri in Settings, you’ll need to train it to recognize your voice so that it can work properly. Your iPhone will guide you through the whole process.
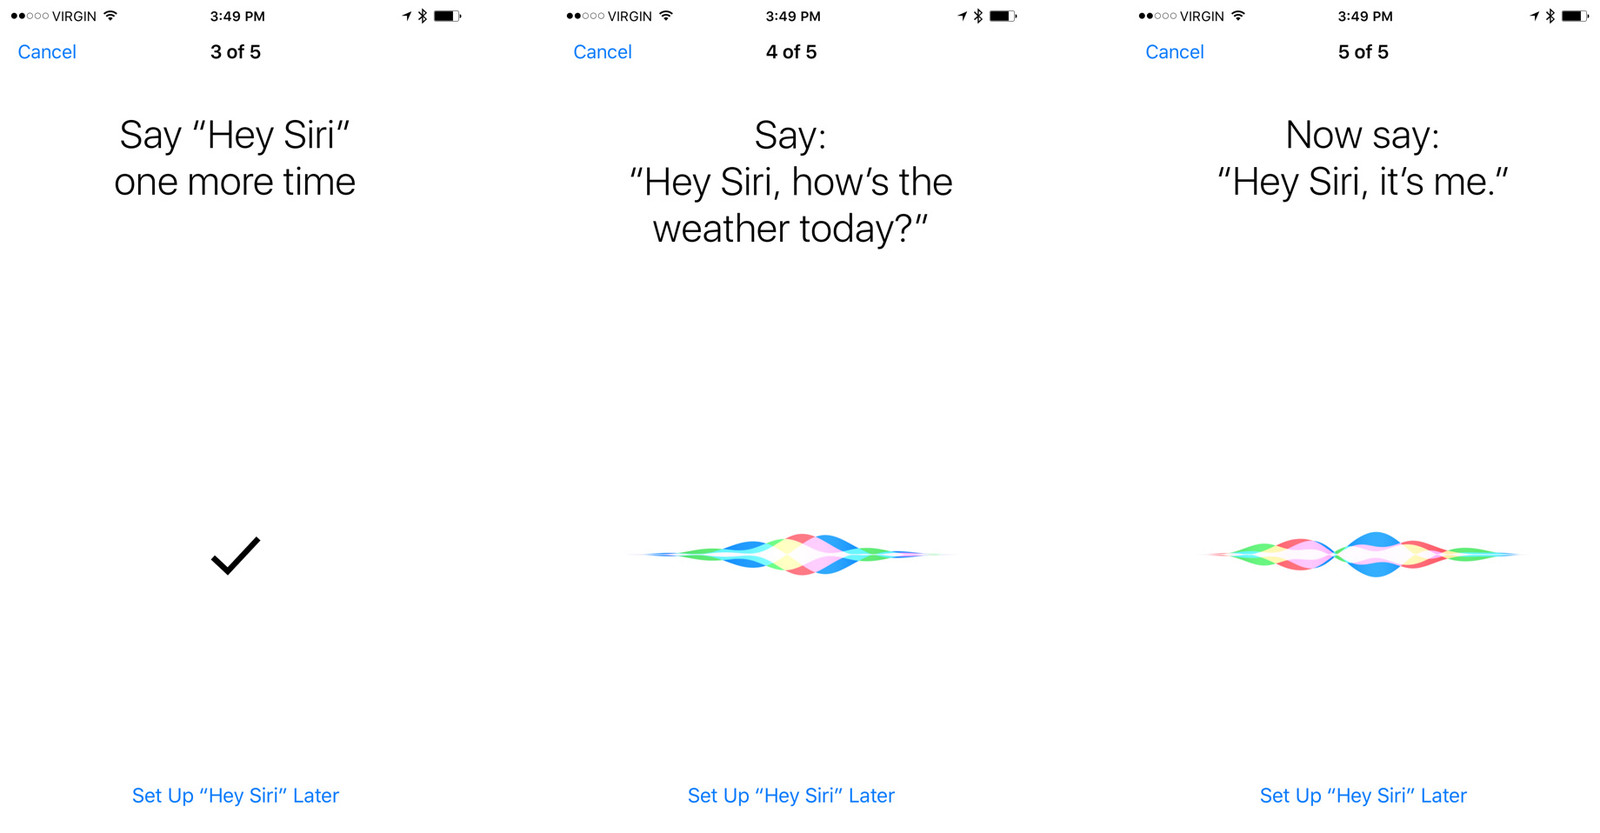
- 1. Tap Set Up Now.
- 2. When you are prompted to say Hey Siri,Hey Siri, how’s the weather? and Hey Siri, it’s me., follow the instructions and say it to help Siri familiarize itself with your voice.
- 3. Tap Done to finish the activation.
Now you can say Hey Siri to your iPhone without pressing the Home button and unlocking it. Just say Hey Siri with the things you want Siri to do to your iPhone within a range that your iPhone can hear you.
To enjoy the hands free Siri using experience, check out this post which shows you several interesting Siri commands.
How to Back Up Hey Settings on iPhone
After setting up Hey Siri on your iPhone, you can now start to enjoy the hands free siri convenience. If you are planning on getting a new iPhone and don’t want to set up Hey Siri again on it, back up your iPhone to iCloud or iTunes. After backing up your iPhone to iCloud or iTunes, the Hey Siri settings should be saved in the backup. Here’s how to back up iPhone to save the Hey Siri settings.
Back up iPhone with iCloud
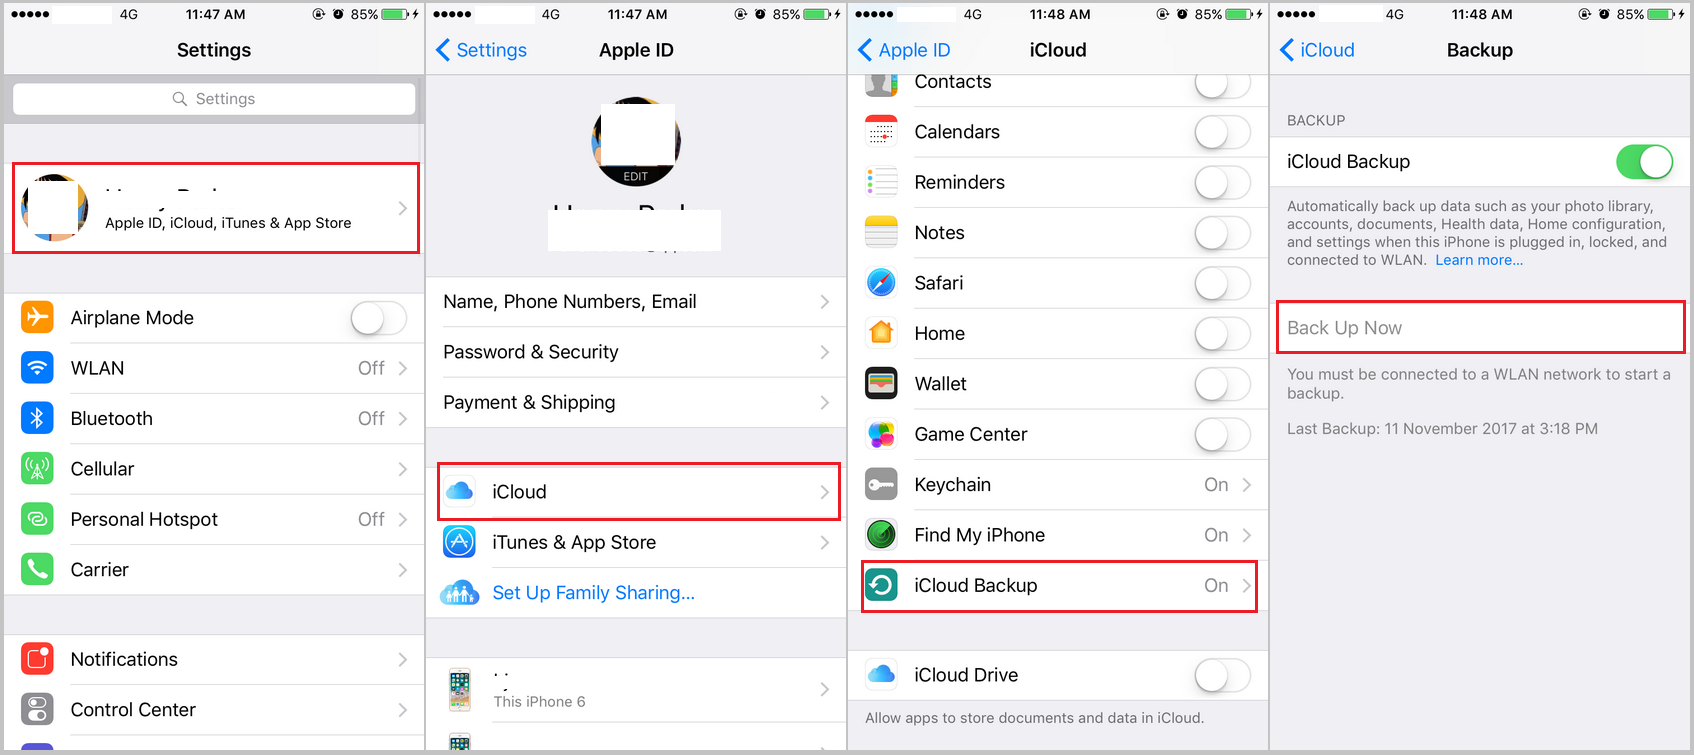
- 1. Connect your iPhone to a stable Wi-Fi network.
- 2. For devices running iOS 10.3 or later, go to Settings>[your name]>iCloud>iCloud Backup. For devices running iOS 10.2 or earlier, go to Settings>iCloud>iCloud Backup.
- 3. Tap on Back Up Now.
Note:
There’s no progress bar to show you the progress of the backup process, so you’ll have to stay connected to the Wi-Fi network until you see the latest backup time shows under Back Up Now.
Back up iPhone with iTunes
- 1. Plug your iPhone into your iPhone.
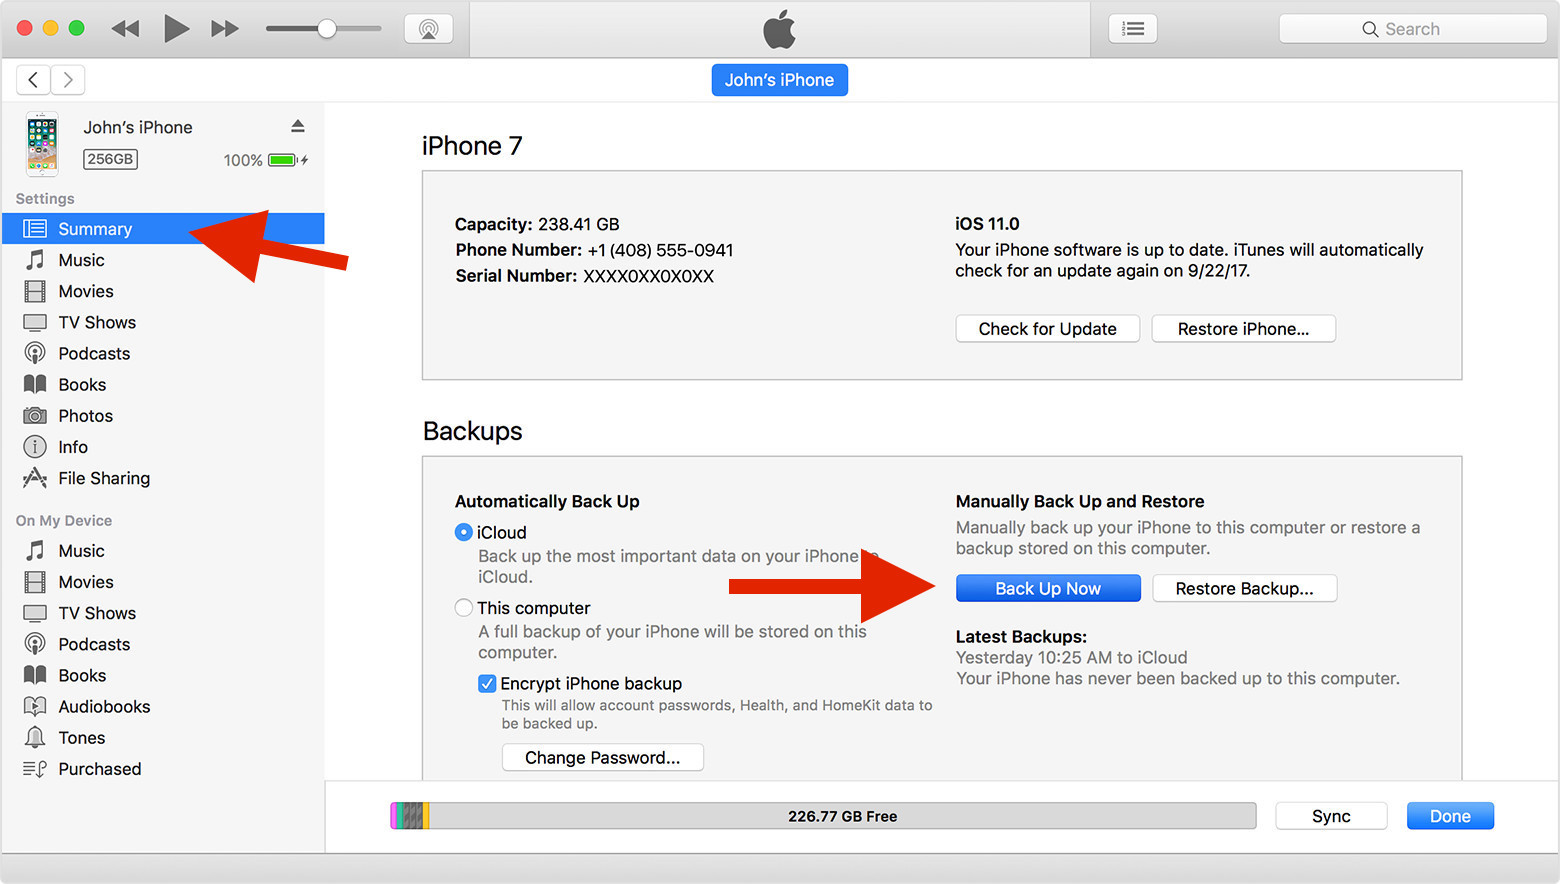
- 2. Launch iTunes on your computer, find the iPhone icon in the upper left section of the interface and click on it to go to Summary.
- 3. In the Backups section, click Back Up Now to back up your iPhone. After the backup is done, you can see the time when the last backup is made.
How to Back Up iPhone Reminders Created with Siri
One thing you can do with Siri is that you can use it to set a reminder for you. It’s convenient as you don’t really have to open the Reminder app and set it up manually. If the reminder is really important to you, you should probably back it up in case it got deleted accidentally. Here I would recommend to you Leawo iOS Data Recovery to back up your reminders. It’s a data recovery program as well as a data backing up program that can help you retrieve your lost reminders and back them up to your computer. Here’s how you can use it to back up your iPhone reminders.
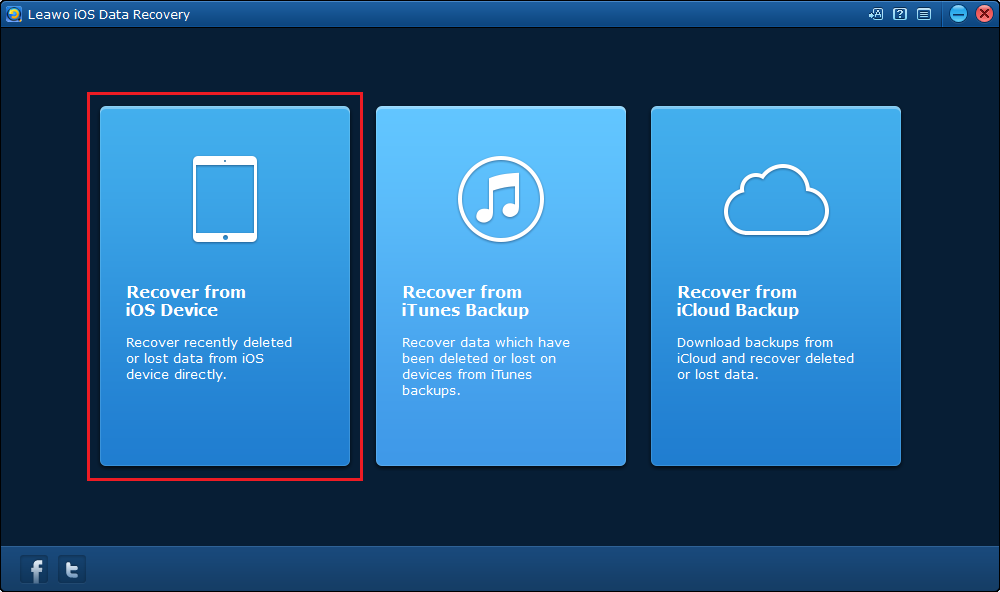
1. Fire up Leawo iOS Data Recovery on your PC and click Recover from iOS Device.
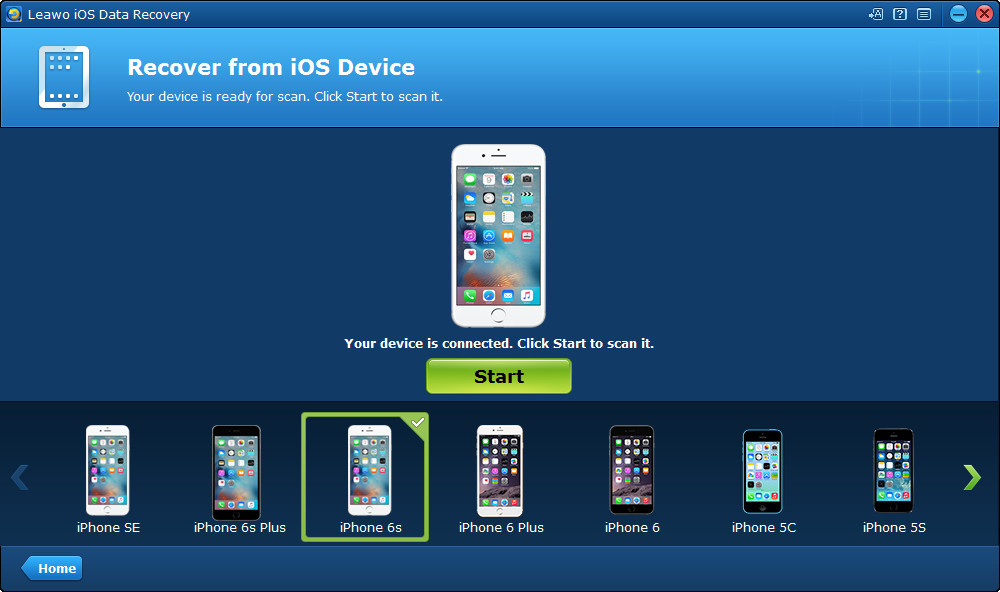
2. Plug your iPhone to your computer and the program will recognize your device. After that, you will see a picture of your iPhone and a Start button under it, click on the Start button to let the program scan your device.
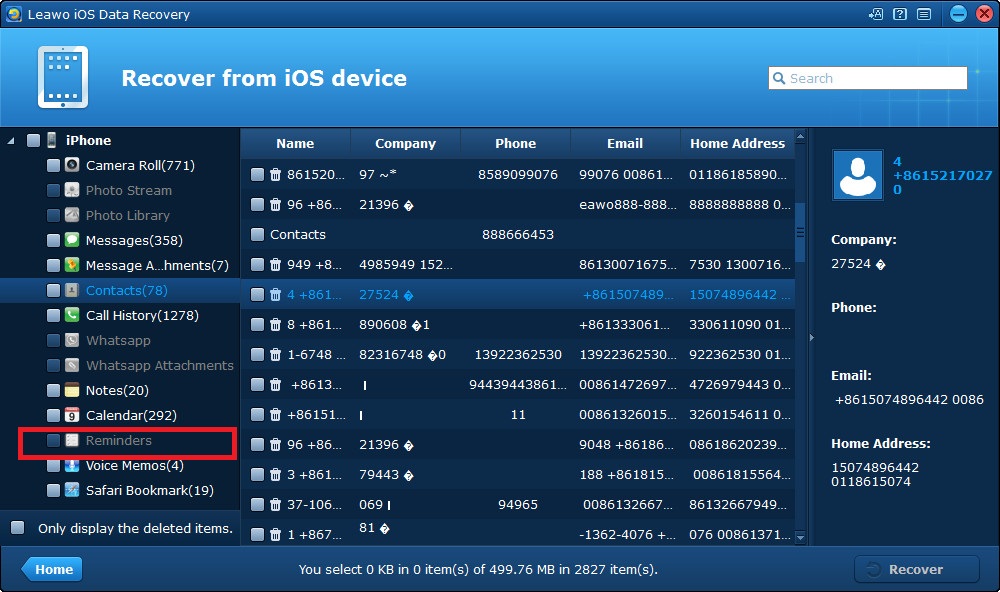
3. After the program finishes scanning your iPhone, click on Reminders on the left side to check out all the reminders on your iPhone. Select the ones you want to back up to your computer and then click the Recover button.
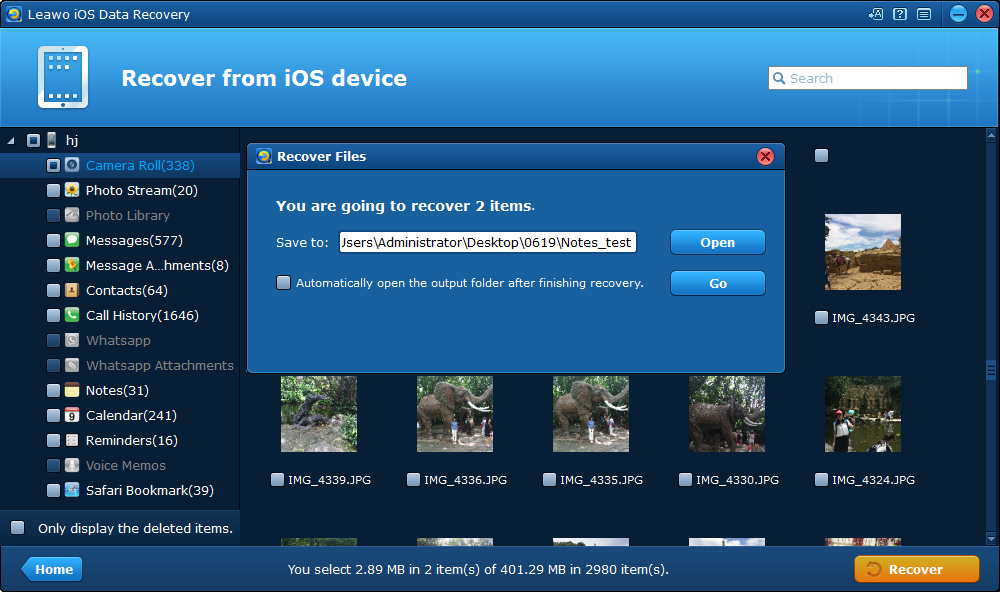
4. Next, a window will show up. Click on the Open button on it to set a folder to store your reminders and then click Go to start backing them up.
There is no doubt that Siri has some flaws, but it’s getting better and smarter. And currently, we can still use Siri to do a lot of cool things like asking her to help us recognize a song or find a coffee shop near us. Make good use of it and Siri could help make our life better.

