Cloud computing has revolutionized how we use computers and mobile devices over the last decade, and Apple’s answer to this technology is iCloud. iCloud is simply an all-inclusive title for all Apple’s services delivered through the internet on either Mac computers, iOS devices or Windows computers. We will be focusing on a feature of iCloud, which is called Find My Friends. So, what does Find My Friends do? It is a location sharing tool that allows people to locate their friends, family or loved ones through iCloud or through a dedicated app on Mac computers, iPhones, iPads and iPods. This service uses the device’s GPS capabilities to find your ‘friends’ using it. Since the release of macOS Catalina and iOS 13, Find My Friends has been combined with Find my iPhone, in a single application called Find My. Though it seems unnecessary to some people (because of privacy concerns), for others the ability to constantly track one another is normalized and this can also change the dynamics of friendship both for good and bad. For people traveling with others, Find My Friends can be used as a backup in case they get separated.
This service/ app is also a way people can use to passively catch up on what their friends are doing, instead of them saying it. Another advantage is that using this service/ app brings about a sense of safety, as it will be easier to locate a friend who might potentially be in danger. However, it has its limitations, one being that it will be difficult to bound or terminate it (which could be a way of snubbing someone, among several other reasons. This kind of location sharing which is always-on might also make it difficult to avoid social interaction, because other people will be seeing your location. It is still a very nice feature to have, and in this guide we will show you how to use Find My Friends on iOS and iCloud.
Part 1: How to set up and use Find My Friends
The benefits of using Find My Friends have been listed above, although it can be a very scary thought for some people. Apple will give users of this service/ app complete control of who can and who can not locate whoever is using it. The location information is also completely encrypted, so there should be no worry of prying eyes from elsewhere. To setup find my friends on iOS 13, you first of all need to be signed into your iCloud account, and the other steps are below.
Step 1: Open the “Settings” app, and go to “Privacy” followed by “Location Services” and make sure that it is turned on. On devices running iOS 12 and below, go to “Find My Friends” in the list of applications and on devices running iOS 13 and above, go to “Find My” in the list of applications. Open it, and select “While Using”.
Step 2: Go back to your home screen, locate and open either “Find My Friends” or “Find My” depending with the version of iOS you are using.
Step 3: Add your friends if they have not been added yet. Tap “Add” in the upper right corner (on iOS 13, you should tap “Start Sharing Location” first before tapping “Add”), then type the name of the person and once you have found them, tap “Send”. Next you choose how long you would like to share your location with them, and you will be notified once successful.
Step 4: Follow your friends. Once you have successfully added the person in the previous step, the next step is to follow them. Tap the name of the person you want to follow from the list of people you added. Select “Ask To Follow” and the request will be sent to them. Once they confirm, you will be notified on your device.
Part 2: How to hide iPhone location from Find My Friends
If you feel that you have had enough of using Find My Friends and you want your privacy, it is possible to hide your location (even if you want to do it temporarily). When you stop sharing your location, the other person will see it through their notifications, and if you do not want that, there are other ways to do it discreetly. The fastest way you can do this is to turn on Airplane mode, although this will disable all cellular, WiFi and Bluetooth connections. It is also possible to disable Find My Friends without having to compromise your cellular data, WiFi and Bluetooth use, and it will not even alert them of the change you made. Please follow the steps below.
Step 1: Open the “Settings” app, and tap on your name at the top (this always shows when you are signed into iCloud with your Apple ID).
Step 2: On iOS 12 and below, Open “iCloud” followed by “Share My Location” then toggle its off. On iOS 13, tap your name after opening the “Settings” app, followed by “Find My”,then toggle “Share My Location” off.
Part 3: Another way to use Find My Friends -- iCloud
Sometimes you may not have access to your iOS-based device, but it is still possible to use Find My Friends as long as you know your Apple ID credentials and a computer equipped with a compatible web browser that supports the iCloud website. If you are using a public computer, make sure to sign out before you leave it.
Step 1: Visit the iCloud.com website and sign in using your credentials.
Step 2: Once you have signed in, you will see the “Find My Friends” app from the loss of applications you can use on the website. Open it, and ask to follow the friend you wish to share your location with. Once successful, you will be notified and you will be able to share your location.
Part 4: How to transfer App data from iPhone to iPhone via the third-party tool
The apps you use on your iPhone all contain app data that specify your settings, as well as backups of other things you may not know about even if they use cloud computing to work. The best thing to do is to backup your iPhone or any iOS-based device, so that if you wish to transfer it to another device, your data will be saved. To do this, we recommend Leawo iTransfer which offers more advanced transfer tools than those offered by iTunes. This professional software tool is much more refined for transferring files between iOS devices, and can transfer 12 kinds of data which include apps, SMS and its attachments, photos, videos, music, contacts, etc. What sets this software apart from its competitors is its ability to edit the iTunes library without waiting to have all your music deleted. It has some of the most advanced scanning and transfer technologies which will enable very fast and efficient moving of data between computers and iOS devices. When you use this application, your existing data will not be altered in any way unless you specify it. To transfer App data from iPhone to iPhone, follow the steps below.
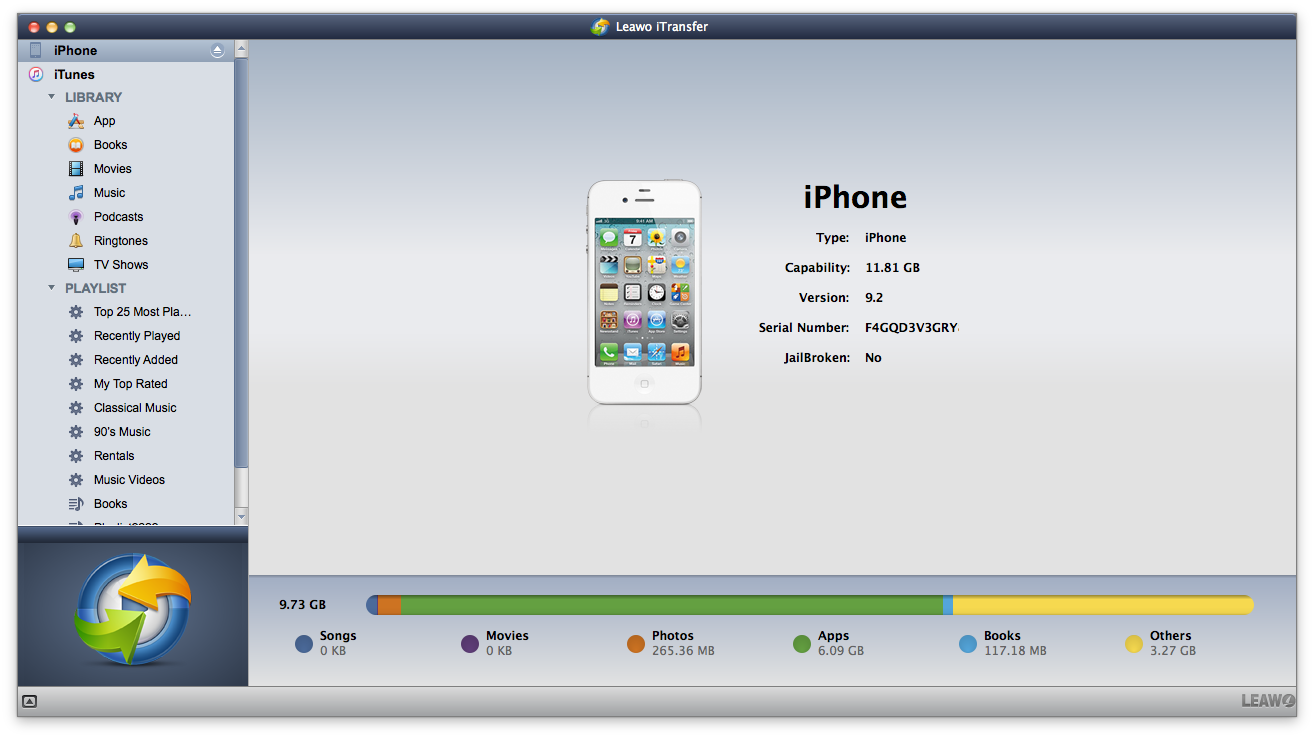
Step 1: Connect your iPhone to the computer through USB. When your iPhone is detected, the libraries (which include installed apps, messages, music, TV shows, podcasts and ringtones) will be shown on the left sidebar.
Step 2: Select the app data and files you wish to transfer. Select the particular library which contains the app data you on the left sidebar, then choose the files you wish to transfer. Hold the “Ctrl” key and click to select the files you wish to transfer on Windows computers. On Mac computers, hold the “Command” key and click to select the files.
Step 3: On Windows computers, right-click and under the “Transfer To:” menu, select ‘My Computer’ which is where you will save the files. On Mac computers, right-click the selected files and choose Transfer To> My Computer.
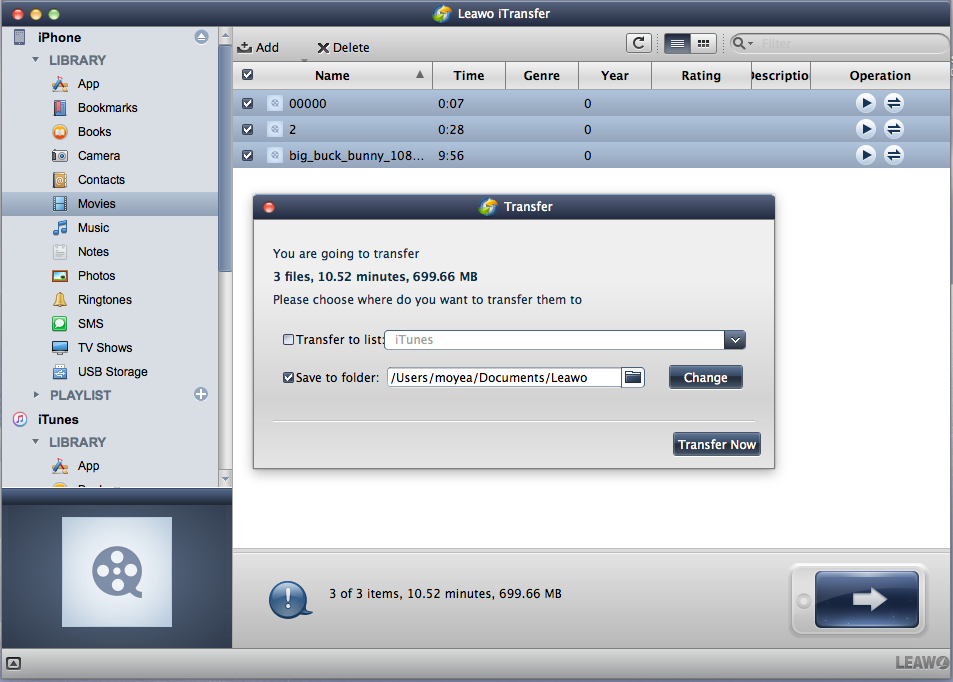
Step 4: Specify the output folder. After you have selected your files and clicked “My Computer” to backup your iPhone, a pop-up dialogue will appear. Check “Save to folder:” followed by clicking “Change” to select the output folder. After that, click “Transfer Now” to begin backing up your data.
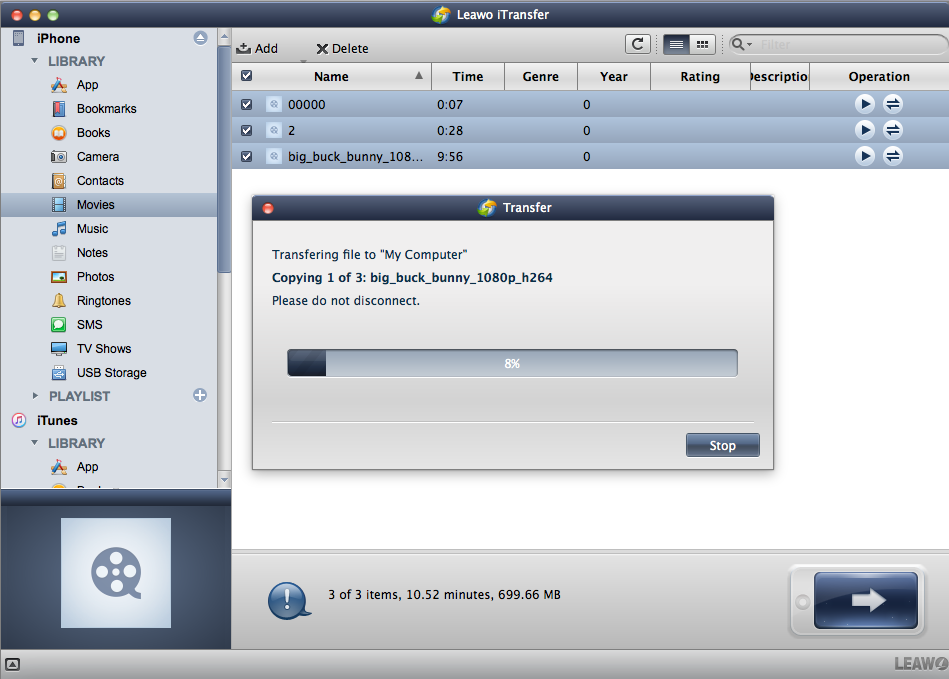
Step 5: Let the transfer finish. The progress bar will show you the overall percentage, and make sure not to disconnect the iPhone until the transfer has completed. If you wish to abort the process, click “Stop”.
Step 6: Connect the new iPhone. Follow the steps 1 and 2 as shown above. On step 3 under the “Transfer To:” menu, select “iPhone” instead. When you have finished, click “Transfer Now” and wait for the transfer to finish.


