Have you downloaded lots of music to your iPod? If you do, you will find your iPod storage is not enough to save other new files. In that case, you can move music from iPod to laptop to make room for other new files that you want to store on your iPod for backup. This is a sensible method, and you can use various tools to help you to realize the iPod to laptop transfer.
Part 1: How to Transfer Music from iPod to Laptop via iTunes
iTunes is an Apple tool, which can be used to solve how to transfer music from iPod to laptop easily. The detailed steps to achieve your aim via iTunes are as follows.
1. Plug your iPod into laptop and then launch iTunes on your computer. Make sure it is the latest version. Move to “Preferences > Devices” and then choose “Prevent iPods, iPhones, and iPads from syncing automatically” to check.
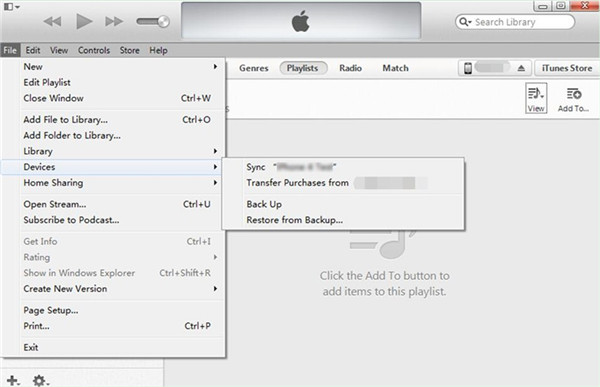
2. After that, move to the iTunes Store and select “Authorize This Computer”. Use your Apple ID to log into it and then click on “File > Devices > Transfer Purchases from ‘device name’ ” in the interface.
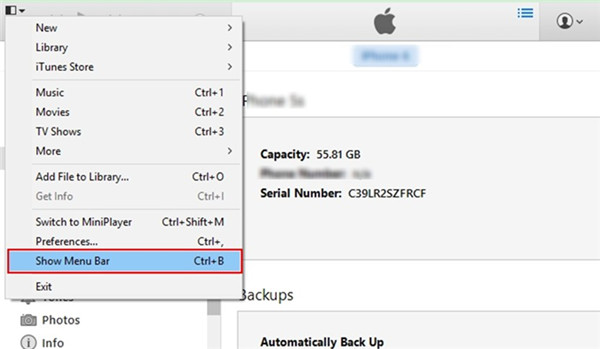
3. Thus, you can see the transferred music files from iPod in the library of iTunes. If you fails to find the menu bar in the interface of iTunes, you can tap the icon at the top left corner to select “Show Menu Bar” to help you.
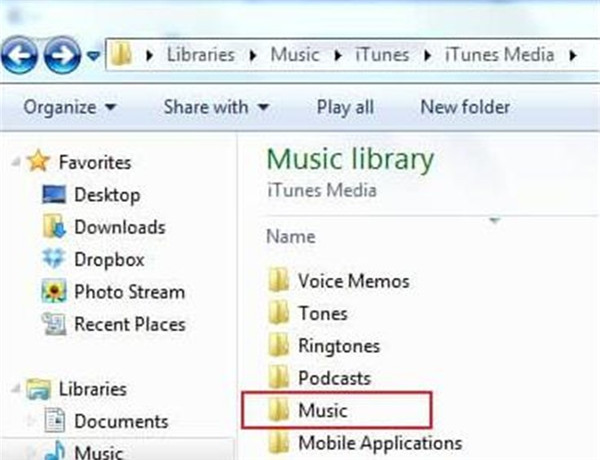
4. Go to the iTunes media folder on your laptop. By default, the transferred music files will be save at C:Users/Administrator/Music/iTunes/iTunes Media. In the end, you can copy the songs from the folder to a computer location to save them. This solution to deal with how to transfer music from iPod to laptop with iTunes is direct and easy to handle.
If you are not fond of this method, you can continue to have a look at other ways to cope with how to copy songs from iPod to laptop successfully.
By the way, would you love to transfer the music file from your iPod to iTunes? It's also a good ways to store your music files.
Part 2: How to transfer Music from iPod to laptop via iTunes store
You can also choose iTunes Store to help you to solve how to transfer songs from iPod to laptop. It is not a harsh task at all. You can now check out the following introductions to know how to make it via iTunes Store easily.
1. On computer, launch the latest version of iTunes. Click on the “Sign In” button at the left corner of the interface.
2. Fill in your Apple ID and password to sign in it.
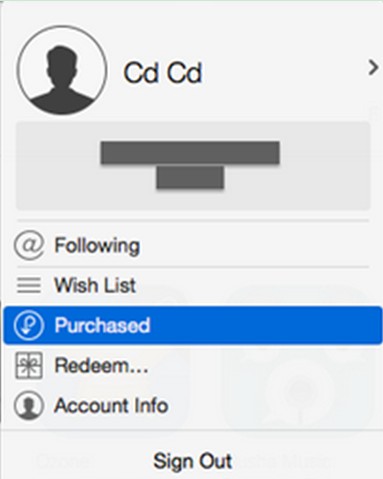
3. Click on the email address at the top left corner of the window and then select to click on the option of “Purchased”.
4. Click on the menu of “Not in My Library” and then choose the songs you want to save to iTunes by clicking on them. Afterwards, you can click on the download button to store them to the iTunes library.
5. In then end, you can refer to step 4 in Part 1 to find the iTunes media folder and copy the songs to a folder of your laptop.
As you can see, the two methods listed above can help you to solve how to copy songs from iPod to laptop without any difficulty. However, there is a big disadvantage in the two methods, for you can only transfer the purchased songs to your laptop from iPod. If you do mind this big shortcoming, you can continue to read the other two solutions in this guidance to assist you to move music from iPod to laptop completely.
Part 3: How to Transfer Music from iPod to Laptop iTools
In order to move music from iPod to laptop thoroughly, in fact, you can make use of iTools for Windows to assist you to make it. This third-party software can solve various transfer issues between computers and iDevices conveniently. The detailed steps are as follows.
1. Make sure your laptop has installed the latest version of iTunes. Run iTunes and then insert iPod into laptop with proper USB cable. After that, go to “Preferences > Devices” and then choose “Prevent iPods, iPhones, and iPads from syncing automatically” to check.
2. Download iTools on your laptop and then open it. Your iPod device will show in the interface and then you need to click on the“Music” option to check out all music tracks in your iPod.
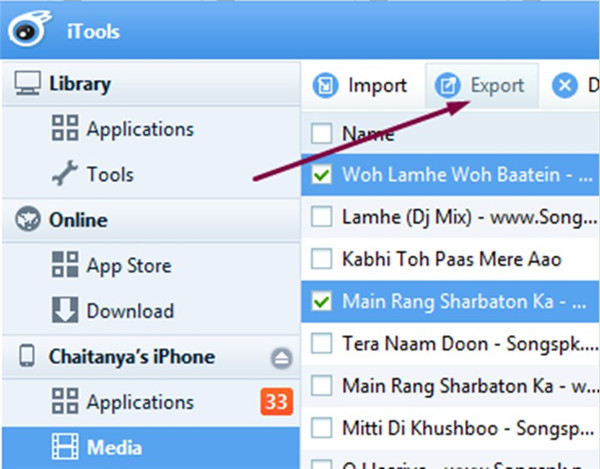
3. Put checkmarks in the boxes beside the songs you want to transfer to laptop. After that, click on the “Export” button. It will ask you for the location to save the exported music files and then you need to choose a laptop folder to store them. In the end, click on the “OK” option to move music from iPod to laptop successfully.
iTools is professional in solving how to transfer songs from iPod to laptop. However, if you want to deal with this issue more secure and rapid, you can continue to read this guidance to see how to make it via Leawo iTransfer.
Part 4: How to Transfer Music from iPod to iPhone via iTransfer
Leawo iTransfer is a great tool to help you to solve how to transfer songs from iPod to laptop. It has multiple functions to enable you to transfer files among iOS devices, computers and iTunes easily. Now let’s check out how to use this professional software to realize iPod to laptop transfer.
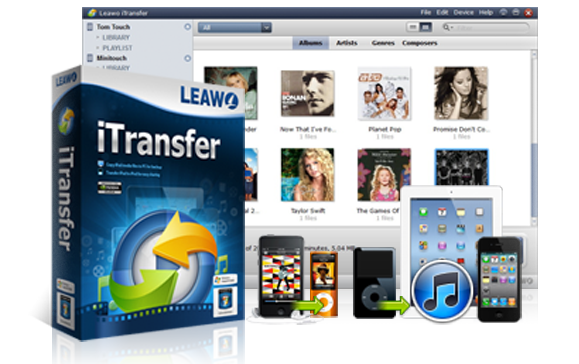
Leawo iTransfer
☉ Transfer files among iOS devices, iTunes and PCs with ease.
☉ Transfer up to 14 kinds of data and files without iTunes.
☉ Support the latest iOS devices like iPhone 7, iPhone 7 Plus, etc.
☉ Play back, view, and delete data and files on iOS devices.
Step 1. Launch Leawo iTransfer and Connect iPod to Laptop
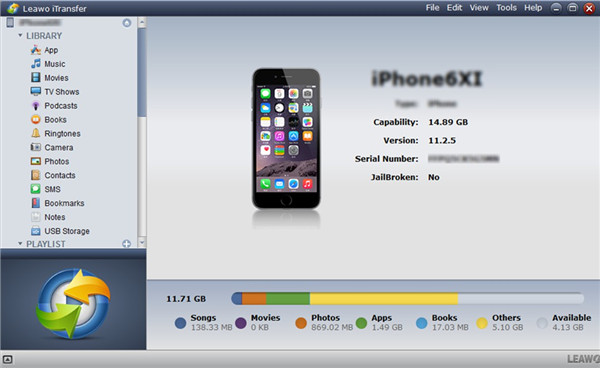
On your computer, run this iPod to laptop transfer software and use a proper USB cable to insert iPod into laptop.
Step 2. Select Music and Click on “Transfer”
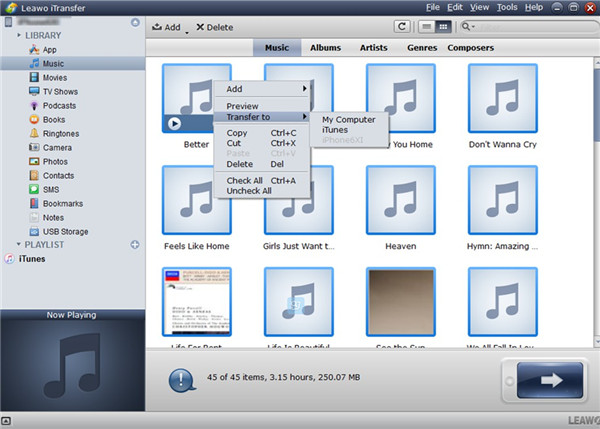
After your iPod device has been recognized by this iPod to laptop transfer program, you need to click on your iPod icon and then move to LIBRARY > Music” tab in the left sidebar. Select the songs you want to move to your computer by clicking on them. Afterwards, right click on one of them to invoke a menu and then you need to choose “Transfer to > My Computer”.
Step 3. Set Output Folder and Transfer Music
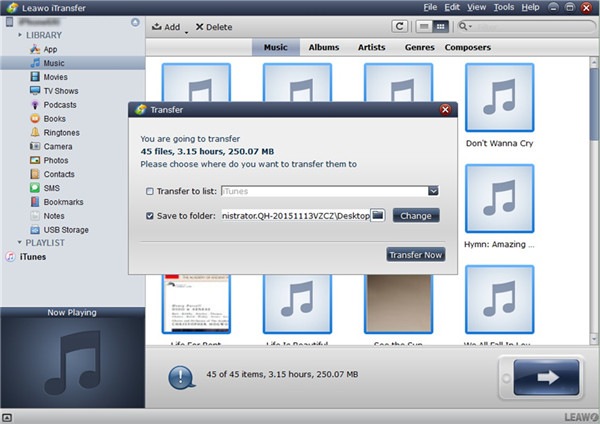
In the next dialog that pops up, check “Save to Folder” and then click on “Change” button to set a location on your laptop to save the exported iPod songs. In the end, you can click on the button of “Transfer Now”. Wait until the transfer process is over, and then your iPod music will be accessible on your laptop folder.
Your music is not purchased file? Don't worry, you can also use iTransfer to transfer non-purchased music from iPod to computer.
iTransfer is an amazing iPod to laptop transfer application, which can offer users great convenience in transferring files. The transfer results are perfect and the process is secure. You can now download this great program to have a try.

