In the case that you want to create some homemade videos and upload them to the Internet, you will need the help of Windows Movie Maker. As Windows Movie Maker is one of the most popular video editors for Windows systems, it can always be a good idea to get more practical skills such as how to add watermark in Movie Maker Windows 10. If you are fascinated by more uses of the watermarks, we have provided some good alternatives since the Microsoft Company discontinued the support of Windows Movie Maker. Keep moving to find out more.
Part 1: How to Add Watermark in Windows Movie Maker
This Windows Movie Maker can sometimes be a very handy tool to just add simple texts as the watermark. Those texts could be your name or username, or some people would like to put some beautiful words on videos all the time. While some people may also have interests in removing watermarks, you can follow the steps for how to watermark videos Windows Movie Maker.
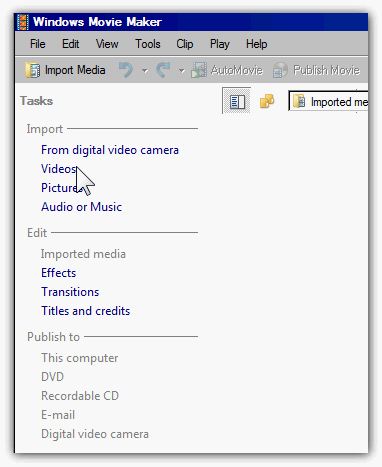
Step 1: Initiate the Windows Movie Maker on your Windows computer. Then load the source videos to add watermark. There are three ways to import your video files. You can tab the “Videos” option from the “Import” section on the left column. Or you can choose to click on the “Import Media” icon at the first of the menu bar. The last method can be the shortcut keys of pressing Ctrl + I at the same time to browse folders on your computer then select videos to input.
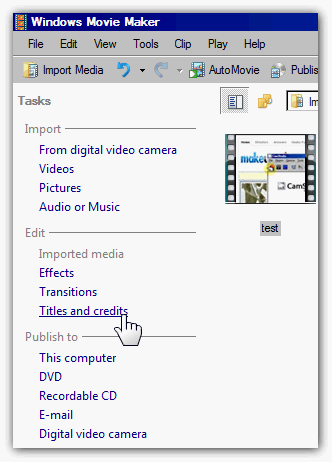
Step 2: Make sure your video files have been put into the timeline box. Currently, you can find the “Title and credits” within the “Edit” part from the left sidebar. Click on “Title and credits” to see the “Title on the selected clip” option from its submenu, then you can press it.
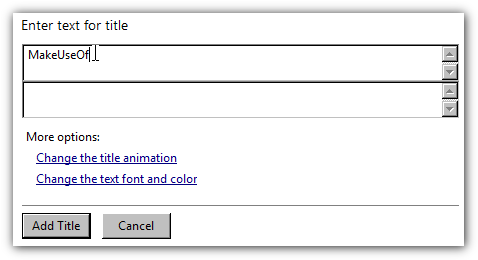
Step 3: When the window is called out as the “Enter text for title”, you can input the text such as your name or username for recognition.
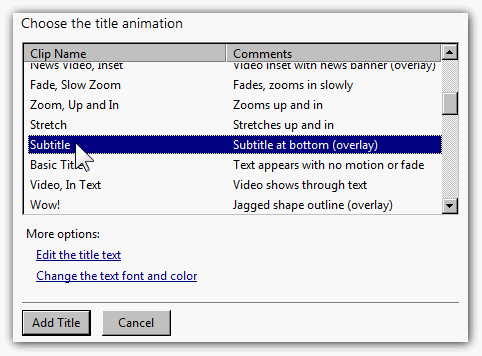
Step 4: Under the text box, there are more options like “Change the title animation” and “Change the text font and color”. Tab the first one to enter the title animation panel and then scroll down to find the “Subtitle” clip name.
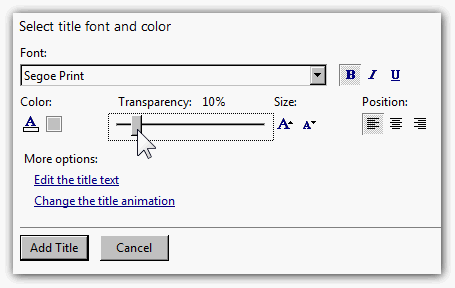
Step 5: To change the position of your watermark text, you can select the second choice of “Change the text font and color” to draw out the title font and color panel. The position modes can align text in three ways as the right, the middle and the left. Meanwhile, in this setting panel, you are allowed to set the transparency. Other normal settings are included as font styles, colors, and sizes.
If you are happy for the watermark you have put in Windows Movie Maker, then you can click the “Add Title” button to apply the watermark.
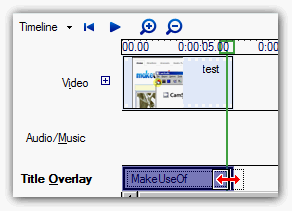
Step 6: Decide the length you would prefer to show watermark with the video. There is a resizer tool while moving your mouse to the edge of the title under the video timeline area. Use this one to choose the watermark displaying length.
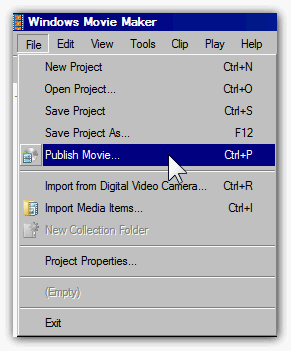
Step 7: The preview is available once you are ready to save the edited video. After knowing how to add watermark in Windows Movie Maker, the final video files with watermarks can be stored by tabbing the “File” menu then “Publish Movie”.
Part 2: 3 Alternatives to Add Watermark on Videos
For your information, when you want to add an image for the watermark, Windows Movie Maker will not be able to execute this task. So it is recommended to obtain another Windows Movie Maker alternative for how to put watermark in Windows Movie Maker. Even though there are some other watermark makers for free, I would like to refer you all the below at first.
No. 1 Leawo DVD Creator
This program is a robust video maker with the top capability of creating videos and burning DVDs. The magic of this software lays on the specialty of the watermark feature. It sets up an independent section for adding watermarks to all the imported videos of any formats in AVI, MKV, MP4, WMV, Xvid, MOV, and more. Users are allowed to input images into the watermark option with various changeable parameters. Besides the watermark support, you will find the DVD menu templates are right by the hands to organize movies parts. Another big feature is that everything is editable within this video editor. The richness of editing offers users to trim, crop, add subtitles and remove noise. Meanwhile, the high burning speed and original quality are insured due to the amazing Intel Quick Sync acceleration technology.
No. 2 Free Video Watermark Maker
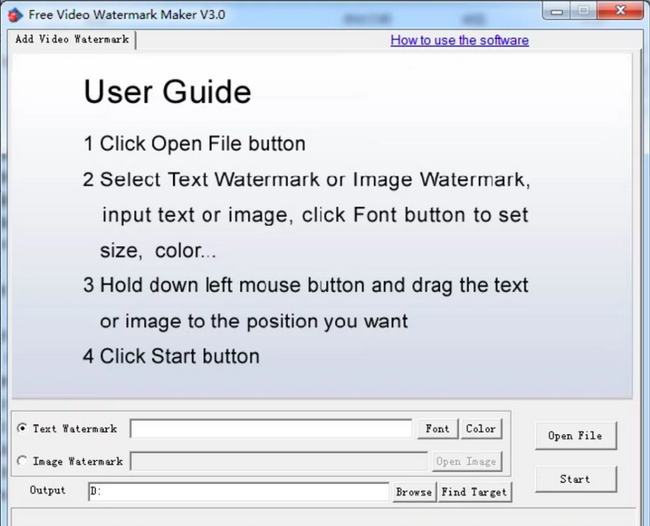
Being as a free application, you can easily figure out how to add watermark in Movie Maker Windows 10 alternative like this. Whereas everyone needs security in this digital world, this free tool would help you for simply protecting all your video works by watermarking. It only specializes in the watermark process, which means setting the size and location of the watermark is all available. But, lower your expectations because it is free and has restrictions on editing features. You possibly require extra tools as a watermark image optimizer or size guide within this product.
No. 3 Easy Video Maker
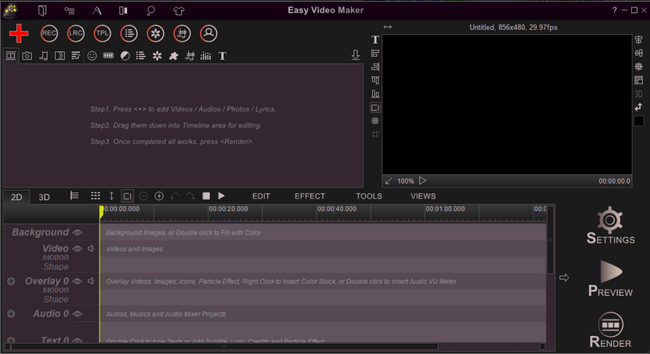
How easy it would be to put watermark in the Easy Video Maker software? The procedure is similar for how to watermark videos Windows Movie Maker. This product is developed by RZSoft and full of features to make videos. It can multi-task other functions like recording screens, making lyrics, and of course, adding watermarks. The Easy Video Maker supports the label and notes when you trim the length of watermarks. You can make many transitions through this app as well. However, beginners might not be prone to handle this complicated interface.
Part 3: How to Add Watermark with Leawo DVD Creator
If you have quite some pictures on your computer that are good for the video contents, meanwhile storing videos to DVD is also needed, how to put watermark to DVD in Windows Movie Maker using them? Under these circumstances, the requirement to get a powerful Windows Movie Maker alternative is obvious. So this coming instruction will assist people to add text even image watermarks to video in all popular formats. Meanwhile, users are more than welcome to set more different watermark parameters.
Step 1: Download and install the Leawo DVD Creator program on your computer.
Notice that this software has two versions for users on Windows and Mac operating systems.
Step 2: Run the Leawo DVD Creator and add video files.
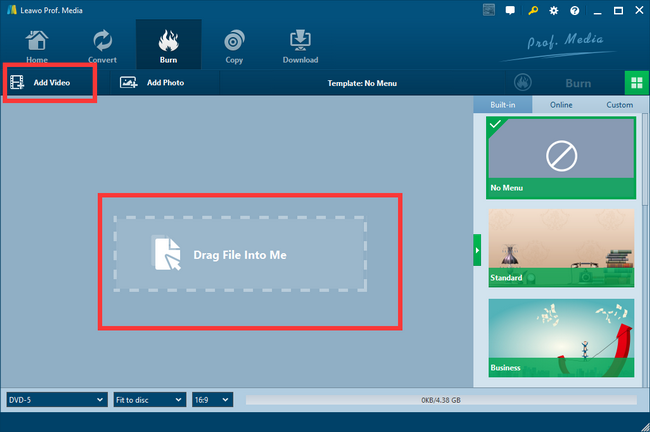
As the red boxes squared out, you can tab the “Add Video” button to view your folders and choose some videos sources. Or in a simple method that pulling your video files into the interface and it will recognize all the media video files.
Step 3: Enter the video editing panel.
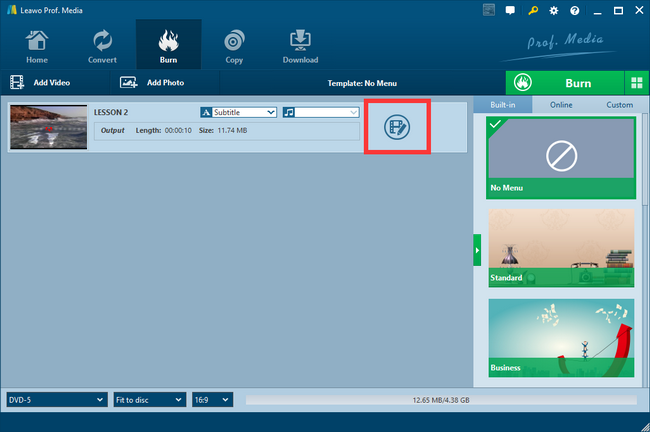
The loaded file will be listed on the file panel. At the end of each information bar, there is an “Edit” icon for users to enter the edit panel. Tab it to get into the editing window.
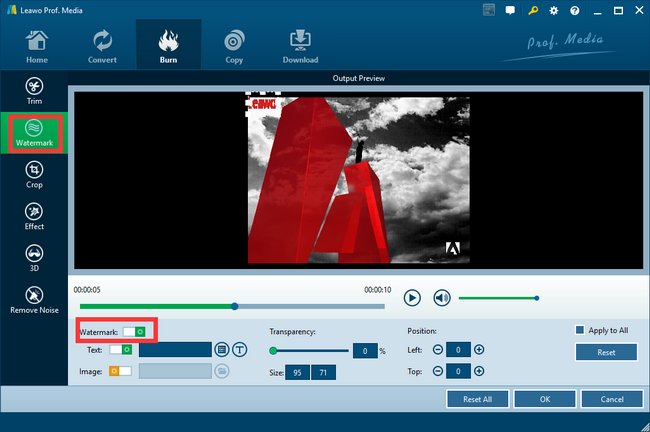
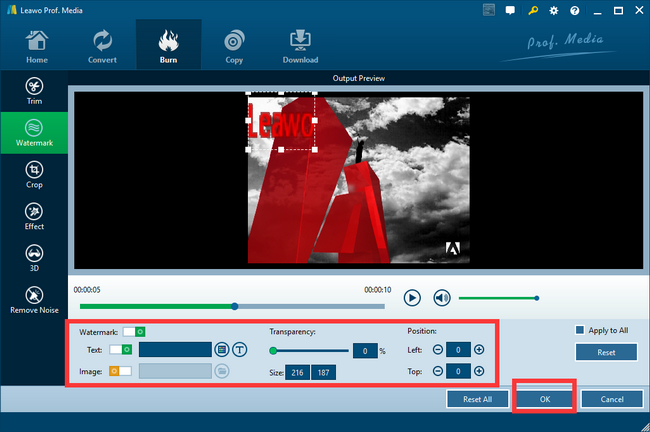
Step 4: Choose the second icon of the watermark from the left sidebar to reach the watermark panel.
The watermark panel will provide you multiple ways for how to add watermark in the Windows Movie Maker alternative. First of all, switch on the “Watermark” option so that you are enabled to add watermark in text or image.
Step 5: Adjust video and audio parameters.
According to your requirements, adjust more parameters for the watermark you added. You can modify the transparency, size, and position. Press the "OK" button to save all the modifications.
Step 6: Save the video files with watermarks.
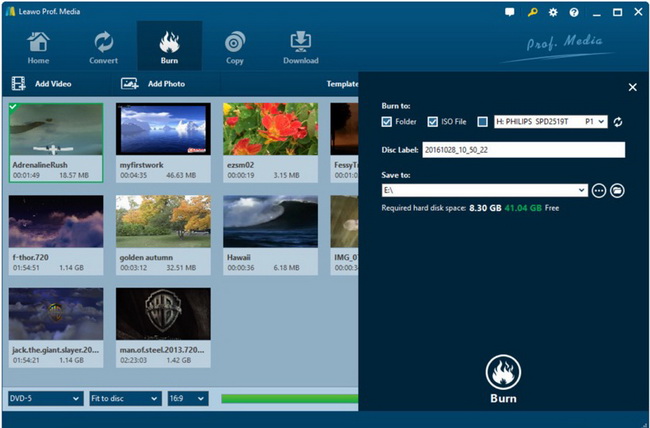
Return to the main interface and you will see a big green "Burn" button on the right side. Tab the button to reel off the burning sidebar and set the burning options. At last, hit the white "Burn" icon to start burning.
Part 4: Best Player to Play Your Video - Leawo Blu-ray Player
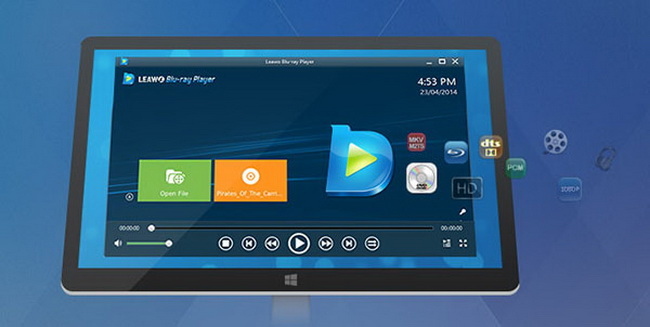
No matter what video with watermarks that you are going to make, a professional player is always in need to verify the video files. Hence, we have the optimal option for every movie lover and maker. Leawo Blu-ray Player is the most reliable program to playback media videos in any formats for home entertainment.
There are many reasons for choosing Leawo Blu-ray Player as the best pick. First of all, it is capable of fully supporting all the video files coming from Windows Movie Maker. Also, the software plays all the other video formats such as NUT, Ogg, OGM, WMV, ASF, FLV, even 4K/HD video in MKV, MP4. More than that, acting as a universal Blu-ray player, it also brings users the best watching experience of movies by the sophisticated image processing technology with stereo audio. If you are looking for some products that can decrypt all discs for playback, you would be thankful to this one. Furthermore, it is built with the ability to apply all the settings customized by users like full-screen playback, volume control, fast-forward, fast-backward, playlists, etc. And it provides a bunch of considerate bonus tools. While it is free for all, try it anytime you like!
Part 5: Conclusion
Knowing how to add watermark in Movie Maker Windows 10 is practical, however, adding pictures can be a little bit more complicated. Windows Movie Maker does not offer the native function to put images to the video files as the watermark. For that reason, you want to learn how to add watermark in Windows Movie Maker alternative like Leawo DVD Creator. One more thing to finalize the whole process is to utilize the best player program. Take advantage of the free Leawo Blu-ray Player to check if you have the right watermarks in your video files.

