When we gather with our best friends or travel around, we like to take photos with our smart phones. Too many photos on your phone may seem to be a little messy. Google Photos app is widely used by smart phone users to manage pictures on iPhone, Android devices and etc. It is quite easy and convenient to use this great app. However, do you know how to remove duplicates from Google Photos or how to delete Google profile photo? Maybe you are not a little confused on these issues. If so, you can read this guidance to know the methods and then you do not need to bother to search for other materials concerned on the questions.
Part 1: How to Remove Google Photos Duplicates on iPhone via iTransfer
It is one annoying thing to get too many Google Photos duplicates, for they occupy too much space on iPhone and can affect the operation speed of iPhone to a great degree. In order to get rid of this trouble, you can download pictures from Google Photos to iPhone folder and then use iTransfer to delete the duplicates on computer. After that, you can sync photos from iPhone to Google Photos library. The process to realize the goal of Google Photos delete duplicates is not complicated, for iTransfer is quite convenient for you to handle, even pupils can use this software skillfully. The following detailed steps will show you how to reach the aim of removing duplicates from Google Photos. Let’s have a look.
1.1 Download Photos from Google Photos to iPhone Folder
In the aim to remove photos from Google Photos, only the duplicates, you need to follow the step-by-step instructions in this part to see how to make it.
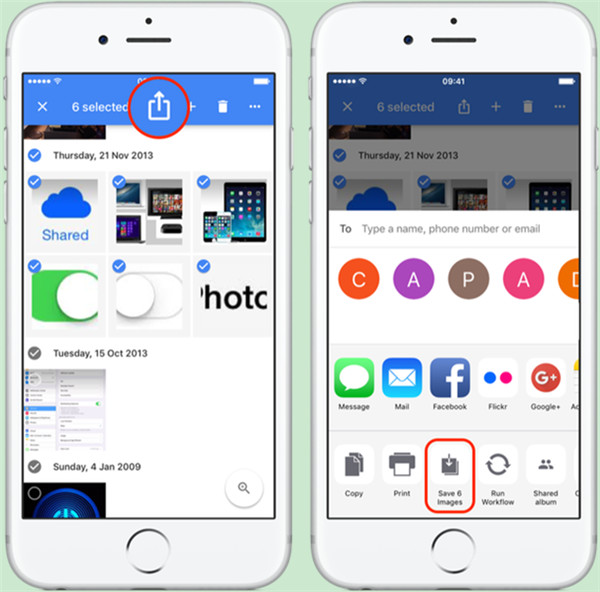
1) Open Google Photos app on iPhone and then choose all photos in this application.
2) Tap the share button with an upward arrow on it and hit the option of “Save x Images”. In a few seconds, your pictures on Google Photos will be available on iPhone folder.
1.2 Remove Pictures from iPhone via iTransfer
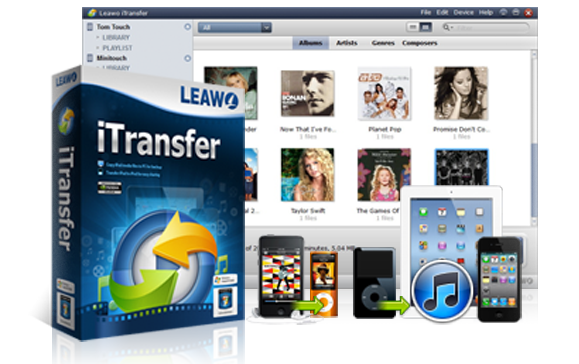
Leawo iTransfer is helpful in managing iOS files. Many users are familiar with its powerful functions. You can transfer, delete and backup files via this excellent tool. It can deal with 12 kinds of files very quickly, including photos, audios, notes and etc. Here you can check out the contents shown below to get to know the method to delete photos off iPhone via iTransfer.
Leawo iTransfer
☉ Transfer files among iOS devices, iTunes and PCs with ease.
☉ Transfer up to 14 kinds of data and files without iTunes.
☉ Support the latest iOS devices like iPhone 7, iPhone 7 Plus, etc.
☉ Play back, view, and delete data and files on iOS devices.
Step 1. Run Leawo iTransfer
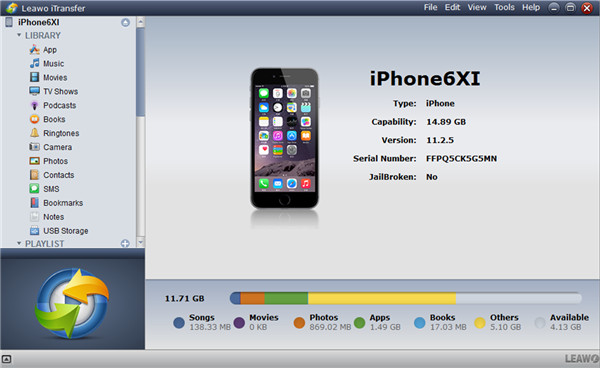
Run Leawo iTransfer on computer and then use a proper USB cable to connect iPhone with computer. iPhone information will show in the main interface.
Step 2. Check iPhone Photos
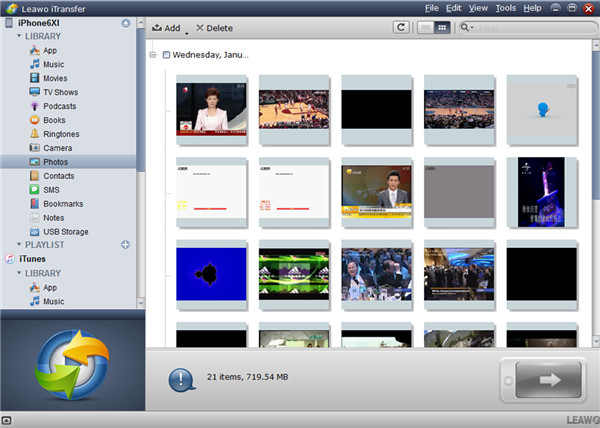
Click iPhone icon and then tap the “Photos” panel under the menu of “LIBRARY” on the left sidebar. Thus, you can view all iPhone photos on computer easily.
Step 3. Delete Photos on iPhone
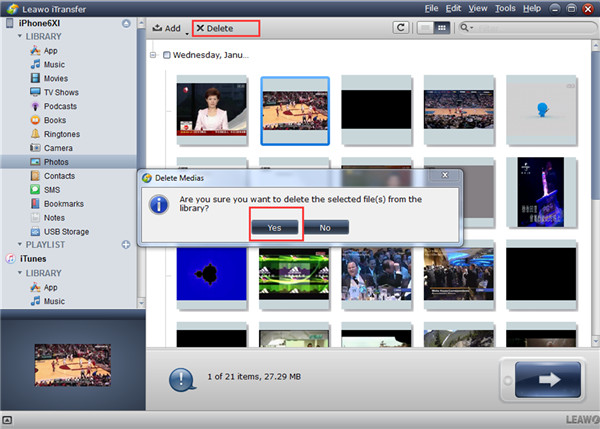
Select the duplicate pictures that you desire to remove and then hit the “Delete” button. Click on “Yes” in the pop-up dialogue. The software will begin to clear the chosen photos from iPhone immediately.
1.3 Sync Photos from iPhone to Google Photos Library
After you delete duplicated photos from iPhone, you need to use Google Photos app once again to reach your target. The sync function of this app will be made use of in this part.
1) Open Google Photos app on iPhone and then log into it.
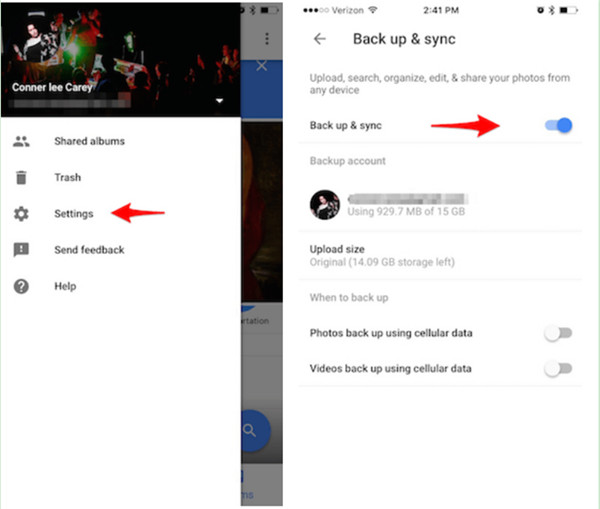
2) Click on the 3 horizontal bars at the upper corner of the interface.
3) Choose “Settings” option to hit and then select “Back up & sync”. Enable this feature and all iPhone photos will be backed up and synced to Google Photos. This process will erase the previous pictures data in Google Photos. Thus, the duplicated photos you have deleted on iPhone will also not show in Google Photos.
As you can see, in order not to see Google Photos deleted photos, you need to take time to settle this problem. Refer to the steps shown above and you will be clear enough to fix how to delete photos from Google Photos.
Part 2: Extension: How to Delete Google Profile Photo
With time passing by, you may become fed up with your old Google profile photo and want to get a way to remove Google profile photo. This is actually simple to be realized via using a web browser on computer. If you want to know how to make it, check out the steps listed below.
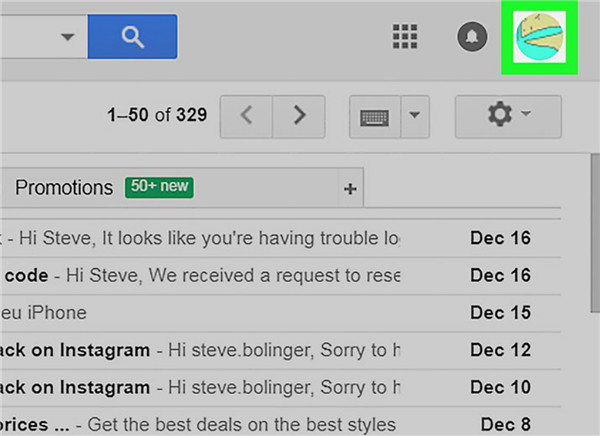
1. On your computer, open a web browser and then navigate to mail.google.com. Log into your Gmail account with your password. After that, hit the profile picture icon at the upper-right corner of the interface.
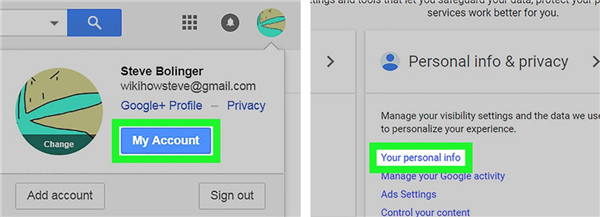
2. In the panel that shows up, you need to click on “My Account” and then hit on “Your personal info” under the menu of "Personal info & privacy" in the new page.
3. Drag down and then hit “About me”. In the new menu list, you need to click on “See all” under the heading of "Your album archive".
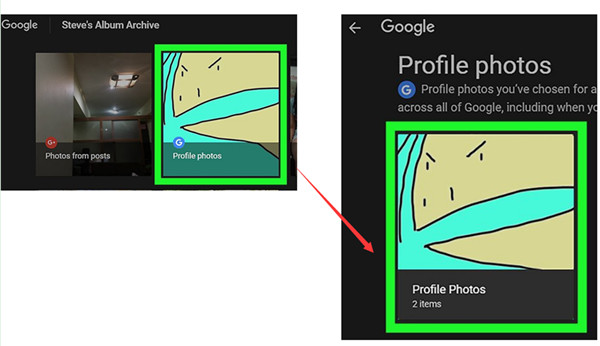
4. Hit “Profile photos” album and then click it again to check out the contents of this album.
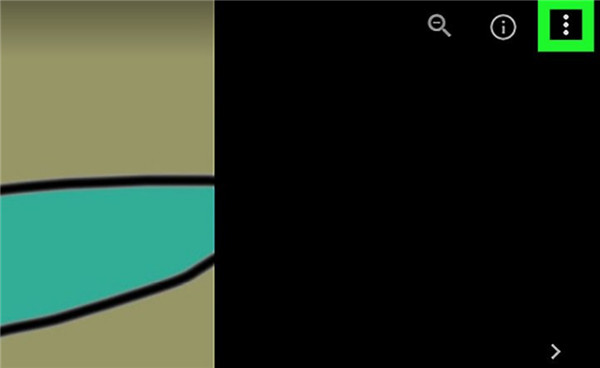
5. Click one profile photo that you want to delete and then hit the 3 vertical dots button at the upper right corner of the screen.
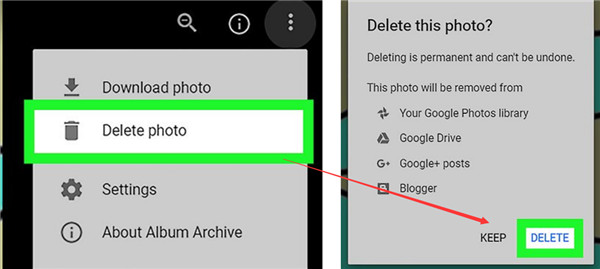
6. In the drop-down menu, you need to tap on the option of “Delete photo”. In the confirmation panel that pops up, you need to choose “DELETE” to finish the process to fix how to remove Google profile picture.
After these steps, you will not see the profile photo that you have just deleted. With several clicks, you can settle this problem quickly. The steps seems to be complex, but they are quite simple to handle. Have a try and you will know my words are true.


 Try for Free
 Try for Free

