Burning DVD on Windows 10 is not difficult technically; you can burn DVD movie on Windows 10 itself, via the Windows media player, or professional DVD burner. The first two methods are easy and handy to achieve but they have a natural disadvantage, which is lacking effects or features for personalizing DVD. Therefore, to a large extent, using a professional DVD burner to help becomes very necessary. Luckily, we have a lot of video burning software for Windows 10 and we are going to pick out the best DVD burning software for Windows 10 and give a step-by-step guide on burning DVD. Also, we will also share the brief procedure to burn a data DVD on Windows 10.
Part 1: Differences between a data DVD and a playable DVD
Before burning a DVD, there is one thing that you have to know. A lot of people start burning their DVDs without knowing this, only to find themselves getting not what they want after the long burning process. Even some people know a little about this, they still don't know well enough for them to burn a DVD successfully. The thing that you have to know here is the difference between a data DVD and a playable movie DVD.
So, people are often confused about what type of DVD to use when burning files. There are two primary ways to burn a DVD: Some people are creating a data DVD that is usually only readable by a compute, others are creating a video DVD that can play in a DVD player. In the first instance, the process is similar to using a thumb drive. Files are simply added from the computer to the inserted DVD. After choosing the type of software that will be used to create the DVD, they can be burned to the disc. This DVD can be inserted into another computer to copy the files to the hard drive. Unlike a thumb drive, however, burning a DVD permanently writes the files to the disk, and you cannot remove it or wipe it (Unless one is using a re-writable DVD).
The second instance, a video DVD, is similar to a vinyl record. Information is written to a DVD in the form of video and audio "streams" that are decoded by a DVD player's laser (think a high-tech record player needle). A video DVD has to be decoded for the video to play. If inserted into a computer and viewed at the file level, one would notice a strange collection of files that, if clicked, will not play the video you know is on the DVD. Unlike a data DVD, which can contain any kind of file, video, photo or document, a video DVD can only have video written on it.
So, with all of that being said, how does one decide which format to use? A data DVD is great for copying files that are on one computer and moving them to a new computer. This DVD could also be used to archive files as a storage or back-up solution. A video is DVD on the other hand, is generally used for exhibition. These can be played in a living room DVD player, or at a conference or convention. In regard to video, a data DVD is only limited by file size. Any format or resolution of video can be burned onto a DVD. A video DVD however, is limited to standard-definition resolutions.
Part 2: How to burn a data DVD on Windows 10
Now that we have known the difference between the data DVD and the playable DVD, let's take a look at how to burn a DVD on Windows 10. First, the data DVD. You actually have many choices if you want to burn a data DVD on Windows 10. Here we will briefly introduce the procedure on burning DVD on Windows 10 via Windows 10 built-in burning tool and Windows media player, respectively.
Method 1: burn DVD on Windows 10 with Windows built-in DVD burning function
Windows built-in tool is a good choice for simply burning files to disc. You can follow the simple steps below to learn how to burn DVD on Windows 10 directly.
Step 1: Insert a blank (empty) CD or DVD into the CD/DVD burner drive of your PC.
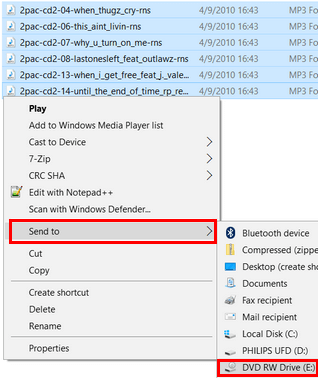
Step 2: Open File Explorer (Windows Explorer). Go to the location on your computer where the files/folders are stored you want to burn to a CD or DVD. Select all the files/folders. And then right-click on the selected files/folders, go to Send to and then choose your CD/DVD burner drive (e.g., DVD RW Drive (D:) or CD RW Drive (E:) ).
Note: if you want to burn VIDEO_TS to DVD, then copy the complete VIDEO_TS folder to the CD/DVD burner drive.
Step 3: A small Burn a Disc window will appear. At Disc title you enter a name for your disc. Select With a CD/DVD player. Click on Next. Your files/folders will now be copied to the CD/DVD burner drive of your PC and when it's done copying, it will open the CD/DVD burner drive in a new window. If it doesn't open the drive in a new window, then open File Explorer and click on the drive in the left-sidebar.
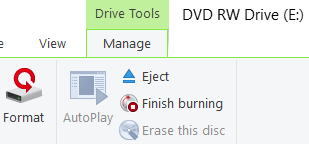
Step 4: When you're done copying files/folders to your CD/DVD burner drive, you click on Drive Tools. Click on Finish burning. Windows 10 will now burn your CD or DVD.
Method 2: burn DVD on Windows 10 with Windows media player in Windows 10
As a free DVD burner for Windows 10, Windows media player is also worth the try. Follow steps to see how to burn files to DVD on Windows 10.
Step 1:Insert a blank (empty) CD or DVD into the CD/DVD burner drive of your PC.
Step 2:Open Windows Media Player. Click on the Burn tab at the top right.
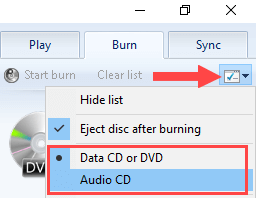
Step 3:Click on the Burn options icon and choose one of the following options:
Data CD or DVD: if you want to burn video file(s) (e.g., MP4, MKV, and AVI), audio files (e.g., MP3 and WMA) or pictures to a CD or DVD. Note: this disc will only play on computers and on CD and DVD players that support these video, audio or image file formats.
Audio CD: if you want to burn MP3, WMA or WAV files to a CD that can be played on any CD player and car stereo.
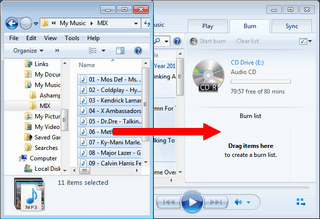
Step 4: Open File Explorer (Windows Explorer). Go to the location on your computer where the files are stored you want to burn to a CD or DVD. Make sure that File Explorer and Windows Media Player are both visible and standing next to each other. Drag your video(s), songs or photos from File Explorer into the burn list in Windows Media Player. If you want you can arrange the videos, songs or photos in the order you want them to appear on your disc.
Step 5: Click on Start Burn located above the Burn list. Windows Media Player will now burn your CD or DVD.
Part 3: How to burn a playable DVD on Windows 10
To burn videos to playable DVD on Windows 10, neither of the methods above would work. That's why you need a professional DVD burning program to help you do the job. The program recommended here is Leawo DVD Creator.
DVD Creator
☉ Convert videos like MP4, AVI, MKV to DVD format fast.
☉ Create DVD-5, DVD-9 disc, folder or ISO image without quality loss.
☉ 1-click operation to create photo slideshows and burn to DVD.
☉ Easily editable effects, 2D to 3D conversion support.
☉ Built-in menu templates and edit disc menu with personal preferences.
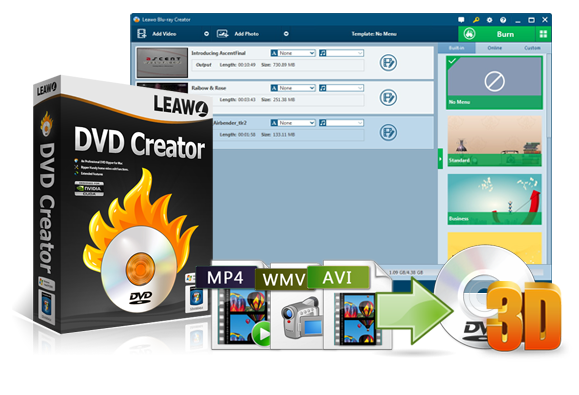
Leawo DVD Creator is a professional DVD burning program that can easily burn all kinds of videos to a DVD disc. The advanced burning technology within the software can allow you burn your video in a highest speed and preserve the original quality at the same time. The program is easy to use, and can deliver a stable performance when burning any video to a DVD disc or ISO files or folder. To burn a DVD with Leawo DVD Creator, all you need to do is to follow the instructions below.
Step 1: Download and launch Leawo DVD Creator
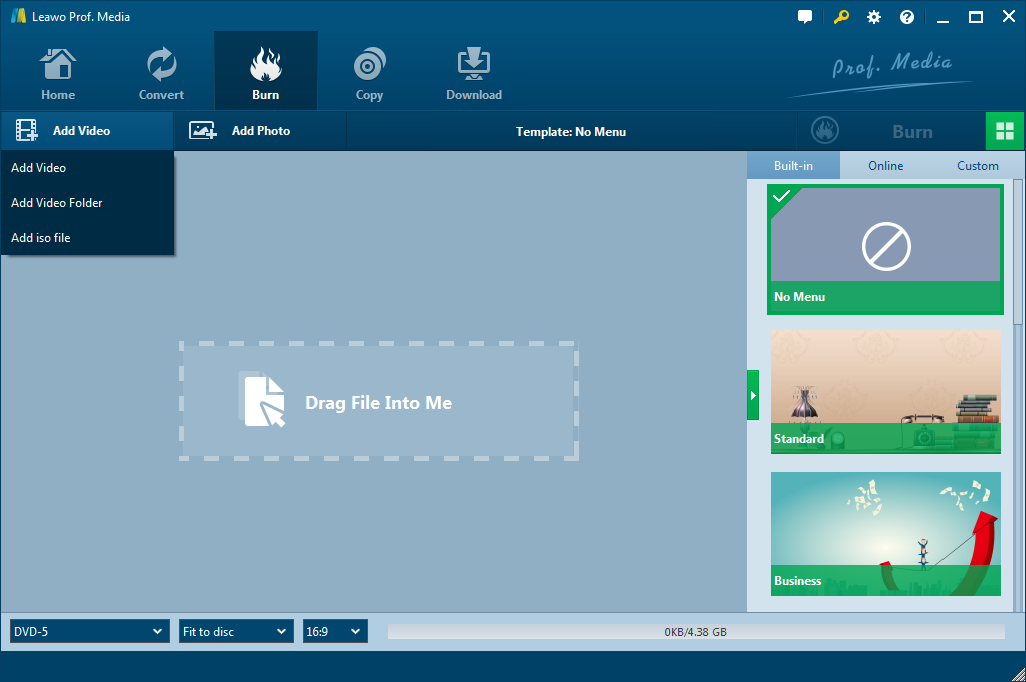
Step 2: Import your source video by clicking the "Add Video" button. You can import a single video, ISO file or a folder. Also, if you want to burn photos to a DVD, you can import pictures by clicking the "Add Photo" button on the right.
Step 3: Leawo DVD Creator provides some additional functions for you to burn a more personalized DVD disc. If you want to do some further edits to your video, click the edit button on the video, you can trim, crop, add special effects, add watermarks, or turn 2D video to 3D in the built-in video editor. You can also create a DVD menu based on the beautiful DVD menu templates.
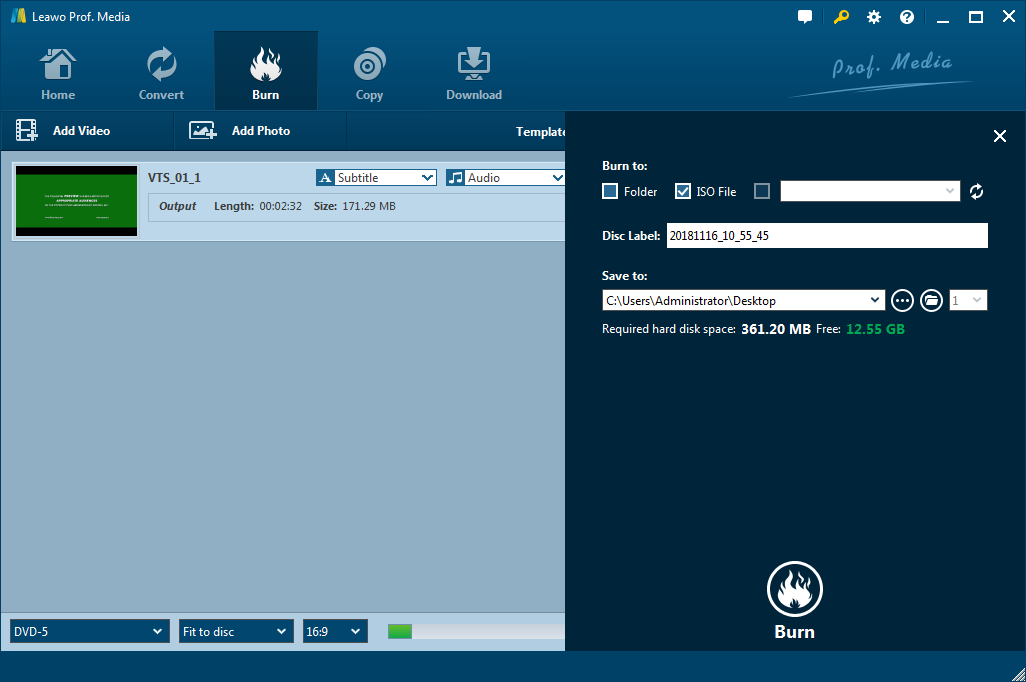
Step 4: Finally, click the green "Burn" button to call out the burning setting panel, where you can set output format, whether you want to create an ISO file or folder, or you want to burn your video to an optical DVD disc. Then set an output directory. When you have set all of that, click the burn icon below to start burning. How long the burning process will take depends on the speed you have chosen in the third step. You can choose to shut down your PC when it's finished if you don't want to wait.


 Try for Free
 Try for Free

