If you have bought a new iPad and want to transfer files from iPhone to iPad, this guidance is just for you. You can refer to the 4 ways in this tutorial to help you. Actually, to transfer files between iPhone and iPad is not a hard task. You just need the detailed steps to assist you to make it. Here I will show you how to realize iPhone to iPad file transfer without any difficulty.
Part 1: How to Transfer Files from iPhone to iPad via Airdrop
If your iPhone and iPad both have the function of Airdrop, this method will be convenient to you to share files between iPhone and iPad. Airdrop allows you to share almost all kinds of files by communicating with other devices over Wi-Fi network and Bluetooth. This solution will tell you how to transfer files from iPhone to iPad via Airdrop easily. The steps are shown below.
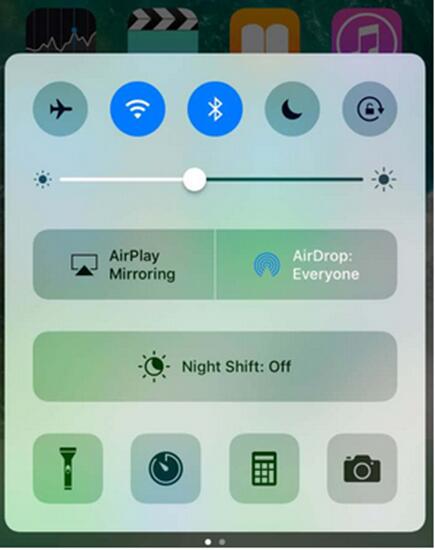
1. On both your iPhone and iPad, you need to swipe upwards to navigate to the “Control Centre” to enable Airdrop by clicking on it. Then you need to choose “Contacts Only” or “Everyone” as you prefer. You iDevices will turn on Wi-Fi and Bluetooth automatically. This is the preparation to use Airdrop to realize iPhone to iPad file transfer.
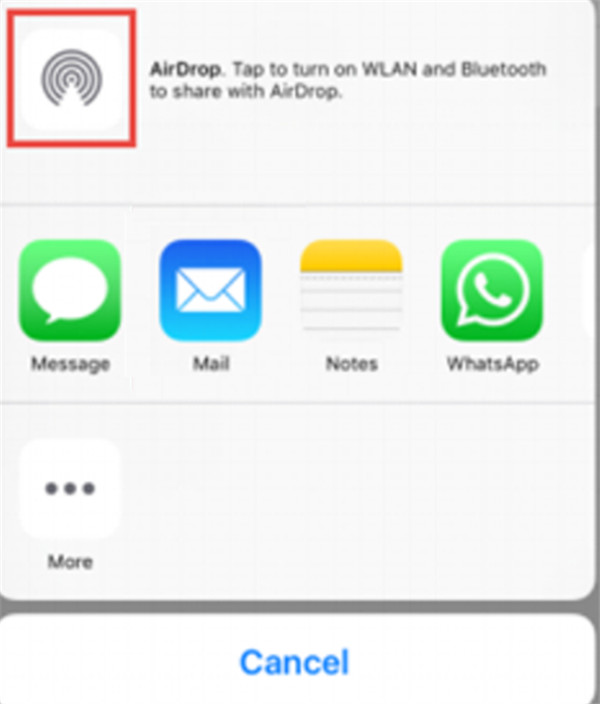
2. On your iPhone, you need to click to open the file you want to transfer to your iPad. In the next interface, you need to click on the share button. A panel will pop up to give your several methods to share files, and you need to click on the option of “Airdrop”.
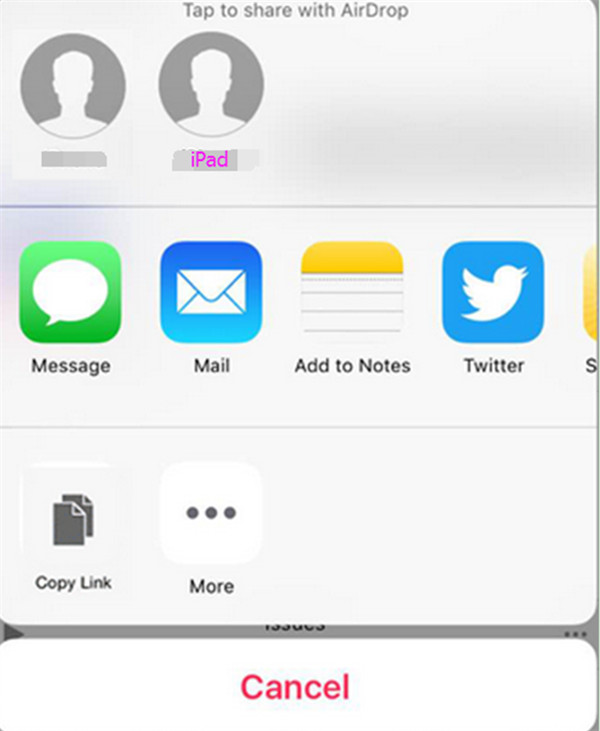
3. Afterwards, click on the person that you want to share files to and click on the iPad icon to realize iPhone to iPad file transfer.
4. Navigate to your iPad, and you will see a notice says “‘iPhone’ would like to share…”. You need to click on the “Accept” button to finish the process of sharing files from iPhone to iPad.
To share files between iPhone and iPad via Airdrop is quite simple. You just need to enable Airdrop on both iDevices and then airdrop files from one to another to make the iPhone to iPad file transfer come true. However, if your iDevices have no Airdrop function, you can head to the other methods in this guidance to help you to transfer files between iPhone and iPad.
Part 2: How to Share Files Between iPhone and iPad with File Sharing
The File Sharing function of iTunes can also be used to transfer files between iPhone and iPad. However, this method won’t allow you to transfer all types of files from iPhone to iPad at ease. It depends on the apps on your iDevices that can use the File Sharing function. Let’s start to see how to transfer files between iPhone and iPad via File Sharing now.
1. First, you need to launch iTunes on your computer with the latest version. Connect your iPhone to your PC to begin the process to share files between iPhone and iPad with File Sharing.
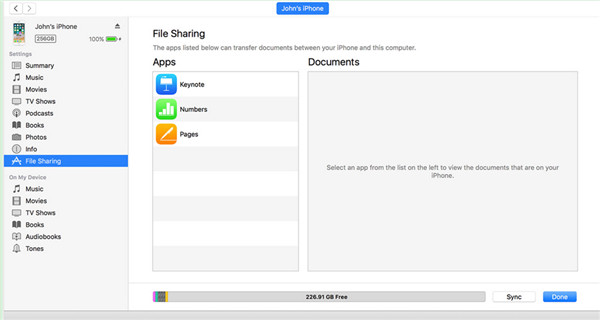
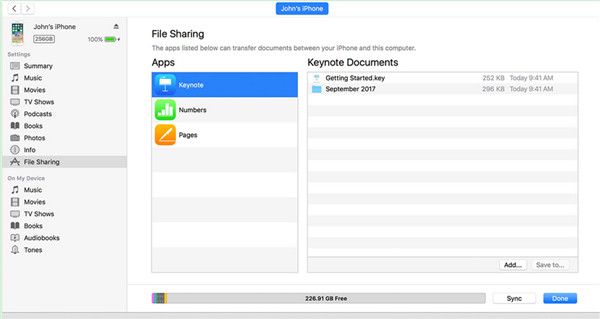
2. Click on the iPhone icon and then choose “Settings > Summary > File Sharing” to invoke the “File Sharing” area in the right side of the window.
3. Under the menu of “Apps”, you need to choose one application to check which documents can be shared in this application on your iPhone. If there is no File Sharing in the interface, it means your iPhone has not been installed with the applications that qualify with the files-sharing function.
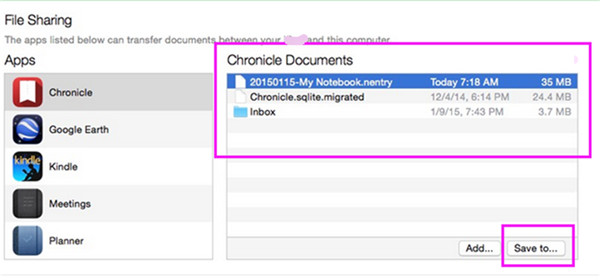
4. After you have chosen the application you need, then you can go to the “Documents” list to copy the files on your iPhone to your computer folder. You can also choose the iPhone files and then click on the “Save to” button to save the iPhone files to your computer folder.
5. When the iPhone files are on your computer folder, you need to unplug your iPhone and then connect your iPad to your computer to continue to solve how to transfer files from iPhone to iPad.
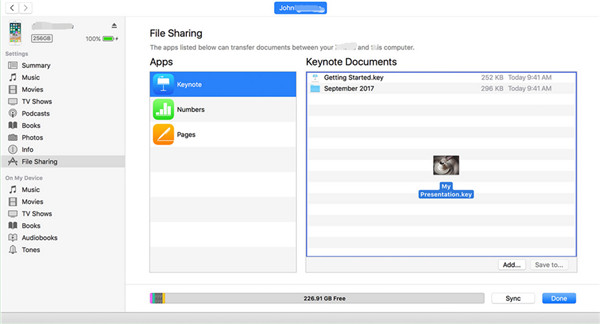
6. When iTunes detect your iPad, you need to go to the “File Sharing” section as mentioned in second step. Afterwards, you can drag and drop the files you have saved from iPhone to computer onto the “Documents” list. You can also add files by clicking on the “Add” button under the “Documents” list to browser your computer to find the iPhone files that you want to transfer to your iPad.
7. Eventually, you can click “Done” to confirm your settings. iTunes will then copy the files to the application on your iPad. You should know that you only can add files that will work with the application.
This solution is a bit complicated for you to transfer files between iPhone and iPad. If you do mind the limitations of the apps, you can use other methods in this guidance to assist you to share files between iPhone and iPad directly.
Part 3: How to Transfer Files from iPhone to iPad with iTunes in detail
You can also make use of the backup function of iTunes to transfer files between iPhone and iPad. This method allows you to back up all files from iPhone to iPad without choosing which files you want. This is also a big disadvantage of this solution. If you just want to do so, you can check out the following steps to help you to realize iPhone to iPad file transfer thoroughly.
1. First, you need to launch the latest version of iTunes on your computer. Afterwards, plug your iPhone into PC with proper USB cable.
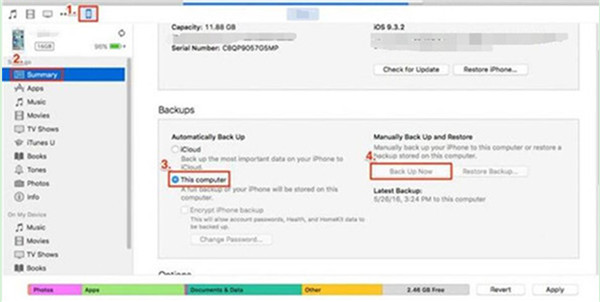
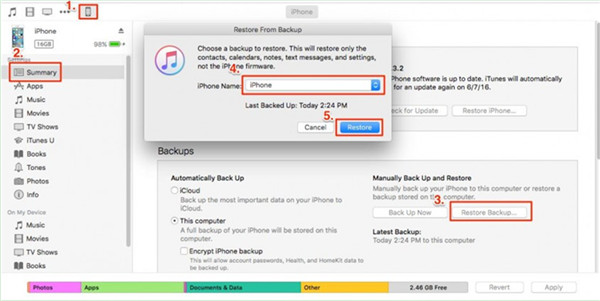
2. Click on the iPhone icon in the left sidebar, and then navigate to “Summary” option. In the right part of the interface, you need to check “This computer” and then tap “Backup Now” to transfer your iPhone files to PC.
3. After that, you need to unplug your iPhone and connect your iPad to computer to continue to solve how to transfer files from iPhone to iPad. When your iPad info has been recognized by the iTunes, you need to go to “iPad icon > Summary > Restore Backup”. A dialog will ask you to choose the backup you want to restore. You need to choose the iPhone files that you have back up to your computer. Click on “Restore” to begin to transfer iPhone files to iPad.
You should know that in the backup process, all your iPad files will be covered by the iPhone files and data. If you do mind this shortcoming of the solution to solve how to transfer files between iPhone and iPad, you can choose to use iTransfer to help you to realize iPhone to iPad file transfer perfectly and accurately.
Part 4: How to Transfer Files from iPhone to iPad with iTransfer
This professional program is really helpful on solving the problem of how to transfer files between iPhone and iPad. You can use this tool almost without any limitation. It supports you to transfer various files, such as photos, videos and other 10 kinds of files among computers, iDevices and iTunes. To transfer files from iPhone to iPad is an easy task with the assistance of Leawo iTransfer. The following contents will show you how to share files between iPhone and iPad with this gorgeous tool. Here I would like to take photos as the example.
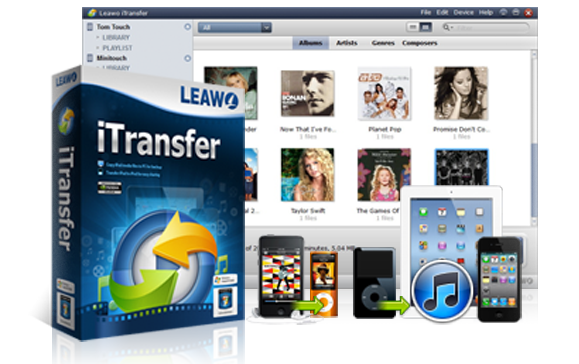
Leawo iTransfer
☉ Transfer files among iOS devices, iTunes and PCs with ease.
☉ Transfer up to 14 kinds of data and files without iTunes.
☉ Support the latest iOS devices like iPhone 7, iPhone 7 Plus, etc.
☉ Play back, view, and delete data and files on iOS devices.
4.1 Export Files from iPhone to Computer
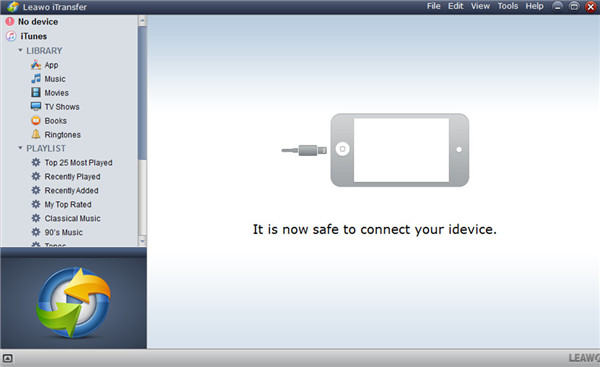
1.Launch the iPhone to iPad file transfer software on your computer and connect your iPhone with computer with proper USB cable. The software will detect your iPhone information automatically.
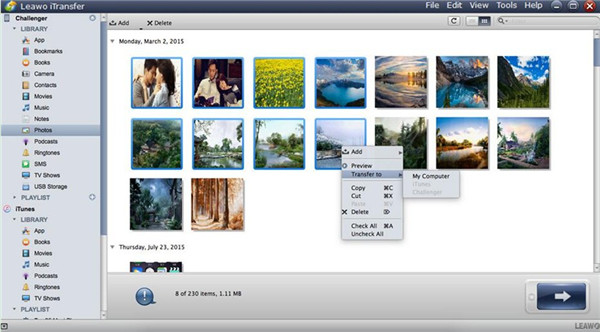
2.Click on your iPhone icon and then tap “LIBRARY > Photos”. Select the photos you want to transfer to your iPad and then right-click on one of them. In the next panel, click on “Transfer to > My Computer”. A tab will pop up to ask you to set the output inventory of the exported files on your computer, and you need to choose a folder on your PC to save them. Afterwards, click on “Transfer Now” to finish the process of transferring files from iPhone to PC.
4.2 Import Files from PC to iPad
When your iPhone files are on your computer, you need to unplug your iPhone and continue to solve how to transfer files from iPhone to iPad with the iPhone to iPad file transfer software – iTransfer.
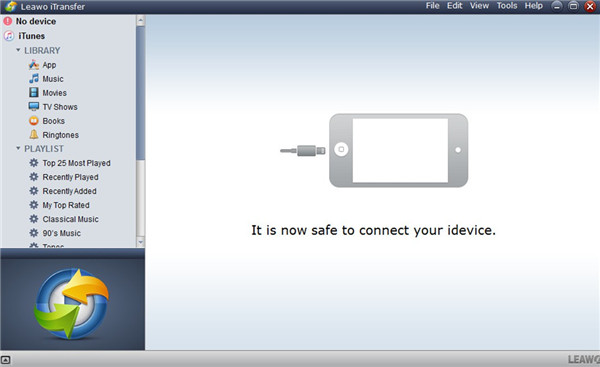
1.Connect your iPad to computer and wait until the iPhone to iPad file transfer software show your iPad information.
2.Click on the iPad icon and then click on “Photos” tab under the menu of “LINRARY”. Then you need to click on “Add” button to browse your computer to located the iPhone files that have been exported to your PC. Click on “Open” to begin to transfer iPhone files from computer to your iPad. When the process comes to an end, you can view your iPhone files on your iPad at ease.
This solution offers you accurate and safe results. It is quite effective and can help you to transfer files without any difficulty. This solutions has shown the example of photos. If you want to transfer other files, you just need to choose the corresponding category under the menu of “LIBRARY” to realize your goal.

