If your iPod is short of space, you can transfer files from iPod to Mac to help you. It is easy to realize your goal by referring to the contents in this guidance. Let’ now check out different ways to assist you to solve the problem of how to copy files from iPod to Mac in case you need.
Articles You may be feel useful:
3 Ways to Transfer Music from iPod to iTunes Library
3 Best Music Player Apps for iPod touch
How to Transfer Music from iPod to iPhone without iTunes
- Part 1: How to Transfer Files from iPod to Mac with iTunes (All Purchases)
- Part 2: How to Transfer Files from iPod to Mac with Photos App (Photos and Videos Only)
- Part 3: How to Transfer Files from iPod to Mac with iCloud
- Part 4: How to Transfer Files from iPod to Mac with iCloud Drive
- Part 5: How to Transfer Files from iPod to Mac with iTransfer
Part 1: How to Transfer Files from iPod to Mac with iTunes (All Purchases)
If you have purchased lots of files from the iTunes Store, you can transfer files from iPod to Mac via iTunes. However, you can only transfer the files that you have bought on your iPod. The steps to copy files from iPod to Mac with iTunes are as follows.
Step 1. On Mac, launch the latest version of iTunes and then head to “Preferences” and then click on the “Devices” button. In the next panel, check “Prevent iPods, iPhones, and iPads from syncing automatically” and then continue to solve how to transfer files from iPod to Mac with iTunes.
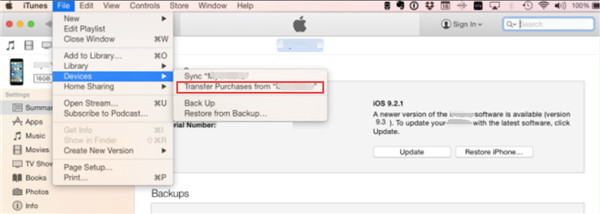
Step 2. Connect your iPod with your Mac and then head to the iTunes Store. Select “Authorize This Computer” and then fill in the Apple ID that you have employed to buy files on your iPod. Afterwards, click on “File > Devices > Transfer Purchases from ‘device name’ ”.
When you have finished the above process, you will be able to view the iPod files on the iTunes. This method helps you to transfer all your purchased files from iPod to Mac. If you want to transfer the non-purchased files from iPod to Mac, you can look at the other ways to help you.
Part 2: How to Transfer Files from iPod to Mac with Photos App (Photos and Videos Only)
Photos app is also a good tool to help you to copy files from iPod to Mac, but this only allows you to deal with the photos and video files. Let’s check out the following instructions to help you to make it.
1. On your Mac computer, launch Photos app and then connect your iPod with Mac with proper USB cable.
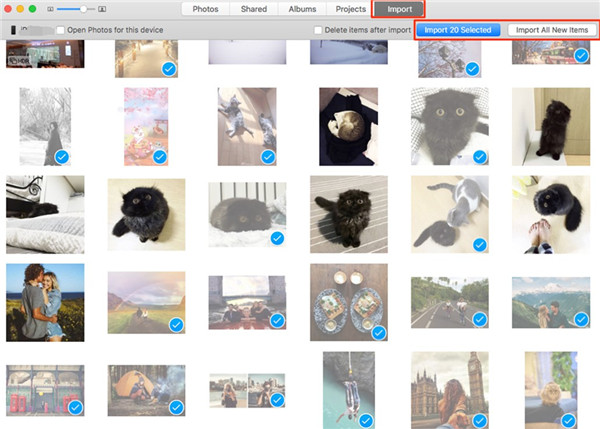
2. Then you can click on the “Import” button. After that, you can choose the photos and video files on your iPod to export to Mac.
3. Click on “Import XX Selected” or “Import All Items” to transfer videos and photos to your Mac.
This method to transfer files from iPod to Mac is quite direct. If you want to transfer other files from iPod to Mac more effectively, you can use the following 3 solutions to assist you to solve how to transfer files from iPod to Mac.
Part 3: How to Transfer Files from iPod to Mac with iCloud
iCloud is a quite common solution to help you to copy files from iPod to Mac. You can use it to back up various kinds of files to your Mac. You just need to make sure your iPod can connect to Wi-Fi if you want to adopt this solution to solve how to transfer files from iPod to Mac. The following contents will show you this way in detail. Here I would like to take photos for example.
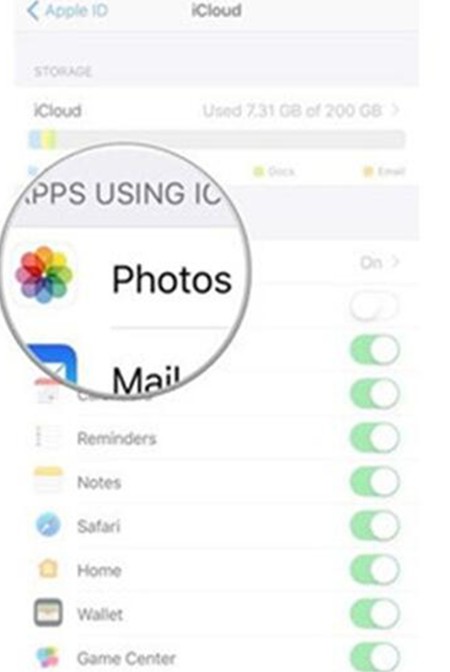
1. On your iPod, navigate to “Settings > Name/Apple ID”. Then you need to click on ““iCloud > Photos” to enable the sync of photos to iCloud. If you want to sync other files from iPod to iCloud, you can click to enable the corresponding panel you need.
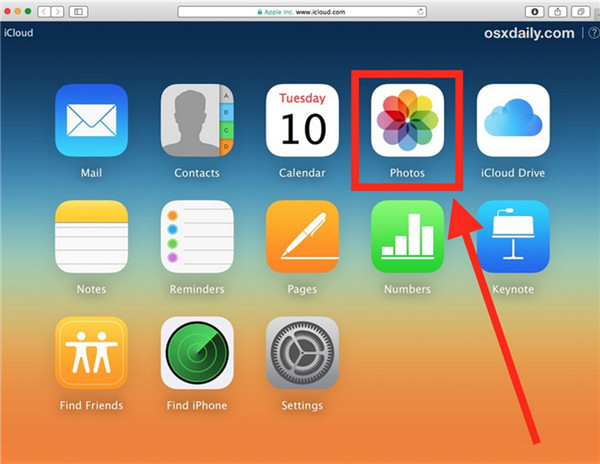
2. On your Mac, open a web browser and then log into iCloud.com with the same Apple ID you have just used on your iPod. Then you need to click on “Photos > Albums > All Photos” to check the synced photos from iPod. After that, you can click on the download button to save the iPod pictures to a Mac folder.
If you have synced other files to iCloud, such videos, contacts, reminders, notes and so on, you can click the corresponding option in the interface of iCloud.com to download them to your Mac computer for later use.
Part 4: How to Transfer Files from iPod to Mac with iCloud Drive
iCloud Drive is also simple to handle. You can take advantage of it to help you to solve how to copy files from iPod to Mac without any difficulty. Let’s begin to read the following contents to see how to make it.
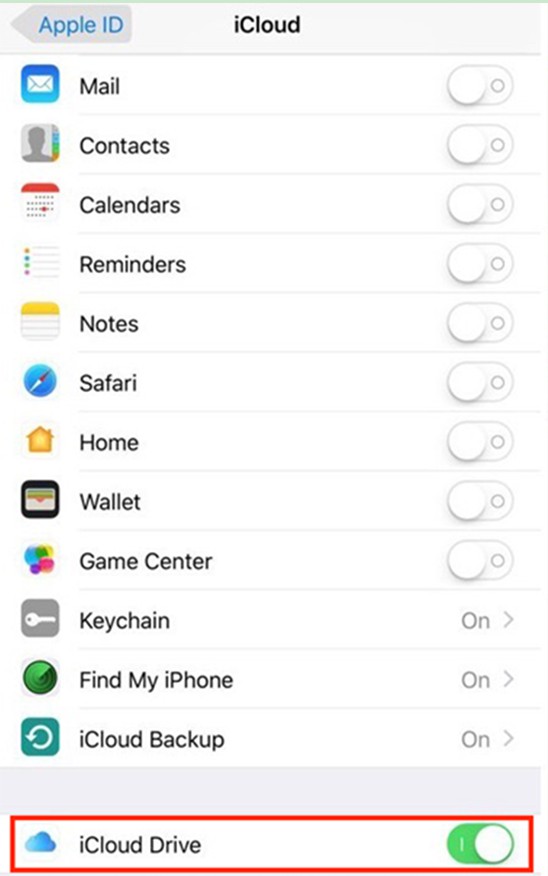
1. On your iPod, you need to click on “Settings > Apple ID > iCloud”. Then you need to find “iCloud Drive” option to tap to turn on it to begin the process to copy files from iPod to Mac.
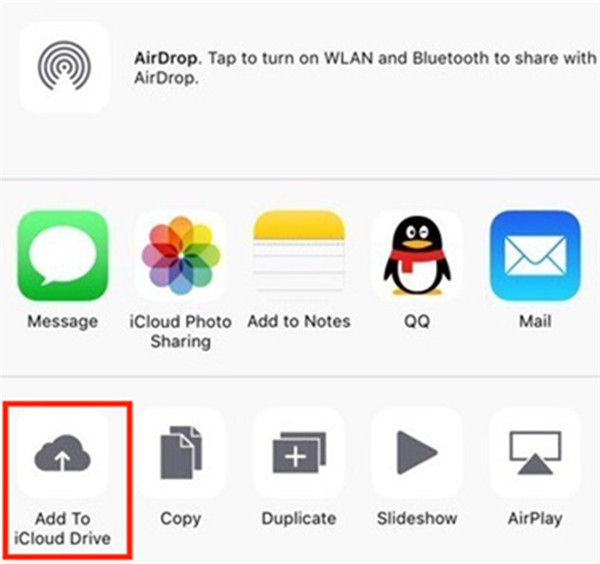
2. Then you need to click on a file on your iPod, such as a video, a photo and so on. After that, click on the button at the lower left of the corner to share the file. Choose “Add To iCloud Drive” to add the file to iCloud Drive.
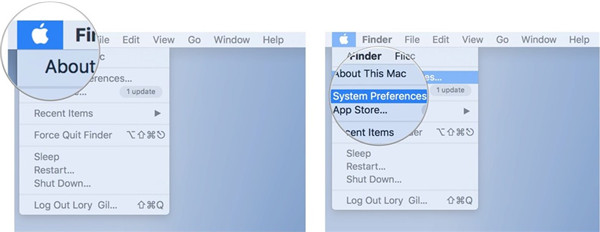
3. On your Mac, you need to click on the Apple icon at the upper left corner of the Mac interface. Then you need to click on “System Preferences”.
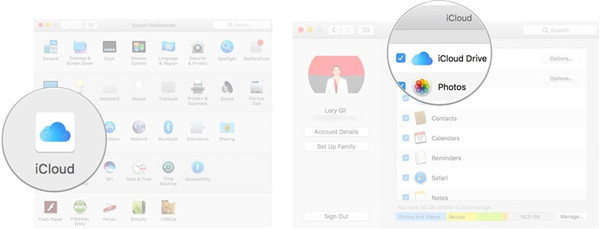
4. Tap the “iCloud” option and then check “iCloud Drive” to turn it on. Afterwards, click on “Manage” button.
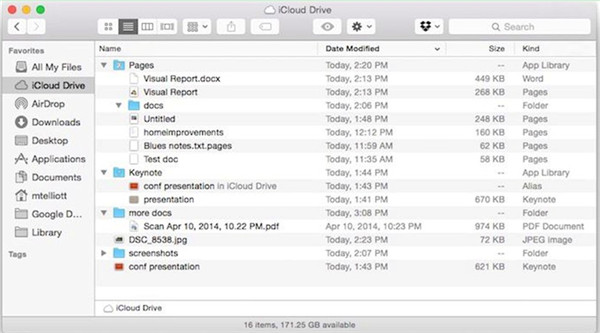
5. Find the iCloud Drive folder in “Finder” after you have done the steps above. After that, you can check out your iPod files in this folder, and then click on the download button to save the files to your Mac computer in a designated folder by yourself.
If you want to use a more efficient 3rd-party program to help you to copy files from iPod to Mac, you can continue to read the 5th part in this guidance.
Part 5: How to Transfer Files from iPod to Mac with iTransfer
Leawo iTransfer for Mac is a professional tool to assist you to copy files from iPod to Mac. It can assist you to solve various transfer problems. You can take advantage of it to manage 12 kinds of files among computers, iTunes and iDevices. I will illustrate the detailed steps in the following contents. Let’s have a look. Here I would like to take photos for instance.
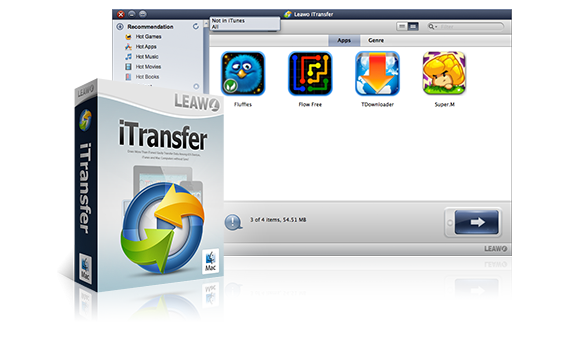
iTransfer for Mac
☉ Copy files among iOS devices, iTunes and PCs.
☉ Copy up to 14 kinds of data/files without iTunes.
☉ Support the latest iOS devices.
☉ Play back, view, delete data and files on iOS devices.
Step 1: Launch Leawo iTransfer and Connect iPod with Mac
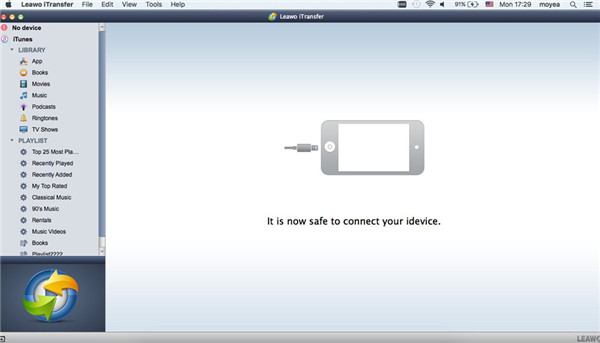
Launch Leawo iTransfer for Mac and connect your iPod with Mac with suitable USB cable. The software will detect your iPod automatically.
Step 2: Select Files to Transfer from iPod to Mac
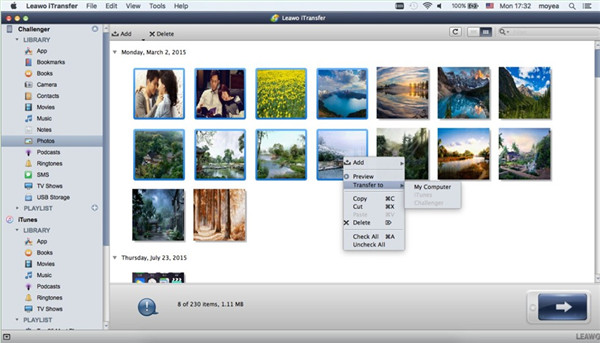
In the interface, click on the iPod icon and then you need to navigate to the “Photos” menu under the panel of “LIBRARY”. Right click one of the photos and then click on the option of “Transfer to”. Afterwards, you need to select “My Computer”.
Step 3: Select Output Folder to Transfer from iPod to Mac
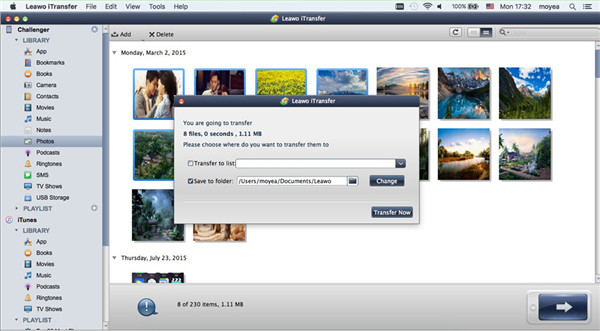
In the next panel, you need to tick “Save to folder” and click on “Change” to navigate to a folder on your Mac to save the iPod files.
Step 4: Transfer from iPod to Mac
When you have set the output folder, you need to click on “Transfer Now” to initiate the process to copy files from iPod to Mac. When the process is over, you will be able to view and edit your iPod files on your Mac.
This powerful tool can also be used to transfer other files from iPod to Mac. You only need to click on the corresponding panel under the menu of “LIBRARY” to realize your goal. Have a try and you will know how effective it is.


 Try for Free
 Try for Free


