Although the stability of the released iOS 12 is quite good, some users may also encounter the problem of incompatibility. This can affect your using experience to a great degree. In this case, you may desire to downgrade iOS 12 to 11 or roll back iOS. This seems to be hard to realize, but it is really easy to be completed after you understand the method in this tutorial. You will become clear on how to make it come true.
Part 1: How to Downgrade iOS 12 to 11
In order to revert to previous iOS to avoid some issues, you can check out the steps listed below to help you. You can also keep the data of iOS 12 after you roll back iOS. As for how to make it, follow me to read through this part. Here I will take iPhone X for instance.
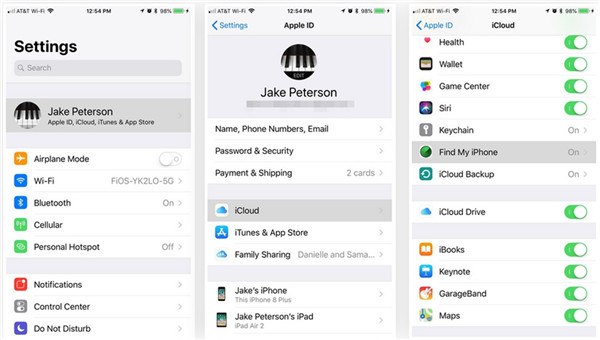
1. On iPhone, click on "Settings" and then click on "Apple ID" to choose "iCloud" under the menu. Next, you need to drag down to click on "Find My iPhone" to turn off this feature. When a panel pops up, you need to enter your Apple ID and password to confirm your operation.
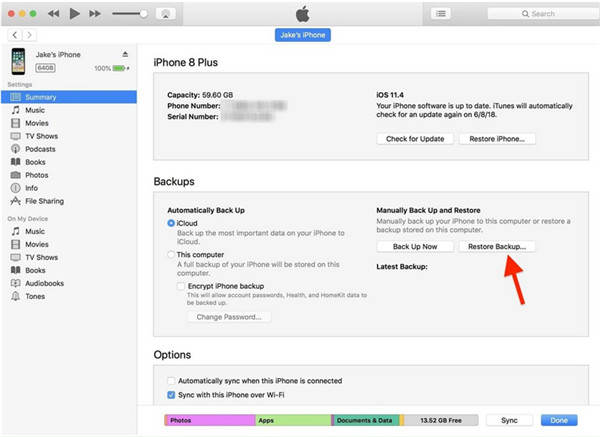
2. Insert iPhone into computer and then run iTunes of the latest version. Wait until you see your iPhone icon appears at the top-left corner of the interface. When you want to back up iPhone to iTunes, you can click on iPhone icon and then tap on "Summary> Back Up Now" successively.
Note: Before the backup begins, you need to disable automatic syncing by moving to "iTunes> Preferences" to tick the option of "Prevent iPods, iPhones and iPads from syncing automatically" at first.
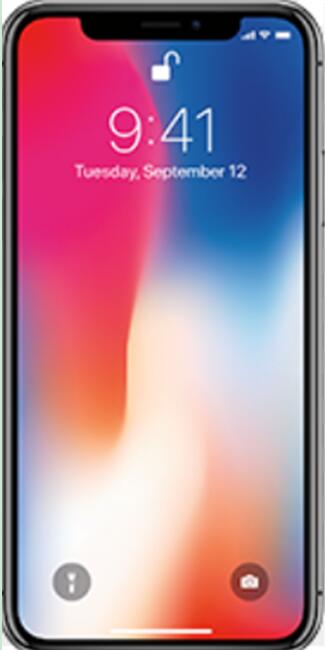
3. On iPhone X, press and release the Volume Up button. Then you need to press and quickly release Volume Down button. After that, press and hold the Side button until the Recovery interface displays.
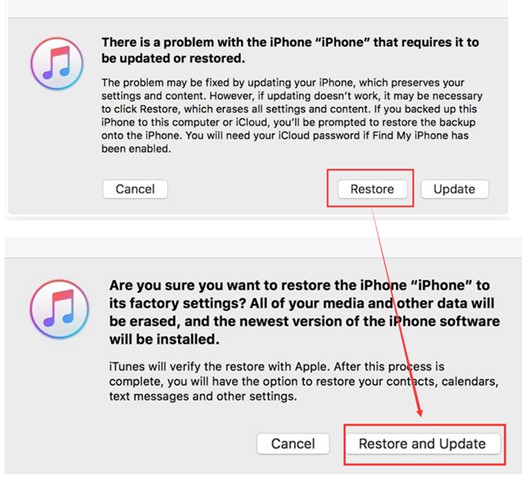
4. When you see the recovery window on iPhone, you will see iTunes shows you a dialog saying that "There is a problem with the iPhone that requires it to be updated or restored." You need to click on "Restore" button. Afterwards, click on "Restore and Update" to begin to erase iPhone and install it back to the factory settings with iOS 11. When you see the welcome interface on iPhone, you will know that you are successful to revert to previous iOS 11.
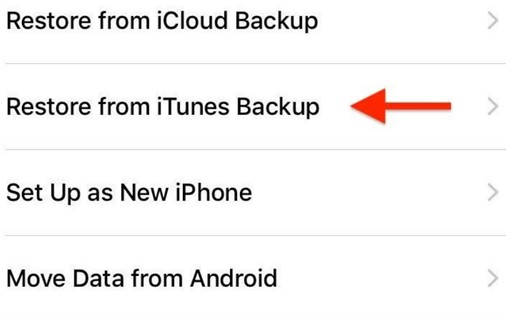
5. After the downgrading is completed, you may need to continue to get your previous data back. For this aim, you need to click on "Restore from iTunes Backup" when you have backed up iPhone to iTunes for preparation. When you do not want any old data, you can choose "Set Up as New iPhone".
6. On iTunes, you need to move to iPhone icon and then click on "Summary" option to navigate to the "Backups" area to hit "Restore Backup". Choose the backup you need to restore and then click on "Restore" button to begin the process. This process will take you a moment, and you can wait until it is over.
When you operate iPhone according to the steps shown above, you may be able to downgrade iOS 12 to 11 just with a few clicks.
Part 2: How to Uninstall iOS 12 Beta
When you are using iOS 12 beta, you may want to go back to normal system version. Have no idea on how to uninstall iOS 12 beta? This solution will show you some simple steps to assist you. You will be able to fix how to uninstall iOS 12 beta without computer easily. Now let's check out the detailed steps.
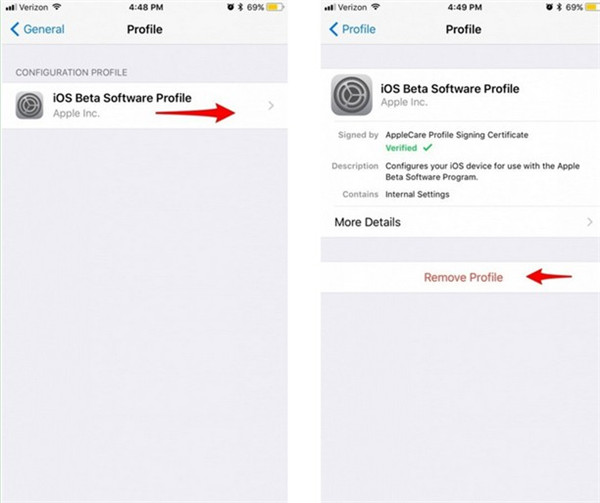
1. On iPhone, go to click on "Settings> General > Profile" in order. Choose the "iOS Beta Software Profile" and tap on "Remove Profile".
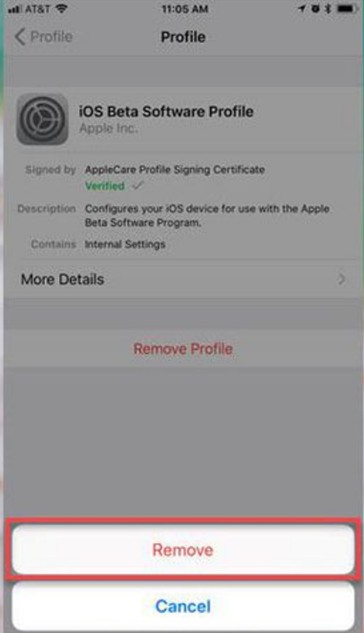
2. In the next interface, you need to enter you PIN to confirm your operation. After that, click on "Remove" on the screen to go back to a normal user profile.
Thus you can solve how to uninstall iOS 12 beta without computer. However, you should know that this process will erase your iPhone data at the same time. If you mind this shortcoming, you can actually backup iOS 12 to computer to cover this disadvantage beforehand.
Part 3: How to Backup iOS 12 Data to Mac via iTransfer for Mac
When you want to keep iOS 12 data before you cope with how to uninstall iOS 12 beta without computer successfully, you can in fact transfer iOS 12 data to Mac via iTransfer for Mac. This is not hard to be realized with the clear statement in the following paragraphs. iTransfer for Mac has helped numerous users get rid of the backup issues. Its powerful functions are praisable, which has won a great reputation among users. As for how to use it to export iOS 12 data to Mac with its help, I would like to take photos for example to show you the process.
Leawo iTransfer for Mac
☉ copy files among iOS devices, iTunes and PCs with ease.
☉ copy up to 14 kinds of data and files without iTunes.
☉ Support the latest iOS devices like iPhone 7, iPhone 7 Plus, etc.
☉ Play back, view, and delete data and files on iOS devices.
Step 1: Launch Leawo iTransfer for Mac and Connect iPhone with Mac
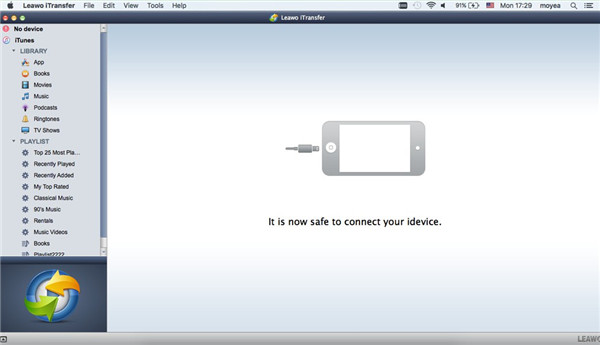
Connect iPhone with Mac with USB cable and then open iTransfer for Mac. The program will show your iPhone information automatically.
Step 2: Choose Photos to Transfer
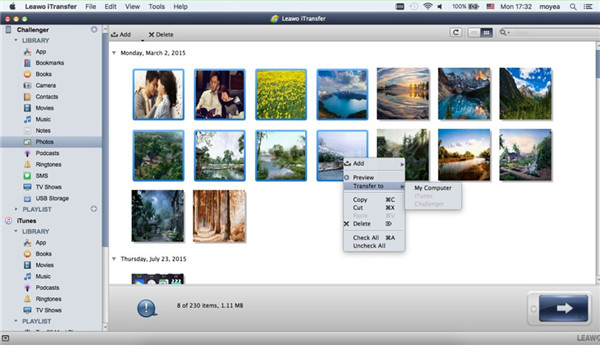
Click on iPhone icon and then hit "LIBRARY> Photos" tab to check all iPhone pictures in the right part of the window. Choose the photos you want to back up to Mac and then right click on one of them to click on "Transfer to> My Computer".
Step 3: Choose Output Folder
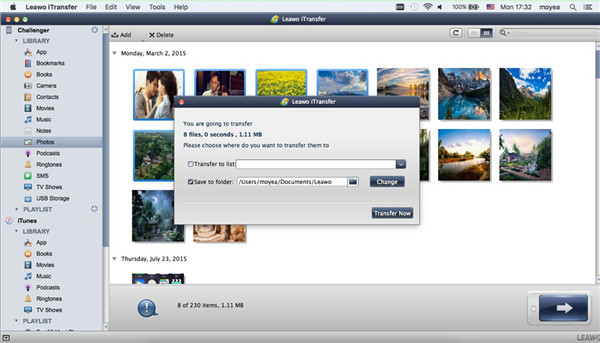
Check the option of "Save to folder" and then hit "Change" button to browse Mac to find a proper folder to save exported pictures from iPhone. After that, tap on "Transfer Now" button and the program will start moving pictures from iPhone to Mac at once. In a few seconds, your target will be reached.
As for backing up other files from iPhone to Mac, this software will also do. You can refer to the steps shown above as well, but you need to choose corresponding category from the left sidebar according to your need.

