With the development of internet, nowadays people share information through online sharing platforms such as video sharing platforms or audio sharing platforms like YouTube, iFunny, Facebook, etc. The traditional solutions like emailing, sticking a USB to the computer to transmitting files are still existing in our daily life but demands for them are declined. Do you still remember the position on our computer or notebook where we can insert the CD or DVD for playing the contents inside it? The question looks weird but it actually makes sense since fewer users adopts the solution of reading information from the discs to get what they want. Although the discs seem to be outdated for the time being, it is one of the effective ways to restore information. How to copy things from the discs in case the discs fail every now and then? The article will give some tips on it.
What is ISO File?
The ISO file can be regarded as a complete copy of every piece of information stored on a physical optical disc such as CD, DVD and Blu-ray disc. Without any compression, the ISO file is a full copy of the disc. The ISO file created from a disc can be burnt as a new disc with the information same as the original one. Most of the operating systems allow the user to mount an ISO image as a virtual disc which is treated as a real optical disc by all your apps.
One key feature of the ISO file is that it allows all the files to be contained in one easily downloadable file. Therefore, people frequently use the ISO file to distribute large programs and operating systems.
Why do You Choose an ISO File?
Before discussing about the importance of creating an ISO file, we might bring up the topic of why we still choose the optical discs nowadays. Even though making use of the physically optical discs is no longer a mainstream for storing information, we can find a large number of discs every here and there in our daily life. Singers release their albums in the way of physically optical disc but not virtual disc which can be downloaded online. Some books sell to the customers with the optical discs as their accessories because the book not only contains words but vocal recordings. This can easily be seen among the students of English majors who want to buy the books for practicing their listening. All in all, the internet can satisfy people in many aspects but it still cannot replace the position of optical discs nowadays.
Transferring files from the optical discs to an ISO file can prevent them from getting lost. Programs that are stored in the optical disc can be expensive and once the disc is broken, the expensive program can hardly recover. So that is the significance of creating an ISO file. We highly recommend you to back up all the installation media which are stored in an optical disc.
An ISO file can be burnt to another disc as a backup and it can also be transferred to a USB stick as well as a removable hard drive. Emailing and cloud storage are two solutions for delivering ISO files but you should make the ISO file is compressed to small enough due to the limited capacity of the email or cloud storage.
How to Make ISO File?
The concept of making ISO file can be simply regarded as backing up the music or video sources. It is not as difficult as you might consider it. In order to make an ISO file, you should install the third-party app for ISO file creation. I would recommend the ISO Creator which I perceive as the easiest app for making ISO file.
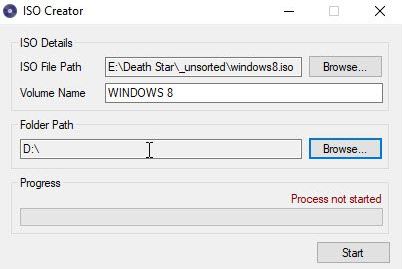
After installing the ISO Creator, run it up. There are three configures for you to set.
From the "ISO Details" panel, two boxes of "ISO File Path" and "Volume Name" are needed to be set.
The path set in the box of "ISO File Path" represents where you want your completed ISO file to be located. Just pick one site in your PC to place your ISO file and remember to type the desired name of the ISO file's path in the Window. Here we recommend the name of the path to be set as easily-recognized as possible.
Another box of "Volume Name" is specifically for the name of the ISO file which is called when you open it in Windows' File Explorer. Here we can simply set it the same as the path of the ISO file.
The third position that you have to set is the "Folder Path", where the installation disc that you want to transfer things from it to the ISO file is. From the disc reader of your Window's file explorer, you can see where the installation disc is.
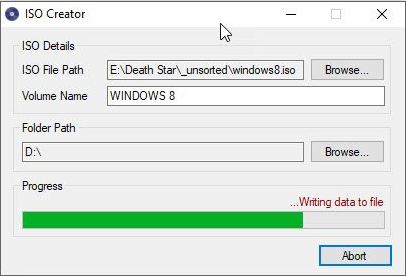
With three areas set, click the "Start" button to let it work. It will take a few minutes, hopefully less than 10 minutes for the progress to be completed.
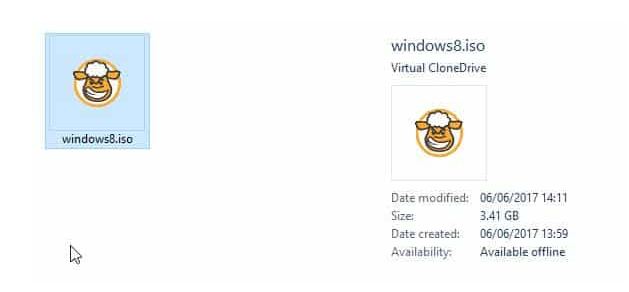
When the progress bar runs to the end, the creation of ISO file is finished and you can check it in File Explorer. The angry-looking sheep is showing as well in a moment.
How to Run ISO File?
We have created ISO file with the help of ISO Creator. But that doesn't mean the ISO file can be freely opened with the double-clicking the file just like we open a conventional file. There are several methods to open the ISO file. We recommend two solutions to do that. Both are easily-operating and free.
-
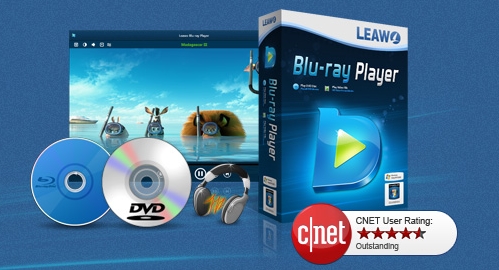
Leawo Blu-ray Player
Region-free Blu-ray player software to play Blu-ray disc and DVD disc for free, regardless of disc protection and region restriction.
Play 4K FLV videos, 4K MKV videos, 4K MP4 videos, etc. without quality loss.
Play 1080P videos, 720P videos with lossless quality.
First: Run ISO file via Leawo Blu-ray Player
Leawo Blu-ray Player is a free app for running not only ISO files, but also DVD, videos up to 4K or 1080p, audio files and IFO files, etc. The Leawo series apps are incorporated to form an integrated routine where you can not only download videos up to 4K and convert 4K into 1080P, but also send the 4k videos to the inner-connected subroutine Best Blu-ray Player for playback.
The next section will guide you how to play ISO file and make some basic editing while playing.
Step 1: Load ISO file onto the program
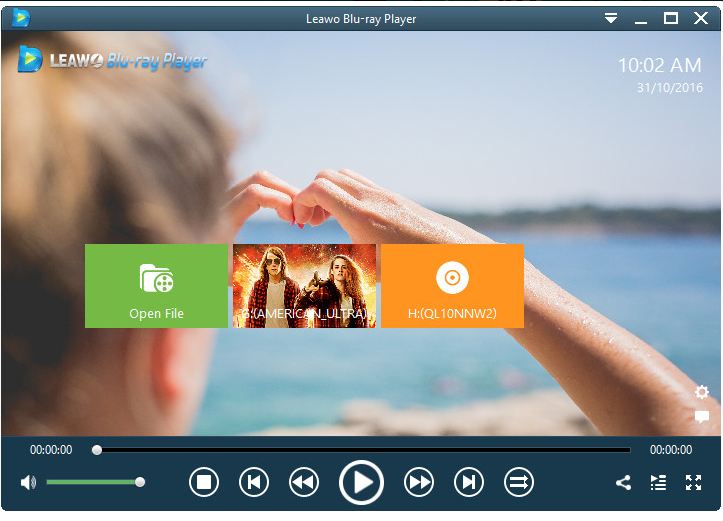
Before loading the ISO file onto the program, you should install and run the Leawo Blu-ray Player at first. You can download it from the main interface of Leawo official website. Search the Leawo Blu-ray Player among the apps with the mark of free and download it.
Then click the green "Open File" button to open the ISO file for playback. For loading other kinds of files, you could also right-click the main interface and select "Open > Open Folder". After the ISO file is loaded onto the program, you can see it on the playlist.
Step 2: Subtitle setting
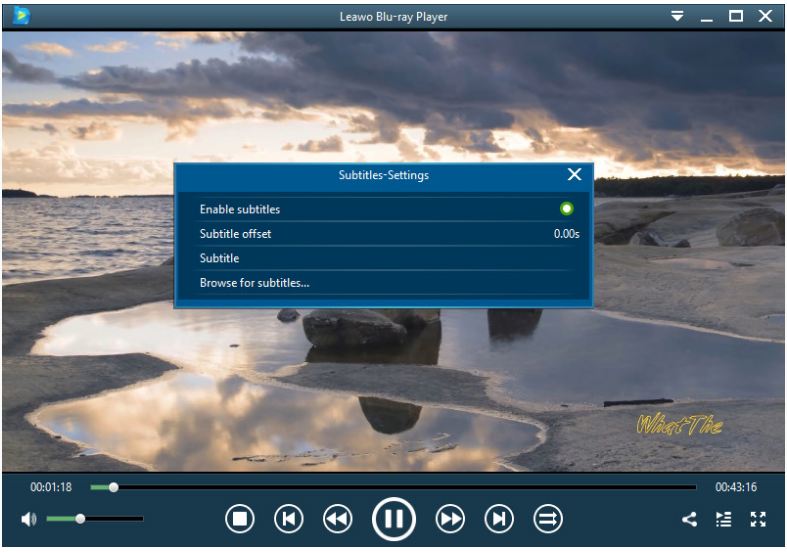
The media file will start to play as soon as you load it and click the starting icon. During playback, as long as you move the mouse onto the subtitle area, 4 icons will pop out. The functions of the icons are separately Enable (Disable) subtitles, Subtitle offset, Subtitle selecting and Browse for subtitle.
Step 3: video setting
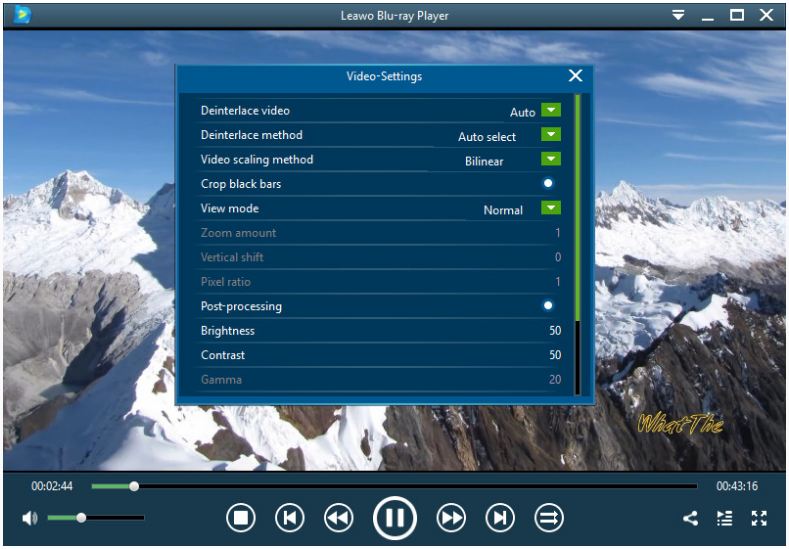
Right-click the main interface and then select "Video" option to pop out an interface for video settings which can be done while playback.
Second: Run ISO file via Virtual Clone Drive
From the aforementioned part of how to make ISO file, we could see the Virtual Clone Drive (the one with a crazy looking sheep icon) appears on the File Explorer interface. It simulates running a real disc and mounts the ISO file instead.
You can go to the Windows File Associations settings where you can connect ISO files with VCD automatically for future playing. You can also right-click the ISO file and select "Open with>Virtual Clone Drive" to open the ISO file.
Conclusion
As a full-functioned app for playing not only ISO files and other videos/audios in normal formats, Leawo Blu-ray Player offers the best services on file playback and meanwhile totally free. Free charge doesn't mean lower quality service. What the user concerns the most and what he really in need of are the focusing points of the Leawo Blu-ray Player.

