iPhone Recorder app enables users to record any kind of audio they hear. The recorded audio files are saved as voice memos on your iPhone. The voice memos can be synced to computer with iTunes, and you can listen to them on your computer. But if you want to convert iPhone voice memos to ringtones, you may wonder how to do that.
Part 1: Convert iPhone Voice Memos to Ringtones
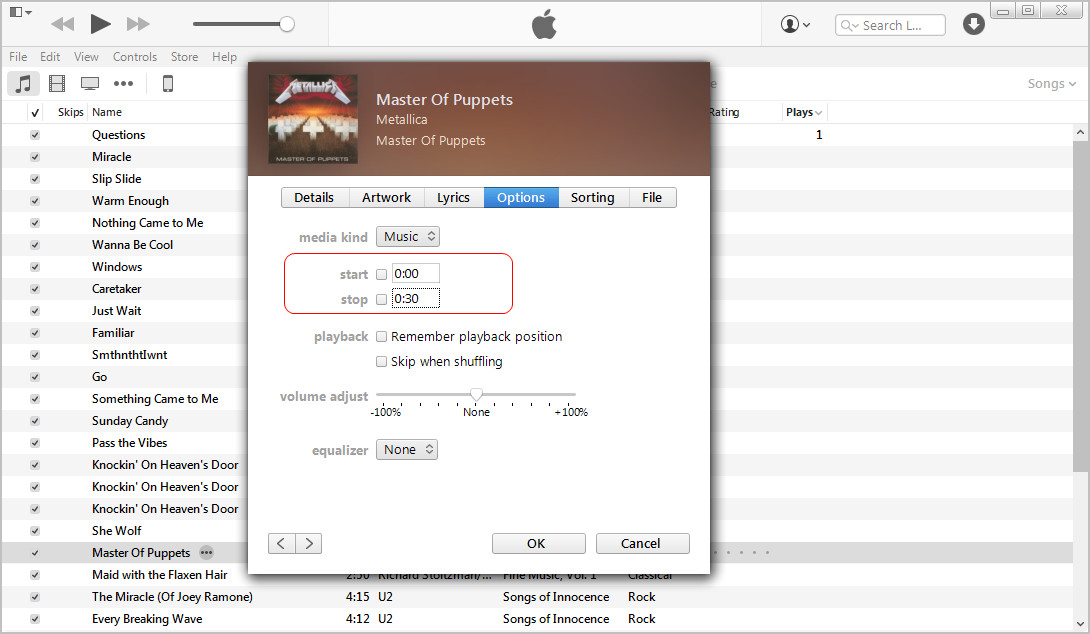
When it comes to converting iPhone voice memos, you should take the length of the voice memos at first. You must be well aware that iPhone ringtones are limited within 30 seconds, therefore when you want to make iPhone ringtones, you should cut the voice memos into 30 seconds. iTunes enables users to finish the task, so if you have sync iPhone voice memos to iTunes music library, you can convert them to iPhone ringtones. The following guidance will show you how to convert iPhone voice memos to ringtones.
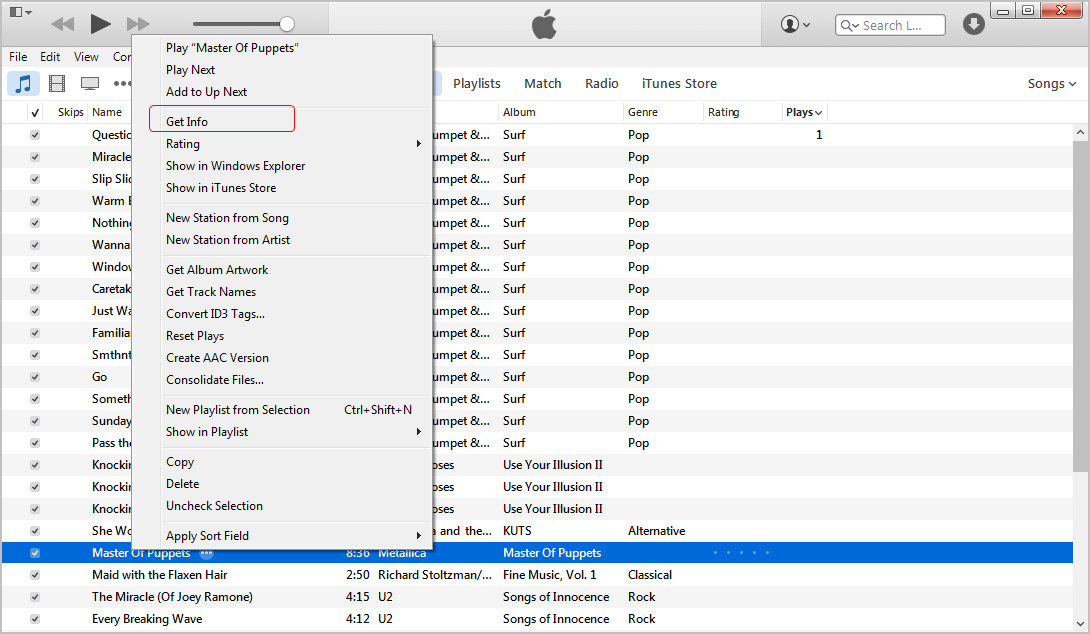
1. Run iTunes and locate the playlist Voice Memos, in which you find all your iPhone voice memos.
2. Find the voice memo you want to convert, and right-click it. Then choose Get Info.
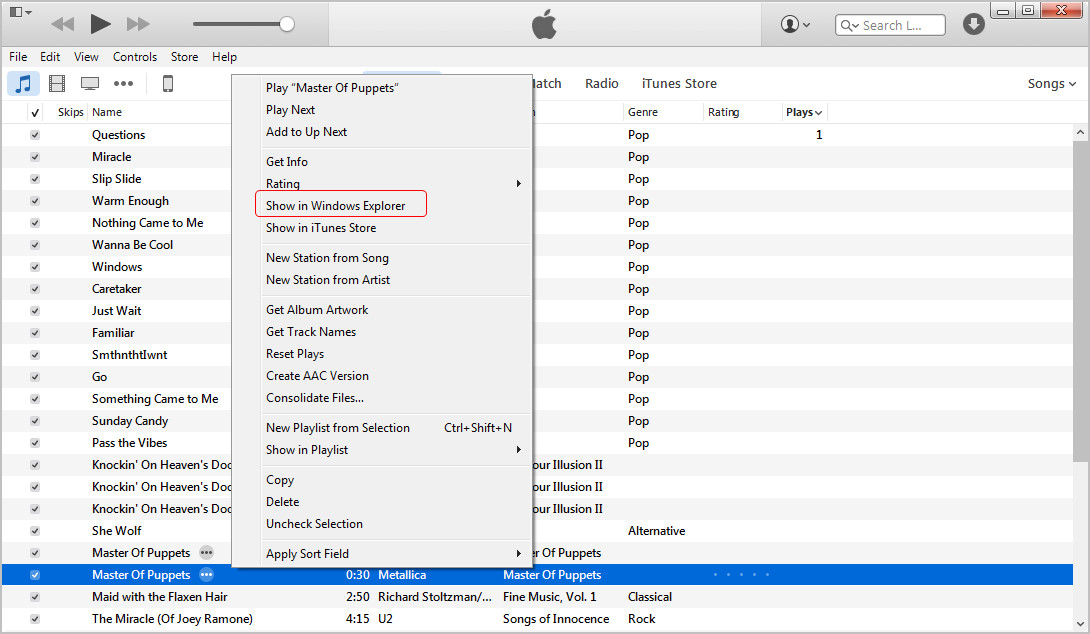
5. Rename the voice memo and change the file extension to .m4r.
Now you can sync the M4R file to iPhone as a ringtone. You can use iTunes to do that, but you should pay attention to the auto sync of iTunes, because it’ll erase the available files in iPhone during the syncing process. If you get rid of iTunes, you can use third-party iPhone transfer software to transfer ringtones to iPhone after converting iPhone voice memos to ringtones.
Part 2: Transfer Converted Ringtones to iPhone
Method 1: How to Transfer Ringtones to iPhone with iTransfer
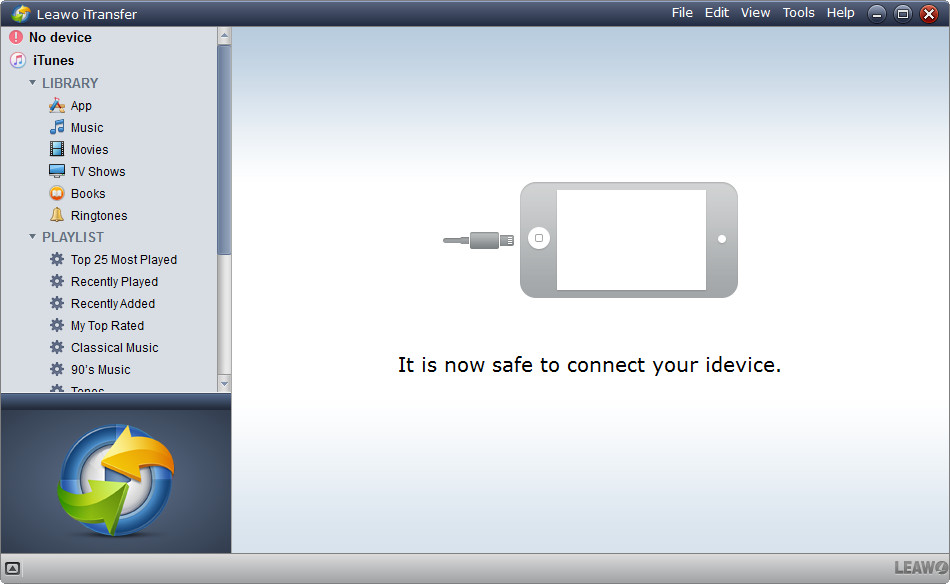
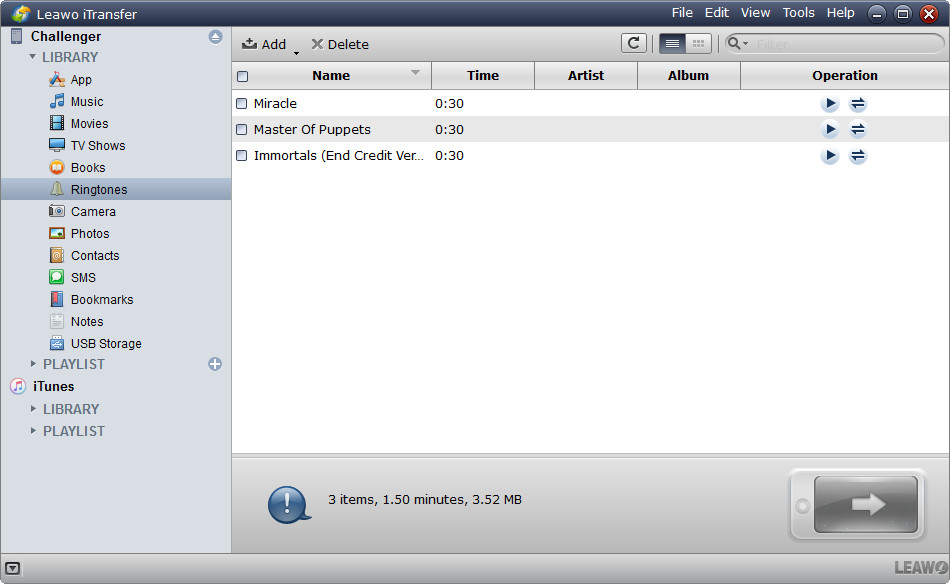
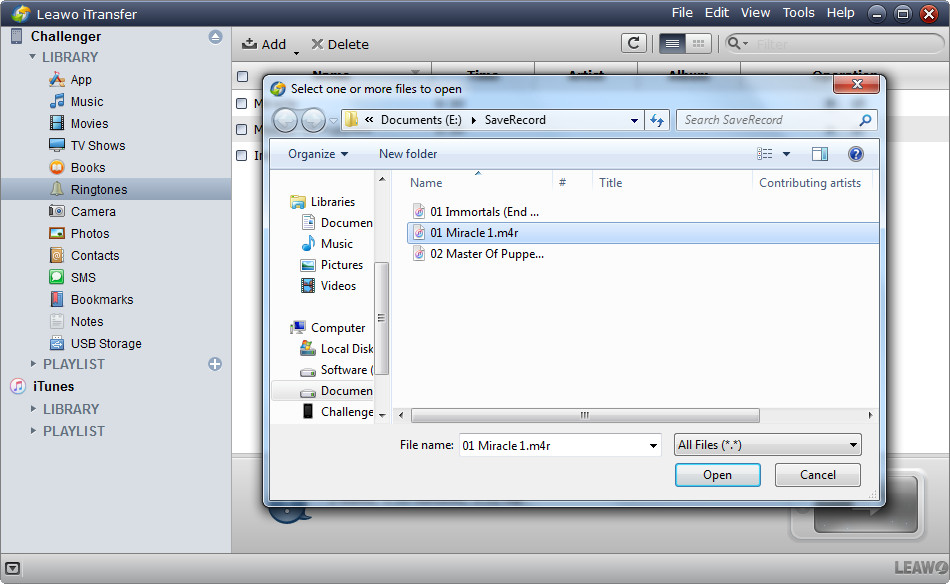
Among all the iPhone transfer programs, Leawo iTransfer is regarded as one of the best. This software is used for transferring files among iOS devices, iTunes and computers, and it helps users to get rid of iTunes when you want to sync files to iPhone. The following guidance will show you how to transfer ringtones to iPhone after converting iPhone voice memos to ringtones, and you can free download the software to have a try.

Leawo iTransfer
☉ Transfer up to 14 kinds of data and files without iTunes.
☉ Support the latest iOS devices like iPhone X, iPhone XR, etc.
☉ Play back, view, and delete data and files on iOS devices.
When the transfer is finished, you will get the ringtones in your iPhone. You can tap Settings > Sounds > Ringtone to set up the voice memo as your iPhone ringtone. you are also able to transfer various kinds of files without iTunes, for example, you can transfer music from iPhone to computer with the help of this software. Sometimes you may not know the exact location of iPhone ringtones, if you want to find the ringtone to transfer, you can check the following route:
Mac OS X: Finder > Go > ~/ > Music/ > iTunes > iTunes Media/ > Tones/
Now you can convert iPhone voice memos to ringtones easily, and then transfer ringtones to iPhone in short time. If you are interested in Leawo iTransfer, just check it out.
Method 2: Convert Voice Memo to iPhone Ringtone without Computer – Using GarageBand
Apart from iTunes, GarageBand is also helpful to convert voice memos to iPhone ringtone. You can follow the steps shown below to reach this goal successfully.
1. On your iPhone, you need to install the GarageBand app and then run it. Click on the audio icon in the main interface of the software.
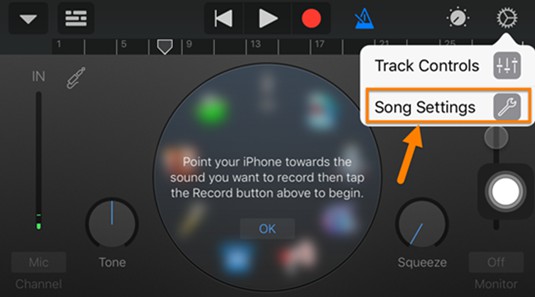
2. In the next interface, you need to hit the gear icon on the top right of the window and then click on the option of “Song Settings” in the menu that shows up.
3. Click on “Metronome and Count-in> No sound” successively. Hit the button “Done” at the top right corner of the interface to go back to the starting page of the application.
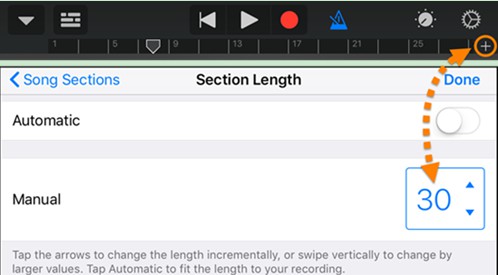
4. Click on the “+” icon under the gear button to enter into the interface of “Section Length”. Turn off the tab of “Automatic” and then increase the number against the “Manual” option to 30. Afterwards, you need to hit “Done” button to navigate to the main interface of the software.
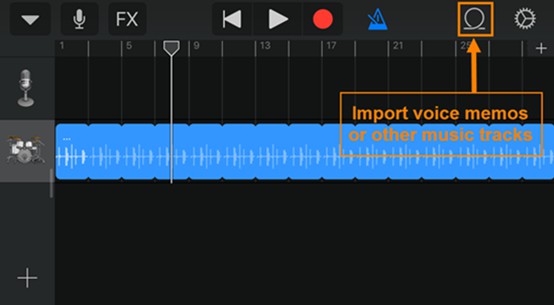
5. Hit the loop icon on the left of the gear button to import the voice memo you would like to convert to iPhone ringtone. You need to long press on the voice memo from the list of your iPhone and then drag it to the timeline on the main interface of GarageBand app.
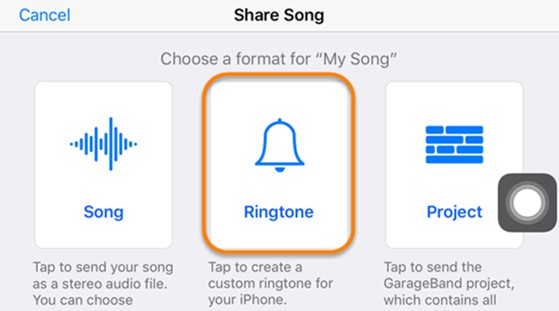
6. After that, you can save and share the voice memo as a ringtone. Name it while you are saving it.
You can choose the tool you like to convert the voice memo to ringtone on iPhone. After you finish the conversion, you can continue to learn the method to transfer the converted ringtones to iPhone.
Part 3: How to Set Ringtones on iPhone
After you save various ringtones, you can set it on your iPhone as you like by referring to the following paragraphs.
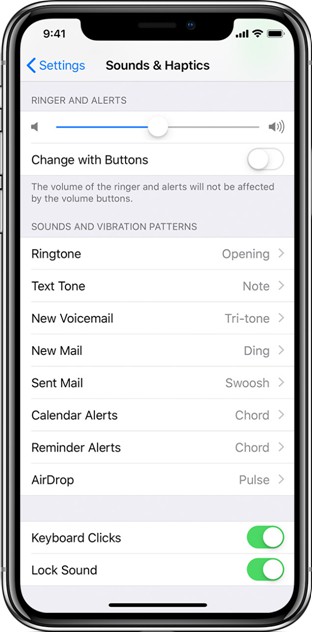
1. On your iPhone device, you first need to click on Settings app and then navigate to “Sounds & Haptics” menu to find the section of “SOUNDS AND VIBRATIONS PATTERNS”.
2. Click on the sound that you would like to alter. You are able to change or set your ringtones for Ringtone, Text Tone, New Voicemail, New Mail, Sent Mail, Calendar Alerts, Reminder Alerts, and Airdrop.
3. Click on the name of a ringtone or alert tone to listen to it and set it as the new sound.
4. If you desire to set a Ringtone or Text Tone for a specific contact, you can run the Contacts app and hit a specific contact. Afterwards, you can click on the “Edit” button in the upper-right corner of the interface to hit “Ringtone” or “Text Tone” to select one new sound.
The steps to set ringtones on iPhone are quite easy. Now you can have a try on your iPhone and set the sound you are fond of as the perfect ringtone.
Bonus Tips: How to Make Voice Memo on iPhone
Now you have known the solution to convert iPhone voice memos to ringtones, and the ways to fix how to transfer converted ringtones to iPhone and how to set ringtones on iPhone, then you can continue to read the following contents to learn the tips to make a voice memo on your iPhone device in case you need. Voice Memos app can be used to record various kinds of audios you desire to save on your iPhone, including a lecture, a video, an interview and etc. Now let’s begin to have a look at how to make it come true with this great software.
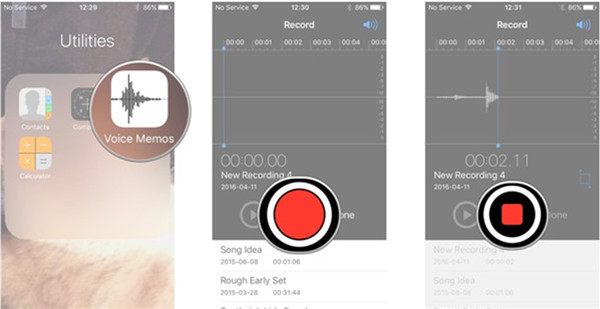
1. On your iPhone, you need to navigate to the Voice Memos app on the home screen or in the folder of“Utilities” of your iPhone.
2. Choose one topic you desire to talk about or the content you would like to record in the voice memo.
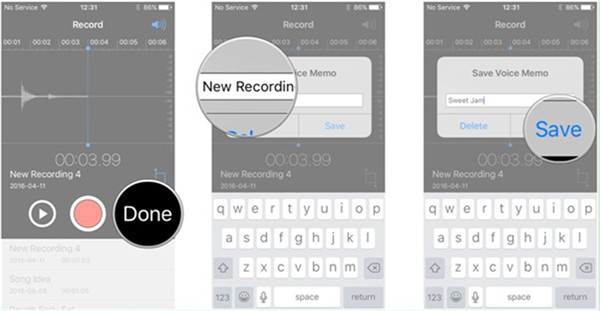
3. Click on the red circle button in the interface of Voice Memos app to start recording the content you would like to add in a voice memo.
4. You need to click on the stop button whenever you would like to stop the recording. If you desire to continue to record, you can click on the red record button once again.
5. After that, hit the “Done” button when you are satisfied with the recorded content. The panel of “Save Voice Memo” will show up after you hit the “Done” button. You can name the recorded voice memo and then hit the “Save” button to save the recorded file. If you are not content with the recorded voice memo, you can hit the “Delete” button to remove it.
These are the detailed steps to instruct you to know how to make a voice memo with this app. You’d better hold the Microphone with a proper distance and not too close.

