Image stabilization plays an important role in shooting photos with perfect quality by stabilizing your images. It is known as one of the fundamental building blocks of an excellent smartphone camera. If your smartphone camera is not equipped with this feature, your photos will come out as blurry ones and your videos will be a mess. There are some distinct types of image stabilization, such as optical image stabilization, electronic image stabilization, hybrid image stabilization, etc. If you desire to know them, you are just in the right place. This tutorial will explain them to you in detail.
Part 1: What is Optical Image Stabilization (OIS)?
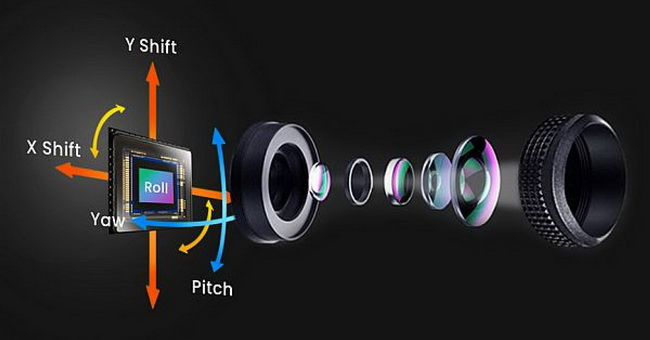
OIS is powered by motors, which is one mechanical image stabilization technology relied on the physical hardware. Phones with optical image stabilization can stabilize photography process by identifying the movement of cameras and moving the lens with motors to offset the camera movement. OIS is quite helpful for shooting images and videos, especially when you shoot in low light environment. By enabling OIS, little shakes can be canceled out to make sharp photos. OIS is the most common form of image stabilization. To make good use of it, you will be able to obtain clear photos in various circumstances. Many people would like to buy optical image stabilization iPhone to enjoy the OIS technology to produce wonderful images in daily life.
Part 2: What is Electronic Image Stabilization (EIS)?
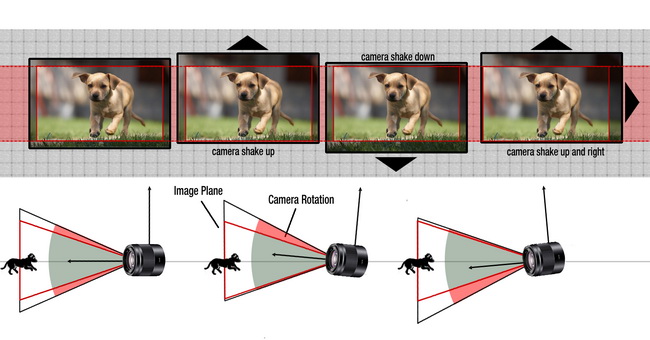
It is also necessary for you to learn about electronic image stabilization to help you choose a proper phone to shoot. EIS is short for it, which can work without the physical hardware. It just use the accelerometer of your phone to detect slight movements. The camera software on your smartphone can interpret small shakes and then align each frame together automatically. It is quite essential in the processes of HDR and night mode to shoot photos. When you shoot videos, the EIS software will find a point of high contrast and then try to retain that point in the same part of the frame. It can lock the stabilization of a subject perfectly. With the assistance of EIS, you can also gain the jelly effect at ease, which can bring you unnatural-looking distortion from slight alterations in perspective. However, the crop of this stabilization method hinders you from seeing the full sensor in the output. If you do not like this drawback of EIS, you can turn to OIS to help you to gain clear images.
Part 3: OIS vs. EIS vs. HIS
Apart from OIS and EIS, there is another image stabilization technology named Hybrid Image Stabilization (HIS), which is combination of both OIS and EIS. This is a comprehensive solution for cancelling camera shake influences. With HIS, when you take photos, you can enjoy the basic hardware stabilization provided by OIS and the effect of smoothing out the video footage further. If you desire to know what it is actually look like, you can try Google’s Pixel which is the first phone to apply an OIS and EIS hybrid system.
As you can see, HIS is very easy to handle, which allows you to enjoy the benefits of both OIS and EIS simply. HIS has more advantages over OIS and EIS, so you can choose HIS if you have much more requirements on photo quality. However, if you desire to choose between OIS and EIS, the former is recommended.
By the way, in the year of 2020, the iPhone 12 Pro Max came to the market with its first sensor shift image stabilization system for its main camera, which is more like the In Body Image Stabilization (IBIS) in DSLRs and pro cameras. Besides, the gimbal camera of Vivo X50 and Vivo X60 series also bring clear and stable images with great anti-shake effect. There are also other new technology to stabilize images, and it is hard to name all of them. So let’s just end here and you can surf on the Internet to learn more.
Part 4: What If Your Smartphones Doesn't Have OIS?
Most modern smartphones now have OIS for stabilizing your image. However, some old types of phones do not have this feature. In order to deal with the camera shake influences, you can refer to the following tips to help you to get clear photos.
- When you take photos during the daytime or when the light is rich, you can take clear photos by increasing the shutter speed to reduce camera shake effect.
- You are suggested to make use of a tripod or gimbal to help you stabilize camera and produce clear pictures.
- It is also a good idea to fix blur photos with some great photo enhancers, which can assist you to get wonderful photo effects. Read on the next part and you will learn a good tool to fix shaky photos taken by smartphones with OIS.
Part 5: How to Fix Shaky Photos Taken by Smartphones Without OIS?
Although there are many apps on smartphones to fix shaky photo shot by phones without OIS, these applications are less powerful than photo enhancers on computer. It is much more convenient to use your large computer screen to fix photos as well. Here I would like to recommend you a practical transfer tool to assist you to move phone photos to computer and a photo enhancer on computer to improve your shaky photo quality to a great degree.
5.1 Export photos to computer with Leawo iTransfer
In order to enhance iPhone photos on computer, you first need to export them to your computer for preparation. For this aim, you can resort to Leawo iTransfer to make it smoothly. This tool is quite useful for dealing with various transfer tasks among iOS devices, computers and iTunes. Its transfer speed is high and its accuracy is satisfying. Follow the steps below and you can export your iPhone photos to computer accurately.
Steps:
- First you need to launch Leawo iTransfer and then use a matched USB cable connect your iPhone with computer.
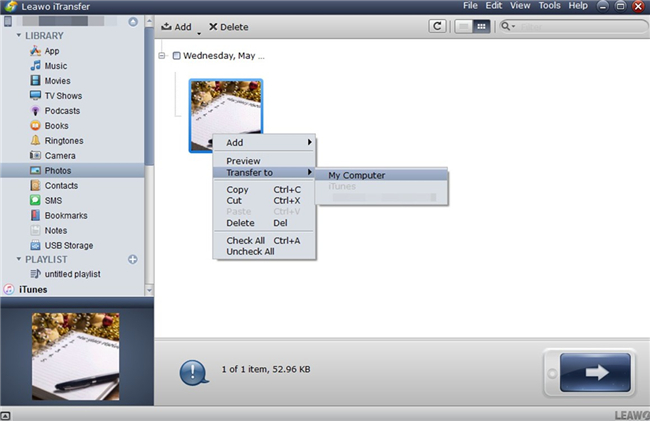
- Hit on your iPhone icon after the software indentify your iPhone. Click on “Photos” tab under the menu of “LIBRARY” and then choose the photos you desire to transfer to computer.
- Hit on the transfer button at the bottom right of the interface and then choose “Transfer to> My Computer”. Afterwards, select a proper location on computer to save your exported iPhone photos. Hit on “Transfer Now” on the panel and your iPhone photos will be accessible on computer in a few seconds.
5.2 Enhance photos with Leawo PhotoIns
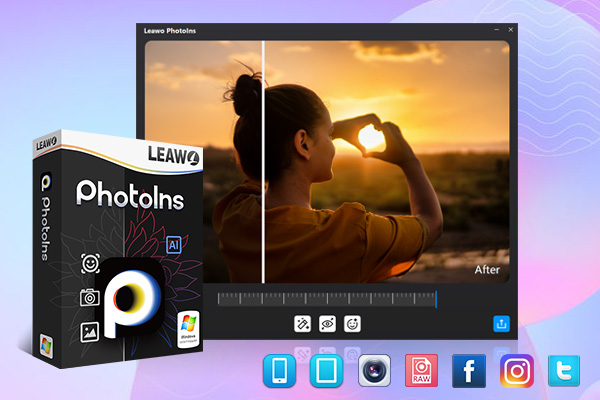
After your iPhone images are available on your computer local folder, it is time to fix your photos with a good photo enhancer. Leawo PhotoIns is highly recommended for its great AI enhancing features. It can assist all levels of photographers to create better photos. You can use it to adjust exposure, optimize photo colors, remove haziness, boost lighting and color quality and so on with only several simple clicks, which calls for no photography skills. The following simple guide will direct you to enhance shaky images excellently.
Step 1. Download and Install Leawo PhotoIns
Download the flyweight Leawo PhotoIns installation package from its official website and then install it on your computer by following the on-screen instructions easily. In a few minutes, you will be able to use this great tool.
-
Leawo PhotoIns
- Enhance portrait photos easily with advanced AI technology
- Fix photo exposure and white balance issues automatically
- Optimize photo colors and perfect photo tints
- Make photos perfectly clear with smart dehaze
- Boost photo lighting and color quality
- Process RAW and JPG files
Step 2. Launch Software and Add iPhone Photos
Fire up Leawo PhotoIns on your computer. When you see its main interface, you can hit on the button of “Add Photos” to load the images you have just exported from iPhone to the software. To directly drag and drop your source photos to the middle part of the interface is also feasible. You can also delete the imported photos on the photo-listing panel if you add wrong pictures.
Step 3. Enhance iPhone Photos Automatically
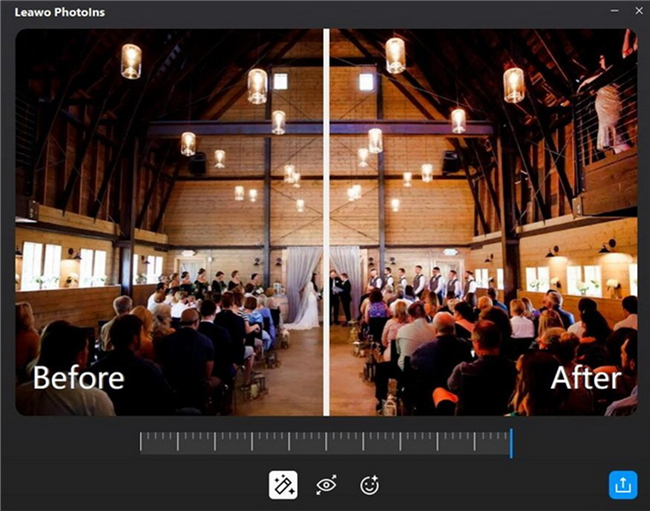
Choose an image and double-click on it to call out the editing panel of this software. The built-in AI photo enhancer will begin to improve your shaky photo quality automatically. Below the previewer of the program, you can see an effect adjust bar. This bar enables you to adjust the AI enhancing degrees based on your own demands. You can view the comparison of the “Before” and the “After” effects clearly on your computer screen.
Step 4. Output Enhanced Photos
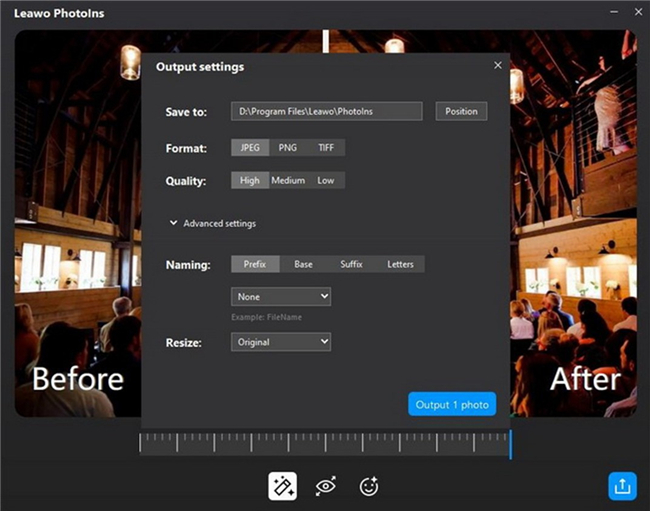
After the AI enhancement of your shaky photos comes to an end, you need to hit on the blue output icon on the bottom right corner to invoke the output setting panel. Here you can specify the output path, output format, quality, and adjust other settings freely. Finally, you can export the enhanced pictures when all settings are completed by hitting on the button of “Output 1 photo”.

