If you are a photographer or you enjoy taking photos, you must have gathered a lot of photos on your smartphones and cameras. With such a large pile of photos at hand, have you ever been confused about the arrangement of these photos? Or do you have the requirements to make a slideshow or photo album with these photos? What's more, have you ever imaged that how to turn the photos or videos into movies to have a better backup for them? Well, if you are falling to one of the categories, then you can just stop here and read along to capture the useful information for you.
Solution 1: Turn photos to movies with Windows Live Movie Maker
How to turn photos into movies? You can reach the goal by adopting different solutions. However, no matter which solution you will accept, what you must prepare is a photo to movie program. The first solution is to make full use of Windows Live Movie Maker.
As a professional movie burning program, Windows Live Movie Maker will be needed to be installed as a series of suites. It can help you to free convert and edit the photos into movies with a lot of features provided. Just follow the steps below to start your photos conversion.
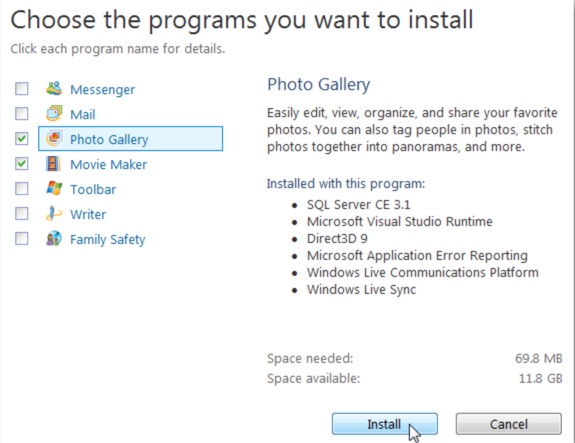
Step 1. Install the Windows Live Movie Maker on your computer. Here, you only need to select a part of suites to be installed. Since you only need to turn photos into movies, you can select "Photo Gallery" to continue.
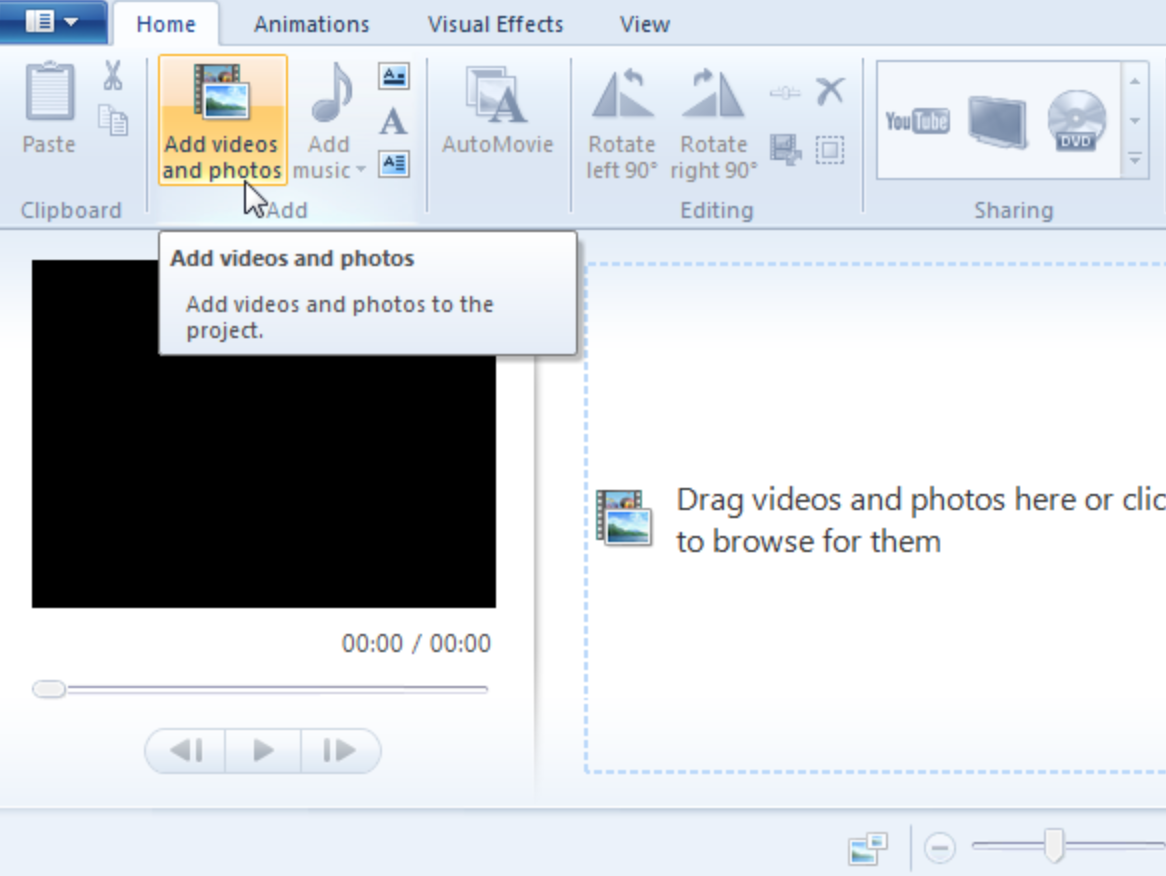
Step 2. Add the photos you would like to turn into movies to this program by clicking "Add videos and photos" button on the home tab. You can also directly drag these photos to the main panel.
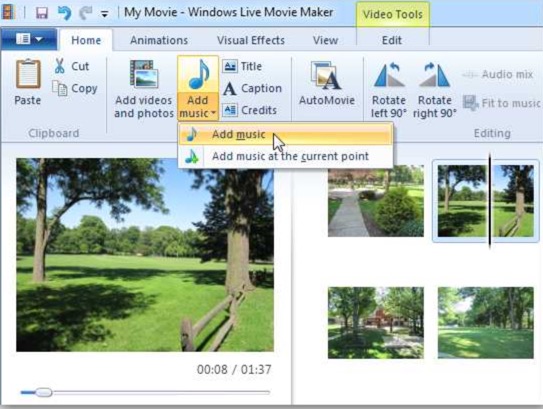
Step 3. Add background music. Once you have imported the photos, now you can choose a piece of your favorite music to be the BGM of the final movie by selecting "Add music" button on the top tab. Windows Live Movie Maker supports WAV, MP3, M4A, WMA, AIFF, and ASF.
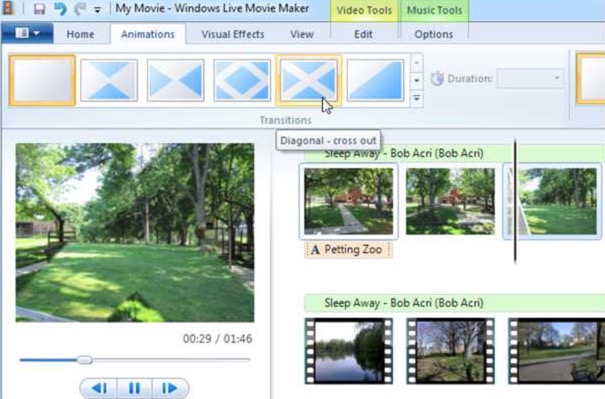
Step 4. Apply animation, visual effects to your movie. Furthermore, in order to obtain a more personal movie, you can select your own preferred style and visual effects by selecting the buttons "Animation", "Visual effects" and so on the top of home tab.
Step 5. Save the movie. Once you have already set the related parameters, you can finally save the movie by selecting the icon at the top left, and then then select "Save movie". After a while, you can obtain a WMV video file which contains all the selected photos.
Solution 2: Turn photos to movies with Leawo DVD Creator
Now if you are not satisfied with the above movie creator, then you can turn to my second solution to turn your photos to movies. As well, the second solution will have to use another powerful photo to movie burner. That is Leawo DVD Creator. Different from Windows Live Movie Maker, Leawo DVD Creator will directly help you to turn photos into movie in the format of DVD which has a better resolution and higher resolutions. As a comprehensive DVD burning program, Leawo DVD Creator doesn't only provide you the best solutions to turn all kinds of videos into DVD, but also it supports the photos conversion.
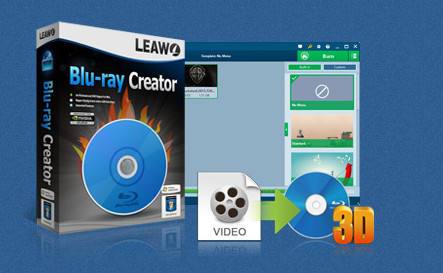
Blu-ray Creator
☉ Burn videos to Blu-ray/DVD disc, folder and/or ISO image file simultaneously.
☉ Create photo slideshows from various photos and burn to DVD/Blu-ray disc easily.
☉ One click operation to burn ISO image file to Blu-ray/DVD disc.
☉Edit output videos to add image or text watermark, trim video size, adjust effect, etc.
☉ Create 3D Blu-ray/DVD movies with 6 different 3D effects.
☉ Add disc menu to Blu-ray/DVD disc, even design disc menu with personal preferrences.
The built-in slideshow video maker can help you convert your photos to slideshow videos and burn them to DVD. The photo slideshow editor provides you with the option to edit the video by setting the duration of each photo and transaction. Also, you can add background music to the slideshow. Now let's take a look at the detailed steps.
Step 1. Download Leawo DVD Creator and install it on your computer.
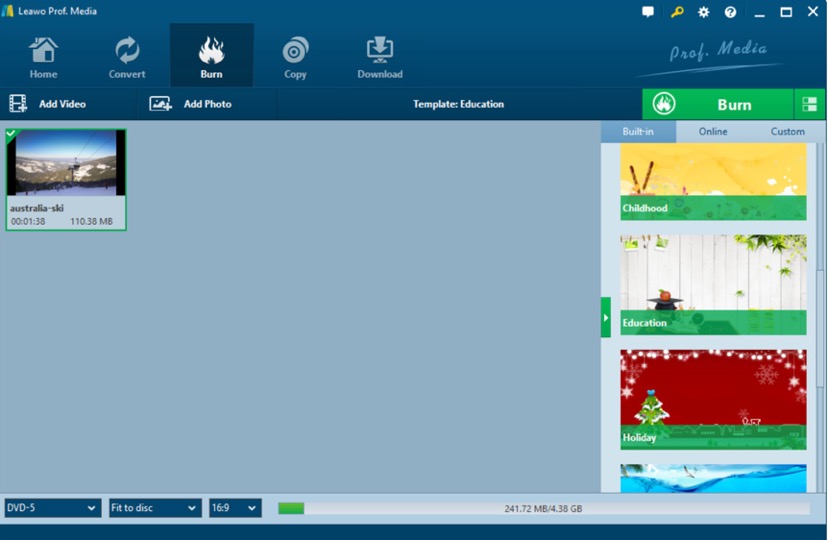
Step 2. Insert the photos you would like to turn into a movie to the program by clicking "Add Photos", or directly drag them to the main interface.
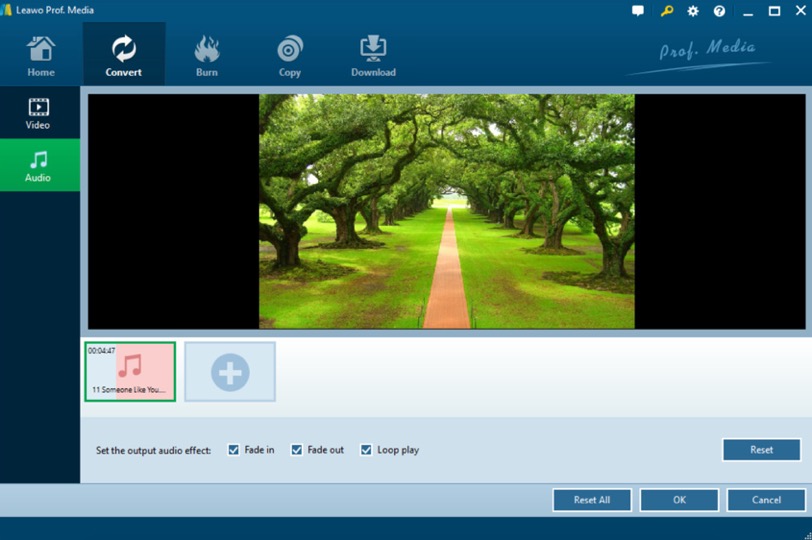
Step 3. Add background music to the inserted photos. You can click the "Edit" icon on the photo files on the main interface where you can see two editing options "Video" and "Audio". Under the "Audio" tab, you can add your favorite music to the photo by clicking "Add Music" button then. Then click "OK".
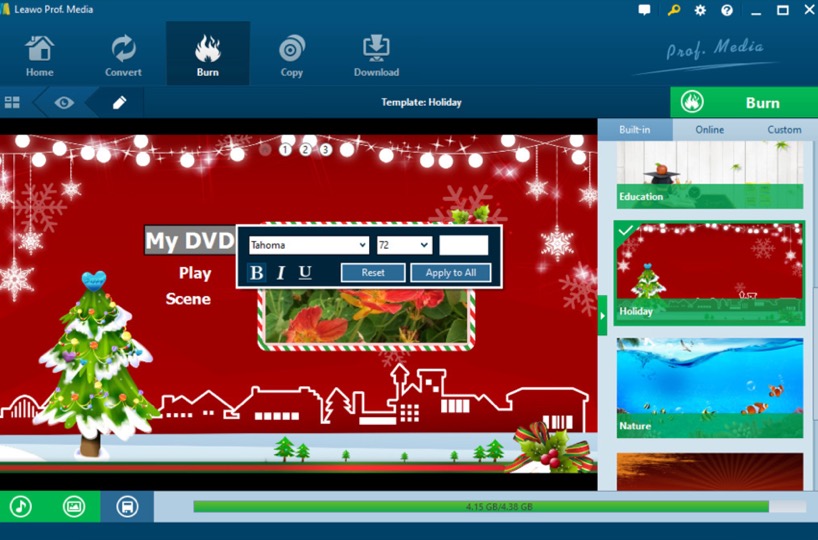
Step 4. Set the output DVD menu templates. When you have imported the photos to the main panel, you can select your preferred menu templates from the list on the right bar. You can select from the templates library or DIY according to your own preferences.
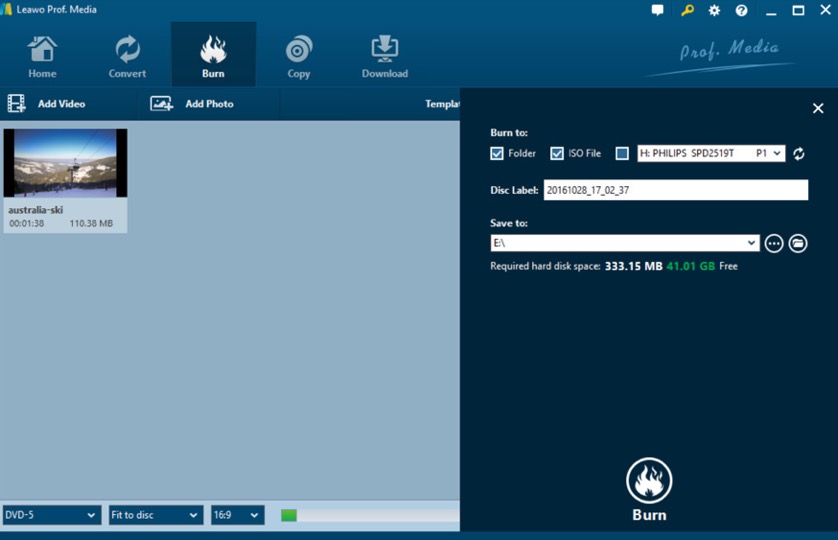
Step 5. Start turning photos into DVD now. Finally click the green icon "Burn" and select the "Burn to", "Disc label" and "Save to" options, you will successfully turn photos into a movie in a DVD disc.
Conclusion: A simple comparison between the two
Well, by referring to the above introductions, now you are clear about the detailed steps on how to turn photos into movies. While comparing Windows Live Movie Maker with Leawo DVD Creator, you will find that both programs are all powerful in converting photos. However, the former one will only allow you to turn the photos to a video file only while Leawo DVD Creator will directly burn the photos into a piece of DVD which will much easier to be kept and shared. Additionally, in terms of the output video quality, Leawo DVD Creator will present a better audio and video quality due to it supports DVD format. Furthermore, if you are not familiar with the burning progress, Leawo DVD Creator will suit you more because it has a simple interface and is easy to be handled.


 Try for Free
 Try for Free

