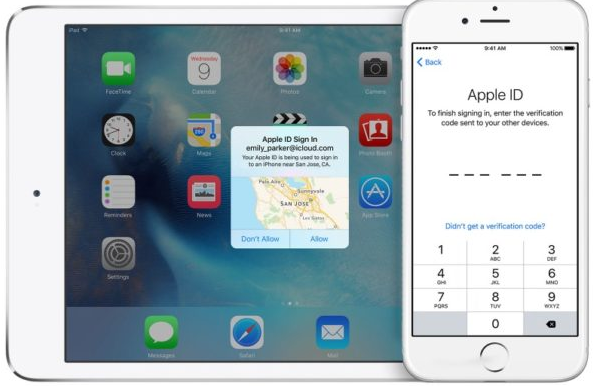
Have you ever heard of Apple two factor authentication? Two factor authentication offers an additional security layer and significantly enhances security for Apple ID. It requires both a proper password and a trusted device or through text message to a trusted phone number. In other words, even if someone were to know the password of an Apple ID, he still cannot log in to the account, for he needs access to a pre-determined trusted device. Instead of using SMS to transmit verification PINs, two-factor authentication will send a six-digit PIN to your "trusted device”. This guide below will walk through the steps to setup two factor authentication Apple user needs to follow.
How to Setup Two-Factor Authentication on iPhone?
Before setting up two factor authentication Apple user needs to be aware that it requires modern versions of system on devices. For iPhone and iPad, this means iOS 9 or later. Older iOS system software does not support two-factor authentication.
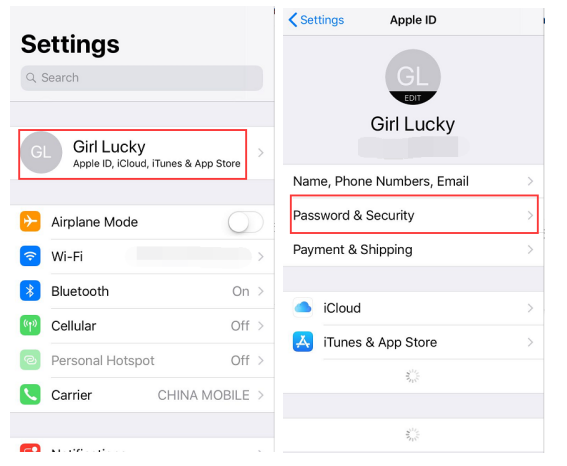
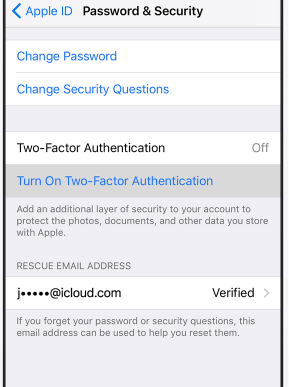
If your iOS version is 10.3 or later, to set up two factor authentication Apple user can follow the steps:
- 1. Open Settings on your iPhone.
- 2. Tap the Apple ID.
- 3. Tap Password & Security.
- 4. Tap Turn On Two-Factor Authentication.
- 5. Tap Continue.
If your iOS version is 10.2 or earlier, to set up two factor authentication Apple user can follow the steps:
- 1. Open Settings on your iPhone.
- 2. Tap the iCloud.
- 3. Tap your Apple ID.
- 4. Tap Password & Security.
- 5. Tap Turn On Two-Factor Authentication.
- 6. Tap Continue.
How to Use Apple Two-Factor Authentication Codes?
- 1. After you have turned on two-factor authentication, sign in to icloud.com with your iCloud account.
- 2. Tap Allow as a message pop up on your trusted device.
- 3. Enter the phone number that you hope to receive verification codes.
- 4. Apple sends a verification code to the phone number you have provided after you tap Allow.
- 5. At last, you are able to turn on two-factor authentication after entering the verification code to verify your phone number.
It is not hard to set up Apple two factor authentication. And you can also disable it as you need. Once two-factor authentication is disabled, you are able to log in to Apple ID from anywhere, whether on the web, iPhone, iPad, Mac with only a password again, and you don’t have to double authenticate with a trusted device code.
How to Back Up your iPhone?
With two factor authentication Apple user will find the additional layer of security make our account safer. But what should you do if you lose your iPhone, and the data in the iPhone is so important for you? Hereby, I will suggest you to back up your iPhone data in advance to avoid data loss. Then you need a powerful third party program, Leawo iOS Data Recovery, which can help you back up your iPhone data well.
As an All-inclusive Data Recovery Program for iPhone, Leawo iOS Data Recovery acts as iPhone data recovery software to recover deleted or lost data for all models of iPhone, so as to help you avoid data loss due to mistaken deleting or other occasions. Moreover, it supports up to 14 types of data. The supported data are as follow: Messages, Contacts, Call History, WhatsApp, Notes, Calendar, Reminders, Safari bookmark, Camera roll, Photo stream, Photo library, Message attachments, Voice memos, WhatsApp attachments. What makes it a better choice than iTunes as a data backup tool is that it allows you to back up different types of data separately and you can easily access them on your computer. While iTunes will back up all your data on your iPhone but there’s no way you can access them unless you restore your iPhone from the backup. Here’s how to back up your data using Leawo iOS Data Recovery.
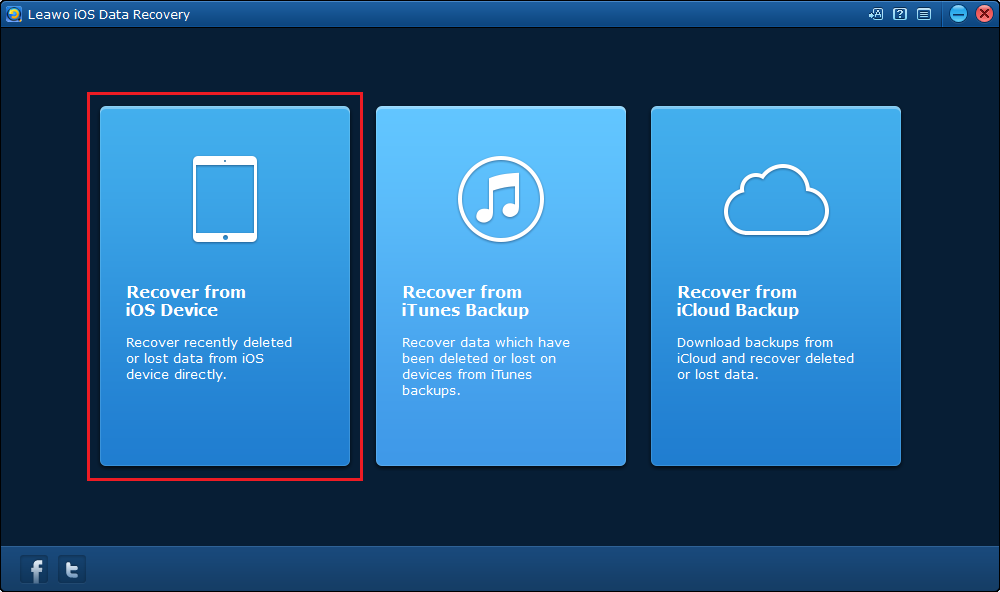
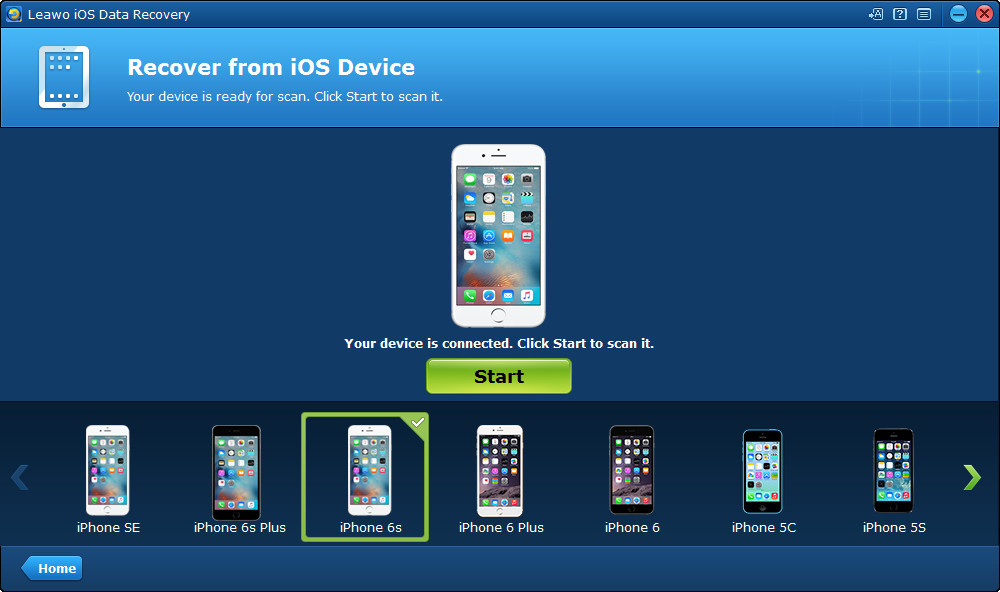
Step 1: Download and launch the software, connect your device to your computer, then click the first tab on the main interface.
Step 2: After the software detects your device, click Start button to start scanning your device.
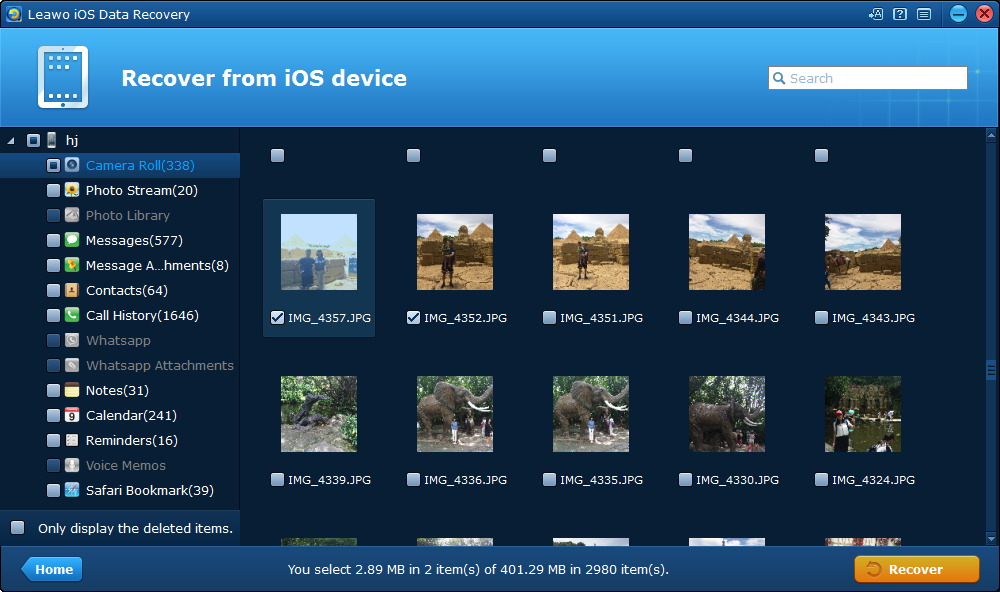
Step 3: When the scanning process is finished, you will see the list of all the data on your device. Choose the data you want to back up and click Recover button.
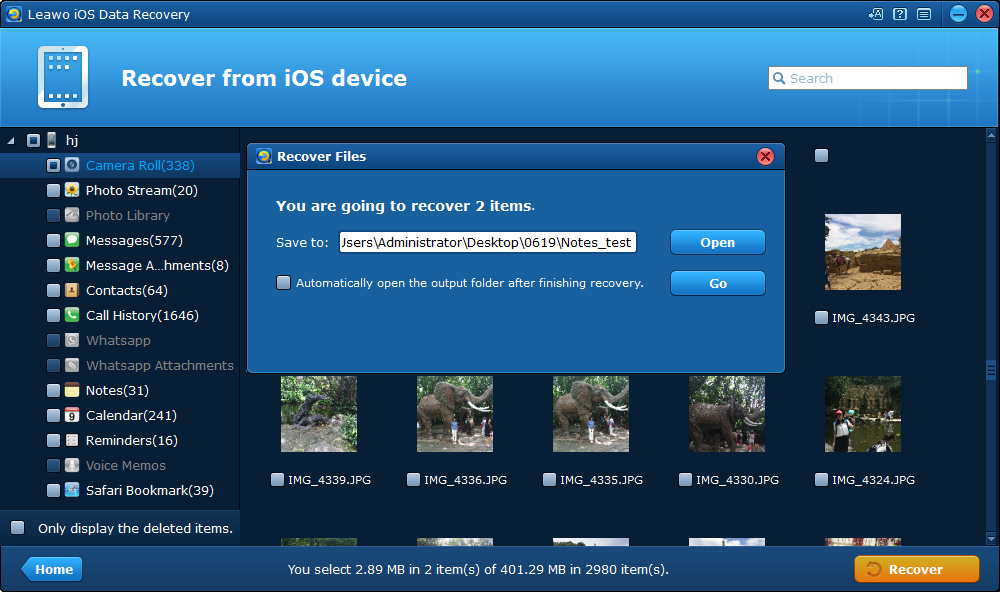
Step 4: A window would show up for you to set a path to save the data you prefer to back up. After setting, click Go button to start backing up data to your computer.
In the tutorial, we have better understanding of Apple two factor authentication. And please be awared that there is no right or wrong answer here whether or not to use two-factor authentication, for it is largely a matter of personal preference.

