Saving your favourite shows and games on YouTube TV is easy. This can help if you're busy during show time. Whether you want to save the big game while at work or a funny show for after dinner, setting recordings is quick. Just tap a few times on your device. I'll walk through the recording choices step-by-step. Then you can start taping shows for later today. This post will also show you how to pick shows to record once or all the time through the best screen recorders.
OutlineCLOSE
Part 1: Can You Record on YouTube TV?
Yes, you can record on YouTube with DVR. YouTube TV's cloud DVR provides some very compelling advantages over other streaming options. It stands out by offering users unlimited storage space for recordings, allowing them to build up an extensive on-demand library without worry of storage caps.
This is enormously convenient for viewers who like to archive all their favourite shows. The service also allows simultaneous recordings of multiple live programs, ensuring users never miss anything airing at once. Recorded content can be accessed from up to three devices simultaneously as well. However, YouTube TV's DVR is not without its limitations.
The YouTube TV DVR is handy for recording your favourites, but there are some things to know. First, the amount of storage you get depends on your plan. The basic plan only lets you store recordings for 9 months. After that, older recordings get deleted to make room for new ones. Furthermore, not every show can be recorded too because of rules from the channels. You also can't fast-forward through commercials when watching recordings of TV shows. Anything you record will expire if not watched within 9 months.
Additionally, your recorded library can only be accessed through the YouTube TV app. It means you can't download recordings to watch offline. While the DVR is useful, it's not unlimited like a regular DVR box. Storage space and channel rules mean some shows can't be saved. Only streaming recorded shows is also different from a DVR. Knowing the limits helps make the most of the recording feature. It adds flexibility but isn't a perfect personal video recorder.
Part 2: How to Record on YouTube TV Officially?
To record a show on YouTube TV with DVR, open the app and select the magnifying glass in the top-right corner of the screen. Then enter the name of the show or program that you want to record. Finally, select the plus icon next to the show’s name.
Step 1: Open the YouTube TV app on your chosen device like a smart TV, streaming player, phone or computer. You can access YouTube TV on most devices.
Step 2: Sign in with your Google account if needed. On a computer, click "Sign In" in the top right. On mobile apps, tap the "Sign In" button and enter your username and password. For some streaming devices, you may need to go to tv.youtube.com/start and enter a code before signing in with Google.
Step 3: Locate the magnifying glass icon in the top right corner of the home screen.
Step 4: Enter the name of the show, sports event or movie you want to record in the search bar.
Step 5: Select the title when you see it in the search results.
Step 6: Finally, click/tap the plus or record button next to the show/program name. This will add it to your library so you can watch all episodes, including future ones, anytime on any of your linked devices.
Step 7: When you click the plus/record button, it will change to a checkmark. A notification will appear to let you know the show was added to your library for recording.
Also, if using the YouTube TV app on your phone, you can also press and hold on to any show/movie title. This will make a small window pop up where you can then tap "Add to Library" to record it.
Part 3: How to Record on YouTube TV on PC Via Video Recorder?
If you are not into recording YouTube video officially, also if you want to easily record videos from YouTube TV on your computer, I recommend trying CleverGet Streaming Video Recorder. It's a handy program that lets you capture and save videos playing on your screen from almost any streaming site, like YouTube TV, Netflix, Hulu, etc. The software works in the background without getting in the way of your viewing. You can record videos in high-quality 1080p MP4 or MKV files. This is great for saving your favourite shows, movies, sports or anything else from YouTube TV or other sites to watch later, even if they have restrictions against downloading. CleverGet makes the recording process simple with just a couple of clicks. You don't need technical skills, just install it and you're ready to record any streaming video with total convenience. Let me show you how to use this. Download and install CleverGet, and then launch the program.

-
CleverGet Streaming Video Recorder
- Record videos of any type from almost all websites
- Record online videos in fullscreen and background mode
- Record stream videos with smart recording settings
- Save streaming videos to MP4/MKV files
- Collect full metadata info for media server
- Easy-to-use interface
Step 1: Play Back Target Video
Open the video you want to record within CleverGet. Make sure the video is playing in full screen mode for the entire screen to be captured.
Step 2: Complete Recording Related Settings
Look for the red circle icon next to the home button at the top of the window. Click this to open the "Recording Settings" popup window. Here you can choose the file format like MP4 or AVI, set the recording quality, add a countdown before it starts, and select where to save the recorded files on your computer. Adjust these options as desired. Then click the "Start Recording" button.
Step 3: Set Recording Start Point, Subtitle, Audio and Volume
During the countdown, take a moment to ensure the correct subtitles and audio track are selected, and adjust the volume level for recording. Or click "Record Now" to start immediately without a countdown.
Step 4: View Recording Process
Once recording begins, CleverGet will minimise and a projecting window will open showing the recording in progress. You can see details like recording time, file size increasing, title, etc here. You can also click the clock icon to set the total recording length if not recording the full video.
Step 5: Check Recordings
You can pause the recording anytime by clicking "Pause" and then resume by clicking "Continue Recording". CleverGet will create a new file each time you stop. When finished recording, click the shutdown icon in the top right of the projecting window to close it.
Part 4: Alternative to Record Shows on YouTube TV via Screen Recorder
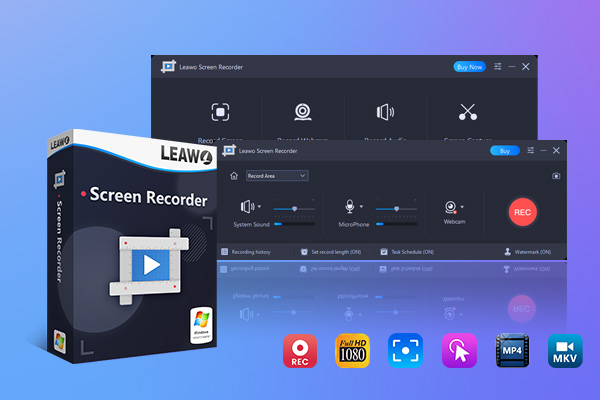
If you're looking for an alternative way to record shows from YouTube TV, you can use Leawo Screen Recorder. This software allows you to capture anything happening on your computer screen as an HD screencast video.
In addition to simply recording your entire screen, it offers helpful features like defining a custom recording area so you can snag just the YouTube TV window if you want. You can also schedule recordings in advance to capture shows automatically. It provides a versatile solution for recording streaming content or presentations for later review. The extra tools help you generate professional-looking recordings with minimal effort. It makes an excellent YouTube TV alternative for the effortless screencast. I will show you how to use this Leawo screen recorder to record shows on YouTube. First go ahead and install Leawo Screen Recorder, then open this software on your computer.

-
Leawo Screen Recorder
- Support Windows 7/8/8.1/10/11.
- Provide various doodle and annotation tools.
- Support to record online class, PowerPoint presentation, and zoom meeting.
- Smoothly record gameplay in high quality, including large 3D games.
- Add background music or voiceover to video.
- Integrate more advanced functions like real-time drawing, scheduled recording, shortcut controls, etc.
Step 1: Set Output Preferences
Click the settings button and go to Output. Here you can choose your video format like MP4, quality levels, and save location for recorded files.
Step 2: Select Recording Region
Click "Record Screen" and select if you want the full screen or a specific area recorded.
Step 3: Configure Settings Before Recording
Adjust audio and video settings like volume, microphone, webcam from the options menu. Make sure your audio sources are set up.
Step 5: Start Recording
When ready, press the large red "Record" button or use a hotkey like Ctrl+R to start capturing. You'll see a timer while recording. When finished, hit the stop button.
Step 6: Manage Recordings
All recordings will be saved and accessible in the history tab. You can play, rename, share or delete files from here.
Following these simple steps allows easy setup and screen recording with Leawo Screen Recorder. The clear interface makes the process smooth.
Conclusion
In this article we covered how to record stuff using YouTube TV's DVR feature and with some other recorders. It talked about the cool things you can do like save as many shows as you want without limits. For easily archiving YouTube TV shows and live events on your computer, I recommend trying the simple yet powerful CleverGet Streaming Recorder. It makes recording YouTube TV videos a breeze so you can build up an extensive on-demand library of your favourites.


 Try for Free
 Try for Free


Comments are closed.