As an convenient tool to stay in touch with your friends, families and teammates, FaceTime can be easily handled with on your iPhone or on Mac. Sometimes, people may not only want FaceTime to contact with others, but also they have the advanced requirements on keeping some moments down. How to save some special moments with FaceTime on your Mac? Here if you can record FaceTime audio on Mac, then the purpose could be achieved. Luckily, you can use your Mac to record the FaceTime audio in an easy way. Here are the steps on how to record FaceTime audio on Mac. Please refer to the following information.
Method 1: Record FaceTime audio with QuickTime
QuickTime is the primary media player for Mac OS computers. The QuickTime movie file format is a special file format that has been used to load a variety of different media manifold tracks. QuickTime can support a variety of digital formats including MOV, MPEG-4, MPEG-2, MPEG-1, 3GPP, 3GPP2, AVCHD, AVI and DV. By the way, QuickTime can be capable of recording audios due to its built-in recording function. Before adopting QuickTime to record FaceTime audio, you had better have a further check on your QuickTime whether it is updated version or not. When everything is ready, you can record FaceTime audio with QuickTime by following the steps below.
Step 1. Check your QuickTime and FaceTime on your Mac. Then open QuickTime.
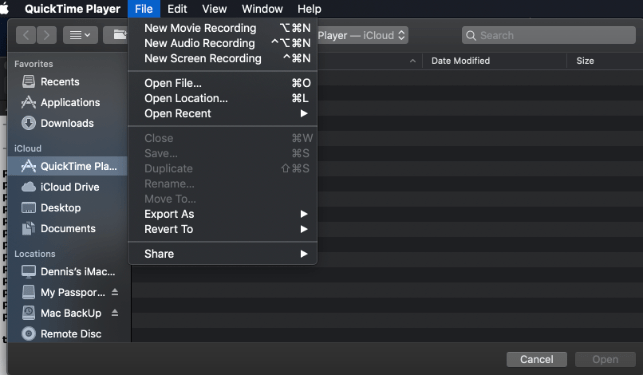
Step 2. Click File on the main menu and choose New Screen Recording to record option. Then, click the arrow next to the record button in the QuickTime window.
Step 3. Under the available microphones option, choose Internal Microphone from the list to confirm the input method.
Step 4. Open FaceTime on your Mac. You can simply locate FaceTime app in the Dock, or you can call Siri to bring out this app. Prepare the FaceTime and make everything ready.
Step 5. Start recording FaceTime audio on QuickTime. click the Record button in QuickTime on your Mac, and then start your FaceTime call. If you would like to stop the recording, you can simply click the Red button again.
Step 6. When FaceTime call is over, click the Stop Recording button in QuickTime. Now click Save button and name your recording and save it on your local Mac hard drive. Finally click Save button and all of the recording process have completed.
Method 2: Record FaceTime audio with Leawo Music Recorder
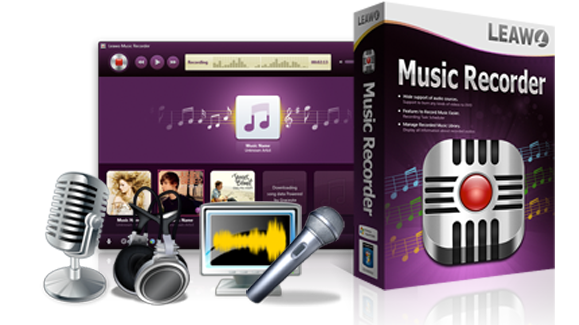
Besides the default media player on Mac, you can also record FaceTime audio by referring to some additional powerful audio recording programs. Among them, Leawo Music Recorder could be the one you should not miss. Leawo Music Recorder can record any audio file available, be it built-in input audio file or computer stream audio file. It can record audio and music from computer audio and online music sources like Pandora, YouTube, AOL Music, Last.fm, and so on, and Mic or other built-in input audio stream like Realtek High Definition Audio, Realtek Digital Input, as well. The built-in Recording Task Scheduler allows people to schedule music recording with this music recording software program. It let people set recording Start Time and Recording Duration. Leawo Music Recorder can automatically download and add music tags to recorded music files, like song artist, song album, song album artwork, song name, genre, year, etc. It also features an internal music tag editor, Leawo Music Recorder even allows users to edit music tags manually. Users could freely edit music tags like artist, album, cover, genre, etc. Last of all, Leawo Music Recorder allows people to set the recording file parameters including audio format, audio codec, bit rate and sample rate. Users can use Leawo Music Recorder to record Pandora to MP3 or WMA. All these outstanding features make Leawo Music Recorder the best Pandora recorder and best Music recording software to record Pandora stream on your Mac. Here are the instructions to record FaceTime audio on Mac with Leawo Music Recorder.
-
Leawo Music Recorder
- Record any sound from computer stream audio and built-in input audio.
- Record music from 1000+ music sites like YouTube, Facebook, Veoh, VEVO, etc.
- Schedule music recording via the internal recording task scheduler.
- Automatically/manually add and complete music tags like artist, album, cover, genre, etc.
- Save recorded musicfiles into either WAV or MP3 format for wide uses.
Step 1. Download Leawo Music Recorder for Mac on your computer. Once downloaded, you can directly use it immediately without any further installation.
Step 2. Select your own preferred audio source. Open and run Leawo Music Recorder on your Mac, then the first thing you should do is to set the audio source for the output recorded file. Here, you can click on the Audio Source icon on the main interface, then the Audio Source Preferences window would pop up immediately. On the preferences setting panel, you can select Record Computer Audio under the Audio Source option. Once you chose this option, that means you would record the audio from your Mac’s audio stream or online music.
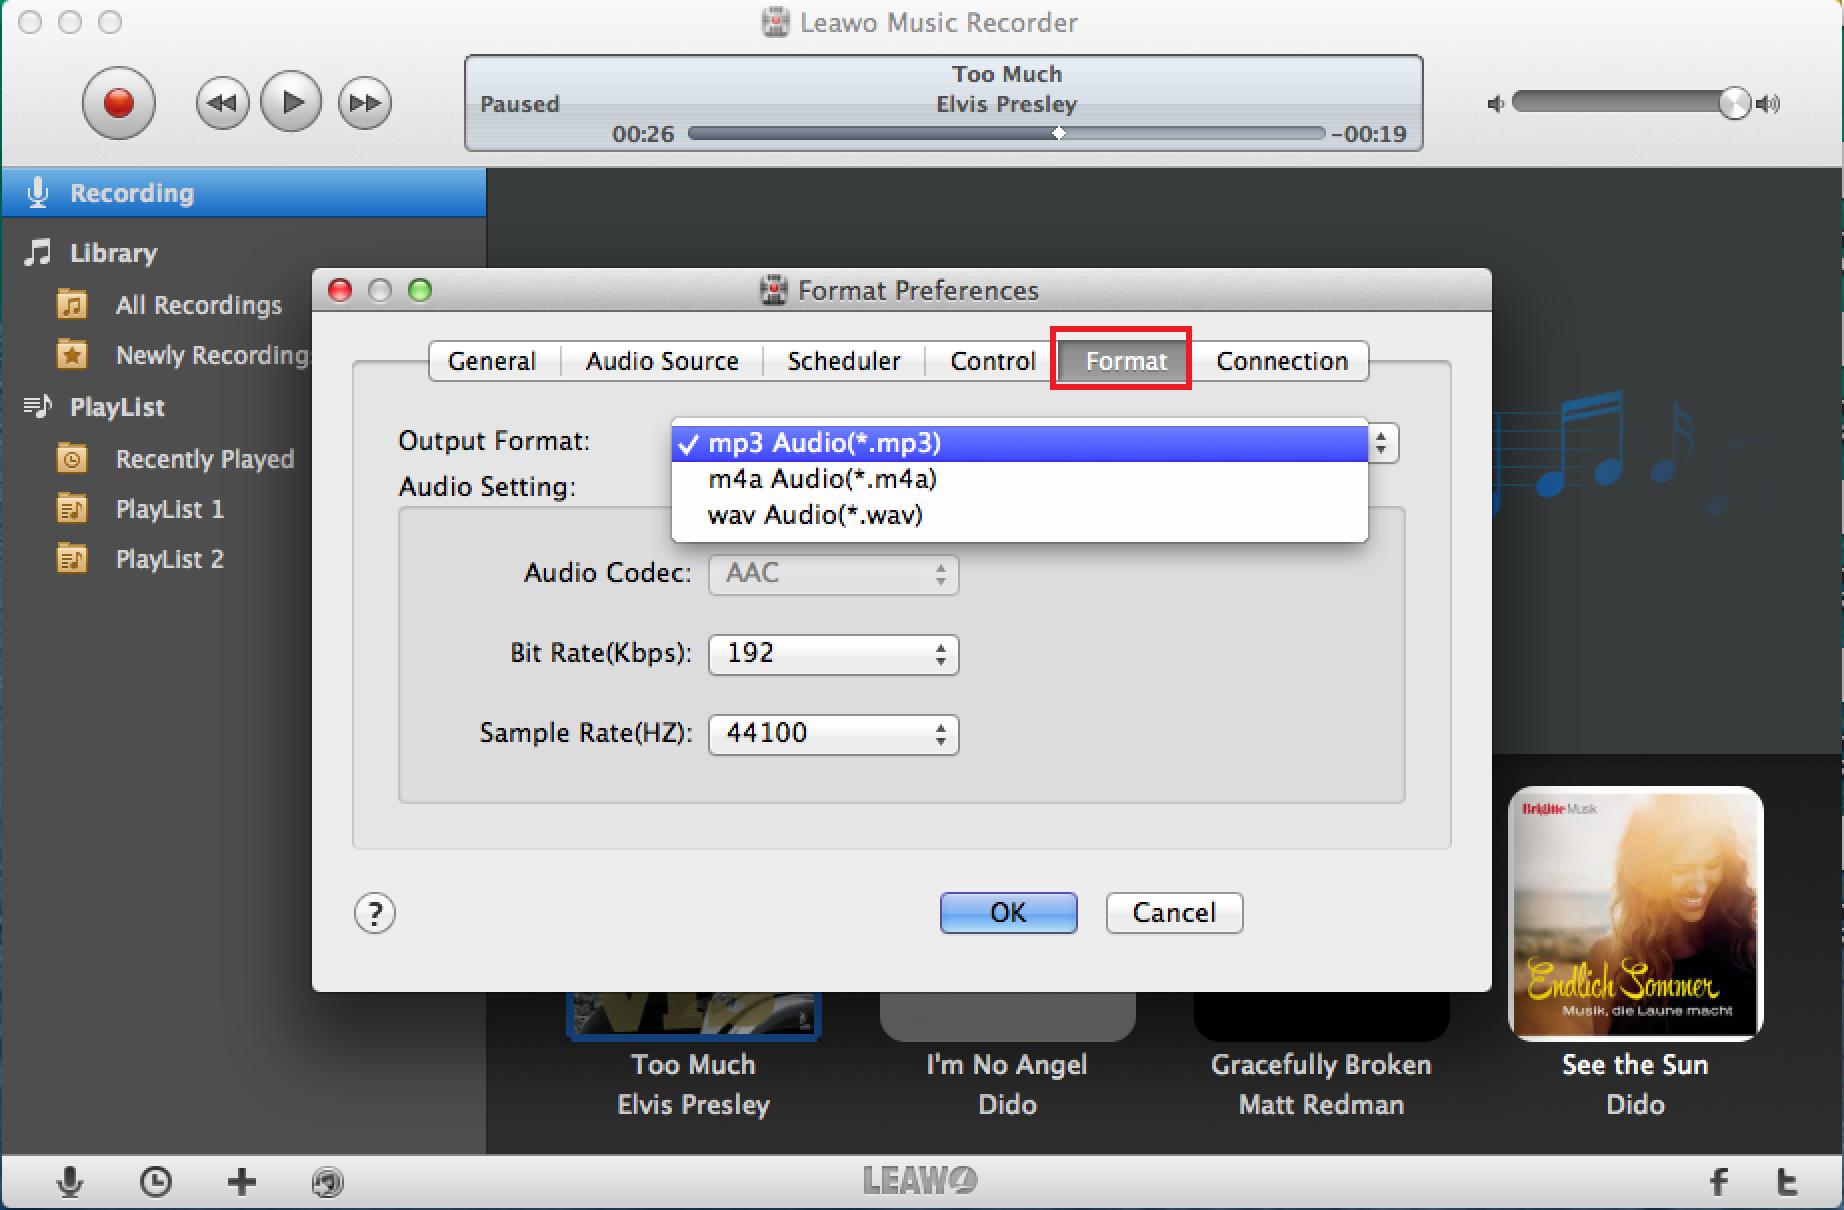
Step 3. Choose the output audio format. Click the inverted triangle button on the top-right corner to invoke the program settings panel. Under General tab you need to set the output directory to save recorded FaceTime audio. Under the Format tab you need to set the format (MP3 or WAV) for output recordings, and you could also set the audio parameters here, including Audio Codec, Bit Rate, and Sample Rate in the Audio Setting box.
Step 4. Choose the output location. When the output audio format has been chosen, then you can turn to select General tab to click the folder button to change the output location. Click OK button when it is done.
Step 5. Start recording the FaceTime audio. When you are ready, you can open FaceTime chatting room and then click the red Start icon to begin recording. If you want to stop the recording, you can simply click the record button again. If you have already completed the recording, then click the same button to stop recording. Finally, you can go to the saving route to find the recorded FaceTime audio.
Furthermore, if you want to record with a schedule, you can make full use of the pop-up Scheduler Preferences option. In details, you should click the clock button at the left bottom to set the start time and duration.
Method 3: Record FaceTime audio with Audacity
Asides from the above powerful music recording program -- Leawo Music Recorder, another excellent tool Audacity can be your good option. That is Audacity. Audacity is a free cross-platform, free and open source recording and editing sound editor. Audacity provides ideal music file functions that can reduce noise, change the beat, and meet general editing needs. Audacity allows you to easily edit music files without burden, and provides ideal music file functions. The built-in sound effects include echo, change the beat, and reduce noise. The built-in editing, copying, mixing and special effects functions can meet the general needs. It can import and export WAV, MP3, Ogg Vorbis or other sound file formats, and supports MP4, MOV, WMA, M4A, AC3 files. It also supports the Nyquist programming language, allowing you to write your own effects. Now, here are the detailed instructions on how to record FaceTime audio with Audacity.
Step 1. Download and install Audacity on your Mac. You can simply search Audacity on the APP Store. This program is free to download to your Mac. What’s more, asides Audacity, you can install Soundflower on your Mac as well which would help you to route sounds to any other Mac app instead of the default speakers.
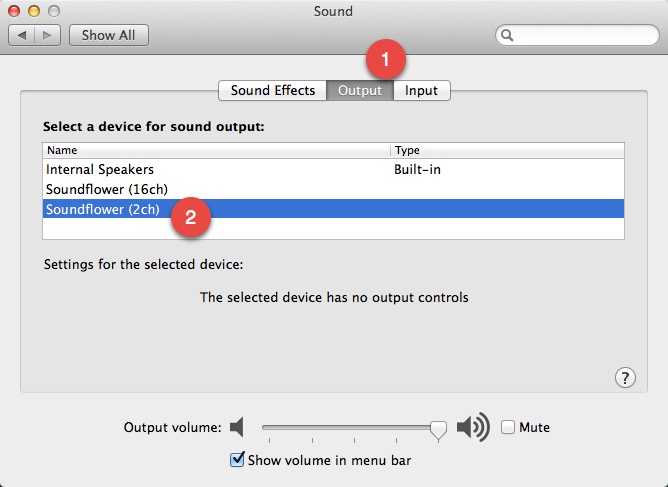
Step 2. Configure the sound speaker and Soundflower. You first need to click the Apple menu to open the System Preferences on your Mac. Under the main setting panel, choose Sounds and then the Output tab. Under the tab, select Soundflower as the sound output device to record the audio. Once it is done, then go to Soundflower and add it to your main menu. At the same time, you can set the output Soundflower 2ch.
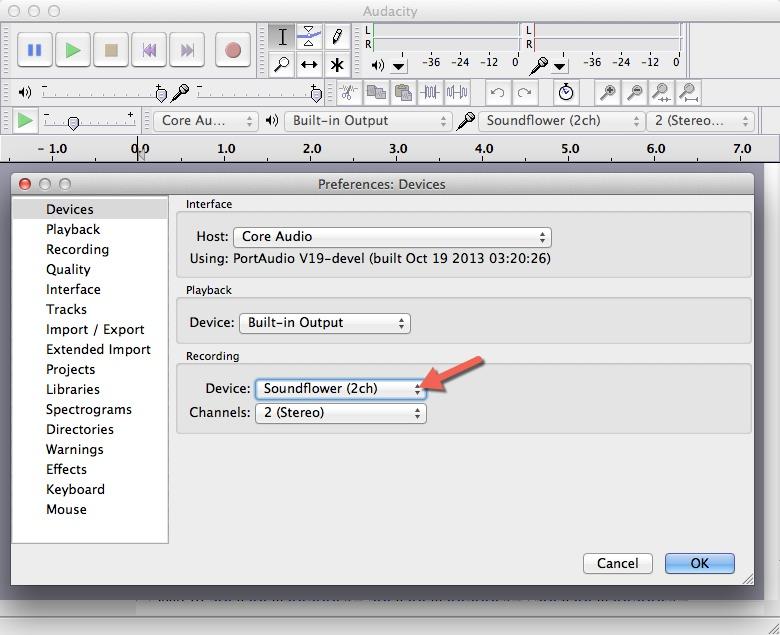
Step 3. Configure the audio and recording settings on Audacity. Once the app has been installed on your Mac, then you can open Audacity and directly go to Audacity Preferences and then here you can change the devices tab which could refer to Soundflower. That means Soundflower could be used as the Recording device. In details, while recording the FaceTime call with Audacity, you can also be allowed to listen to the audio at the same time. When you choose the related settings, then click OK to save your preferences.
Step 4. Start recording FaceTime audio once you have set all the parameters on your Mac. First, you can click the start icon on FaceTime to begin your video call. Then, return to Audacity app and hit the record button on this program. All the FaceTime call content would be recorded while the process. Finally, when you are done, the recording could be stored on your Mac which is usually kept in the format of MP3. Furthermore, you can choose to your Mac’s sound settings to the original state which means you can set the Output as Internal Speaker or Line Out you prefer. Until now, the steps on how to record FaceTime audio on Mac.

