iPhoto is a Mac built-in utility to transfer photos and photo videos(Videos you shoot with iPhone camera). iPhoto supports most common image file formats.After photos are imported, they can be titled, labeled, sorted and organized into groups (known as “events”). Individual photos can be edited with basic image manipulation tools, such as a red-eye filter, contrast and brightness adjustments, cropping and resizing tools, and other basic functions.
When it comes to how to transfer photos from iPhone to Mac, there is no doubt that many users will choose iPhoto. Importing photos from iPhone to iPhoto on your Mac is easy. In addition to iPhoto, you can also use iPhoto alternative, Photos app, to import photos from your iOS device to your Mac without using iCloud Photo Library. The following guidance will show you how to do that.
Part 1. Import Photos from iPhone to iPhoto
If the photo you want to export is taken by your iPhone and stored in your Camera Roll, then you can directly transfer photos from iPhone to iPhoto on Mac OS X. Below is the simple steps for your reference:
Step 1. Directly connect your iPhone to Mac, and then iPhoto will automatically launch. If it doesn't open automatically, open it from the Finder.
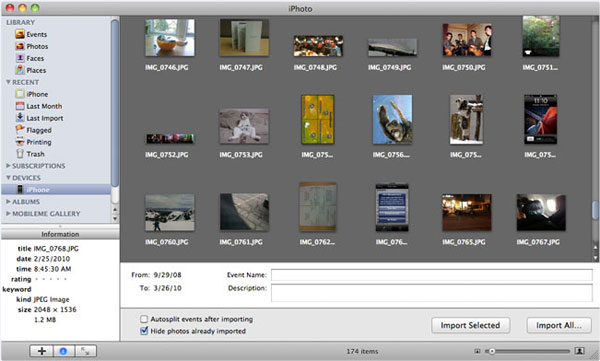
Step 2. Open to the Import window. All photos taken with iPhone will be listed under "Camera Roll".
Step 3. Click "Import Photos" button to import all photos or click "Import Selected" button to import one or more selected photos.
Step 4. It will ask you "Delete Photos on your iPhone?". Click "Keep Photos" button. Your photos will now be imported to iPhoto.
Part 2. Import Photos from iPhone to iPhoto's Alternative
Photos is the latest app released by Apple that has replaced its earlier iPhoto program. Though the basic features and functioning of Photos is similar like iPhoto, there are a few improvement and changes so as to enhance your overall experience. You can import iPhone photos to iPhoto’s alternative Photos for backup or any other reason as listed in the above part of the article.
Step 1. Connect your iPhone to your Mac with a USB cable. You might need to unlock your iOS device using your passcode. You might also see a prompt on the iOS device asking you to Trust This Computer. Tap Trust to continue.
Step 2. On your Mac, the Photos app automatically opens. If it doesn't, open the Photos app.
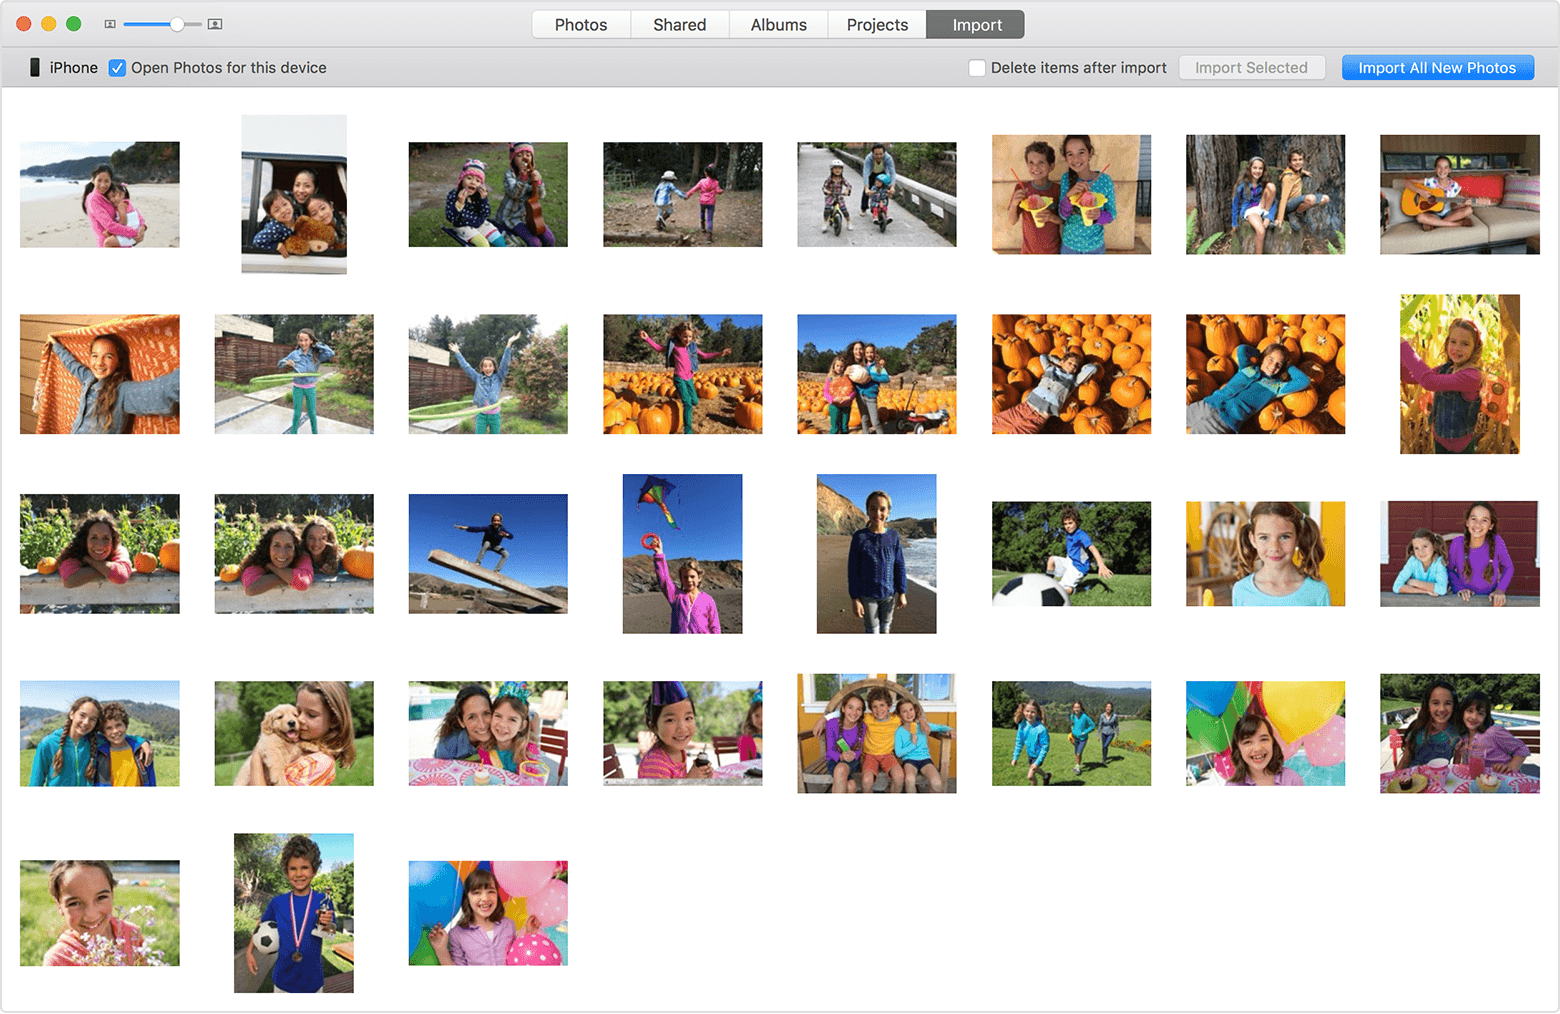
Step 3. The Photos app shows an Import screen with all the photos and videos that are on your connected device. If the Import screen doesn't automatically appear, click the Import tab at the top of the Photos app, or click the device's name in the Photos sidebar.
Step 4. To import a selection of photos, click the ones you want, then click Import Selected. To import all new photos, click Import All New Photos.
Step 5. When the import is complete, a message box asks if you want to delete or keep the photos on your device. Click Delete Items to remove the photos, or click Keep Items to keep them on the device. If you select Keep Items, you'll have to delete them directly from your device when you want to remove them.
Note: Both of the tools can only import photos from Camera Roll/All Photos, photos and videos that you sync from your computer to your iOS device using iTunes can't be imported back to your Mac computer. Therefore, in order to transfer these photos from iPhone to Mac, using third-party software proves to be an ideal solution.
Part 3. Import Photos from iPhone to iPhoto/Photos with iPhone Transfer Software
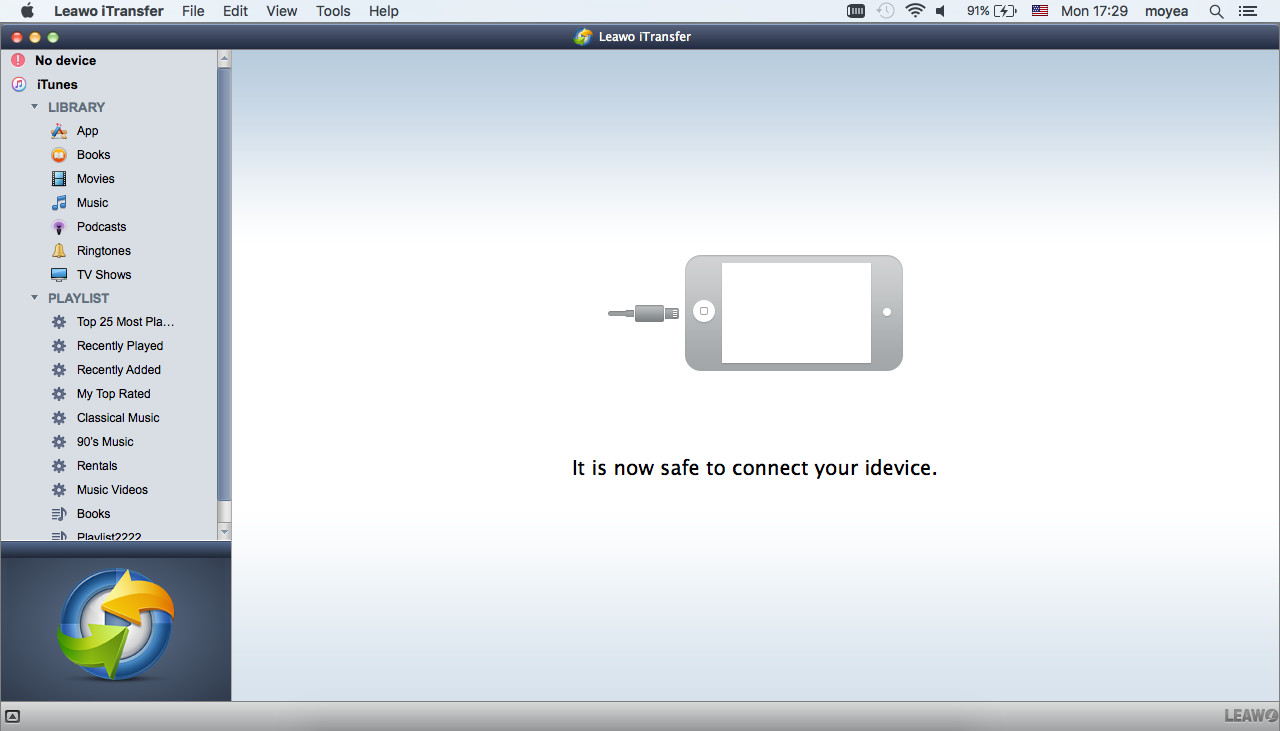
iPhone transfer software for Mac computers can be used for transferring photos from iPhone to Mac. Among all the iPhone transfer programs, Leawo iTransfer for Mac is regarded as one of the best. This software is used for transferring files among iOS devices, iTunes and Mac computers, and it enables users to transfer various kinds of files without using iTunes. The following guidance will show you how to transfer photos from iPhone to iPhoto/Photos, and you can free download the software to have a try.
Step 1. Run Leawo iTransfer for Mac and connect iPhone to computer with the USB cable. The software will recognize your iPhone.
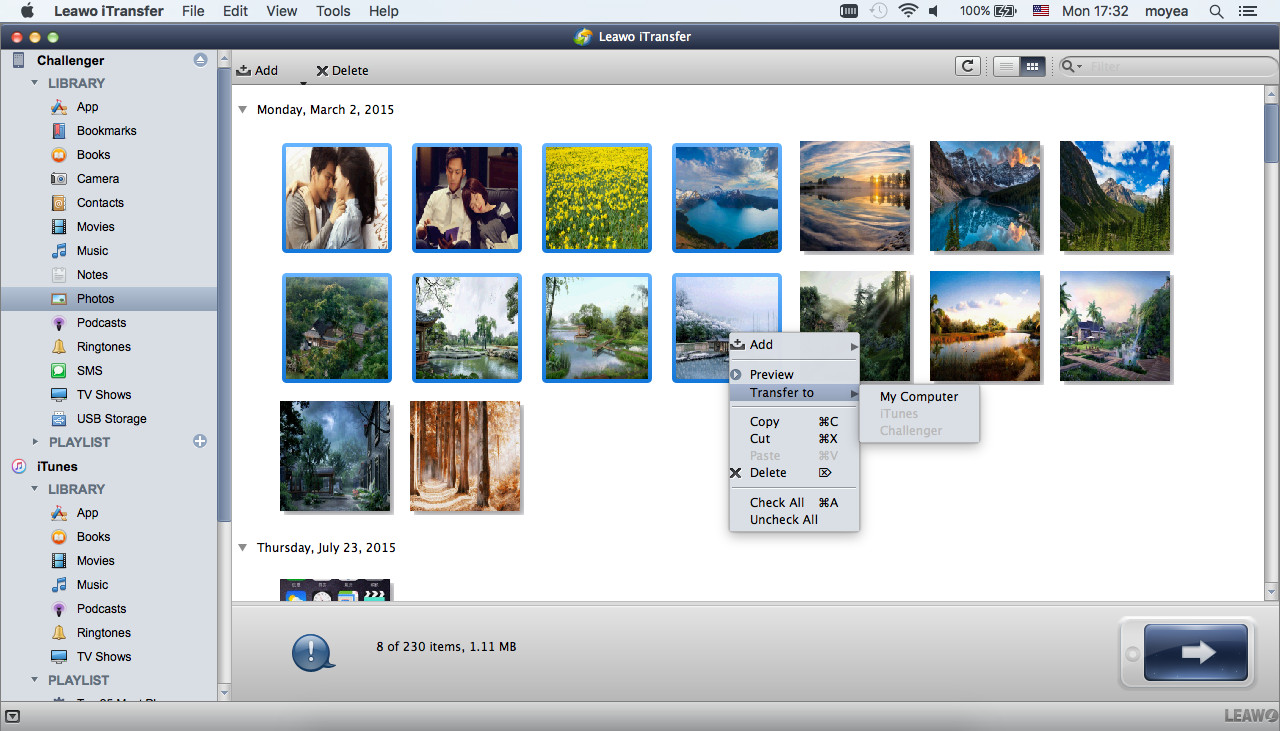
Step 2. Click the name of iPhone and choose Camera or Photo Library in the left sidebar. The iPhone photos will display in the right part of the software window.
Step 3. Hold Command/Shift key to select the photos you want to transfer, and click the transfer button at the right bottom. Or right-click one selected photo and choose Transfer to > My Computer.
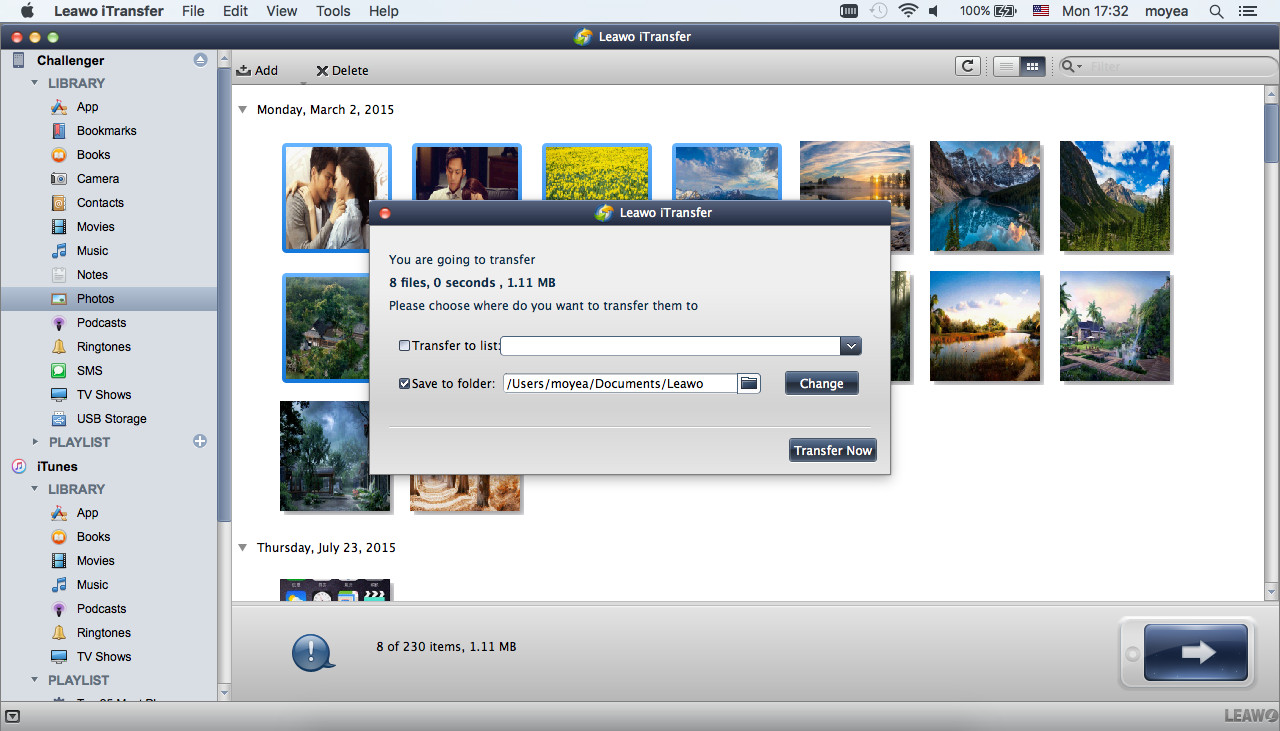
Step 4. After selecting photos, you’ll see a pop-up dialog. Check Save to Folder and click Change to choose a folder on your computer to save the photos. Then click Transfer Now to start to copy photos from iPhone to Mac computers.
When the transfer finishes, you will get the photos in target folder. Now open the folder on Mac where images were transferred. Next select the images and then tap on "Share" option on top menu bar. From drop down menu, select option of "Add to Photos". The selected photos will be transferred to the Photos app on Mac.
With Leawo iTransfer for Mac, you can easily copy photos from iPhone to Mac, and you are also allowed to transfer other kinds of files with this software, for example, you can transfer music from iPhone to computer with Leawo iTransfer for Mac.

