“... my iPhone continues to say "this iPhone is currently being restored." It's been two days so far, it seems like the iCloud backup is stuck ...”
Recently, I have seen that many people have complained about such kind of problems that their iPhone won't restore. If you are also frustrated by this problem with iCloud, don't be anymore. To save you from frustration, today we will collect the need-to-know information and view different the solutions, finding out that for various situations, you may wish to apply some of solutions to solve the iPhone won't restore problems. Check out the right solution below according to your situation.
Solution 1: Update iPhone to the Latest iOS Version
In my opinion, the problem of “this iPhone is currently being restored” may occur when you have not updated the latest iOS version. For example, when someone had got the iOS 7.0.3 installed, and the restore would get stuck at some point. But when with the latest version, the 7.0.4 update, it worked well. You can follow the steps below to update iPhone to the Latest iOS Version.
Step 1. Plug your iPhone into power and connect it to the Internet with Wi-Fi.
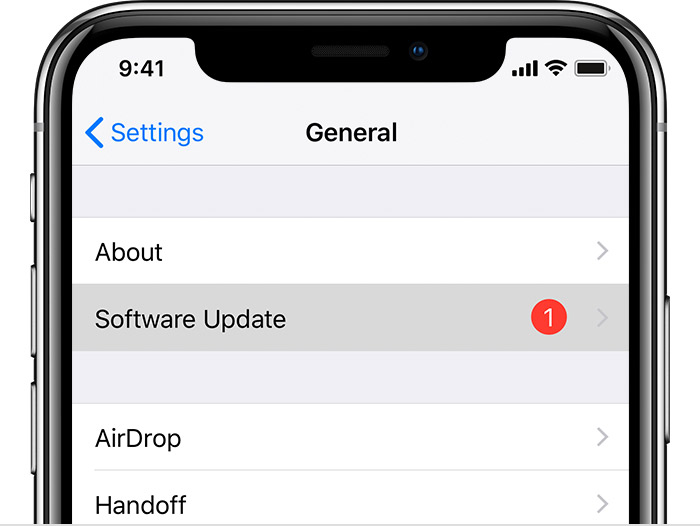
Step 2. Open the Settings app. Tap on General, then on Software Update.
Step 3. Your iPhone will check for an update, and if one is available it will give you the option to download and install it. Tap Download and Install. When a message asks you to temporarily remove apps for more space for the update, tap Continue or Cancel.
Step 4. To update now, tap Install. Just follow the steps and your device will be up to date with the latest, greatest version of iOS!
In fact, with the version of iOS 12, you are able to have your iOS device update automatically. To turn on automatic updates, you can simply turn on your iPhone, go to Settings > General > Software Update > Automatic Updates. When you are done, you will be happy to find that your iOS device has finally automatically updated to the latest version of iOS. In some case, some updates might still need to be installed manually.
Solution 2: Check Apps, Music, and Photos Downloading Status
When the issue of “this iPhone is currently being restored” happens, you need to make sure that it is not downloading any apps still. All you need to do is to carefully check all the folders and pages to check whether is there any app still greyed out, which means it has not yet downloaded. Then you need to check is there any song downloading in iTunes. Also check your Camera Roll because the pictures can take quite a while to download from the cloud.
If there are any, just turn off the iPhone by holding the Home button and the Power button at the same time for at least 10 seconds. After your iPhone is turned on, you can go to the page of restoring iPhone to see whether the restoring has been stopped.
Solution 3: Stop iCloud Restore in Setting Directly
If you are getting stuck in restore for more than 24~72 hours, then the best thing is to stop it at once. You can do that directly on your iPhone and generally you will not lose data just stop the process. Here is how to do it.
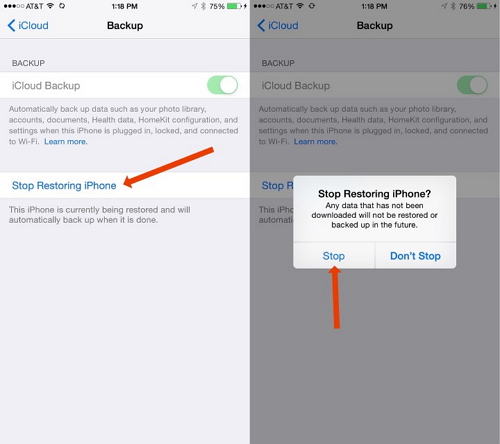
Step 1. Navigate your way to Settings on your iPhone and tap on iCloud Backup.
Step 2. Tap the option “Stop Restoring iPhone”, then you will be prompted to confirm that you really want to stop the recovery process. Tap on “Stop”.
Solution 4: Force Restart iPhone with No Network Connection
When encountering ”this iPhone is currently being restored”, another ideal way is to force a boot without network connection. To complete the task, follow the guide mentioned below in details.
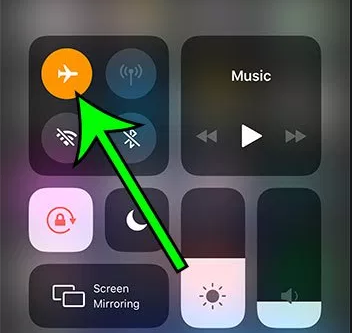
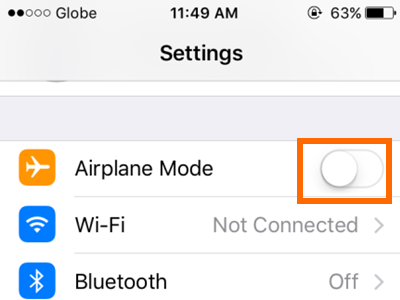
Step 1. Enable AirPlane mode, which disables all wireless communication including WiFi, cellular, GPS, NFC, and Bluetooth. To do it, on your iPhone, open Control Center, then tap the AirPlane icon. Or you can also go to Settings > Airplane Mode and tap the slider to turn it on.
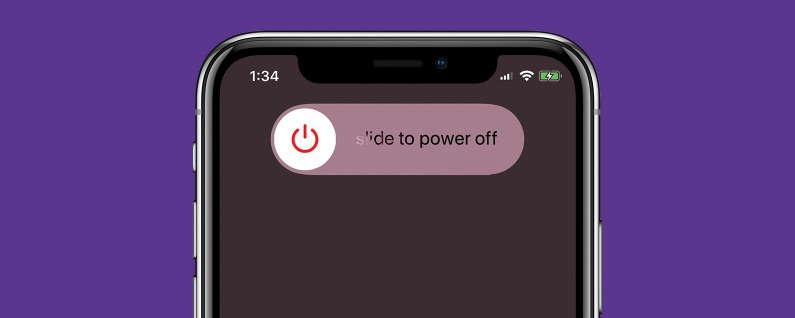
Step 2. Hold sleep/wake button of iPhone and sliding the red control to turn off it.
Step 3. Press and hold the Side button to turn it on. Release the Side button when the Apple logo appears, and give your phone about 30 seconds to reboot. You'll be asked to enter your Passcode if you have one.
Step 4. Check the last page in the folders to make sure no icons are still "downloading". Then you are able to connect it to iTunes and check whether it's still downloading or not.
Step 5. Switch on under the "Airplane mode" section to wait for the device to resume downloading. When the process is done successfully, you may find the program has stopped the restore, but you will potentially lose some data.
Solution 5: Restore iPhone with iCloud Alternative - iOS Data Recovery
If the above did not work, we are pleased to share with you a powerful all-inclusive data recovery software, the Leawo iOS Data Recovery . You can also try this one if you would like to avoid to handle such-and-such issues when restoring. Leawo iOS Data Recovery, a professional iPhone data backup & restore tool can be really helpful and allows you to restore iCloud backup without any risk of getting stuck. Up to 14 types of data could be recovered easily. Leawo iOS Data Recovery is the best iOS data recovery software since it enables iOS owners to recover data from various modes to ensure successful data recovery.
Step 1. After you get into the main interface, first click the third tab, recover from iCloud Backup.
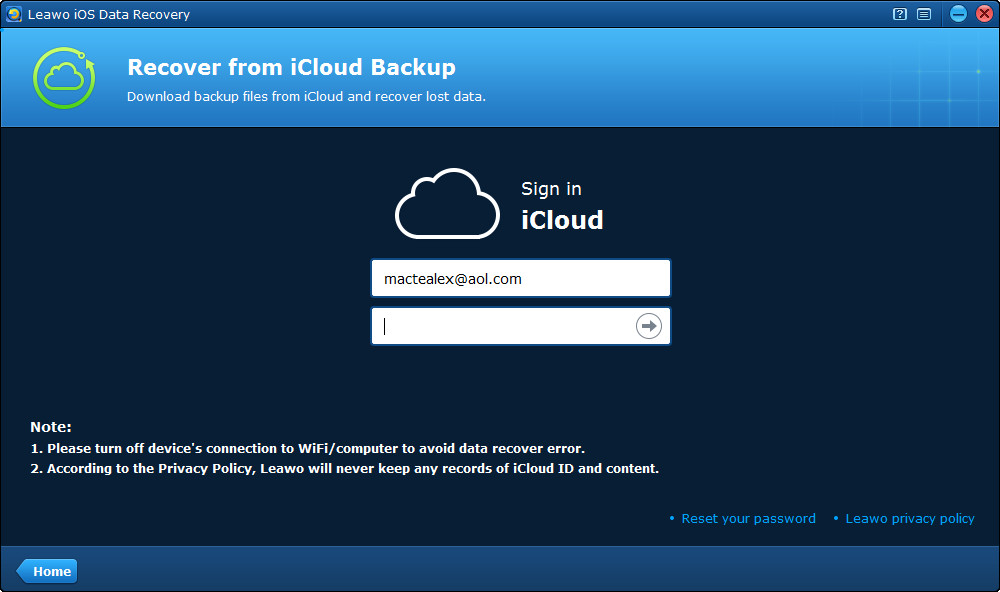
Step 2. Then on the next page, you have to log on iCloud with your Apple ID.
Step 3. After logging successfully, the program would scan your backup on iCloud automatically. When the process is finished, your backup would be shown on the list of the interface. Nest, you need to double click the backup option at the bottom left to download the backup.Log out by clicking Log Out button before you start downloading the backup.
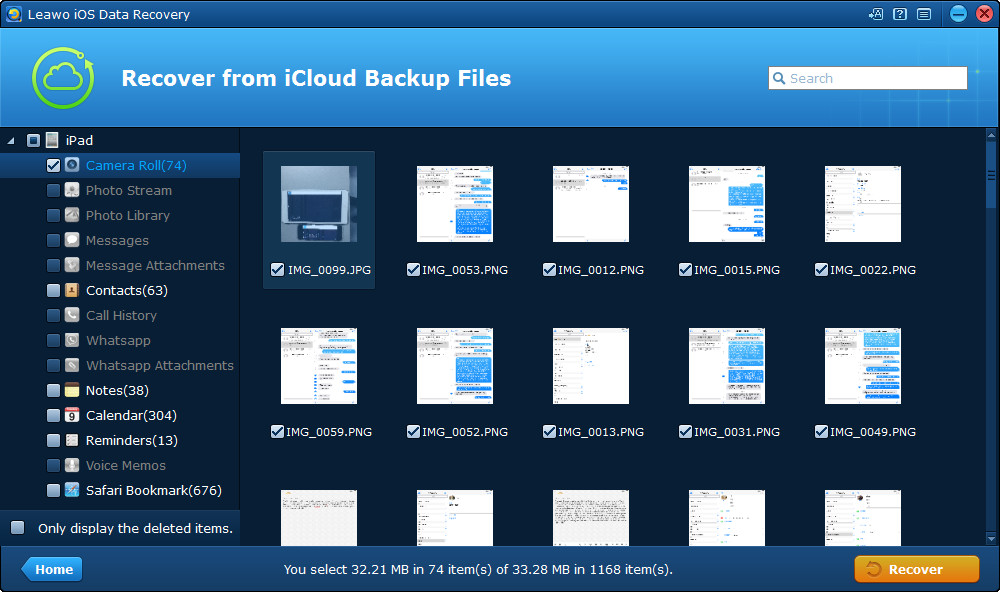
Step 4. Once the program has completed downloading all the backup, it will scan automatically. In a few seconds, you will be surprised to find that all the content in your backup shown on the interface. On the left column are the data categories. Just select one category and check the files in it that you look forward to recovering.
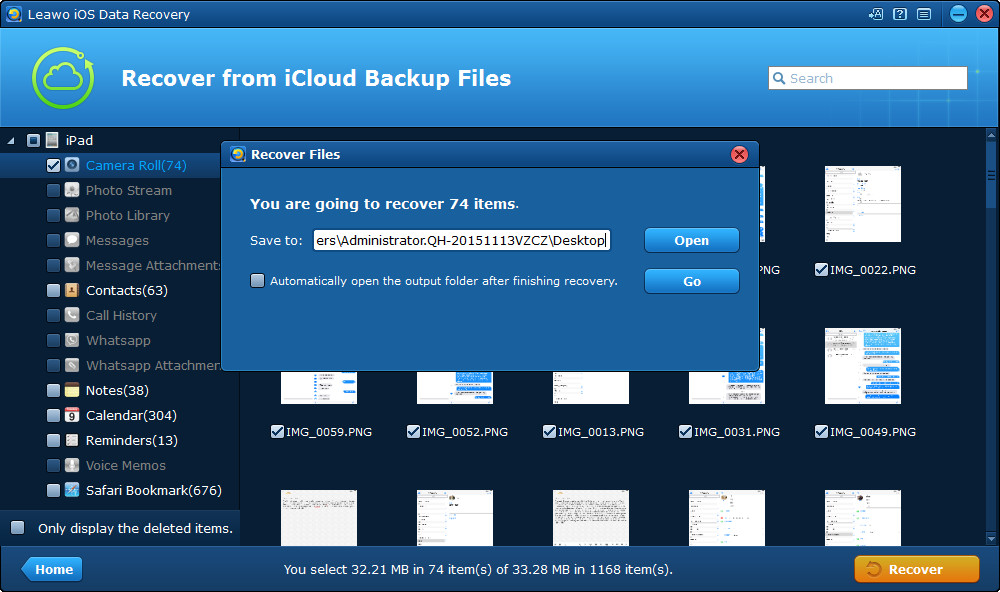
Step 5. After you have select all the data you want, click Recover to get a pop-up window. On the window, set the directory for the files you've chosen to recover. Last but not least, hit the option Go.
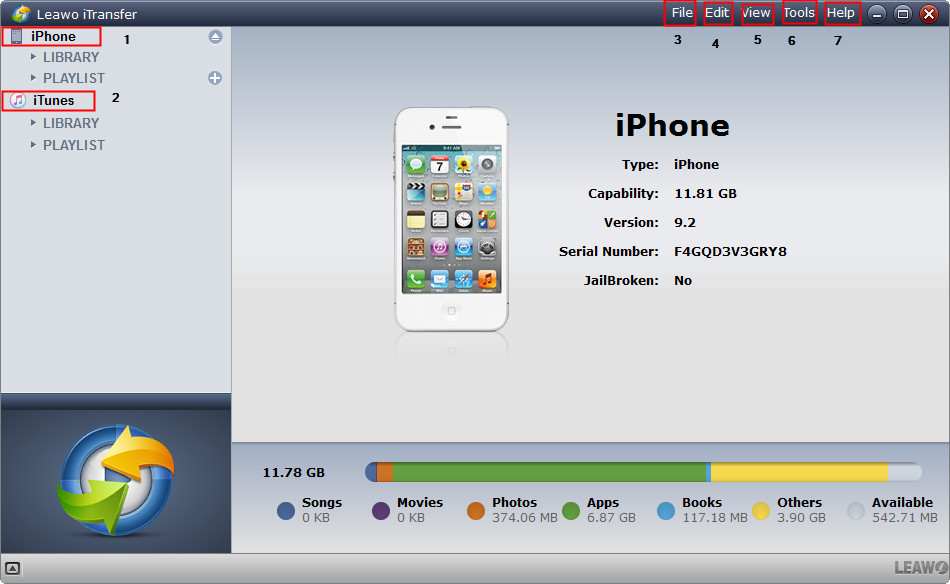
Tada! Your iCloud backup has been restored on your computer without any problems, fast and easily. Then you can turn to iTunes or below Leawo iTransfer to transfer restored iCloud data from computer to iPhone. Both of them will help you restore the data to iPhone at ease. However, not all people are familiar with Leawo iTransfer. As far as I am concerned, Leawo iTransfer is better, which is capable of providing perfect solutions for iPhone transfer issues. It’s quite nice to transfer 12 kinds of files, like apps, photos, music, videos, SMS, contacts, and so on between iOS devices, iTunes and PCs. Besides, it can also back up iPhone, iPad and iPod (touch) files to computer.
In fact, many Apple users find it an easy thing to back up and restore their mobile devices to and from iCloud, but there also have been reports of the iCloud backup becoming stuck in the way, such as “this iPhone is currently being restored”. Follow our guide above to help you fix it. If you have any other good idea, share with us anytime.


 Try for Free
 Try for Free

