DVD discs are mostly used for movie and music storage in daily uses. Music files with high quality would need to be stored in a DVD disc. How to make a music disc or how to burn music to DVD discs would be problems coming along with the prosperity of the music market all over the world. The mainstream music file formats include MP3, WMA, CDA, and others. Nowadays DVD burning software has never been made so easy. This article will show you three DVD burning software tools used on Windows.
Part 1: How to burn music files to DVD with Leawo Video Converter and Leawo DVD Creator
As major modules in the Leawo Prof. Media, Leawo Video Converter allows users to convert video and audio files contained in more than 180 formats from one to another like MP4 to MKV, MKV to AVI, RMVB to FLV,etc., and the Leawo DVD Creator supports almost all video formats you can find and even photos, and then burns them to Blu-ray or DVD videos. Leawo DVD Creator has following keys features:
>Burn DVD from any video and photos
>Customize DVD menu with various templates offered
>Create DVD at high speed and little data loss
>Edit video to make it your own style
>Convert photos into slideshows and burn to DVD
And there are some Bonus features like subtitle and audio track selection, PAL/NTSC TV Standards supported, instant preview, video playback, and screenshot supported.
Using Leawo Prof. Media to burn music files to DVD discs, you need to use the DVD Converter to convert the audio files to music video first. Then how to burn a music video to DVD is when you need to use DVD Creator.
Here is the first instruction, to convert the source music files to a video.
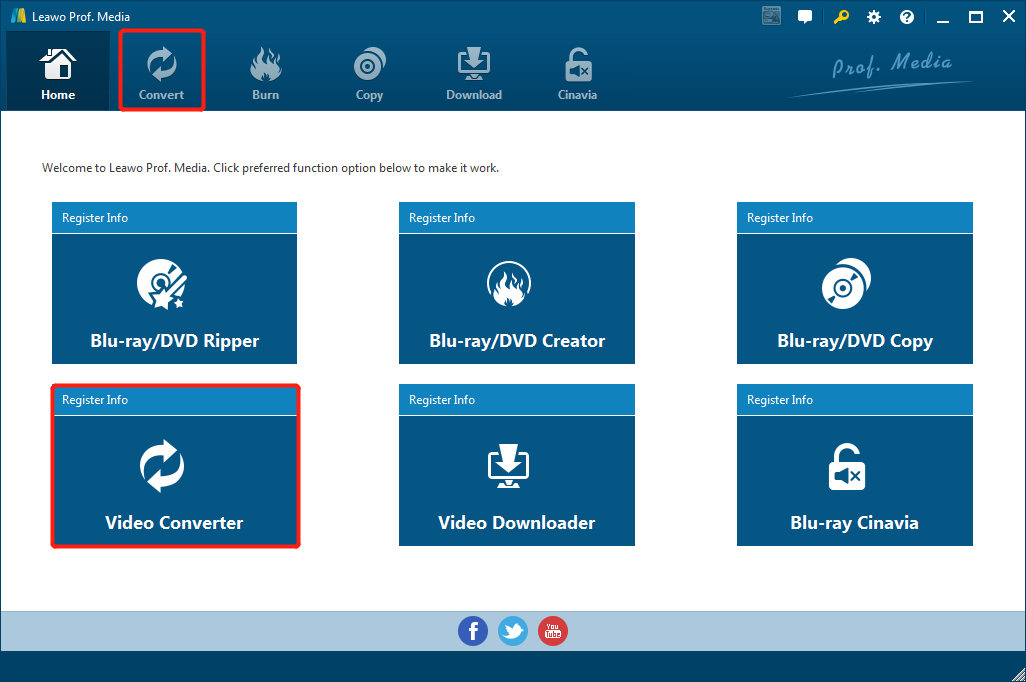
Step 1: Run the Leawo Prof. Media program. Select the Convert button in the upper toolbar or the Video Converter in the main interface, as highlighted in the following figure, to enter the Convert module.
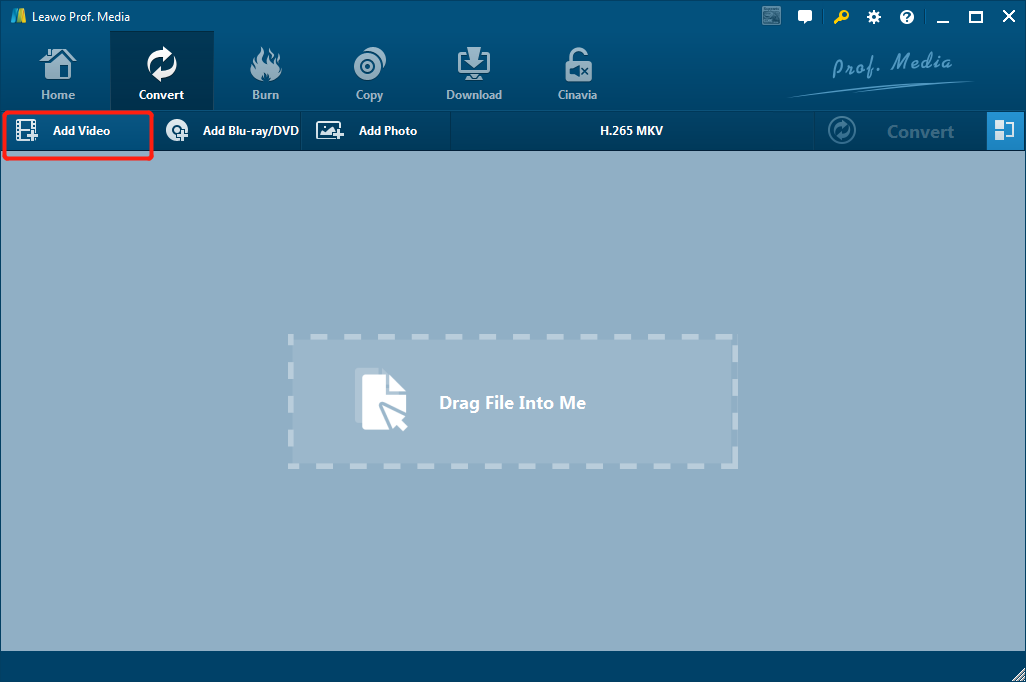
Step 2: Click Add Video> Add Video to add the source music file. Or you can directly drag the source file to the middle of the interface.
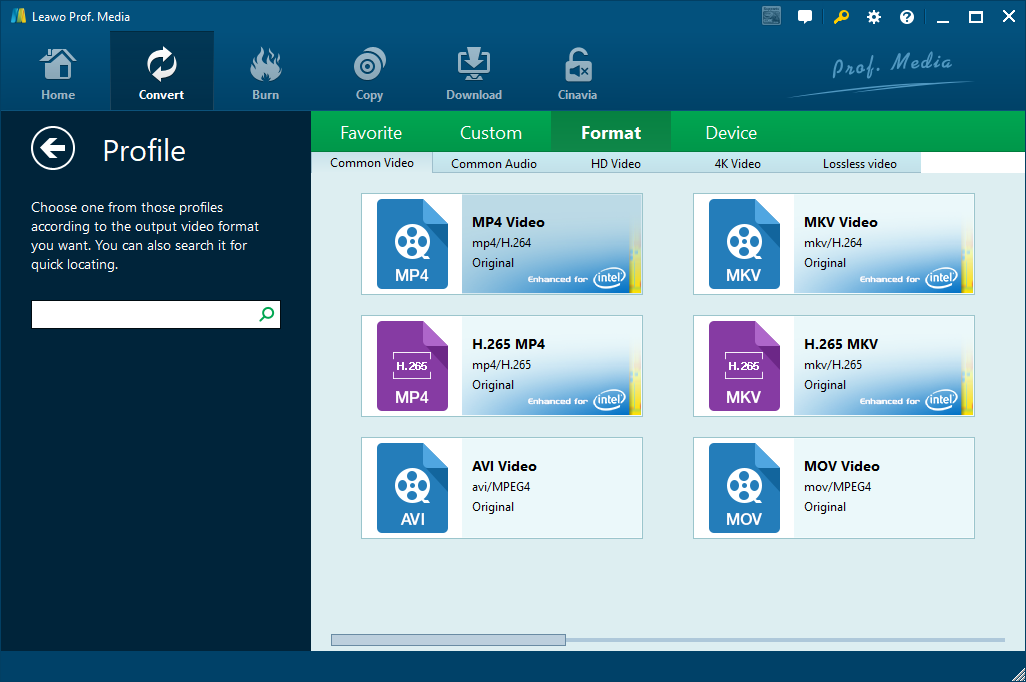
Step 3: To the left side of the green Convert button, it shows the output file format. Click the button to check the output format details. Click Change and the Profile panel will be shown. You can click the format you prefer and then it will automatically return to the main interface.
Likewise, click Edit and the Profile Settings panel will be shown. You can design the output video and audio qualities. When everything is set up OK, click OK to return to the main interface.
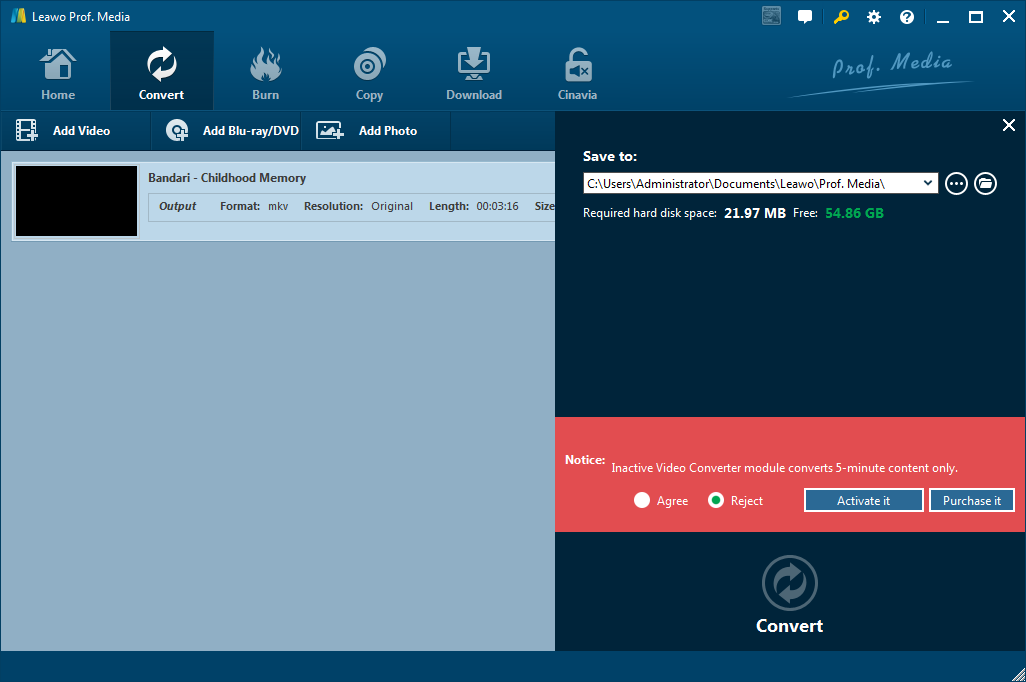
Step 4: Click the green Convert button. In the pop-out settings panel, set the output path and click the round Convert icon to start the converting process.
The following is the instruction on how to burn music videos to DVD content.
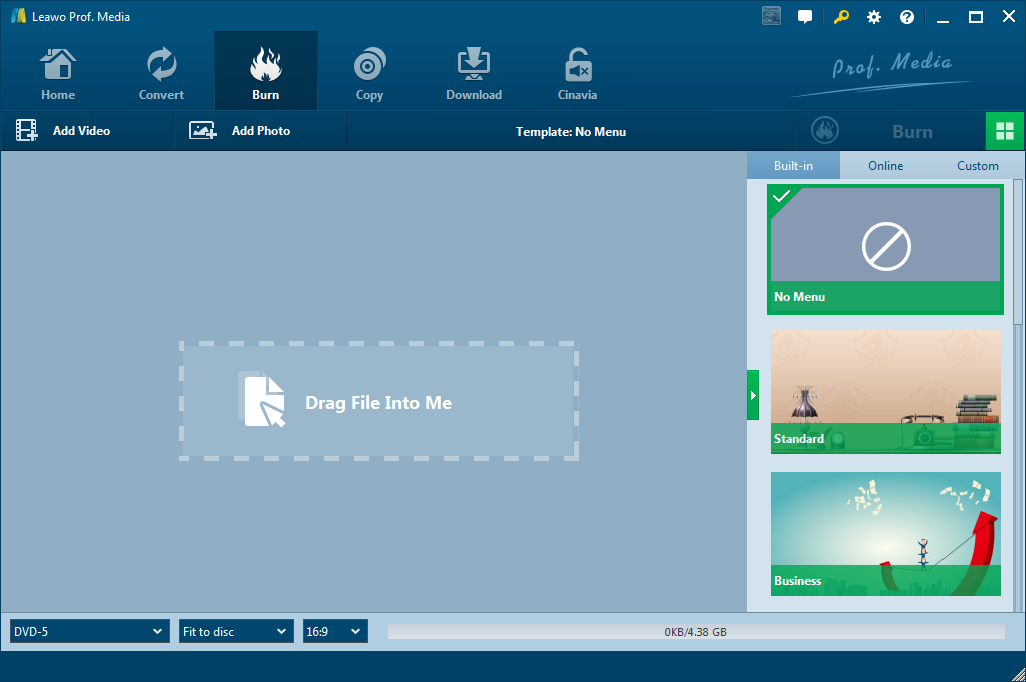
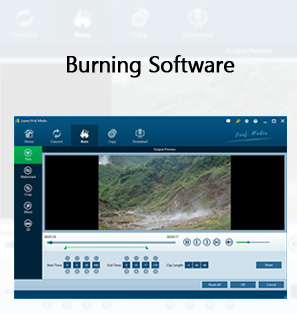
Step 1: When the converting process finishes, click the Burn tab in the upper toolbar to enter the burn module. Click Add Video to add the output video you just convert. Or you can directly drag the output video to the middle of the main interface.
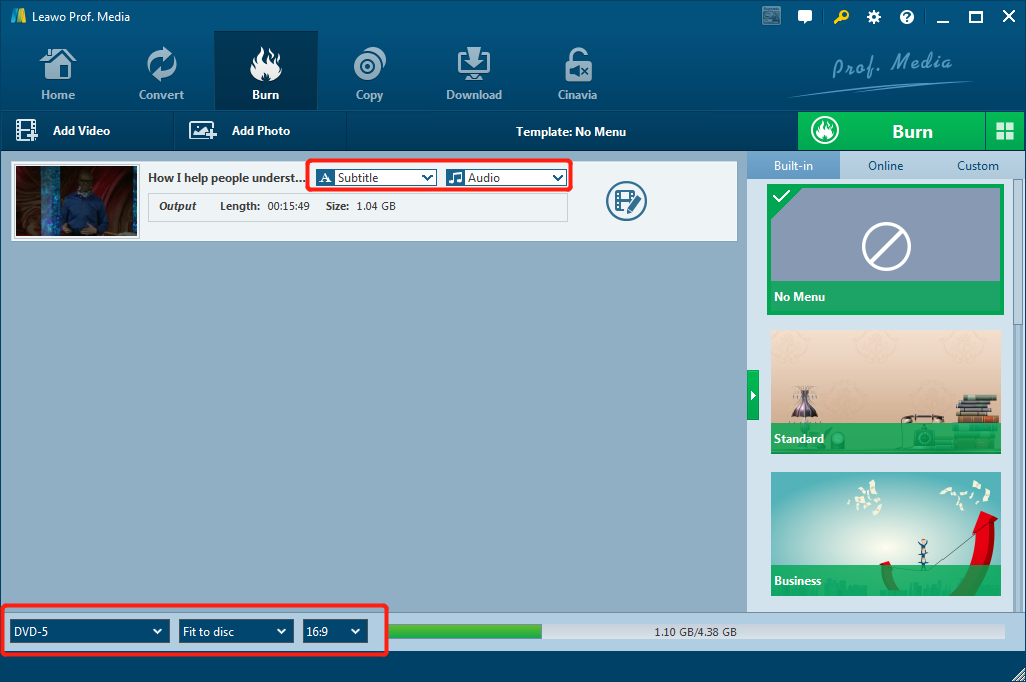
Step 2: At the video column, you can click the Subtitle and Audio drop-down menus to choose a subtitle and an audio track, or even import subtitles from local files. At the lower left corner, select the output output disc type, DVD-5 or DVD-9. The resolution can be set to fit to disc or the other you prefer and the aspect ratio can be 16:9 or 4:3.
Step 3: In the right toolbar, select a menu template from the Built-in, Online or Custom templates. The Customs templates are those you have used before. Click the preview icon in the middle of a template to enter the preview page. Then click the edit icon as shown in the following figure to enter the editing mode.
Step 4: If the interface shows the chapter list, you can click the little homepage button in the upper middle to return to the video home page. The words Chapter List and 1/1 (page number) in this page, My DVD, Play, and Scene in the home page are editable. Double-click the words to edit if you need to.
There are three buttons at the bottom left corner. Click the first music button to add an audio file as background music. You can determine the length of the playtime and effects like fade in, fade out, or loop play. Click the second image button to add an image or video file as background. When everything is OK, click the third button to save the menu to Custom as a template for next-time use. Then click the start button to return to the main interface.
Step 5: Click the Edit icon in the end of the video column. Edit the DVD file according to your actual needs. Click the buttons in the left sidebar to trim the video, add watermarks, crop the video, add video effects, add 3D effect, or remove noise. Click the Reset button to undo your previous step or click the Reset all button to cancel all the changes you have made to the video. After all editing is done, click OK to save the changes.
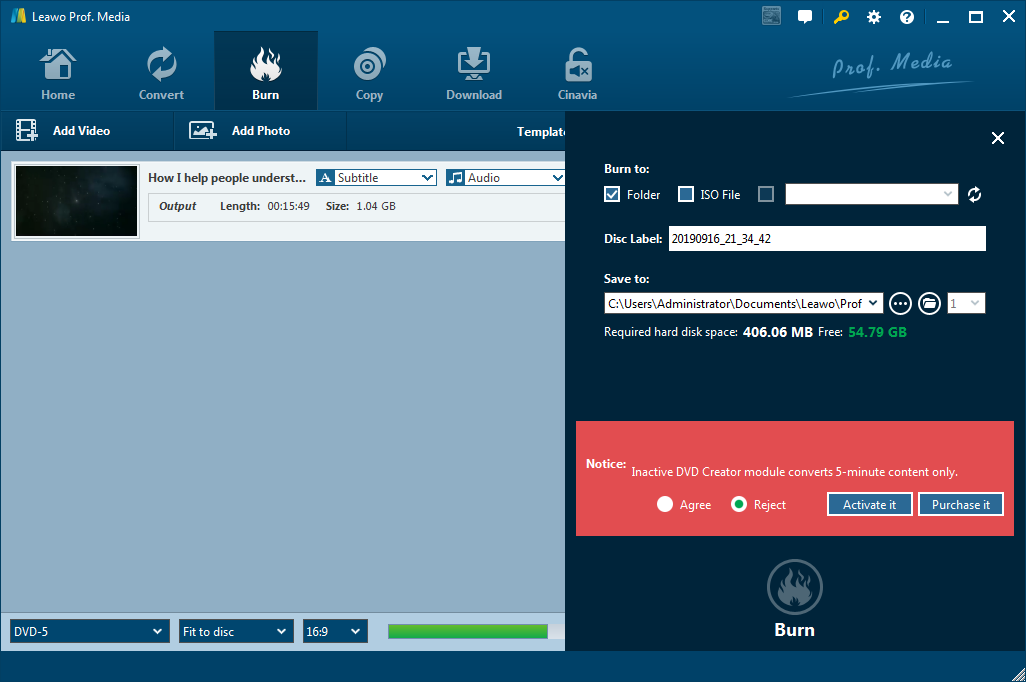
Step 6: Click the green burn button. In the settings panel, select what kind of output format you prefer from the Burn to options. Rename the disc label and set the output path. Then click the Burn button to start the burning process.
Part 2: How to burn music files to DVD with Windows Media Player
Windows Media Player is a Windows-Based software. You can organize your digital media collection, sync digital media files to a portable device, play media files, and burn them to DVD or CD discs.
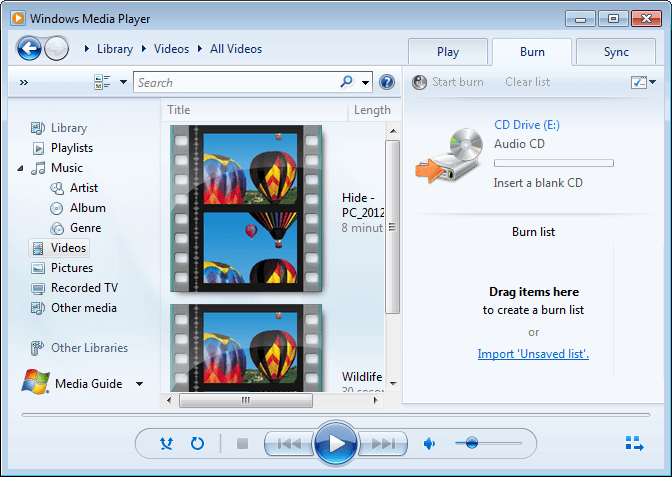
Step 1: Run the Windows Media Player program. In the Player Library, select the Burn tab, select the Burn options button, and then select Audio CD or Data CD or DVD.
Step 2: Insert a blank writable DVD into the DVD drive in your computer. Please make sure that the DVD drive is compatible with the disc type you are using. Otherwise the burning might fail and the DVD disc might crash.
Step 3: Search for the items in your Player Library that you want to burn to the disc, and then drag them to the list pane (on the right side of the Player Library) to create a burn list. When you're finished with the list, select Start Burn.
Part 3: How to burn music files to DVD with Burn My Files
Burn My Files is a small program to burn DVD discs. It writes data directly to the DVD, while other programs need time in writing temporary files to the computer hard drive. The burning process using Burn My files can be fast and error free.
Step 1: Insert a writable DVD disc to the Disc drive. Run the Burn My Files program. Click Burn Music Disc and select the disc you just insert. Click the Add button to add the source music file. You can add multiple music files if you need to.
Step 2: When all source files are added, click the Burn Music button to start the burn process.
Part 4: Comparison and conclusion
All these three programs can realize the purpose of burning music files to DVD discs. However, there are some differences.
Both the Windows Media Player and Burn My Files can directly burn music files to DVD discs directly and Burn My Files can directly burn to the DVD disc without writing temporary files to the computers. It would take two main steps, converting and burning, for the Leawo Prof. Media to finish the process. But if you use the Leawo Prof. Media, you don’t need to insert an DVD disc into the computer before you begin burning.
What’s more, only the Leawo Prof. Media integrates modules which allow users to design the music files and output videos files freely. The editing options are plenty for customization. Users can customize the DVD menu, add video effects, add subtitles, add background images or music, etc. While the Windows Media Player and Burn My Files can only burn the original audio files without permission to edit the files or add anything. In this case, users have to find other tools if they need to add a subtitle or add a background image.
So in conclusion, the Leawo Prof. Media is a powerful all-in-one software bundle for users to burn DVD discs and design the videos at will. It is a much more convenient tool than the other two.

