If you would like to watch and share videos in gorgeous HD, minus the ads, and follow categories, channels, and collections to fill your feed with amazing stuff each and every day, you can try Vimeo, a video platform alternative to YouTube. For many, Vimeo is a way to escape many of YouTube's flaws. When you upload a video to Vimeo, you will be surprised that it is really easy to share your videos with friends and family. This means that there's no need to send lots of individual emails because you can upload the video once and share it with everyone else at the same time.
Instead of producing and shipping DVDs, especially sports promotions use Vimeo to broadcast and share shows or matches. Of course, you can upload videos to be freely accessible as well. These formats are best supported by Vimeo:
- -MP4 (Motion Picture Experts Group Part 14)
- -MPEG or .MPG (Motion Picture Experts Group)
- -MOV (QuickTime Movie)
- -AVI (Audio Video Interleaved)
However, as you can see, DVD is not included in the list, in order to share your DVD movies on Vimeo, you have to rip DVD to Vimeo friendly video formats using a DVD ripping program. Below, we will share three wonderful tools with you, Leawo DVD Ripper, Magic DVD Ripper and iSkysoft DVD Ripper.
Part 1: How to convert DVD to Vimeo with Leawo DVD Ripper
As one of the best well-known DVD ripper, Leawo DVD Ripper allows you to rip and convert DVD to video, to extract audio content from source DVD and save in various audio formats like AAC, FLAC, WAV, MP3, etc., and it allows you to directly set device model as output profile. Besides, with Leawo DVD Ripper, you could decrypt, rip and convert DVD content to any common video (for example, DVD to MP4), 720P video, 1080P video, 4K video based on your personal preference. This tutorial below will show you how to convert DVD to Vimeo in just a few steps.
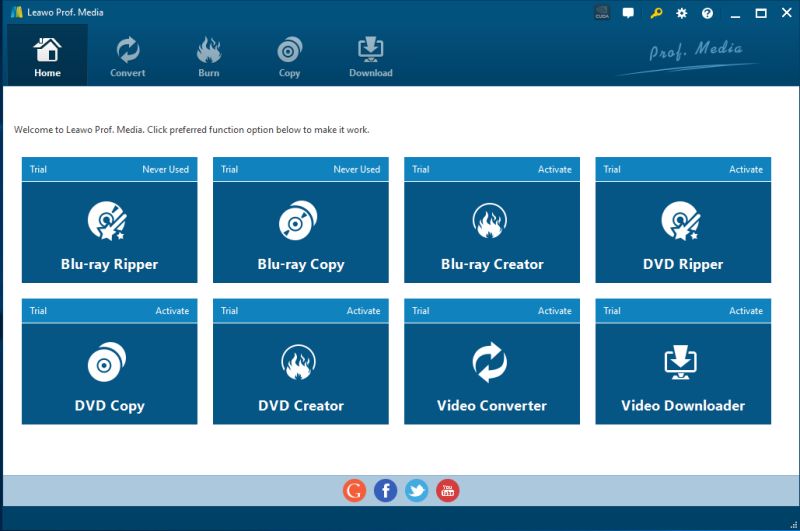
Step 1. Download, install and launch Leawo DVD Ripper on your computer. Simply click "Add UHD/Blu-ray/DVD" icon to load your DVD disc files you want to put on your Vimeo. If you like, you can select subtitle, audio, preview DVD videos with built-in player, or even screenshot during previewing, etc.
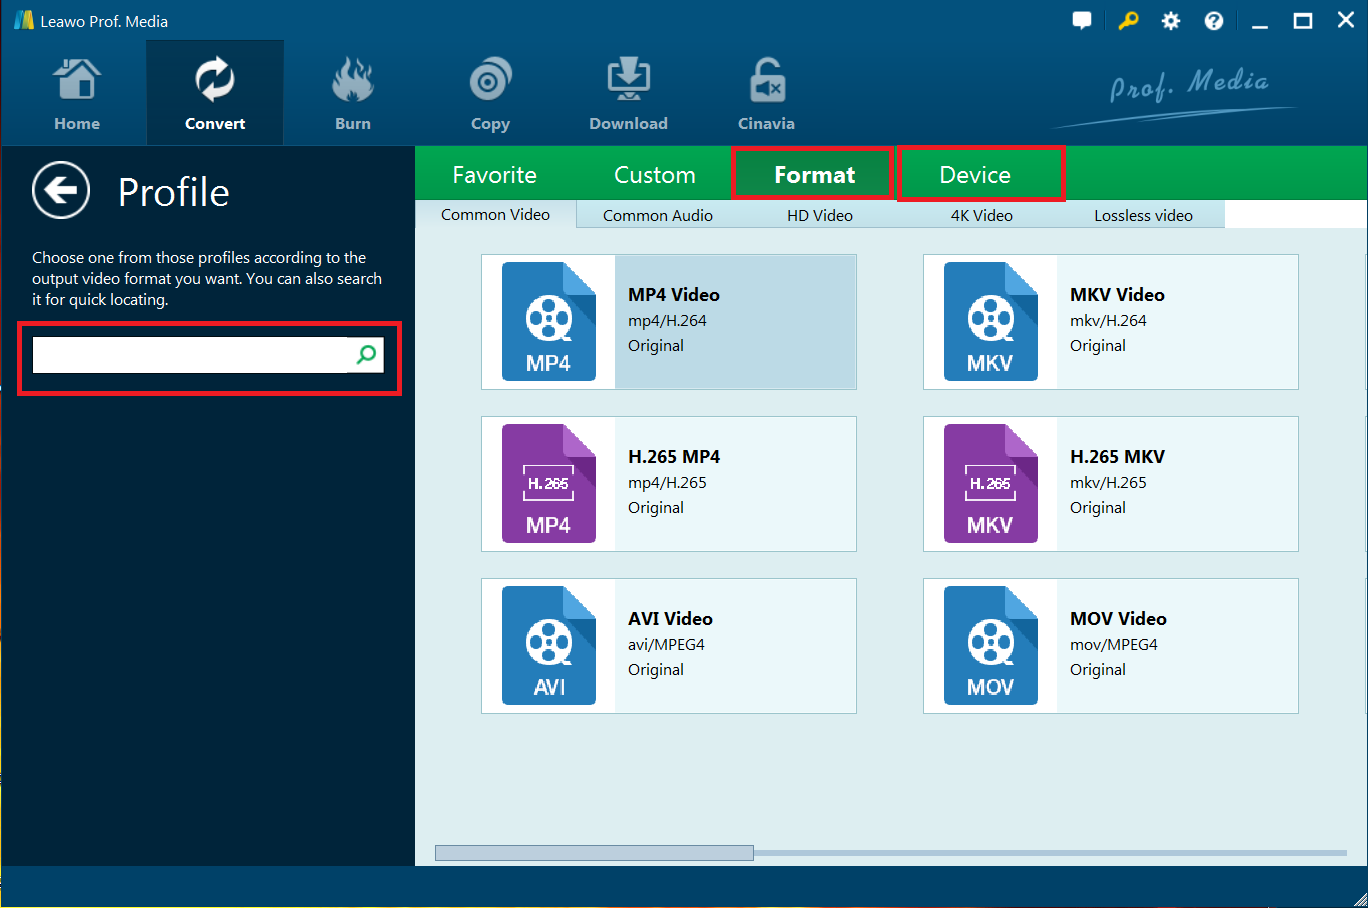
Step 2. Set the output video profile that Vimeo. You can just click the drop-down box (named "MP4 Video" by default), and hit "Change" button to choose your targeted output format.
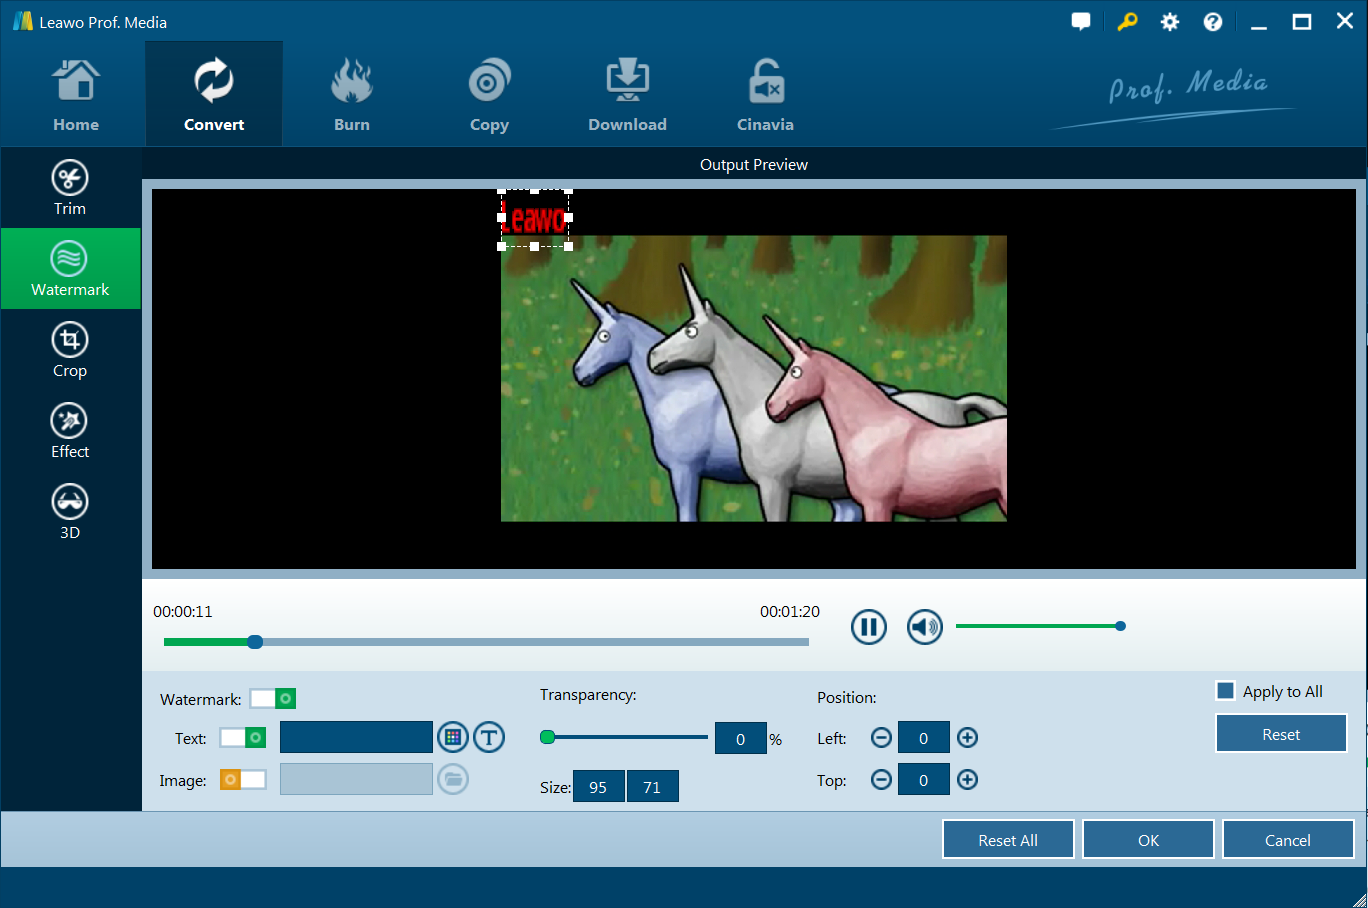
Step 3. In addition, you also have the right to adjust detailed settings. Click the drop-down box and click "Edit" to adjust video and audio parameters of output format, including video codec, quality, bit rate, frame rate, aspect ratio, channel, audio codec, resolution, etc.
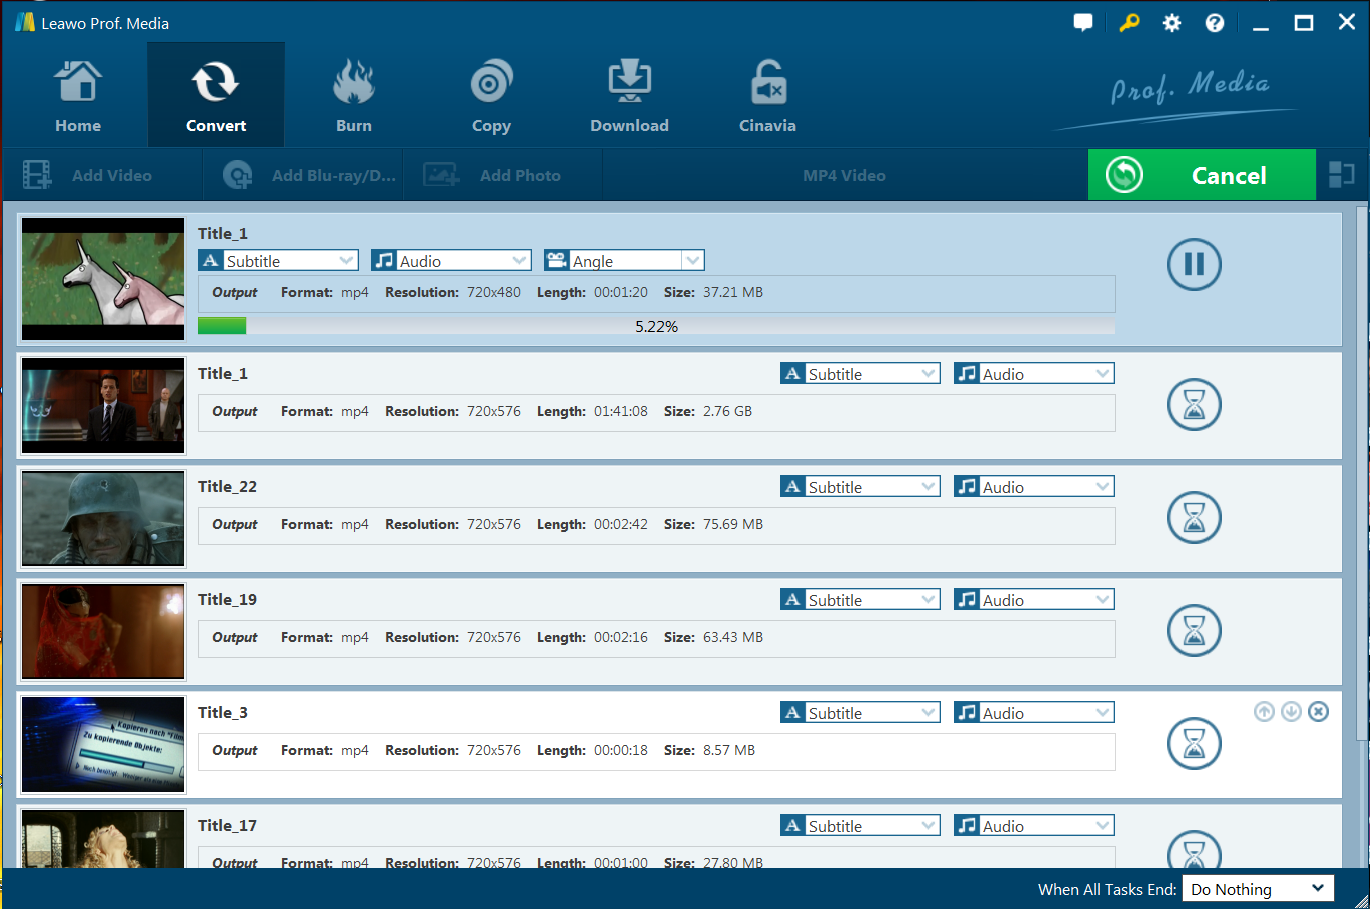
Step 4. Last but not least, you can hit the big green "Convert" button on the top-right of the interface to start to convert.
Part 2: How to convert DVD to Vimeo with Magic DVD Ripper
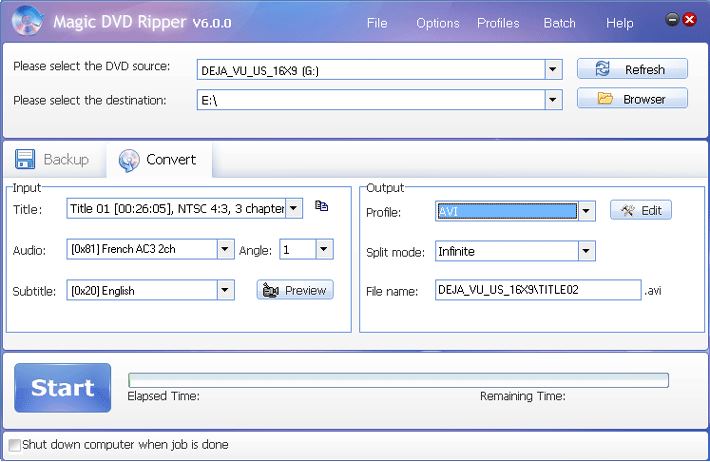
Magic DVD Ripper is a very easy and powerful DVD ripping software tool, which can convert DVD to VCD, SVCD, MP4(for iPod, iPad, PSP, PS3 or smartphone) without any loss of quality. Another feature of Magic DVD Ripper is its batch mode which comes in handy to all those who want to process several clips at the same time. Overall, Magic DVD Ripper can prove a useful tool when it comes to backing up DVDs or ripping them to other formats so one needs to make the most of the evaluation period.
Step 1. Launch Magic DVD Ripper and click the Convert tab. Then you can insert your DVD into your DVD-ROM drive.
Step 2. To specify the destination, click "Browser" button. Next, you can choose proper title, audio and subtitle. Generally, Magic DVD Ripper will automatically choose the longest title and the first audio track. You can also select a clip to rip there. If you want to rip multiple titles at one time, you may choose "Multiple titles" from the Title dropdown list to do that.)
Step 3. You can select a proper profile from the Profile dropdown list. Choose "[More profiles ...]" to see all profiles. Change the file name if necessary.
Step 4. Press the "Start" button to start ripping. In 20-40 minutes, you can rip a DVD to other formats, such as AVI, VCD, WMV, MP4, and also device formats directly.
Part 3: How to convert DVD to Vimeo with iSkysoft DVD Ripper
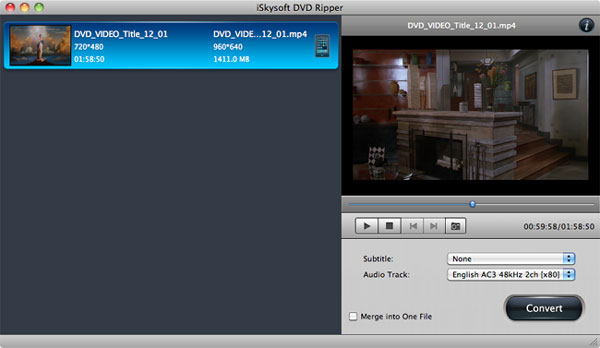
iSkysoft DVD Ripper is an application to extract the contents from a DVD and convert it to another format, which allows you to select the audio channel and subtitle, crop the black lines, join various chapters in a single file or separate your favorite scenes, to name a few of the main options. With iSkysoft DVD Ripper's intuitive and easy interface, ripping videos or audios just a few simple clicks and you can preview all conversion process clearly.
Step 1. Download, install and launch iSkysoft DVD Ripper , the DVD Ripper for Mac and you're your DVD Movie. You are able to click the Drag & drop DVD disc icon on the desktop to the program. Or you can go to "File" menu, choose "Load DVD" to locate the DVD movies you want to rip.
Note: The default setting only read main feature of the DVD movie for conversion, without DVD menu and the movie just starts playing right away.
Step 2. The software provides optimized presets: Apple devices including iPad, iPod, iPhone, Apple TV; Apple Software like iMovie, Final Cut Pro; and a variety of players like Xbox 360, PSP, PS3, Nintento Wii, Walkman, Creative Zen, Sandisk Sansa, etc., making the DVD ripping for your portable devices as easy as 1-2-3! Choose the output format you need.
Note: If you want to resize video and change video and audio settings manually, set a lower bit rate to compress the output video, just click the "Options" button to customize output settings.
Step 3. In the end, just click "Convert" button to begin conversion.
Part 4: Comparison and Conclusion
Below, we have some comparison of the three tools.
| Programs |
Leawo DVD Ripper |
Magic DVD Ripper |
iSkysoft DVD Ripper |
|
OS |
Win & Mac |
Win & Mac |
|
|
Pros |
1.Rip DVD to Video/Audio in 180+ Formats |
1.Simple and easy to use interface |
1.Support All Portable Players in one Interface |
|
Cons |
None |
1.The number of available output formats is less when compared to other similar software |
1.iSkysoft fails to scan titles while ripping protected DVDs at times |
Conclusion
As far as I am concern, Leawo DVD Ripper works the best among all. With the help of Leawo DVD Ripper, you will find it easy to convert DVD to any popular video format. If you want, you could also use Leawo DVD Ripper to edit the videos. Now it is time to join the web's most supportive community of creators and get high-quality tools for hosting, sharing, and streaming videos in gorgeous HD and 4K with no ads.
Part 5: Extension -- How to Upload Video to Vimeo
When the videos are uploaded to the site, you can send anyone the link to share your video with them, which makes it very simple and interesting. Uploading them is very simple and shouldn't take long to complete. To get started uploading your video on Vimeo, follow the steps below:
Step 1. The first thing that you should do is visit the Vimeo website and create an account. If you already have an account, log into it by clicking the login link. If not, follow the prompts to set up your account/channel.
Step 2. Click the "Upload Video" button which is located on the home page of the site.
Step 3. Once you click the upload link, you will be taken to the upload page. You are supposed to ensure that you are permitted to upload the videos, for you can only upload videos that are owned and created by yourself.
Step 4. Click the "Choose a File to Upload" button, then choose the file that you want to upload and then click on "Select."
Note: Vimeo respects your videos and your right to decide who watches them. Privacy options allow you to upload videos and choose who can see them.
Step 5. After the video is uploaded, the video will then be converted automatically. You can close this page if you want, and Vimeo will handle the conversion automatically. As soon as it has finished converting, the service will then email you once the conversion has finished.

