
How to use Leawo PowerPoint to DVD Pro
This page shows you detailed steps on how to convert PowerPoint to video and burn PowerPoint to DVD/Blu-ray content respectively.
- Home
- /
- Leawo PowerPoint to DVD Pro
- /
- User Guide
How to Convert PowerPoint to Video/DVD/Blu-ray
Leawo PowerPoint to DVD Pro combines PowerPoint to video converter, PowerPoint to DVD burner, and PowerPoint to Blu-ray burner. It could convert PowerPoint to video in 180+ formats, burn PPT to DVD with music and menu, and convert PowerPoint to Blu-ray disc/ISO image file. The below guide would show you how to convert PowerPoint to video and how to burn PowerPoint to DVD/Blu-ray.
Step 1: Add source PowerPoint files
On the "Import" panel, click the Import button  on the menu bar or the Add button
  to add source PowerPoint files to the program. You can add up to 12 PPT files at once.
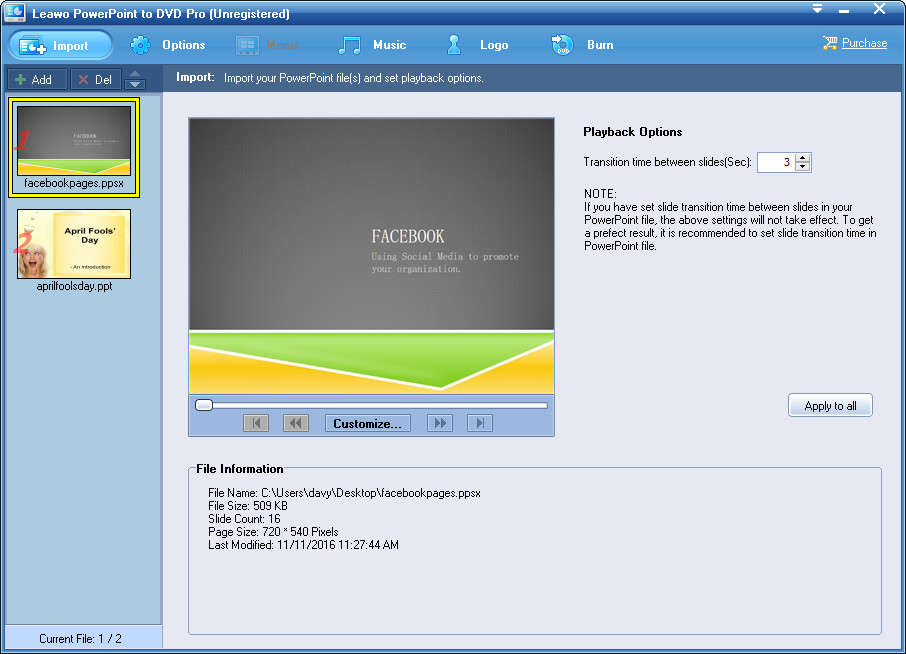
1.1 Manage loaded PowerPoint files
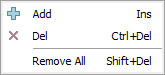
After loading source PowerPoint files, you could view the thumbnail of loaded files on the left panel. Select one loaded PowerPoint file and right click it, you could Add extra PPT files (shortcut key: Insert), Delete selected PowerPoint file (shortcut key: Ctrl+Delete), or Remove All loaded files (shortcut key: Shift+Delete). You could also move up or down a selected PowerPoint file by clicking the move buttons  .
.
1.2 Playback settings
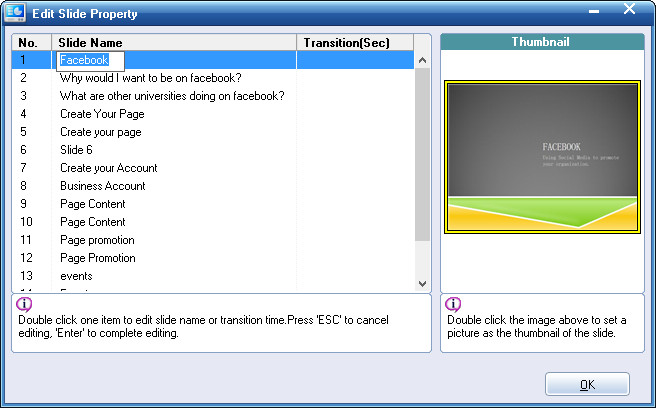
On the right panel, you could drop down the Playback Options box to set the Transition Time between Slides. You could apply your Playback Options settings to all loaded PowerPoint files by clicking the Apply to All button  . Meanwhile, on the right panel, there is a player to let you play back loaded PowerPoint files. You could play back and preview loaded PowerPoint files with ease. What’s more, by clicking the Customize button
  on the player, you can enter the Edit Slide Property window to edit slide properties: double click a Slide Name to change it, and double click the image on the right panel to set another picture as the thumbnail of the slide.
1.3 View PowerPoint information
At the bottom of the right panel, you could see a File Information box, which lists all detailed information about the loaded PowerPoint file you’ve selected, including: name, size, slide count, page size, date, etc.
Step 2: Set output options
Click "Options" button  on the menu bar to choose an output option: Create Standard DVD, Convert to Video File or Create Blu-ray Disc. You need to follow one of the below 3 instructions to continue, according to your real needs.
2.1 Create Standard DVD
If you want to burn PPT to DVD, check the "Create Standard DVD" button. Then, you need to carry out corresponding settings including: DVD Options and output Folder to save created standard DVD content.
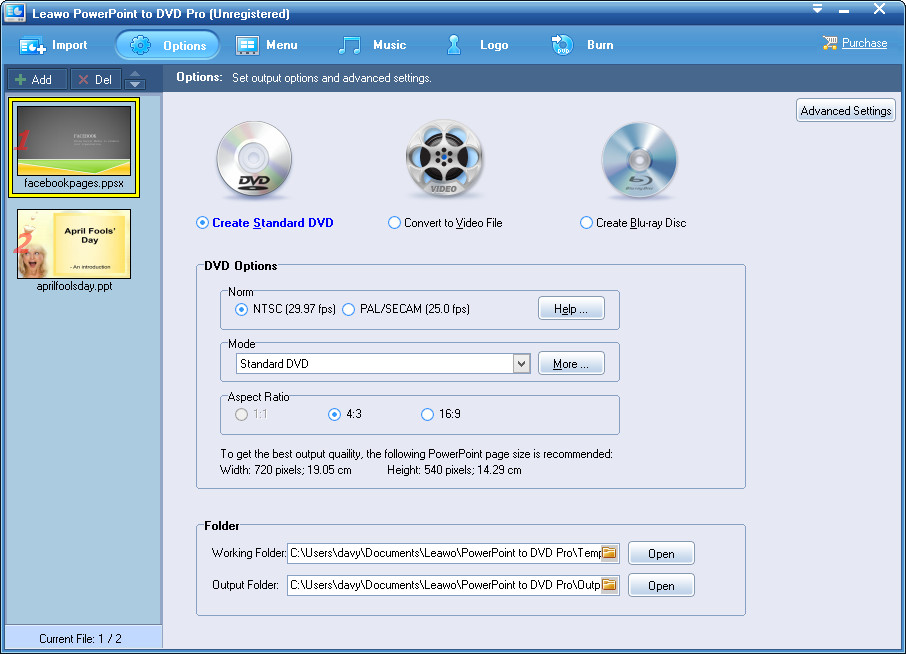
2.1.1 DVD Options
Set output DVD video, Mode and Aspect Ratio.
a. Under the Norm box, set output DVD video format from NTSC or PAL/SECAM according to your region. If you don’t know how to figure out this, click the Help button  to set your region and then the program would automatically figure out the DVD video mode for you.
b. Under the Mode box, set output disc mode from Standard DVD, 480i and 480P. You could also click the More button  to customize mode by changing Aspect Ratio, Encode Size and Display Size.
c. Under the Aspect Ratio box, select output aspect from 4:3 and 16:9 according to your own real situation.
2.1.2 Folder
Set a hard drive folder to process and save output content, including Working Folder and Output Folder. You could click the folder icon  to set directory and Open button
  to open the output directory you've set.
2.2 Convert to Video File
If you want to convert PowerPoint to video, check the Convert to Video File option and then figure out corresponding settings, including output Video Format setting and output Folder setting.
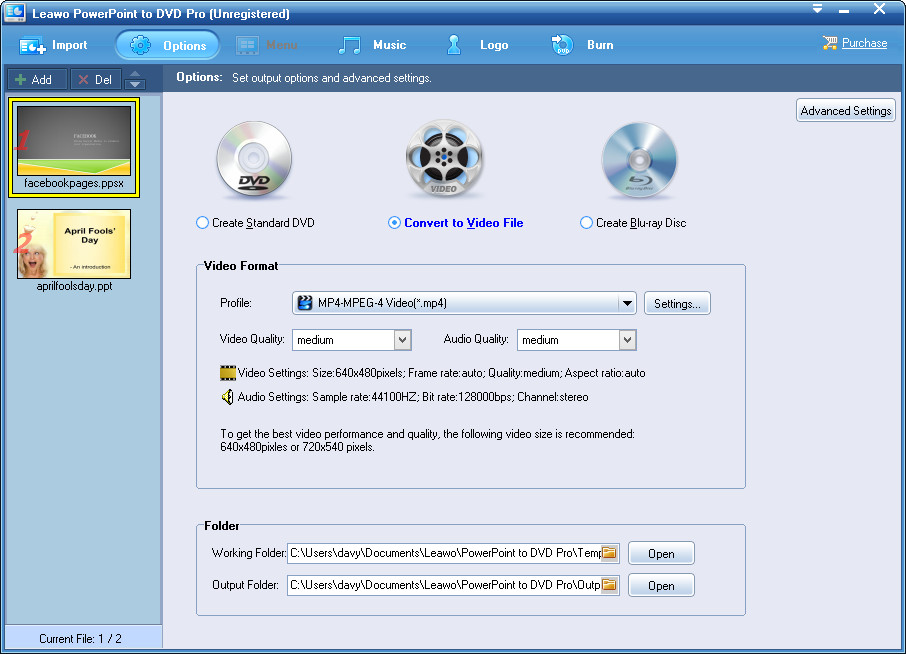
Video Format: Choose desired format as output video format and adjust profile parameters if needed. Set Video Quality and Audio Quality from Medium, Low, High and Custom.
2.2.1 Set output profile
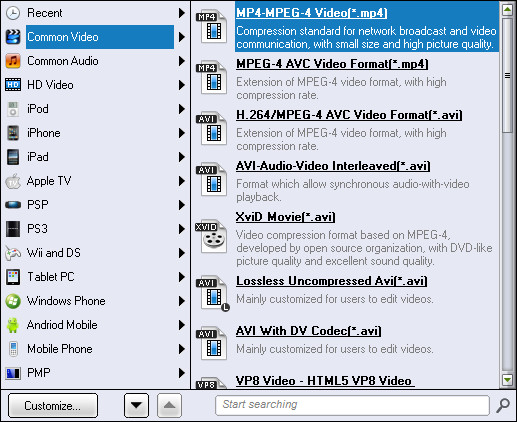
Under the Video Format panel, click the Profile box  to open the profile selecting panel, where you could select a desired profile as output format. You could choose from various groups: Common Video, Common Audio, HD Video, iPhone, iPod, iPad, etc. Click the Customize button
 ![]() to hide or display certain groups.
to hide or display certain groups.
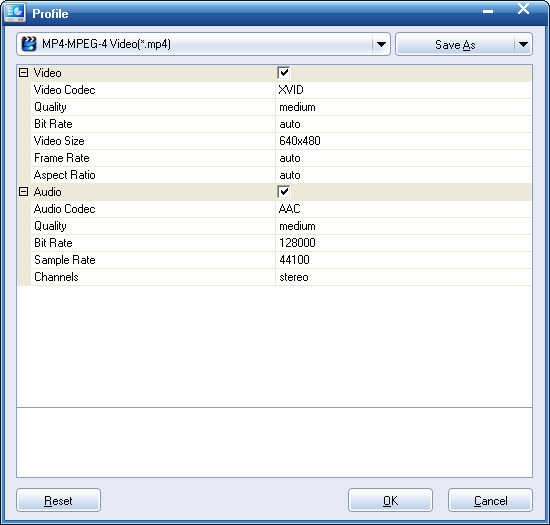
2.2.2 Adjust profile parameters
If you need, you could click the Settings button  to adjust video and audio parameters of selected profile, including: Video Codec, Video Quality, Bit Rate, Aspect Ratio, Video Size, Frame Rate, Audio Codec, Audio Quality, Channel, Audio Bit Rate, etc. You could even save adjusted profile by clicking the Save as button
  for future use.
2.2.3 Folder settings
Set a hard drive folder to process and save output content, including Working Folder and Output Folder. You could click the folder icon to set directory and Open button to open the output directory you've set.
2.3 Create Blu-ray Disc
By clicking the Create Blu-ray Disc option under the Options panel, you choose to burn PowerPoint to Blu-ray disc. A notice would pop out then to remind you that created Blu-ray content supports no manual interruption during playback.

Click the Yes button  to continue. Then you will see the settings panel for burning PowerPoint to Blu-ray disc:
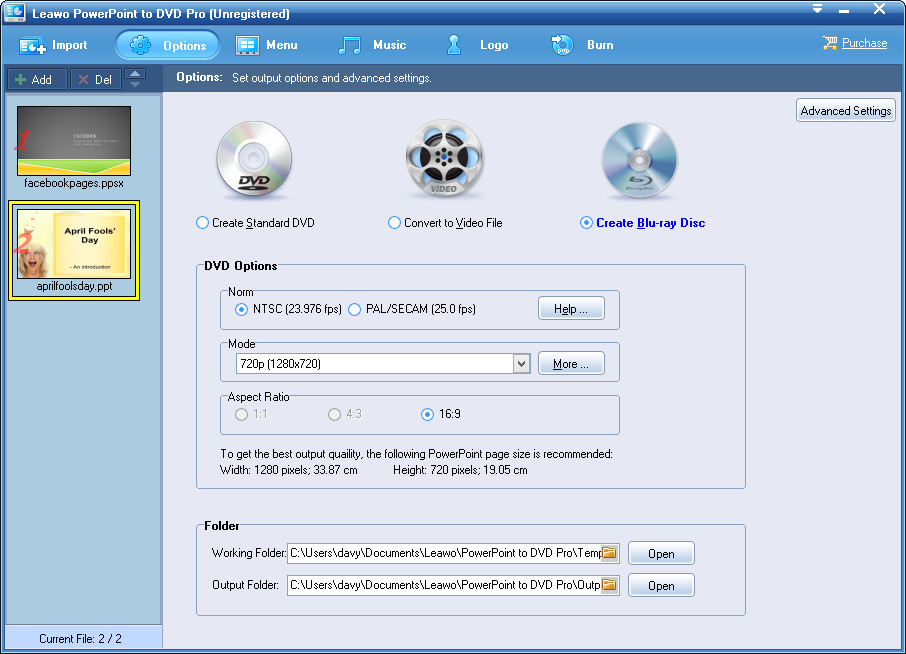
2.3.1 DVD Options settings
Under the DVD Options frame;
a. Set output video mode from NTSC or PAL/SECAM under the Norm box. Click the Help button to set your region and then the program would automatically figure out the video mode for you.
b. Under the Mode box, set output disc mode from 720P and 1080P. You could also click the More button to customize mode by changing Aspect Ratio, Encode Size and Display Size.
c. The output Blu-ray content Aspect Ratio is set as 16:9 by default.
2.3.2 Output Folder settings
Under the Folder frame, set hard drive folders to process and save output content, including Working Folder and Output Folder. You could click the folder icon to set directory and Open button to open the output directory you've set.
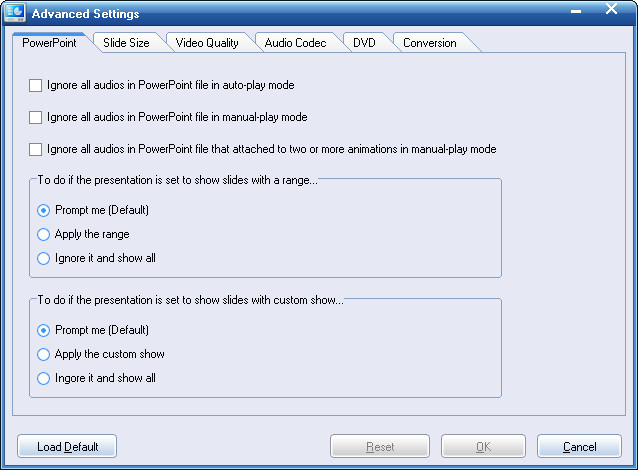
2.4 Advanced Settings
On the Options panel, you could see an "Advanced Settings" button  , by clicking which you could enter the Advanced Settings panel, where you could carry out some advanced settings upon PowerPoint to video/DVD/Blu-ray converting, including: PowerPoint, Slide Size, Video Quality, Audio Codec, DVD and Conversion settings. These advanced settings would help you make PowerPoint file converting user friendlier.
Step 3: Add disc menu
After determining output, if you want to convert PPT to DVD with menu and burn PPT to Blu-ray with menu, you could click the Menu button  to select a disc menu for output Blu-ray/DVD content.
Note:
1. If you choose to convert PowerPoint to video file, skip this step. The Menu button would become unavailable for clicking.
2. If you don’t want a disc menu for output Blu-ray/DVD content, open "Options > Advanced Settings > DVD" option and then check "Disable DVD Menu" option. If you want a disc menu, uncheck "Disable DVD Menu" option.
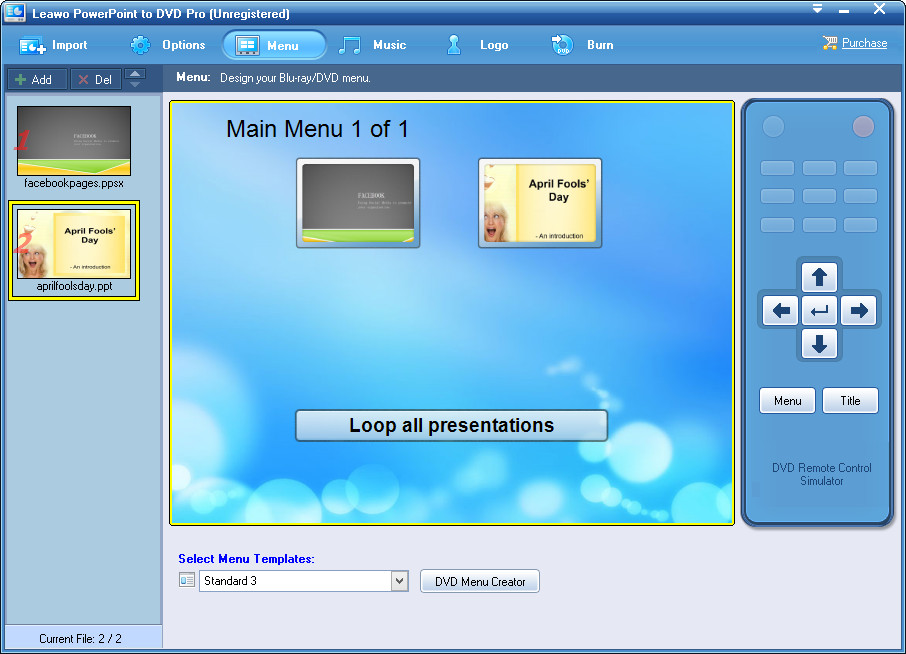
3.1 Select a disc menu
After you click the Menu button , you come to the menu selecting panel, where you could select disc menu, and preview disc menu (including main menu and titles). At the bottom of the Menu tab, open the Select Menu Template dropdown box  to select disc menu template from various preset ones. You could get instant preview of selected disc menu template through the player. On the right side of the Menu tab, you could see a “DVD Remote Control Simulator” to help you control slides playback via remote controller and preview. Click the "Menu" button
  to view the main menu, and "Title" button
  to view titles.
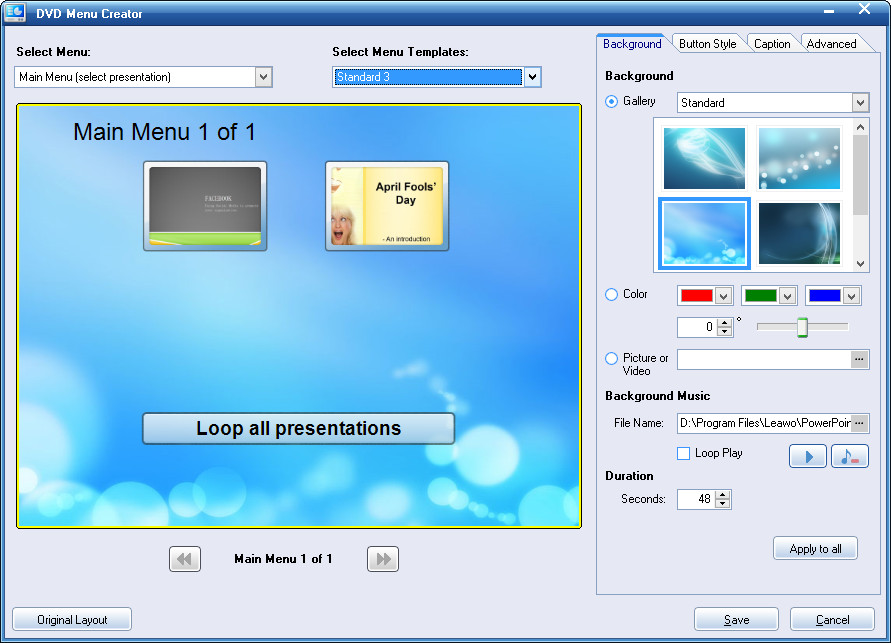
3.2 Design disc menu
You could also design disc menu by clicking the DVD Menu Creator button (dvd-menu-creator.jpg) on the Menu tab. You then come to the DVD Menu Creator window, where you could customize DVD menu as you like, including: select menu for Main Menu and Title Menu, select menu template, customize menu Background, Button Style, Caption and other Advanced settings. You could adjust the thumbnail size and position. To abandon customization, just click the Original Layout button  at the bottom left corner. After customizing disc menu, click the Save button
  to save and quit the DVD Menu Creator panel.
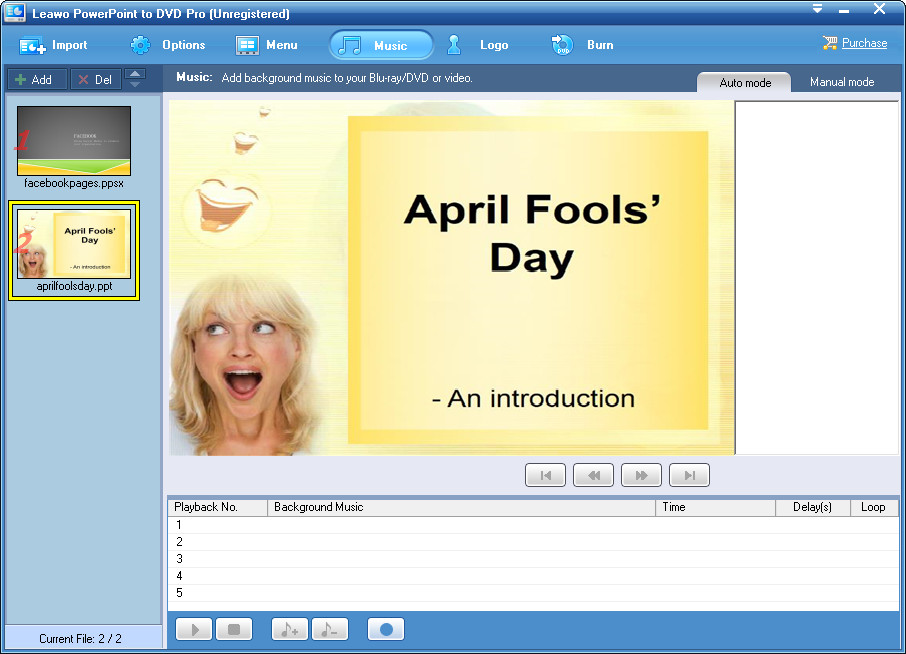
Step 4: Add background music
If you want to burn PPT to DVD with Music, convert PPT to video with music and burn PPT to Blu-ray with music, you can click the Music button  . There are 2 different modes for you to add background music: Auto mode and Manual mode. Under each mode, at the bottom, click Add button
  to add background music one by one, Remove button
  to remove loaded background music, Play button
  to play loaded music, Stop button
  to stop playing, and Record Narration button
  to record a narration.
4.1 Auto mode
Once you click the Music button , you come to the Auto mode window to add background music (if you are in the Manual mode interface, click the Auto mode button  to come back to the "Auto mode" interface). The Audio mode means music files you added would play in order, while you can determine the order by inserting background music to corresponding Playback No. at the bottom panel, where you could also view the music file name and duration. If you check the Loop option, the background music would play in loop. Otherwise background music will play in order as showed under the Playback No. box.
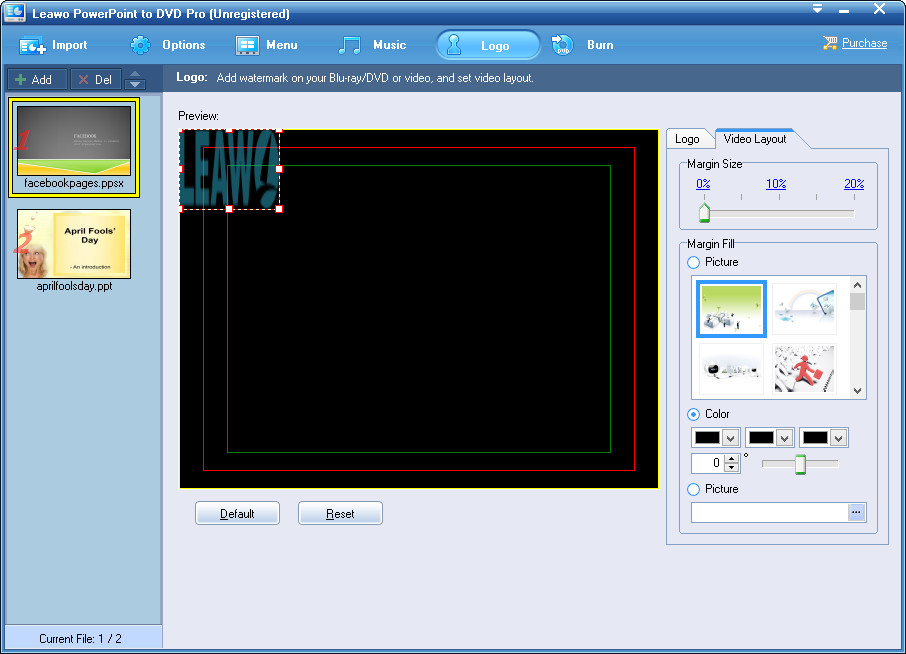
Step 5: Add logo and set layout
Leawo PowerPoint to DVD Pro allows you to add a logo as your own patent to output video/DVD/Blu-ray content for PowerPoint file converting or burning. You could also adjust output video layout. Click the Logo button ![]() to enter the logo and video layout setting window.
to enter the logo and video layout setting window.
5.1 Add logo
Click the Add button ![]() in the Files box to browse and add an image as logo from your local hard drive. You could adjust the Alpha and check "Enable Transparence Color" option to change logo color and Tolerance. To remove logo, check the logo in Files box and then click Remove button
in the Files box to browse and add an image as logo from your local hard drive. You could adjust the Alpha and check "Enable Transparence Color" option to change logo color and Tolerance. To remove logo, check the logo in Files box and then click Remove button  or click the Reset button
  to remove logo. Click the Default button
  to return to default setting.
![]()
5.2 Set Video Layout
Click the Video Layout button  on the Logo panel to resize the output video and fill the margin with picture. You could set Margin Size, choose to set image as margin from either local drive or preset images, and set the color of Margin Fill.
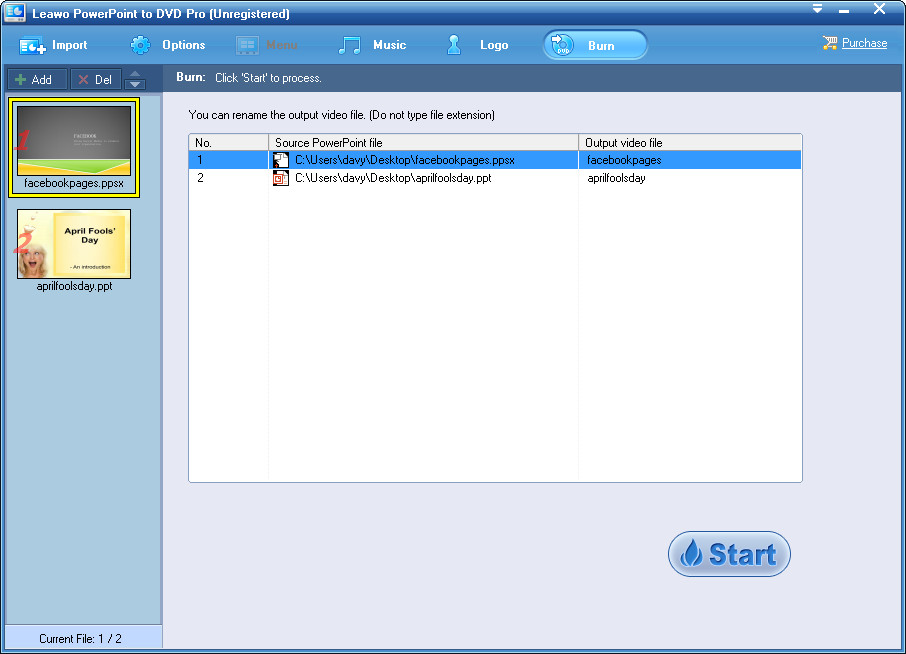
Step 6: Convert PowerPoint to DVD/video/Blu-ray
Finally, with all settings done, click the Burn button  to carry out the last step. The Burn interface would vary upon your choice of Options.
6.1 Burn PowerPoint to DVD
If you choose to "Create Standard DVD" on Options panel, by clicking the Burn button, you come to the following interface:
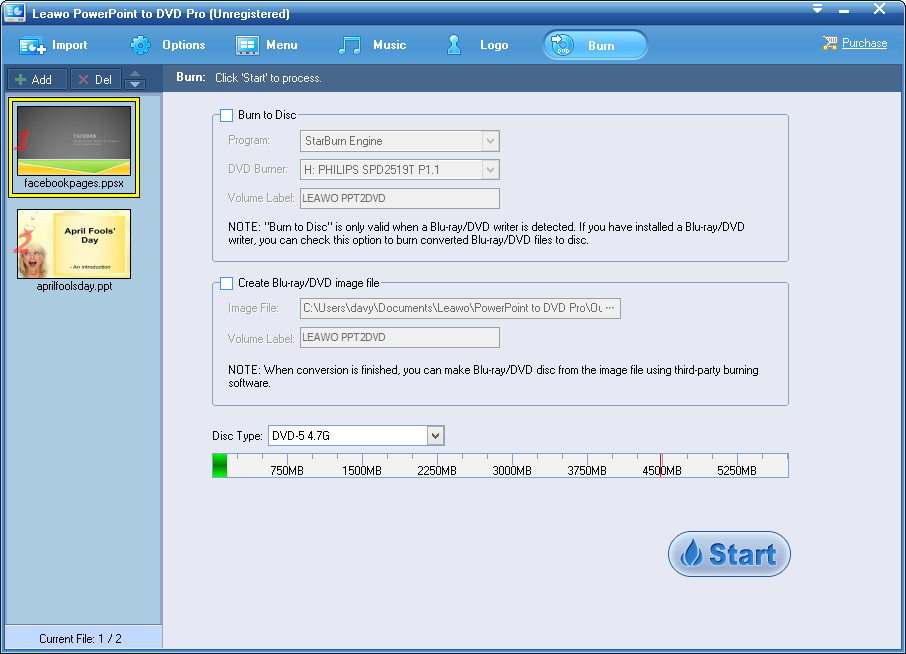
On the Burn interface, you need to set output DVD type:
6.1.1 Burn PowerPoint to DVD disc
To burn PowerPoint to DVD disc, insert a blank writable DVD disc into the disc drive and then check "Burn to Disc" option. Then choose burn engine in Program box, choose target disc in DVD Burner box and input a name for output DVD content in Volume Label box. After that, set output disc type by clicking the Disc Type box  and then click the Start button
  to start burning PPT to DVD disc. Click OK button on the following popup notice window to continue. On the burning interface, you could view the burning process and click the preview box
  to preview.
6.1.2 Burn PowerPoint to DVD image file
To burn PowerPoint to DVD ISO image file, check the "Create Blu-ray/DVD image file" option, set a directory to save output DVD image file in "Image File" box and name output DVD ISO image file in "Volume Label" box. After that, set output disc type by clicking the Disc Type box and then click the Start button to start burning PPT to DVD image file.
Note:
a. It should be noted that you could check both "Burn to Disc" option and "Create Blu-ray/DVD image file" option at the same time to create both DVD disc and DVD ISO image file. It allows multiple choices.
b. Required storage space is displayed to help you make sure your hard drive gets enough space.
6.2 Convert PowerPoint to video
If you choose to "Convert to Video File" on Options panel, by clicking Burn button, you will see the below interface:
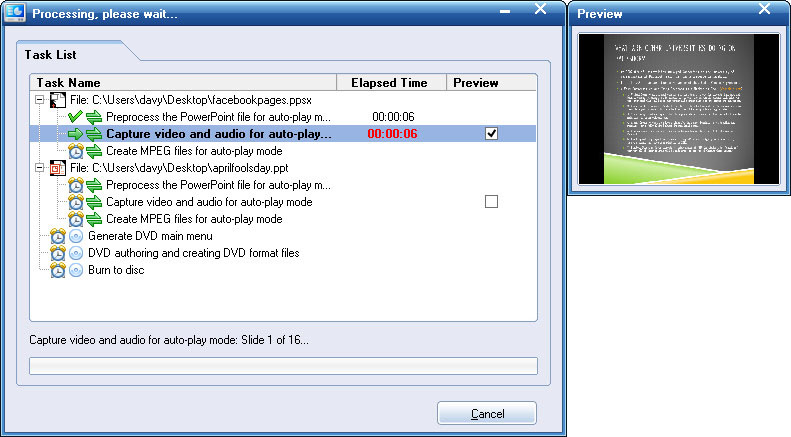
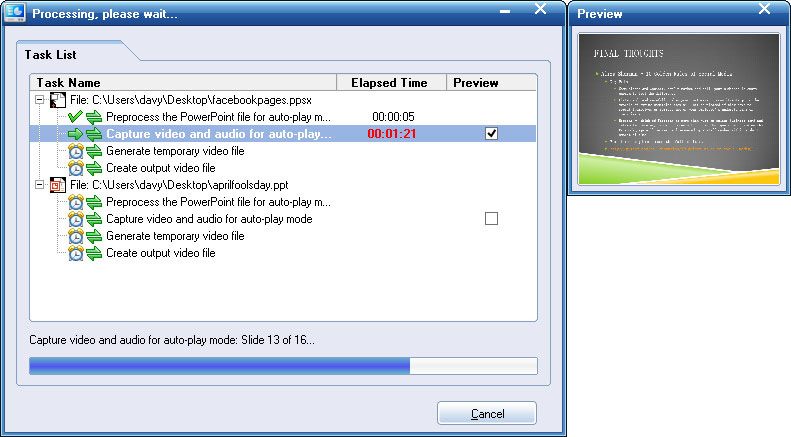
Click the Start button to start converting PowerPoint to video. Once you meet a converting notice window to remind you of the converting tips, click "OK" button to continue.
On the converting interface, you could view the processing progress. If you check the preview box , you will be able to open a preview panel to preview output video.
6.3 Burn PPT to Blu-ray
If you choose to "Create Blu-ray Disc" under the Options panel, when you click the Burn button, you will see the below window:
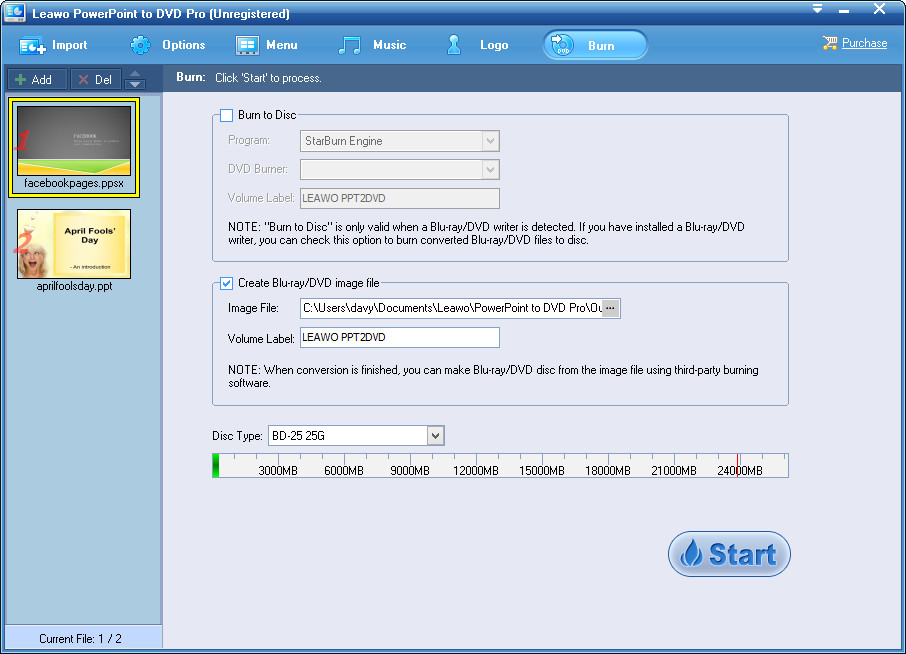
You could choose either to burn PowerPoint to Blu-ray disc or burn PowerPoint to Blu-ray image file.
6.3.1 Burn PPT to Blu-ray disc
Insert a blank writable Blu-ray disc into the BD drive, check "Burn to Disc" box, choose burn engine from StarBurn Engine and Cdrtools in "Program" box, choose BD drive you've inserted a Blu-ray disc into as target in "DVD Burner" box, name output Blu-ray disc in "Volume Label" box, and then click the "Disc Type" box  according to the Blu-ray disc you inserted into the drive, and finally click the Start button to start burning PowerPoint to Blu-ray disc.

On the burning interface, you could view the burning process and click the preview box to open a preview panel for previewing.
6.3.2 Burn PPT to Blu-ray image file
To burn PowerPoint to Blu-ray image file, check the "Create Blu-ray/DVD image file" box, set output directory to save output Blu-ray image file in "Image File" box, give output Blu-ray image file a name in "Volume Label" box, and then click "Disc Type" box to determine whether you want to create a BD50 image file or BD25 image file. After these, click the big Start button to start burning PowerPoint to Blu-ray image file. On the burning page, you could also view the burning process and preview output video content.
Note:
a. It should be noted that you could check both “Burn to Disc” option and “Create Blu-ray/DVD image file” option at the same time to burn PowerPoint to Blu-ray disc and/or Blu-ray image file. It allows multiple choices.
b. Required storage space is displayed to help you make sure your hard drive gets enough space.