If your iPad space is not enough to store other new files, you can come up with some ideas to back up some of your files on iPad to iMac to make room for other new ones. Among those old files, photos may take much space. In order to copy photos from iPad to iMac, you can check out this guidance to assist you.
- Part 1: How to Transfer Photos from iPad to iMac Computer via AirDrop
- Part 2: How to Transfer Photos from iPad to iMac Computer via Bluetooth
- Part 3: How to Transfer Photos from iPad to iMac Computer via Google Drive
- Part 4: How to Transfer Photos from iPad to iMac Computer via Dropbox
- Part 5: How to Transfer Photos from iPad to iMac Computer via Leawo iTransfer for Mac
Part 1: How to Transfer Photos from iPad to iMac Computer via AirDrop
It is not hard to import photos from iPad to iMac at all with the assistance of AirDrop. AirDrop can be a helpful function for the transfer among iDevices. The following contents will direct you to address how to import photos from iPad to iMac perfectly.
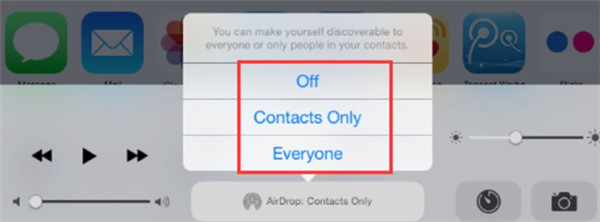
1. On your iPad, you need to swipe upwards to go to the “Control Centre” and toggle to enable the function of “AirDrop”. Connect your iPad with available Wi-Fi network.
2. After that, select “Contacts Only” or “Everyone” as you prefer on iPad.
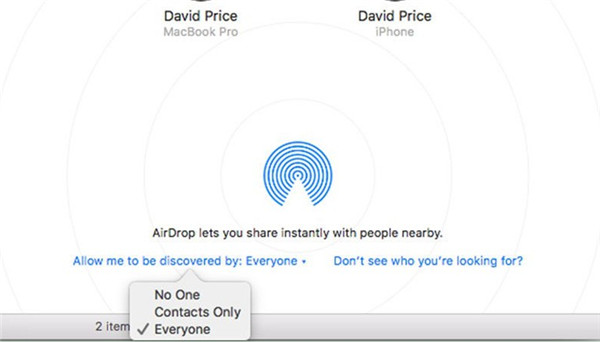
3. On iMac, move to the window of “Finder” and choose “AirDrop” from the left hand column. Enable Wi-Fi function and then make sure your iPad and iMac are connected with the same Wi-Fi network.
4. Navigate to the option of “Allow me to be discovered by” in the “Finder” interface on iMac and then choose “Everyone”, “Contacts Only”, or “No One” according to your need. Here I recommend you to choose to be seen by “Everyone”.
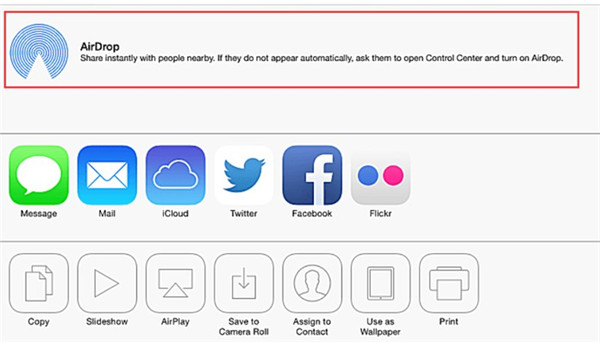
5. Go to Photos app on iPad and choose the photos you want to transfer to iMac, and then click on the share button. Find the iMac device that you want to share with in the row of AirDrop and click on it. if you cannot see iPad photos on Mac, here is the way to fix iPad photos not showing on Mac.
6. On iMac, you will receive an alert that asks you to approve the photos that are being shared. Approve the transfer and the iPad photos will be saved in your “Downloads” folder. You can also use the same Apple ID both on your iPad and iMac to avoid the appearance of the alert, and thus the iPad files will be automatically stored to the folder of “Downloads” on iMac.
As you can see, it is actually quite simple to transfer pictures from iPad to iMac via AirDrop. You can have a try with this solution to help you to make it.
Part 2: How to Transfer Photos from iPad to iMac Computer via Bluetooth
You can also resort to Bluetooth to help you to transfer pictures from iPad to iMac. As for how to make it, please refer to the steps shown below carefully.
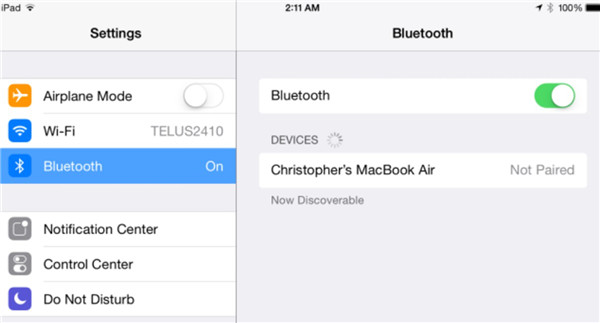
1. On your iPad, go to “Settings >Bluetooth” to enable this function.
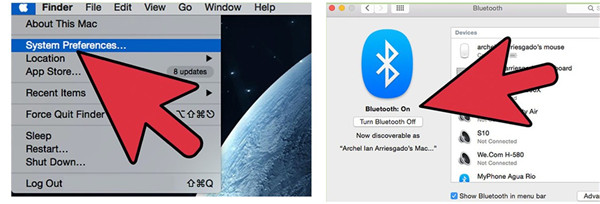
2. On your iMac, click on the Apple icon in the main interface and then choose “System Preferences > Bluetooth” to click on to turn on the feature of “Bluetooth” on iMac.
3. After both your iPad and iMac have enabled the function of Bluetooth, you will see changes on the “Devices” section on both of them. On your iPad “Devices” section, you need to click on the icon of iMac and then tap on the “Pair” button. On your iMac, there will be a notice to ask you whether to agree the “Bluetooth Pairing Request”, and you need to choose the option of “Pair” to click on. Thus, you can pair iPad and iMac successfully via Bluetooth.
4. On your iPad, navigate to choose the pictures that you want to share to iMac and then click on the share icon. Choose “Bluetooth” as the method to transfer photos. After that, you can see a dialog shows on iMac interface to ask you to accept the iPad photos. Click on the “Accept” button to save the iPad pictures on iMac directly.
This method to cope with how to backup iPad to iMac is also easy. Have a try and you will know how convenient it is.
Part 3: How to Transfer Photos from iPad to iMac Computer via Google Drive
In order to fix how to copy photos from iPad to iMac, Google Drive can also be made good use of. You just need to sync photos from iPad to Google Drive and then download them to iMac from Google Drive. The following steps will tell you how to make it quickly.
3.1 Sync Photos from iPad to Google Drive
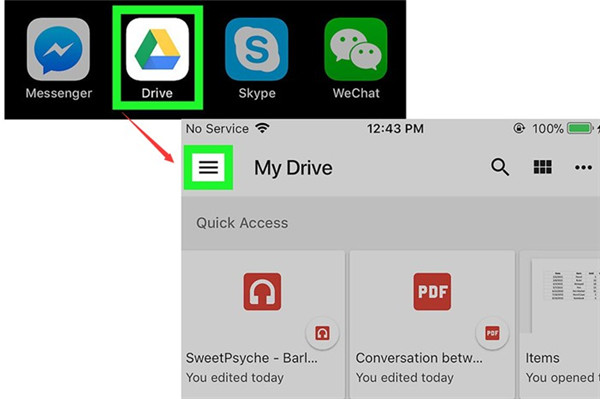
1. On your iPad, run Google Drive app on home screen and then click on the three horizontal lines icon at the top left of the interface.
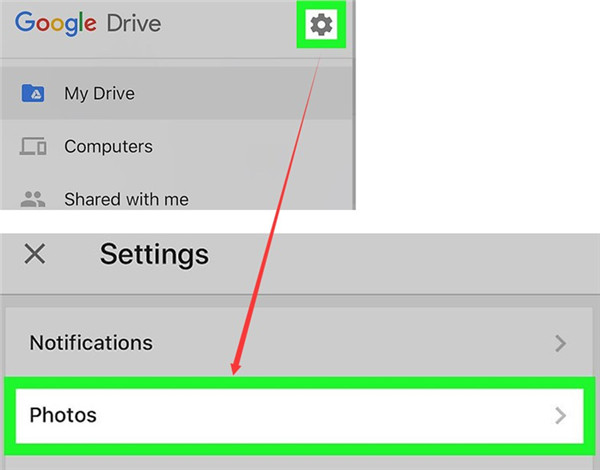
2. On the next window, click on the gear icon and then click on “Photos” option under the menu of “Settings”.
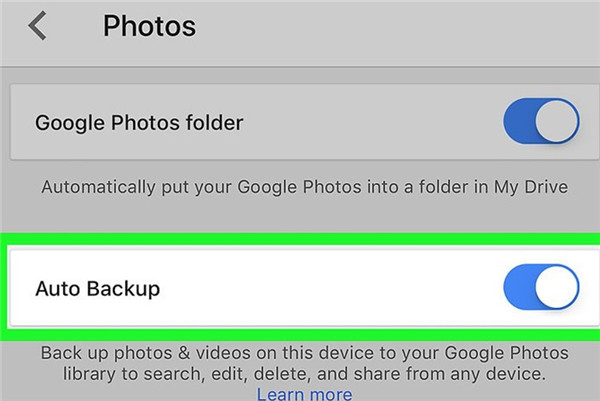
3. Click to enable “Google Photos” and “Auto Backup” features. Thus, your iPad photos and videos will be uploaded to Google Photos automatically. Make sure your iPad is connected with good Wi-Fi network.
3.2 Download iPad Photos from Google Drive to iMac
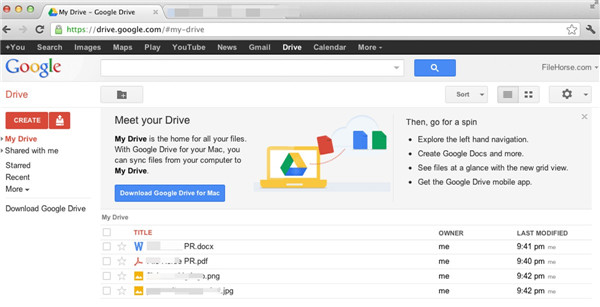
1. On iMac, go to drive.google.com and then log into it with your Email address or phone number. After that, enter your username and password to move to the main interface of Google Drive.
2. Choose the iPad photo under the menu of “My Drive” and then right click on the photo to select the option of “Download”. Wait until the downloading process is over and then you will be able to find the downloaded photos in the “Downloads” folder from your Finder on iMac. You can also choose the location on iMac that you want to store these photos.
This solution seems a bit complicated. If you are not fond of this method to copy photos from iPad to iMac, you can continue to read other effective ways to help you to make it.
Part 4: How to Transfer Photos from iPad to iMac Computer via Dropbox
Dropbox is also a good tool for you to tackle how to import photos from iPad to iMac. You just need to upload iPad photos to Dropbox and then download them to iMac for backup. The detailed contents for you to make it are as follows.
4.1 Upload Photos to Dropbox from iPad
1. Run Dropbox app on iPad and then open a folder that you desire to upload iPad pictures to. Afterwards, click on the icon with 3 dots in the interface and choose the option of "Upload" to tap on.
2. A dialog may show up to ask you to grant Dropbox permission to access your Camera Roll. After you approve this permission, you can then view a list of albums from the Camera Roll of iPad. Click on the album you want and then choose the pictures that you want to upload to Dropbox. After a while, your iPad photos will be available on iPad. Make sure your iPad has been connected with Wi-Fi network.
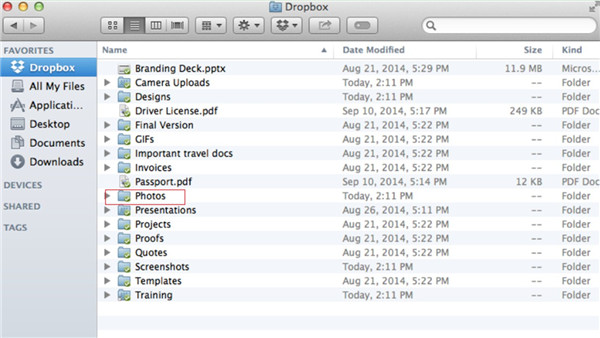
3. On iMac, open Dropbox software and then tap on the folder of Dropbox. Navigate to the photos album that you have uploaded from iPad. Copy and paste the album on a folder on iMac to realize your goal to fix how to import photos from iPad to iMac.
Part 5: How to Transfer Photos from iPad to iMac Computer via Leawo iTransfer for Mac
Leawo iTransfer for Mac is the most professional transfer tool that I want to recommend to you. It is quite powerful in dealing with various transfer issues in an effective and efficient way. As for how to import photos from iPad to iMac via iTransfer for Mac, please follow me to have a look at the following steps.
Leawo iTransfer for Mac
☉ copy files among iOS devices, iTunes and PCs with ease.
☉ copy up to 14 kinds of data and files without iTunes.
☉ Support the latest iOS devices like iPhone 7, iPhone 7 Plus, etc.
☉ Play back, view, and delete data and files on iOS devices.
Step 1: Launch Leawo iTransfer for Mac and Connect iPad with Mac
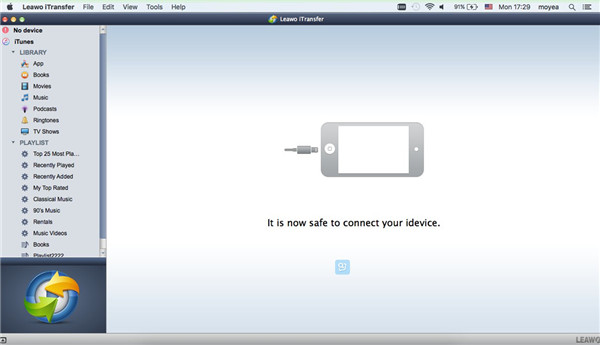
Launch Leawo iTransfer for Mac and connect your iPad with Mac with suitable USB cable. The software will detect your iPad automatically.
Step 2: Select Photos to Transfer from iPad to Mac
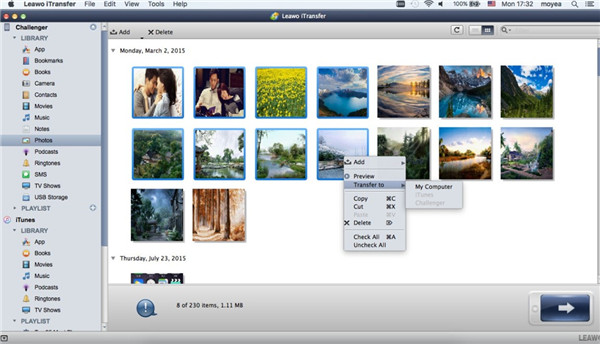
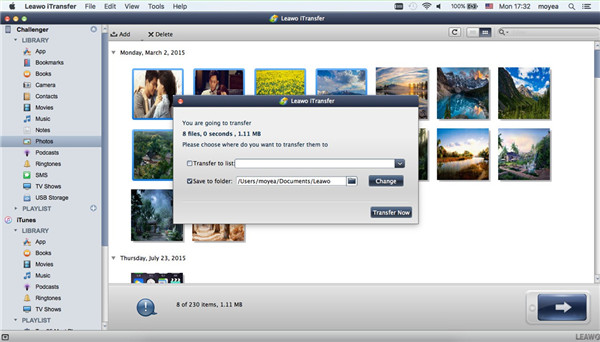
Click on the iPad icon and then you need to navigate to the “Photos” menu under the panel of “LIBRARY”. Right click on one of the pictures and then tap the option of “Transfer to”. Afterwards, choose “My Computer” as the target.
Step 3: Select Output Folder to Transfer from iPad to Mac
Tick “Save to folder” and click on “Change” in the pop-up panel to move to a folder on your Mac to store the iPad pictures. After that, click on “Transfer Now” button and the software will begin to move photos from iPad to iMac folder immediately. After a few seconds, your iPad pictures will be in iMac folder.
As you can see, only with a few clicks, you can resolve how to backup iPad to iMac quickly. Now you can download iTransfer for Mac to achieve your aim rapidly. With iTransfer, you could also move photos from iMac to iPad effortlessly.

