How to Record Screen Using Screen Recorder Module
Detailed steps to show you how to use Screen Recorder module in Leawo Screen Recorder to record any area of your screen with ease.
- Home
- /
- Leawo Screen Recorder
- /
- User Guide
How to Record Screen Using Screen Recorder Module
Leawo Screen Recorder provides an intuitive interface and clear guidance for both novices and experts to record screen.
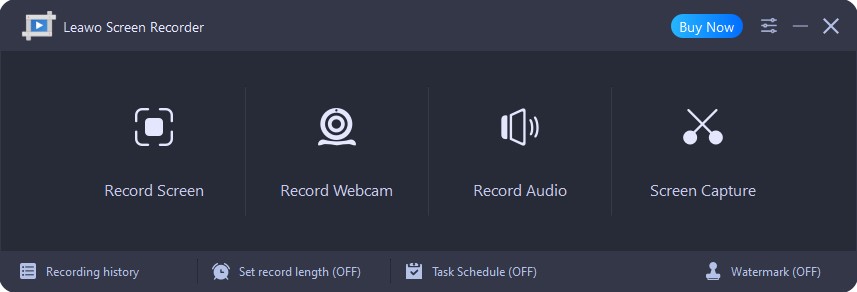
Step 1: Launch Leawo Screen Recorder
Launch Leawo Screen Recorder on your computer.
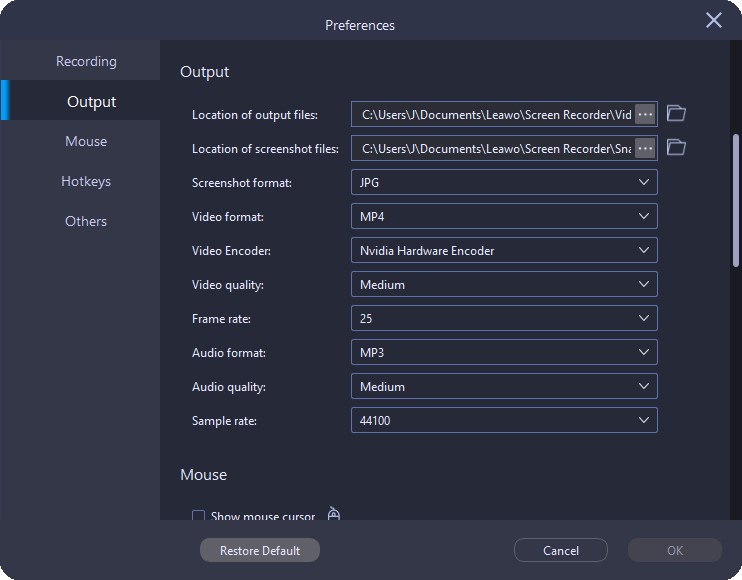
Step 2: Set Output Preferences
Before recording screen, you can first set the output directory, video format, video encoder, video quality, video frame rate, audio quality, and audio sample rate. Click the three-bar icon on the top menu bar and choose "Settings" option in the drop-down menu, a "Preferences" panel will pop up. Click "Output" tab in the left column to set output preferences.
- Output directory: Click the three-dot icon in the end of "Location of output files" option, then browse and choose a local folder as the video output directory.
- Video format: Select a video format among MP4, MKV, FLV, 3GP, MOV, TS, M2TS, AVI, MPEG, and VOB. By default, the video format is MP4.
- Video Encoder: Select a video encoder between hardware and software.
- Video quality: Select video quality between High, Medium and Low.
- Frame rate: Select video frame rate between 5 and 60. The higher the frame rate, the more fluent the video.
- Audio Quality: As with video quality, you can select audio quality between High, Medium and Low.
- Sample rate: Select audio sample rate between 48000, 44100, and 32000. The higher the sample rate, the richer the audio details.
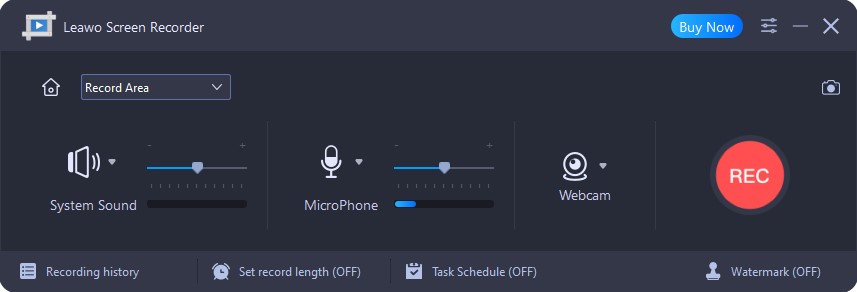
Step 3: Select Recording Region
Once you click the "Record Screen" button on the main interface, a drop-down menu will pop up, where you can select recording region among Full Screen, Select region/window, Fixed region, or Recently used size.
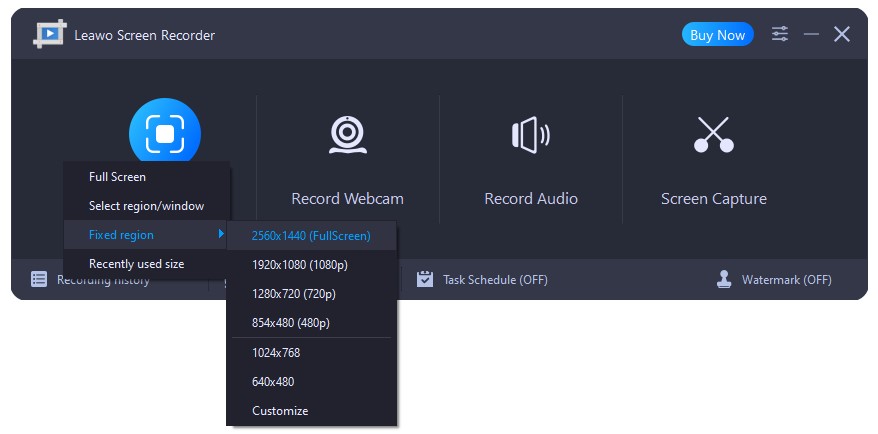
- Full Screen: Record the full screen of your computer, from edge to edge.
- Select region/window: Freely enclose and select recording area.
- Fixed region: Select a fixed dimension for screen recording among Full Screen (based on the resolution of your monitor), 1080p (1920 x 1080), 720p (1280 x 720), 480p (854 x 480), 1024 x768 and 640 x 480.
- Recently used size: The size you used last time will be saved automatically in this option.
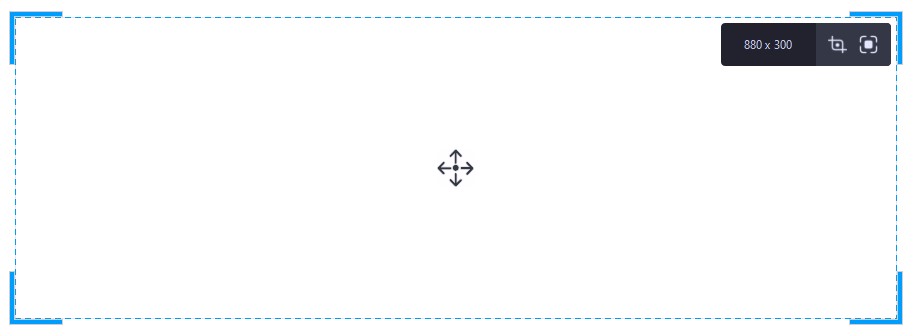
After selecting recording area, in the recording frame, you can drag the blue area at each corner to adjust the size. Or, you can click the "Select region/window" button  or the "Full Screen" button
  to resize it. The dimension will be displayed in the top-right corner.
To move the recording frame, hold and drag the arrow icon  in the middle.
Step 4: Configure Related Settings Before Recording
By default, the screen recording process will automatically record system sound. You can use the scrollbar to adjust volume, and the volume of the sound will be displayed in the volume bar below the scrollbar. To switch to another source of system sound, click the down-arrow icon before the System Sound button  to call out a drop-down menu with a list of available sources. To disable system sound for screen recording, click the System Sound button until a cross icon appears in the lower right corner.
If a microphone  or a webcam
  is plugged in, you can click the corresponding icon to enable the feature. Similarly, to switch to another source, click the down-arrow icon to call out a drop-down menu with a list of available sources.
Step 5: Start to Record Screen
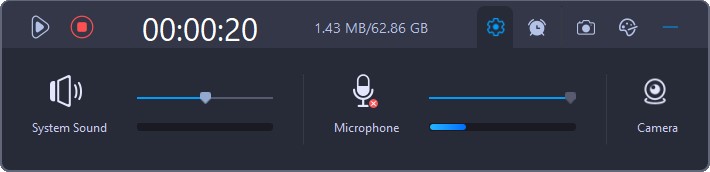
The "Record" button is located in the right of the Screen Recorder window, click it to start recording. Or, you can press the hotkeys you set to start recording. By default, the hotkeys to start and stop recording are "Ctrl + Alt + S". If you’ve checked the "Show countdown before recording" option in the "Preferences" panel, the recording will begin after the countdown (from 3 to 1).
During the recording process, you can click the pause button  to temporarily stop the process, and click the resume button
  to restart the stopped process. Alternatively, you can press the hotkeys you set to pause and resume the process. By default, the hotkeys to pause and resume are "Ctrl + Alt + R". To minimize the window, click the minus button
  in the end, or press the hotkeys you set to hide the panel. By default, the hotkeys to show and hide the flat panel are "Ctrl + Alt + H". To capture screenshot during screen recording process, click the camera button
  .
.

If you want to enable or disable "System Sound", "Microphone" or "Camera" during the screen recording process, click the settings button  , and then click the icon of each feature to enable or disable the corresponding feature.
To schedule the recording process, click the clock button  in the top menu bar, and select the checkbox before "Record length". Then, enter time in the boxes, or enter time by clicking the "Modify" button
  . Plus, you can select the checkbox before "Shut down when recording ends" to let the program automatically shut down after the screen recording process is complete.
Note: The record length should be not less than 1 second.

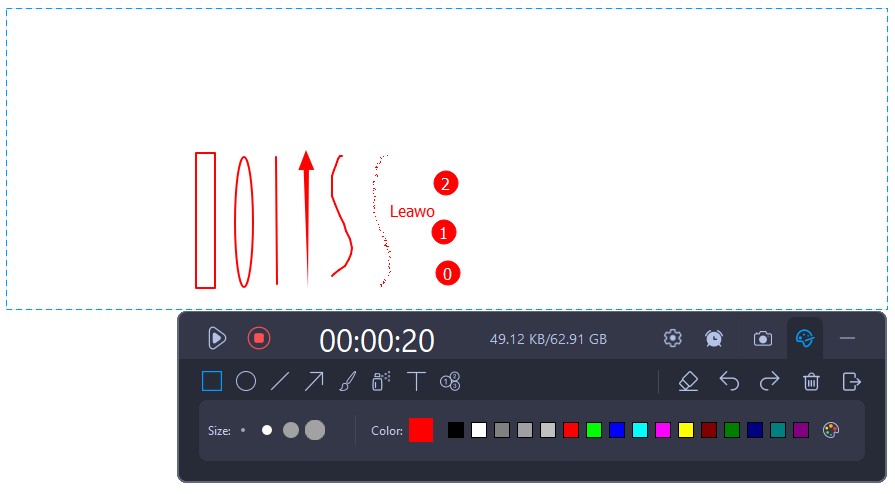
To add drawing and annotation during the screen recording process, click the palette button  in the top menu bar to enter the "Paint" board, which provides Rectangle
  , Ellipse
  , Line
  , Arrow
  , Brush
  , Air brush
  , Text
  , and Callout
  to draw and annotate. Under each paint tool, you can adjust the brush thickness by clicking different circles next the "Size" option, and specify the brush color by clicking the different color blocks. For professionals, a custom palette is provided in the end of "Color" option.
If you accidentally apply a wrong effect, click the "Undo" button  to cancel the most recent change, or click the "Redo" button
  to resume the last operation. Alternatively, if you want to selectively erase the applied effects, click the "Erase" button
  , then smear on the drawing and annotation to erase. Or, you can click the rectangle button
  under the "Erase" tab to erase the applied effects in the framed area. Plus, you can clear all applied effects by clicking the trash can button
  . To exit drawing board editing, click the exit button
  .
.
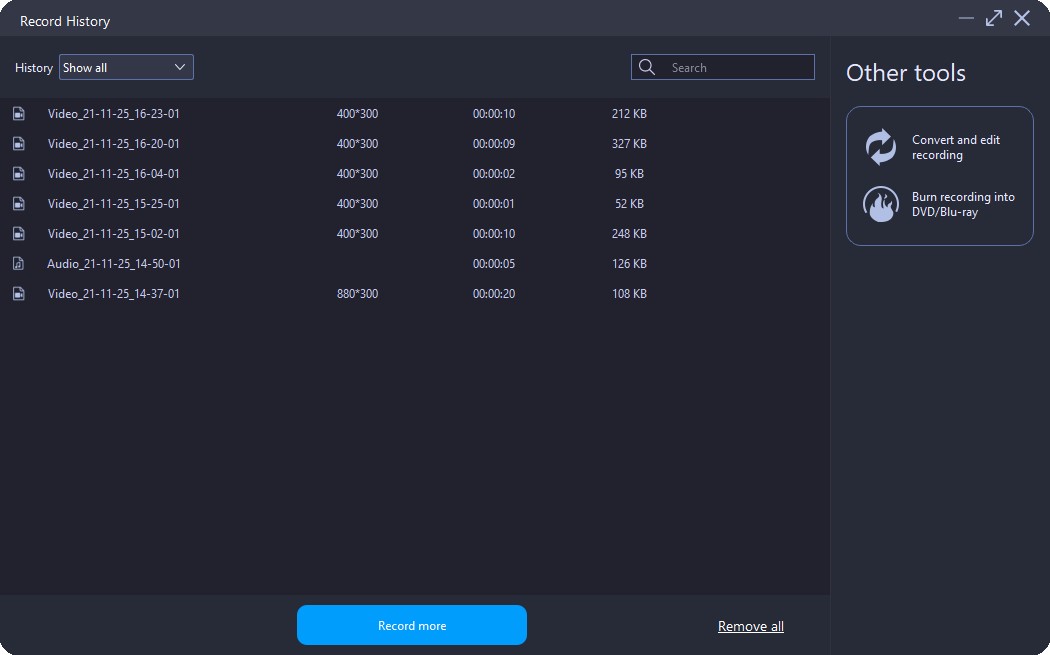
Step 6: Manage Recordings
After the screen recording process is complete, click the "Stop" button  to stop recording. Or, you can press the hotkeys you set to stop recording. By default, the hotkeys to stop recording are "Ctrl + Alt + S". Then, in the "Record History" panel, all recordings will be listed with name, dimension (if available), duration (if available), and size. In addition, you can click the box before "History" to show all recordings, video, audio, or screen capture respectively, or search for recordings in the searching bar.
By clicking on each recording, four buttons will appear in the end. You can click the "Play" button  to view the recording, click the "Rename" button
  to rename the recording, click the "Open folder" button
  to open the location of the recording, and click the "Delete" button
  to delete the recording.
To remove all history recording from the list, click "Remove all" button in the bottom, and then click "OK" button in the pop-up window. If you don’t want to delete local file, uncheck the box before "Delete local file".